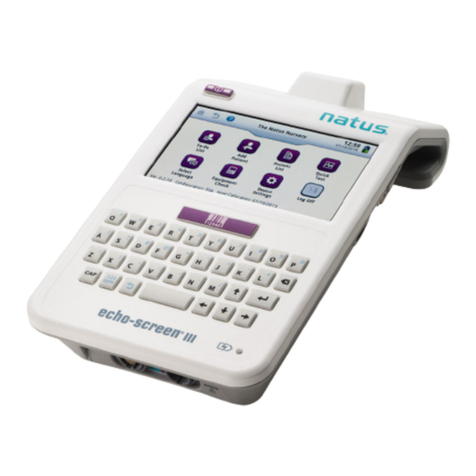
natus Madsen Zodiac User manual

Madsen Zodiac
Diagnostic & Clinical
Stand-alone
User Guide
Doc. No.7-50-1700-EN/08
Part No.7-50-17000-EN

2
Madsen Zodiac
Copyright notice
© 2016, 2020, 2021 Natus Medical Denmark ApS. All rights reserved. ® Otometrics, the Otometrics Icon, Aurical, Madsen, HI-PRO 2,
Otoscan, ICS and HORTMANN are registered trademarks of Natus Medical Denmark ApS in the U.S.A. and/or other countries.
Version release date
2021-12-15
Technical support
Please contact your supplier.

Madsen Zodiac
3
User Guide
Table of Contents
1Overview 4
2Intended use 5
3Unpacking 7
4Installation 7
5The Zodiac probes 10
6The Diagnostic and Clinical front panel 16
7The Zodiac menu 19
8Special tests 20
9Testing with Zodiac Diagnostic or Clinical - Stand-alone 21
10 Managing test results in Madsen Zodiac 34
11 Printing and data transfer from Zodiac 35
12 Troubleshooting 35
13 Service, cleaning and calibration 36
14 Technical specifications 41
15 Standards and warnings 54
16 Other references 60
17 Manufacturer 60
18 Disposal instructions 61

User Guide
4
Madsen Zodiac
1Overview
Madsen Zodiac is a compact device for immittance testing.
Madsen Zodiac Diagnostic and Clinical - Stand-alone
See Testing with Zodiac Diagnostic or Clinical - Stand-
alone ►21
Operating Madsen Zodiac
Use Zodiac as a stand-alone unit with the built-in keypad and display, or, if you are using the Otosuite Immittance software
module, you can use Zodiac with the PC’s keyboard and mouse with the Otosuite Immittance module acting as the display.
If you are controlling Zodiac from Otosuite, see the Madsen Zodiac Diagnostic & Clinical PC-based User Guide.
Probes
Madsen Zodiac supports the following probes:
•The hand-held Quick Check probe
•The two diagnostic probe types, Classic and Comfort
•A contralateral insert phone or TDH-39
Supported tests
Zodiac configurations support the following tests and functionalities:
•Tympanometry
•Reflex Screening
•Reflex Threshold
•Reflex Decay
•ETF-I (Eustachian Tube Function - Intact)
•ETF-P (Eustachian Tube Function - Perforated)
•Admittance Recording (multiple uses, e.g., patulous Eustachian Tube evaluation, acoustic reflexes with external
stimulus)
•Manual Tympanometry
Madsen Zodiac - Otosuite interfacing
Madsen Zodiac operates with the Otosuite Immittance module. From the Otosuite Immittance module, which is NOAH
compatible, you can perform tests, monitor test results, create User Tests, store and export data, and print reports.

User Guide
Madsen Zodiac
5
Noah
The Noah System is a HIMSA product for managing clients/patients, launching hearing test applications and fitting software,
and storing audiological test results. Madsen Zodiac test results can be stored in the Noah database via Otosuite.
Printing test results
Some versions of Madsen Zodiac have a built-in thermal printer for printing test results. When testing with Madsen Zodiac in
connection with the Otosuite Immittance software module, you can transfer test results to Otosuite for printing as Otosuite
reports.
2Intended use
Madsen Zodiac is an auditory impedance tester intended to change the air pressure in the external auditory canal and measure
and graph the mobility characteristics of the tympanic membrane to evaluate the functional condition of the middle ear. This
device measures the acoustic reflex threshold and decay testing and Eustachian tube function testing for intact and perforated
tympanic membranes.
Users: audiologists, ENTs and other health care professionals in testing the hearing of infants, children and adults.
Use: clinical, diagnostic and screening tympanometry and reflex measurements.
Madsen Zodiac uses technologies that are highly effective for clinical and screening purposes. Tympanometry and acoustic reflex
measurements measure the mechanical response of the middle ear and form a basis for evaluating whether the related
physiological structures are functioning correctly or not.
Clinical Benefit: Madsen Zodiac is used to conduct diagnostic and clinical objective testing used to evaluate the condition of the
middle ear eardrum (tympanic membrane) and the conduction bones by creating variations of air pressure in the ear canal.
2.1 Contraindications
Caution • If a patient shows discomfort during the test, stop the test. Any measured results are stored.
Caution • Look into the ear canal. Perform an otoscopy to assess the status of the outer ear before you insert the
probe. If the ear canal is blocked, this may affect the result of the test. Clean the ear canal if needed. Make sure
that there is no residual fluid in the patient's ear after cleaning or wax removal.
Caution • Do not perform testing on patients displaying the following symptoms without the approval of a
medical doctor:
•If there is discharge in the ear
•If the patient recently has undergone middle ear surgery
•If the ear canal is occluded
•If the patient suffers from acute trauma
•If the patient experiences severe discomfort
•If the patient displays symptoms of tinnitus or hyperacusis. Do not use excessively loud acoustic stimuli for
acoustic reflex measurements.

User Guide
6
Madsen Zodiac
2.2 Tympanometry testing on infants
Use the 1000 Hz probe tone for infant tympanometry up to 4 - 6 months of age to avoid the very low resonance
frequency that is normal for infant ears.
Development through the first few months of life significantly alter the acoustic response properties of the infant's middle
ear, and influence tympanometry, e.g.
•size increase of the external ear, middle ear cavity and mastoid
•a change in the orientation of the tympanic membrane
•fusion of the tympanic ring
•a decrease in the overall mass of the middle ear due to changes in bone density
•loss of mesenchyme (connective tissue of the embryo)
•tightening of the ossicular joints
•closer coupling of the stapes to the annular ligament
•the formation of the bony ear canal wall
The infant ear anatomy differs from the adult ear. Due to these differences, use a higher frequency probe tone to collect
tympanograms to identify middle ear effusion. Infants younger than four (4) months may show abnormal 226 Hz
tympanogram even with confirmed middle ear effusion. It is also possible to obtain what appears to be abnormal 226 Hz
tympanograms in normal ears. The 1000 Hz probe tone is the best choice for immittance measurements in infants.
2.3 Typographical conventions
The use of Warning, Caution and Note
To draw your attention to information regarding safe and appropriate use of the device or software, the manual uses
precautionary statements as follows:
To obtain a free printed copy of the user documentation, contact Natus Medical Denmark ApS (www.natus.com).
Warning • Indicates that there is a possibility of injury, death, or other serious adverse reactions associated with
the use or misuse of the device.
Caution • Indicates that there is a possibility of a problem with the device associated with its use or misuse. Such
problems include device malfunction, device failure, damage to the device, or damage to other property.
Note • Indicates that you should take special notice.

User Guide
Madsen Zodiac
7
3Unpacking
1. Unpack the device carefully.
When you unpack the device and accessories, retain the packing material. If you need to send the device in for service,
the original packing material will protect against damage during transport.
2. Visually inspect the equipment for any damage.
If the device is damaged, do not use it. Contact the Natus representative for assistance.
3. Verify the package contents. If the package is incomplete, contact the Natus representative.
4Installation
To ensure safe performance of the device, follow the Warning notes for installation.
See Warning notes ►58.
Location
Perform immittance testing in a quiet room. A sound cabin or sound treated room is not necessary.
Probe
At delivery, the probe is connected to Madsen Zodiac.
This also applies if the configuration includes both a Quick Check probe and a diagnostic probe.
Perform a probe check daily to verify that the system measures correctly.
Probe home
You can mount the probe home on a wall, using the optional probe home wall-mount kit.
Powering
•See Powering the device ►8.
Warning • Do not store the device at temperatures below -20°C (-4°F) or above +60°C (95°F).
Do not operate the device at temperatures below +15°C (+59°F) or above +35°C (95°F).
Caution • If the probe check result does not show a value of 1.9 - 2.1 mmho/cc/cm3/ml at 226 Hz, perform an
admittance calibration. See the Zodiac Reference Manual.

User Guide
8
Madsen Zodiac
4.1 Powering the device
Zodiac is powered through an external power supply connected directly to the mains outlet.
Connecting the external power supply to Zodiac
1. Connect the plug end of the external power supply cable to the external power supply socket on the
back of the device.
Connecting the external power supply to the mains supply
1. Connect the mains plug of the external power supply directly to an AC mains outlet with a three-wire
protective ground.
2. If applicable, switch on the mains supply.
The first time you switch on the device
The first time you switch on the device, or if the device has been without power off for more than two weeks, the internal
clock runs out of power. When you start the device, you can set the time manually or connect to Otosuite where the time
is set automatically.
Switching Madsen Zodiac on and off
1. To switch on Zodiac, press the On/Off button, located on the lower right side.
– In the stand-alone versions of the device, the display
and some function buttons light up.
2. To switch off Zodiac, press the On/Off button.
If needed, switch off the mains supply and disconnect the
power supply from the mains outlet.
Warning • Use only the power supply specified in Technical specifications ►41.
Note • The first time you power on the device, leave it turned on for at least one hour to let the internal clock battery
charge.

User Guide
Madsen Zodiac
9
4.2 Connecting to the PC
To connect Zodiac to the PC, you must install Otosuite on the PC.
For Otosuite installation instructions, see the Otosuite Installation Guide, on the Otosuite installation medium.
Connect the USB cable from the USB socket on the back of the device to a USB socket on the PC.
The Otosuite Immittance software module automatically detects the device.
4.3 The built-in printer
The optional built-in printer is located and controlled from the back
of the Zodiac device.
1. To open the printer cover, press the printer cover button.
2. To close the printer cover, press the printer cover into place until the lock
clicks shut.
Loading a new paper roll
1. Open the printer cover.
2. Remove the empty paper roll.
3. Loosen the paper end edge from the new paper roll.
Warning • Use only the USB cable supplied with Zodiac
Caution • Be careful when opening the paper compartment to avoid injury from the cutter blades.
Note • Use only Natus replacement printer paper.

User Guide
10
Madsen Zodiac
4. Make sure that the paper compartment is clean.
5. Place the paper roll in the compartment with the loose end opening toward
the back of the compartment and upward from the bottom of the
compartment. When you pull the paper upward before closing the cover,
you will see the Otometrics watermark.
6. Tear off the part of the paper where glue has held the roll together.
7. Make sure that the loose end of the paper roll emerges through the paper
slot.
8. To close the printer cover, press the printer cover into place until the lock
clicks shut.
5The Zodiac probes
Health precautions
•Follow established infection control procedures for the setting in which you are working.
•Always use clean eartips.
•To prevent cross-infection, use new eartips when you test every patient.
Caution • Inspect the patient's ear. Look into the ear canal. Perform an otoscopy to assess the status of the outer
ear before you insert the probe. If the ear canal is blocked, this may affect the result of the test. Clean the ear canal
if needed. Make sure that there is no residual fluid in the patient's ear after cleaning or ear wax removal.
Caution • An eartip can be used for both ears. If you suspect infection in one ear, use a new eartip and clean
probe tip and probe ring before you continue testing on the other ear.

User Guide
Madsen Zodiac
11
5.1 The Quick Check probe
If applicable, Zodiac arrives with the Quick Check probe already connected.
A.
Probe body
B.
Ear button
– Press this button to switch test ears
C.
Light indicator showing the color of the selected test
ear and leakage status
Using the probe
•Fitting the eartip on the probe ►22
•Cleaning the probe and probe tip ►37
Holding the probe
•Underhand grip
•Overhand grip
Caution • Always fit an eartip on the probe before inserting it into the ear of the patient.

User Guide
12
Madsen Zodiac
Starting the test
Press the screening eartip gently into the ear canal and the seal forms, the test starts automatically.
Stopping the test
Stop the test by removing the probe from the test ear.
5.2 The diagnostic probes
Zodiac Diagnostic and Zodiac Clinical have a
diagnostic probe connected at delivery.
The diagnostic probe is available in two versions.
The Classic probe The Comfort probe
The Quick Check probe ►11
The diagnostic probe and shoulder strap ►12
Using the probe
•Using two probes with the device ►14
•Fitting the eartip on the probe ►22
•Fitting the probe in the patient's ear ►22
•Cleaning the probe and probe tip ►37
Caution • Always fit an eartip on the probe before inserting it into the ear of the patient.

User Guide
Madsen Zodiac
13
5.2.1 The diagnostic probe and shoulder strap
The diagnostic probe and the probe shoulder strap are connected.
The shoulder strap
The shoulder strap is a flexible strap designed to fit across
the patient’s shoulder. The strap ensures the diagnostic
probe stays in place during testing.
A.
Shoulder strap
B.
Hole for hanging shoulder strap
C.
Diagnostic probe
D.
Control pad
E.
Contralateral phone
F.
Probe cable connections
A.
The diagnostic probe connection
The diagnostic probe is permanently connected to
the control pad.
B.
Connection cable
The connection cable connects the diagnostic probe
to Zodiac.
C.
Connection socket for the contralateral phone
When needed, connect the contralateral phone to
this socket.
Caution • Always fit an eartip on the probe before inserting it into the ear of the patient.

User Guide
14
Madsen Zodiac
The probe control pad
The control pad is part of the shoulder strap.
A.
The light indicator shows the color of the selected
test ear, and probe status
B.
Ear button.
– Press this button to switch test ears
C.
Start/stop button
Press this button to start or stop a test.
The diagnostic probe
A.
The light indicator shows the color of the selected
test ear, probe status, and leakage status
B.
Probe body
C.
Probe ring
D.
Probe tip
5.2.2 Using two probes with the device
To activate a probe, press any one of the buttons on the probe to activate it.
5.3 The contralateral phone
To test for the contralateral reflex, use the contralateral phone to present the stimulus to the non-probe ear.
Connecting the contralateral phone
•When needed, connect the contralateral phone to
this socket on the control pad.
Push the plug firmly into the socket until it locks into
the socket.
Disconnecting the contralateral phone
•To disconnect the contralateral phone, hold the
reinforced sleeve of the plug and pull firmly until the
plug is disconnected.
Caution • Use care when connecting the probe with the contralateral phone to avoid connector damage.

User Guide
Madsen Zodiac
15
Insert phone
1. Fit a suitably sized foam eartip on the contralateral
insert phone.
2. Before inserting the eartip in the patient's ear,
compress the foam eartip to make it smaller.
Insert the eartip in the patient's ear until the outer
surface of the eartip is flush with the ear canal
entrance.
The eartip will expand in the ear canal within a few
seconds.
Supra-aural phone
Fit the supra-aural phone on the patient's head so that the center of the phone points toward the opening
of the ear canal.
Caution • Never insert the contralateral phone into the patient's ear without first inspecting the patient's ear
canal.
Caution • Do not use the contralateral insert phone in an ear with discharge. Use a supra-aural phone instead.
Warning • To prevent cross-infection, use new eartips when you test each patient.
Caution • If an ear canal collapses and prevents the stimulus from entering the ear, use the insert phone or follow
local recommendations.

User Guide
16
Madsen Zodiac
6The Diagnostic and Clinical front panel
A.
Starting and ending a session
B.
Measurement selections
C.
Running tests
D.
On-screen selections
Depending on the configuration of the stand-alone version of Zodiac, the front panel has a range of function buttons, a dial,
and three soft-buttons.
Starting and ending a session
New Session (New Session) Press this button to create a new session.
Report (Report) The function of this button depends on the configuration of the system.
•Zodiac with a built-in printer:
Press this button to print all test results for the current patient.
Measurement selections
Tymp (Tymp)
(tympanometry)
Press this button to select the Tympanometry test.
Ipsi (Ipsi) (ipsilateral) Press to select the presentation side for reflex testing (the probe ear).
Contra (Contra) (contralateral) Press to select the presentation side for reflex testing (the non-probe ear).

User Guide
Madsen Zodiac
17
Stimulus frequencies (Hz) Press these buttons to select the desired pure tone frequency for the reflex
measurement.
You can choose between the following frequencies:
•0.5 kHz
•1 kHz
•2 kHz
•4 kHz
Noise (Noise) (stimulus) Press this button to select Broadband noise as a reflex stimulus.
±P (±P) (pressure offset) Press this button to select a pressure offset to stabilize the eardrum. This
may facilitate reflex recordings from ears that have steeply sloped
tympanograms. Keep the button depressed and use the dial to select the
desired pressure.
The function of this button is described in-depth in the Reference Manual.
Special (Special) (special
tests)
Press this button to select special tests.
Sequence testing
Seq. (Seq.) (automatic
sequence testing)
This function allows you to combine multiple measurements and run them
in an automated sequence.
Press this button to select automatic sequence testing. The buttons
corresponding to the tests and test functions included in the sequence light
upon the device, e.g., Tympanometry + Ipsi and Contra Reflex Thresholds at
several frequencies.
When you press the Start/Stop (Start/Stop) button, all selected functions for
the sequence begin.
You can adjust any settings related to the tests included in the sequence.
Diagnostic sequence
Tympanometry + Reflex Threshold (+ Reflex Decay, if selected from the Set-
tings menu).
Screening sequence
Tympanometry + Reflex Screening.

User Guide
18
Madsen Zodiac
Running tests
Start/Stop (Start/Stop) This button is both on the device and on the diagnostic probe
shoulder strap.
This button lights while a test is running.
•Press this button to perform a tympanometric measurement, to start
reflex tests, and to present stimuli for manual reflex testing.
•During a test, press this button to stop the test.
Auto-start
Press this button to activate Auto start on seal (Auto start on seal) before
you place the probe in the patient's ear.
This button is disabled when you use the Quick Check probe, which always
uses Auto start on seal (Auto start on seal).
Dial Turn the dial to adjust pump pressure and to control the stimulus level.
Ear (Ear) This button is located both on the device and on the probes.
Press this button to toggle the ear selection associated with the current
measurement. The button lights up in the color of the selected ear.
Delete (Delete) Press this button to delete the selected measurement curve.
On-screen selections
Soft button Press this button to select the current function of the soft-button as shown
on the screen just above the soft-button.
•Menu:
Press the soft button below the column.
•Tympanometry:
Press to toggle between tympanometric curves and to change curve
type.
Menu (Menu) Press this button to display the menu where you can select test setups,
change test settings, create user tests, select print output, and select
functions for service and calibration.
Arrow Up This function is enabled when you activate the Menu function
•Press this button until you highlight the desired area on the screen.
Arrow Down This function becomes enabled when you activate the Menu function.
•Press this button until you highlight the desired area on the screen.
Dial In addition to the various measurement functions, use the dial to scroll
between menu items on the screen.

User Guide
Madsen Zodiac
19
7The Zodiac menu
If you use a stand-alone version of Zodiac, you can use the function-specific buttons to activate the most commonly used
functions for testing, changing test settings, and managing test results.
If you need to make further changes to a test setup, or other more specific functions, press Menu (Menu) or Special
(Special) for more choices.
The menu system
Press the Menu (Menu) button to enter the menu system. You will see
three columns of menu items.
•The left column shows a list of predefined test protocols.
•The center column shows the test settings.
•The right column shows the values.
How to use the menu system
When you press the Menu (Menu) button, the menu system appears. The first column is selected: it is shown in gray, and
the selected test protocol is marked in blue.
•Use the dial or the arrow buttons to select another test protocol, if needed.
•Press the soft button below the next column to select this column and scroll to a setting to view or change.
How to change test settings
1. Select a protocol from the left column.
2. Select the center column.
3. Scroll to the setting to view or change.
4. Select the right column to change the setting.
5. Scroll to select a value and press the Select soft button.
6. Repeat steps 2 to 5 to change other settings, if needed.
Using test settings temporarily
•To change protocol settings temporarily, select the left column, scroll to Apply Temporarily (Apply Temporarily)
and press the OK (OK) soft button. This will exit the menu system.
Saving test settings in the protocol
Before you can save test settings in the protocol, you must unlock the protocol: Select Device Settings > Protocol
Settings (Protocol Settings) and set to Allowed (Allowed). If you turn off Zodiac after changing and saving the test settings,
the protocol locks again.
•To save the changed protocol settings permanently, select the left column, scroll to Save to [Protocol name] (Save to
[Protocol name]), and press the Save (Save) soft button.
Canceling changed test settings
•To cancel any changed settings, select the protocol and press the Reload (Reload) soft button.

User Guide
20
Madsen Zodiac
8Special tests
Zodiac can perform special immittance tests, such as ETF-P and Manual Tympanometry. See the Zodiac
Reference Manual for test descriptions.
Accessing special tests
Press the Special (Special) button to view the available tests.
Access the Probe Check (Probe Check) function from the Special Tests (Special Tests) menu.
Loading a special test
1. Press the Special (Special) button.
2. Scroll to select the special test.
3. Press the OK (OK) soft button.
Exiting a special test
Press the Special (Special) button to exit the special test. Zodiac returns to Tympanometry mode.
Exiting the Special Tests menu
•Press the Cancel (Cancel) soft button to exit the Special Tests (Special Tests) menu. Zodiac returns to Tympanometry
mode.
Other manuals for Madsen Zodiac
3
Table of contents
Other natus Test Equipment manuals