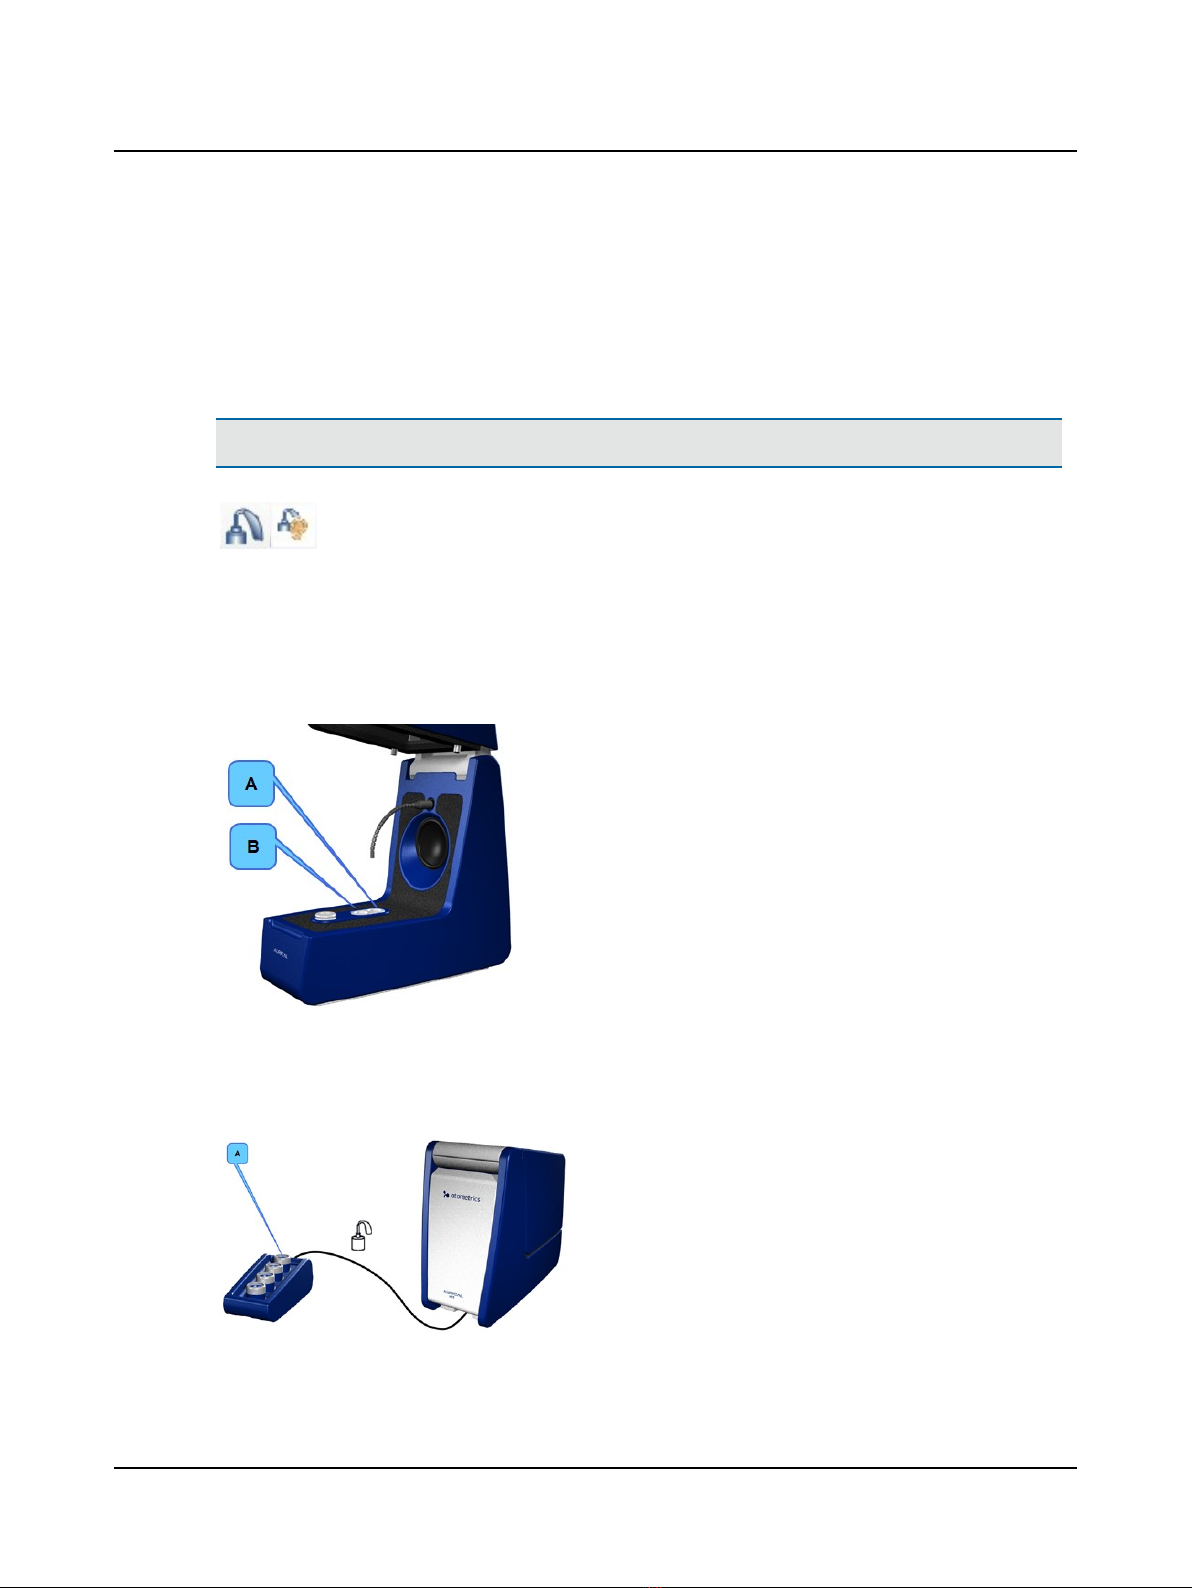
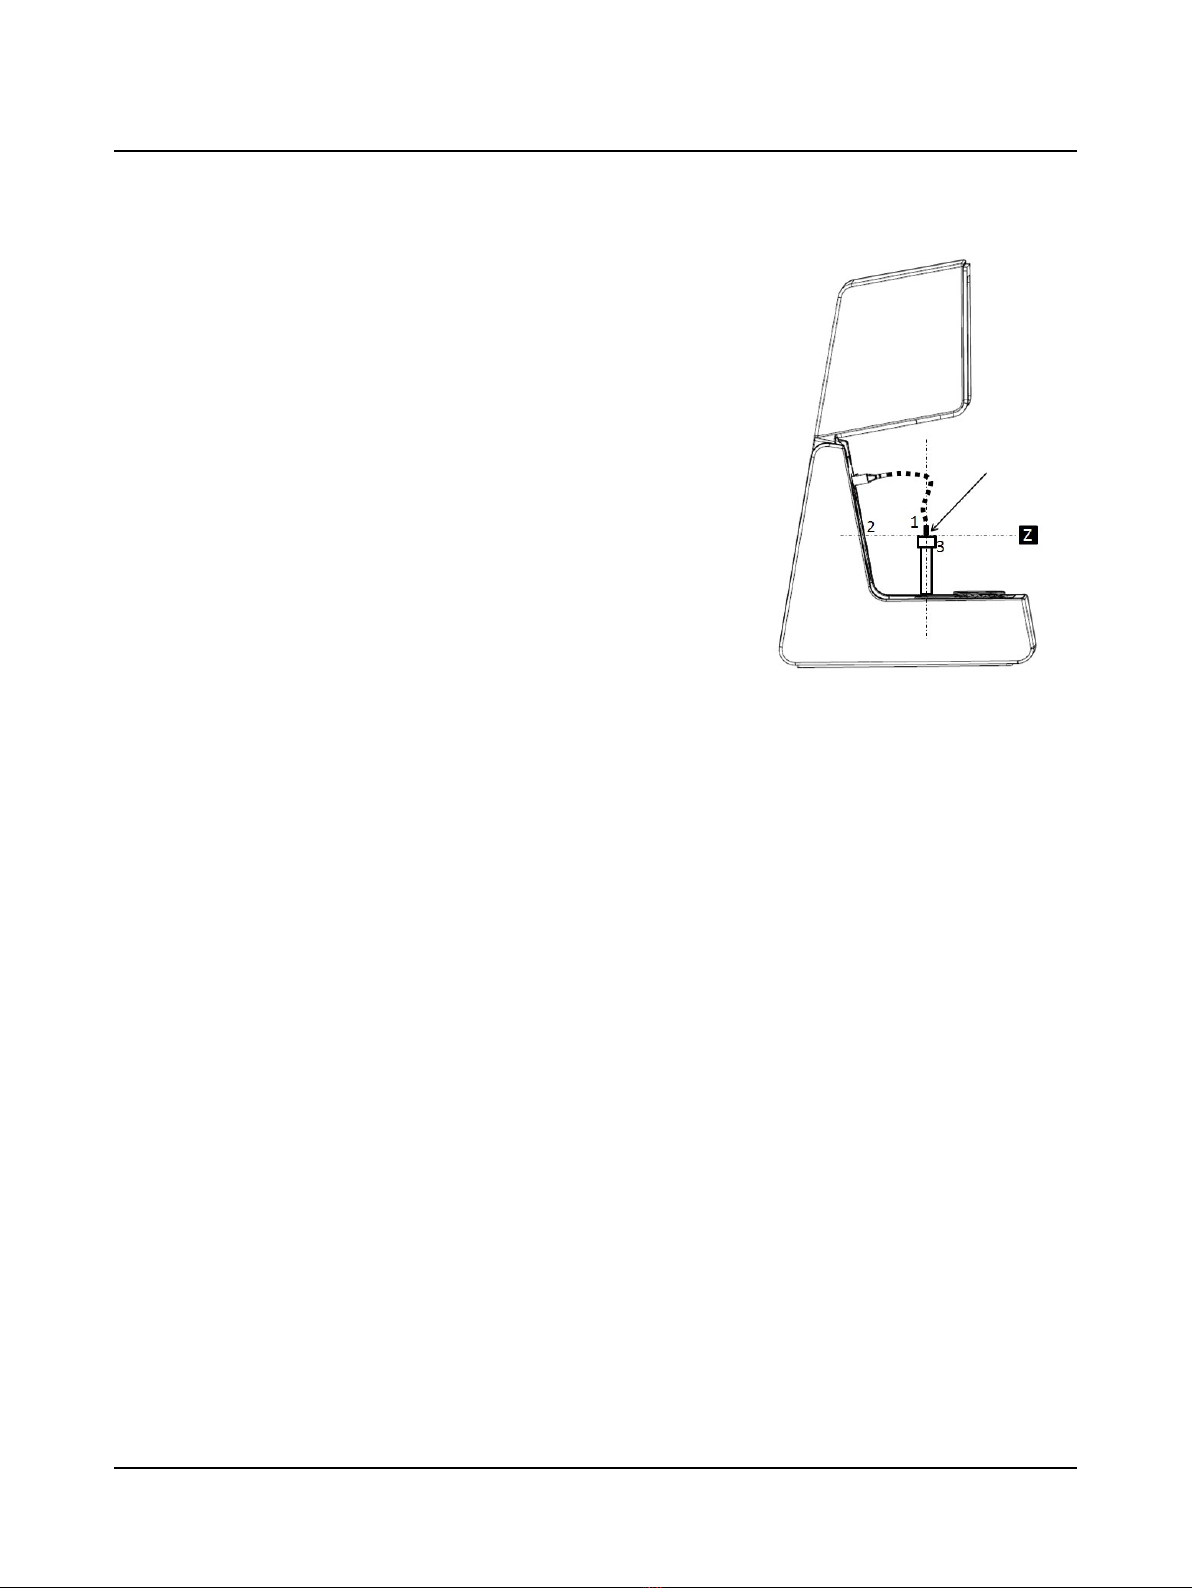
3. Position the reference microphone (1) pointing straight down from
above and centered 1-2 millimeters above the coupler meas-
urement microphone (3).
4. During calibration the microphones must have the exact same dis-
tance to the main loudspeaker (2), along the Z axis. You can ensure
this by looking at the test chamber from the side when you adjust
the reference microphone position for calibration.
5. Close the lid.
6. Select Tools> AURICALHIT Calibration >Reference Microphone.
7. Follow the on-screen instructions.
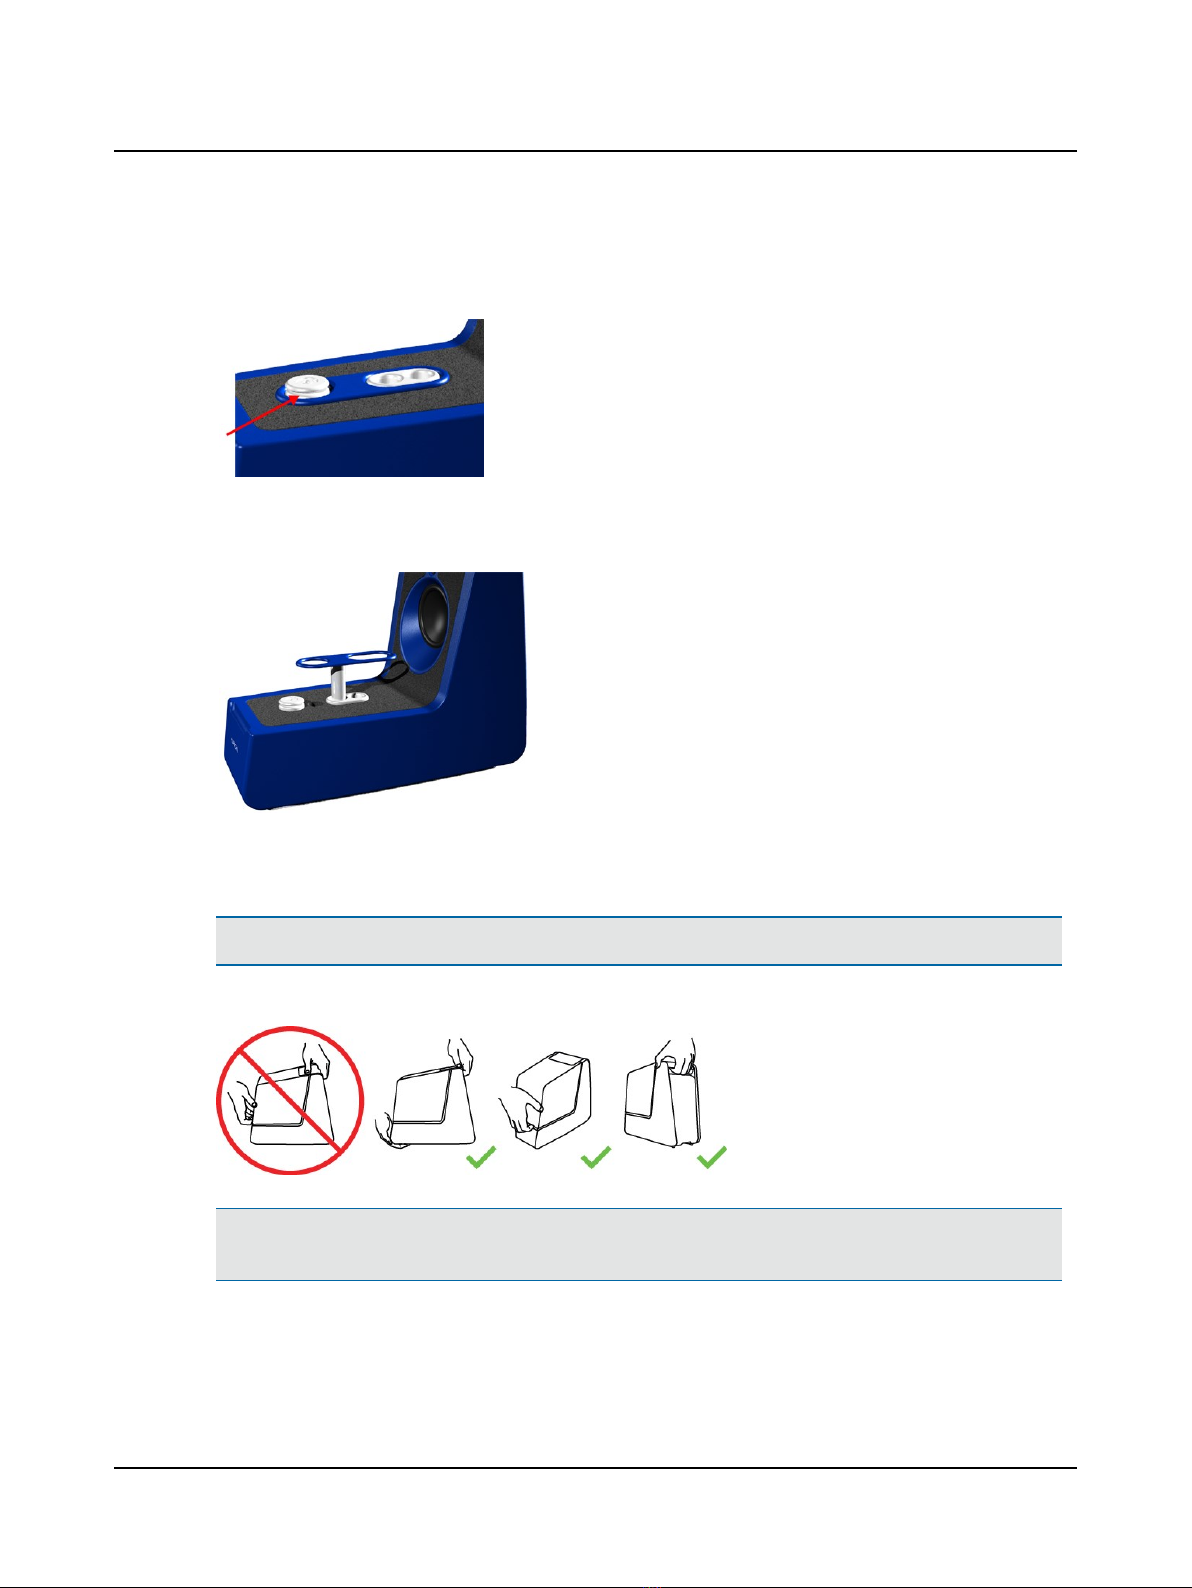
5.2 Positioning the hearing instrument for testing
How you position the hearing instrument for testing in the test chamber depends on the type of hearing instrument or
device you wish to test.
Regardless of form factor (the type of hearing instrument), the only two important things to remember are:
• Aligning directional microphones along the loudspeaker axis.
• Positioning the reference microphone as close as possible to the front microphone of the hearing instrument without
touching it.
You can position the hearing instrument to perform all standard hearing instrument tests without repositioning the hear-
ing instrument between the individual tests:
• acoustic measurements,
• inductive telecoil measurements,
• directional microphone test.
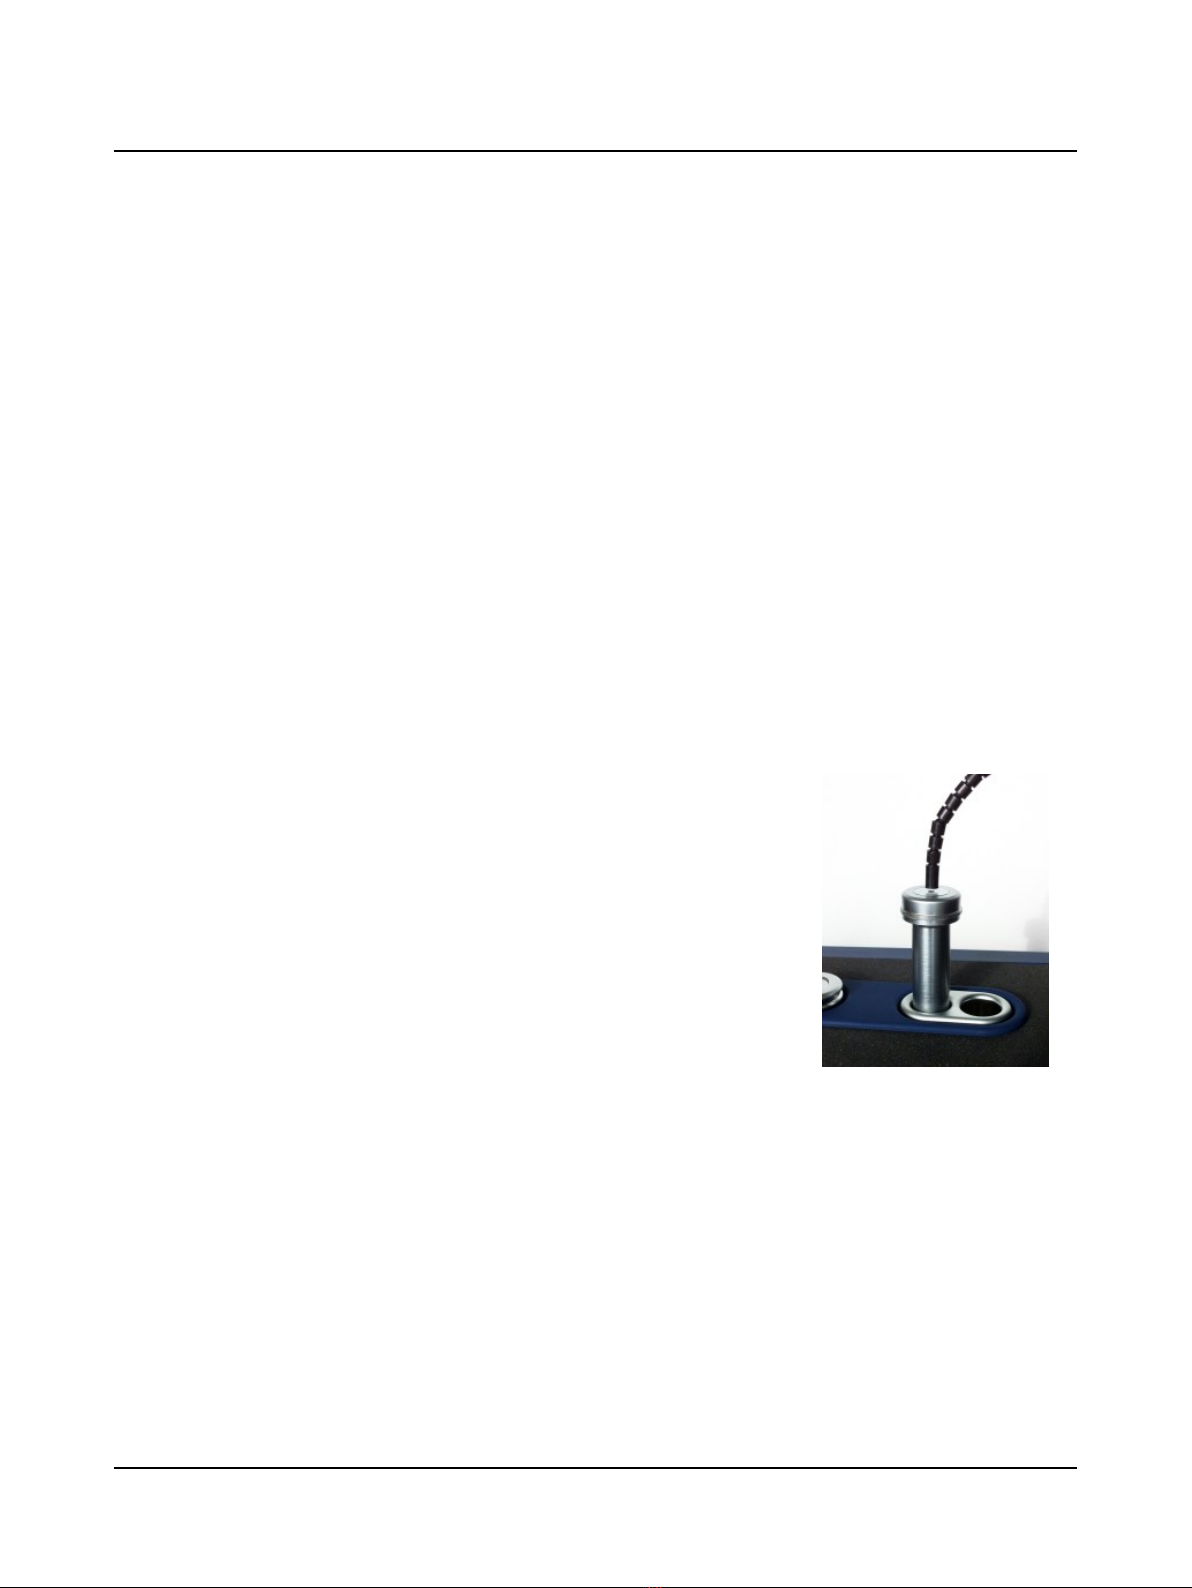
Positioning the reference microphone
– As a rule of thumb, position the reference microphone as close as possible to the front microphone of the hearing
instrument without actually touching it.
Maximum permitted distances are:
Vertically (Y axis) 8mm (above)
Sideways (X axis) ±12mm
Back-to-front (Z axis) ±3mm
5.3 Using the battery simulator
1. Select a battery simulator and insert it in the hearing instrument.
10 Otometrics - AURICALHIT
5 Testing hearing instruments