© 2020 Natus Medical Incorporated 1 026057 RevE
Introduction Echo-Screen III Pro Instructions for Use
Introduction
This document provides the instructions that screeners need for the proper and safe use of the
Echo-Screen III®Pro hearing screener. Administrators should refer to the Echo-Screen III Pro
Reference Guide for instructions about setting up, configuring, and managing Echo-Screen III
Pro hearing screening devices.
Echo-Screen III®Pro devices come with audble software. If you install audble, you can transfer
patient and test data from the device to audble for reviewing and reporting. You can also use
audble to upload patients into worklists on the Echo-Screen III device. In addition, administrators
can use audble to configure and maintain settings and users on the device. For more information
about using the Echo-Screen III device with audble software, see the Echo-Screen III Pro
Reference Guide and the audble/Desktop User Guide.
Note: You can install the Echo-Screen III Pro Reference Guide on the
computer by using the Device Management Tools installation program. Look for
the guide under All Programs, Natus Medical, Echo-Screen III.
Intended Use
The Echo-Screen III hearing screener models are based upon otoacoustic emission (OAE) and
auditory brainstem response (ABR) technology.
The device is intended to screen hearing for newborns through adults, including geriatric
patients. The device does not measure hearing per se, but helps to determine whether or not a
hearing loss may be present.
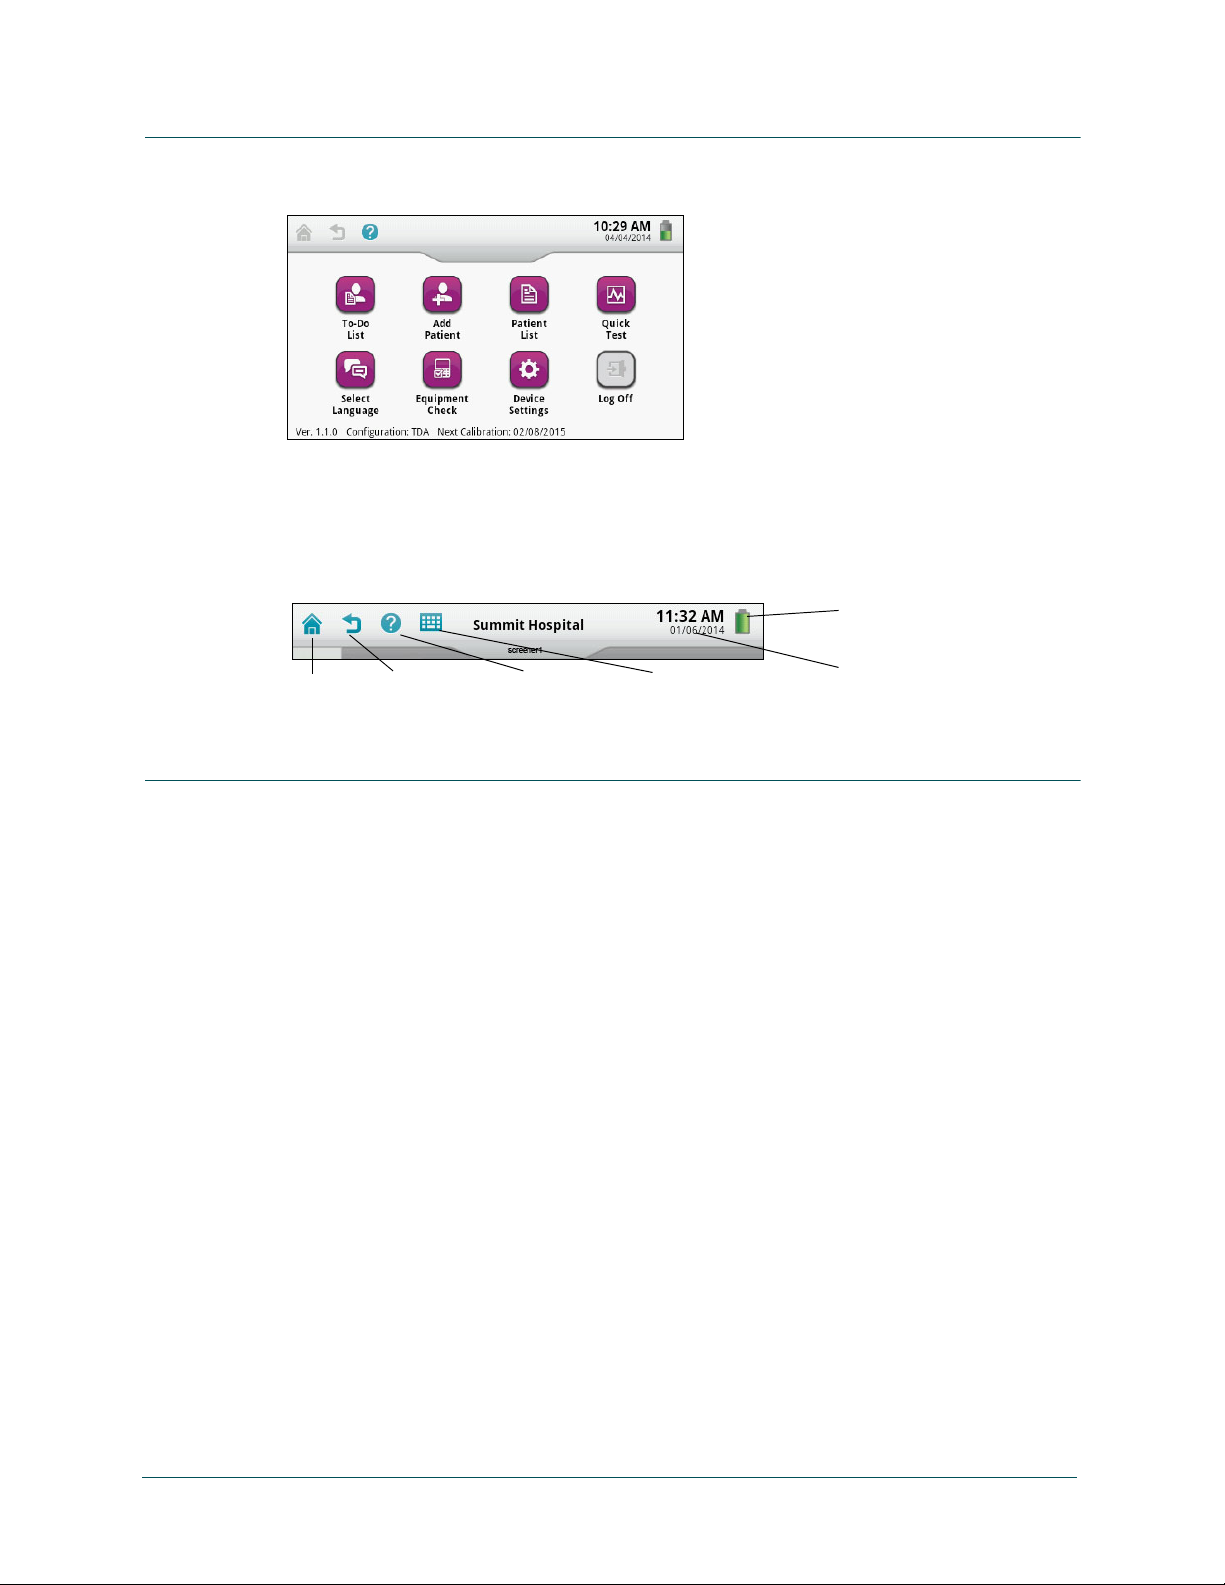
The Echo-Screen III product family consists of handheld, automated OAE and ABR based
hearing screening systems which are easy to use. The measurement flow is menu guided and
the evaluation is based upon signal statistics. The Echo-Screen III devices are intended to be
used by trained personnel in a medical or school environment. The Echo-Screen III models are
not intended for fitting assistive listening devices such as hearing aids or cochlear implants.
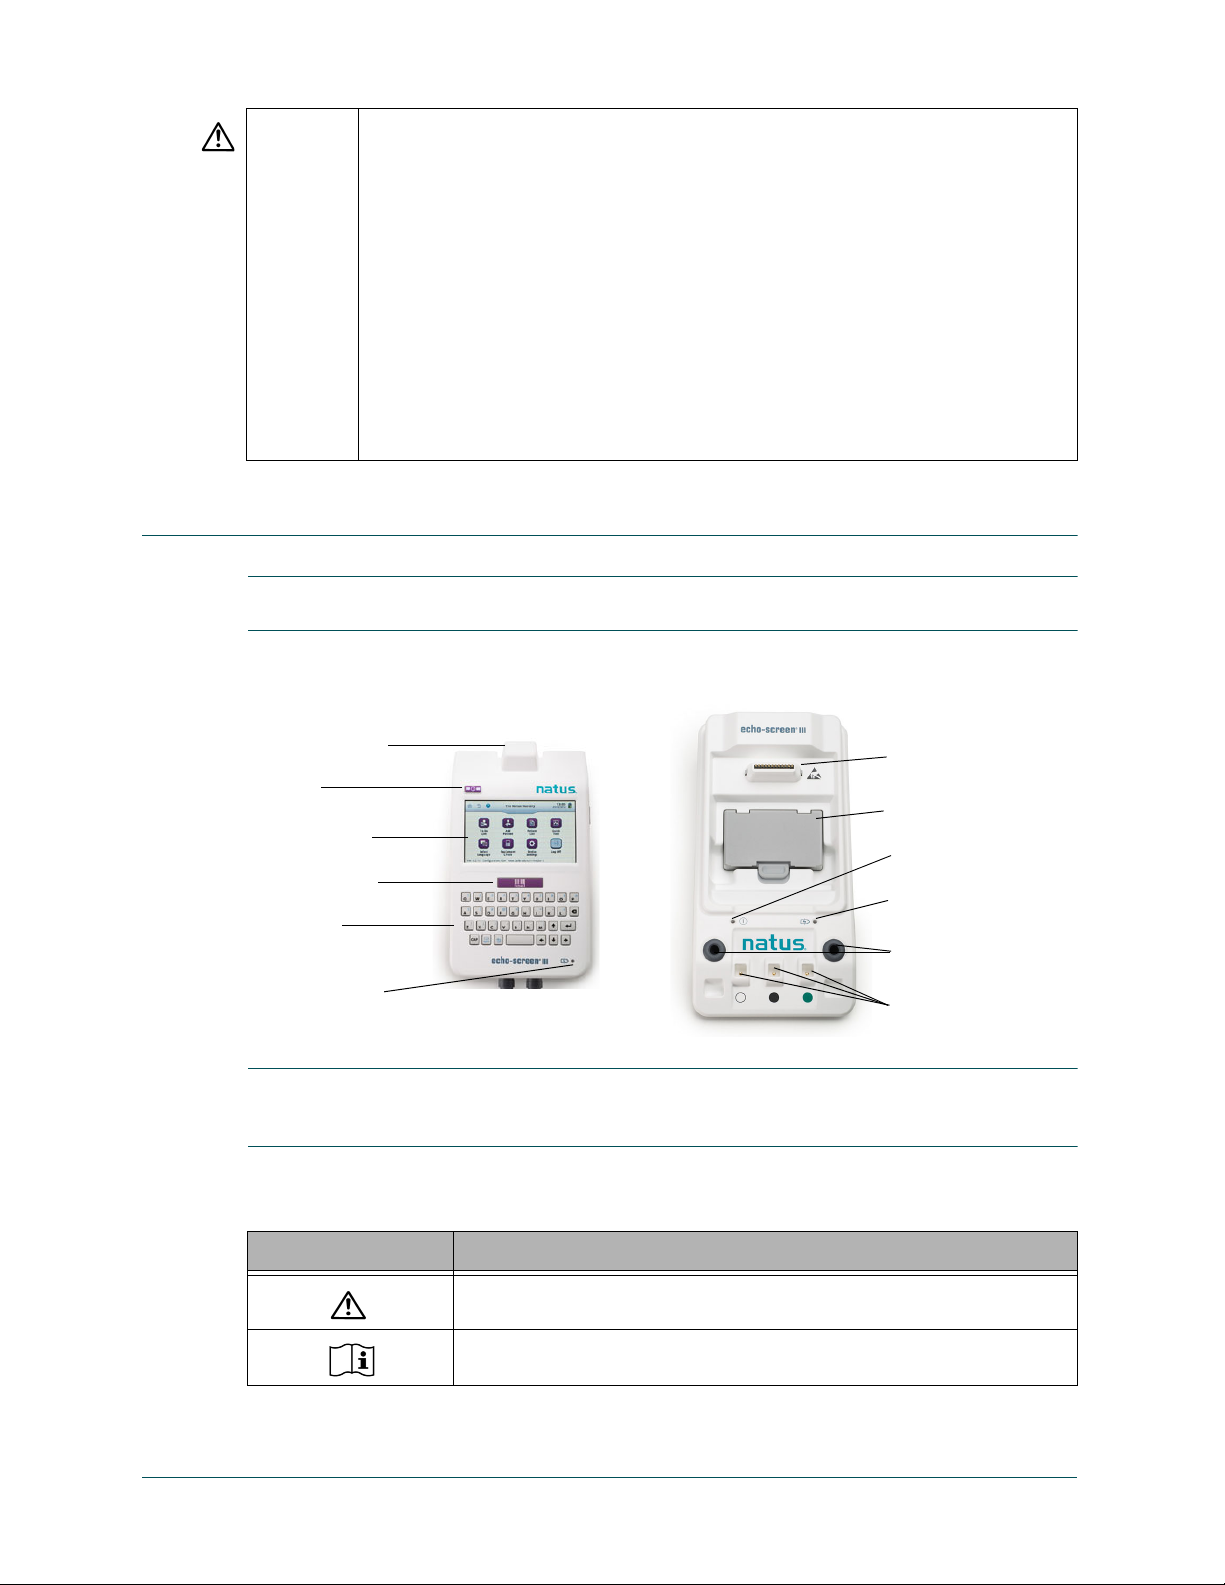
Echo-Screen III Product Information
The Echo-Screen III hearing screener is a portable device for detecting hearing loss in patients
of all stages of life, including newborns of at least 34 weeks gestational age, infants, children,
adults, and geriatric adults.
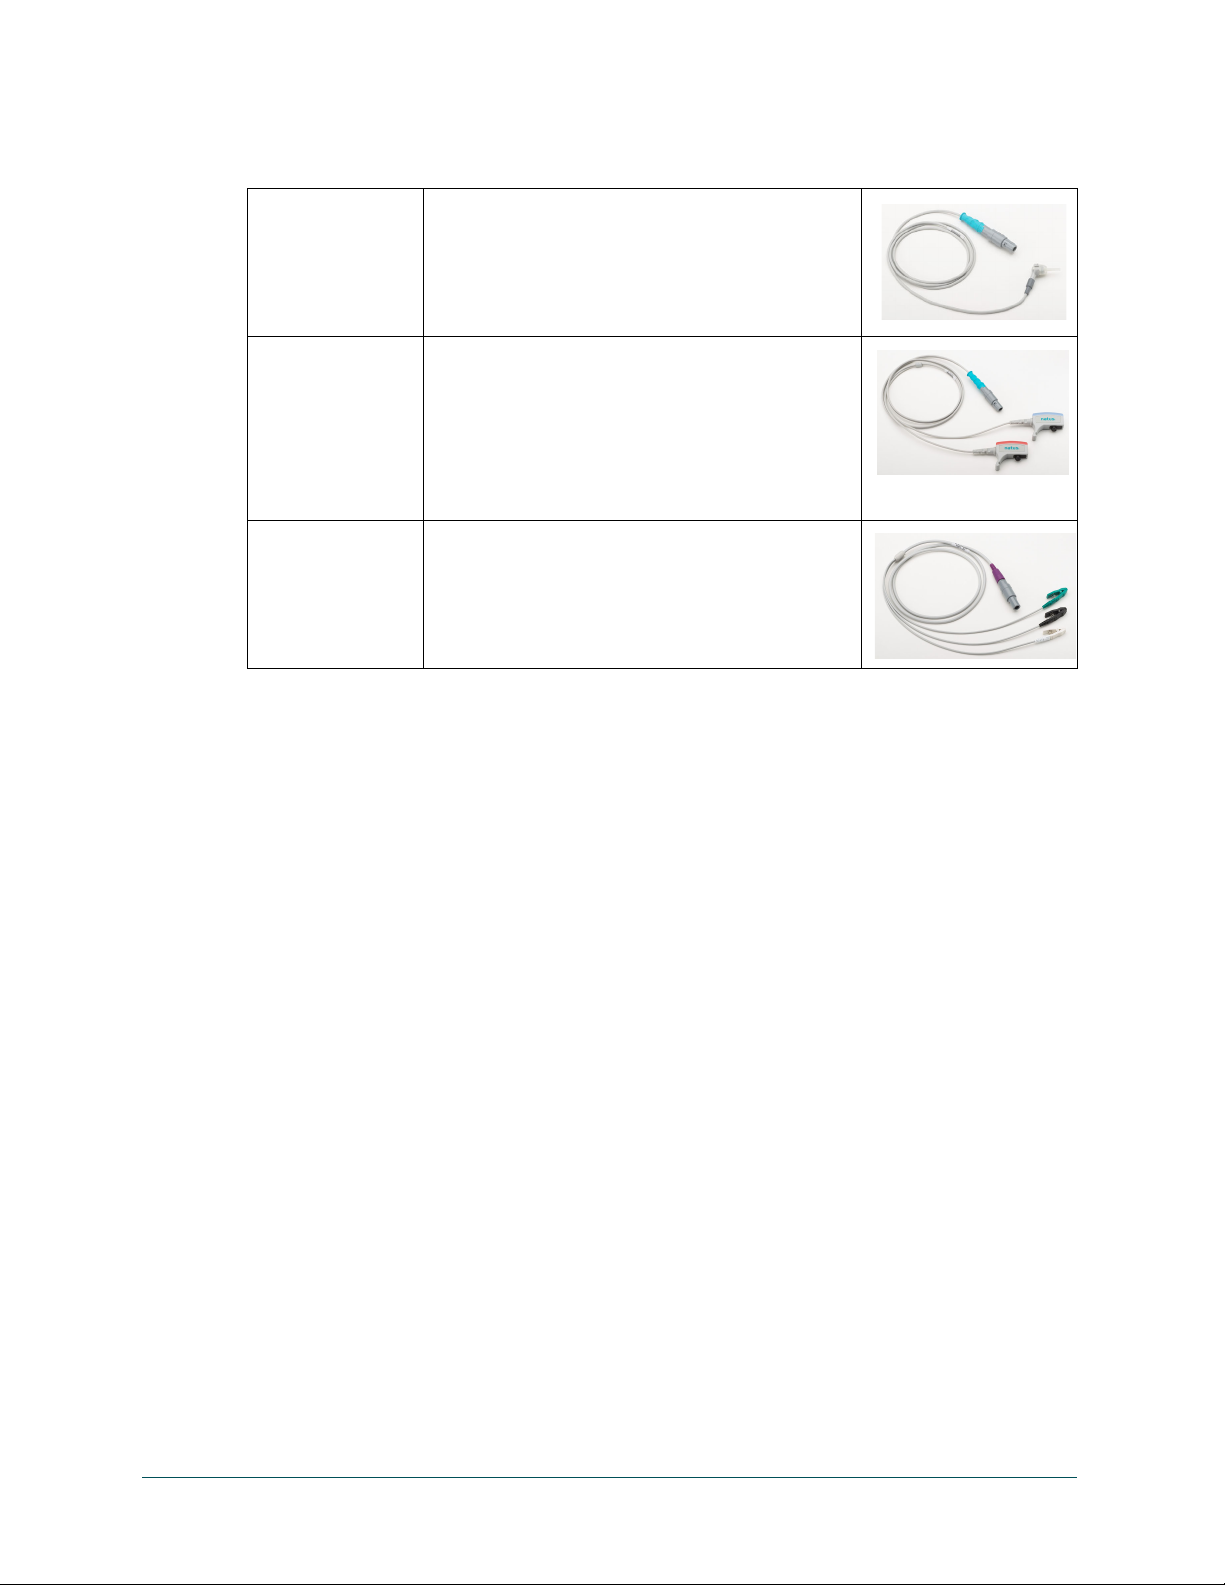
The Echo-Screen III device detects hearing loss by using Automated Otoacoustic Emissions
(AOAE®) technology, which includes both Transient Evoked Otoacoustic Emissions (TEOAE),
Distortion Product Otoacoustic Emissions (DPOAE), and Auditory Brainstem Response (ABR)
technology.
Echo-Screen III devices are designed for use in medical environments, such as the well-baby
nursery, NICU, mother’s bedside, audiology suite, outpatient clinic, or doctor’s office, and in
school environments. Echo-Screen III devices are intended for use by audiologists, physicians,
nurses, and technicians, and any other personnel who are trained to operate the device. Basic
training with the device is sufficient for performing screening of patients in good health.
The otoacoustic emissions test is especially indicated for use in testing individuals who are
unable to respond reliably to verbal instructions, such as infants, young children, and
cognitive-impaired adults.