Navitar FX User manual

FX
Special Effects Slide Projector
Instruction Manual
Introduction ............................................................... 2
Projector Set-up .......................................................... 2
Changing the Lamp ..................................................... 3
Operating the Fader.................................................... 3
Optional Remote & External Dissolve Controller ........ 4
Specifications.............................................................. 4
Warranty .................................................................... 5
NAVITAR, Inc., 200 Commerce Drive , Rochester, NY 14623 USA

2
Introduction
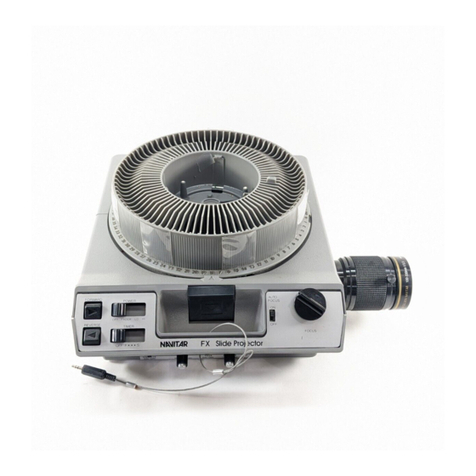
The Navitar FX is the most advanced slide projector on the market today.
Navitar has enhanced the industry standard Kodak slide projector by adding the
following features to the Kodak ktagraphic III, AMT slide projectors:
• 50% more brightness with the Navitar BrightLight lamp module.
• Built-in timer delay between slides.
• Built-in fade/dissolve mechanism during slide advance.
Projector Set-up
1. Read your Kodak operating instruction manual to understand the operation of
your projector’s primary functions.
2. Plug the Navitar FX Projector into the wall outlet. Turn the projector’s power
switch to FAN ONLY.
Do not turn the projector lamp power switch to the high setting, theDo not turn the projector lamp power switch to the high setting, the
Do not turn the projector lamp power switch to the high setting, the
Navitar Dissolve will operate the lamp.Navitar Dissolve will operate the lamp.
Navitar Dissolve will operate the lamp.
In the lamp position, your FX Projector will operate like a non-modified (non-
dissolve) slide projector.
Changing the Lamp
Increased BrightnessYour Navitar FX projector comes equipped with a Navitar BrightLight lamp
module, giving you 50% more brightness than a conventional slide projector.
This significant increase in brightness allows your slides to be seen clearly even
over long projection distances or when the room can’t be completely darkened.
Selecting a Replacement Lamp
The lamp supplied is a General lectric XW (300 watt 82 volt lamp). This G
lamp has been chosen for its maximum brightness and color temperature. It
most closely matches the optical coating of the mirror, condensor and heat filter
in the Navitar BrightLight lamp module.
You can select from any of the following G replacement lamps:
pmaLEG tooF seldnaC efiLbluB )sruoH(
WXE00251
RXE56153
SHF03107
YXE501002
detcejorpegamiediwretem1dradnatsnodesaB* .snel8.2F"7rativaNhtiw

3
Operating the Fader
Built-in Fade/Dissolve Mechanism
The Navitar FX projector has a built-in fade/dissolve mechanism to give you
seamless, professional looking transition between slides without an expensive
external dissolve controller. With Navitar’s FX projector, your slide image fades
to black, then the projector advances to a new slide, adjusts focus and fades up
to full brightness.
Pushing the Advance Button
To operate the fader with the advance button, turn the projector to the FAN
position, turn the TIM R ON/OFF switch to OFF, set the DISSOLV RAT
control to the desired cycle time (1-12 seconds) and push the FORWARD button
on the side.
Note: the unit fades out the lamp, advances the projector and fades the lamp
back up at your selected rate.
Kodak Remote Control
To operate the fader using the Kodak Remote Control, turn the projector to the
FAN position. Plug the Kodak Remote Control that came with your projector into
the 5 pin socket on the rear of your projector.
Turn the TIM R ON/OFF switch to the OFF position. Push the FORWARD
button on the remote control to initiate the fader at whatever rate you have set.
Depending where the dissolve rate is set, the advance could take a few seconds.
The R V RS button operates the projector’s normal reverse cycle without
dissolve. Always hold down
R V RS for about a ½ second for reliable projector reverse cycling.
If you have remote focus on your projector and control, it will operate normally.
Timer Delay Between Slides
To operate the fader with timer delay between slides, turn the projector to the
FAN position. Set the TIM R switch to ON. Set the TIM R D LAY control to the
desired time between cycles.
The Navitar FX will wait your set D LAY time between slides, then will operate
the dissolve cycle at your selected RAT . It will continue this process for each
slide as long as the TIM R ON/OFF switch is ON.
Operating as a Standard Projector
To operate as a standard, non-modified projector, turn the TIM R ON/OFF
switch to the OFF position. Turn the POW R switch to the HIGH position.
4
Optional Remote & External Dissolve Controller
Operating Optional Proportional Remote
To manually fade the lamp on and off, you must use the optional Navitar Propor-
tional Remote Control.
Shut the TIM R ON/OFF switch to OFF. Then turn the remote full counterclock-
wise (zero ohms) and connect the proportional remote to the Navitar FX remote
socket located next to the dissolve knob.
The projector lamp will stay on. Now slowly turn the remote clockwise and note
the projector’s lamp dimming. When the lamp is off, continue to turn the control
and the projector will automatically advance.
Wait for the projector to finish its advance cycle and then turn the control coun-
terclockwise to turn the lamp back on.
The PROPORTIONAL R MOT socket can be used as a remote ON/OFF for
the fader and timer.
Connecting to an External Dissolve Controller
Plug the enclosed phono jack into the remote socket (next to the dissolve knob).
This will defeat the internal dissolve/timer controls. Now your projector can be
used in a multi-media show and controlled by an external dissolve controller
(AVL, Arion, etc.).
Specifications
For general projector specifications, refer to your Kodak
manual.
Navitar FX specifications are as follows:
DissolveDissolve
DissolveDissolve
Dissolve
1-12 second variable.
TT
TT
Timerimer
imerimer
imer
1-10 second variable.
LampLamp
LampLamp
Lamp
G Model XW.
Remote ControlRemote Control
Remote Control
Standard Kodak 5 pin remote control.
Multi-mediaMulti-media
Multi-media
Insert phono jack into remote socket (located next to
dissolve knob) to defeat built-in dissolve/timer controls.
Manual DissolveManual Dissolve
Manual Dissolve
Connect the Navitar proportional remote control to the
remote socket located next to the dissolve knob.

5
Warranty
1 Year Parts/1 Year Labor
This product is warranted to be free from defect in material and workmanship for
a period of one year from the date of invoice to the original purchaser.
If during the warranty period the product is found to be defective, it will be
repaired or replaced at the facilities of Navitar. However, Navitar reserves the
right to refund the purchase price if the replacement or repair is not commercially
practical or timely. Parts not manufactured by Navitar carry only the warranty of
their
manufacturer. Lamps and fuses carry no warranty.
This warranty does not cover damage caused in transit; damage caused by
misuse, neglect or carelessness; or damage resulting from either improper
servicing or modification by someone other than Navitar. Further, this warranty
does not cover any routine maintenance work that is reasonably expected to be
performed by the purchaser.
No responsibility is assumed for unsatisfactory operating performance due to
environmental conditions such as humidity, dust, corrosive chemicals, deposition
of oil or other foreign matter, spillage or other conditions beyond the control of
Navitar.
For service, repair or return procedures under this warranty, contact your dis-
tributor, your local Navitar field officer or Navitar direct at 585-359-4000 or 1-800-
828-6778 in the United States.
xcept as stated herein, Navitar makes no other warranties, expressed or
implied by law, whether of merchantability, fitness for a particular purpose or
otherwise. Further, Navitar shall not, under any circumstances, be liable for
incidental, consequential or other damages.
Table of contents
Other Navitar Projector manuals

Navitar
Navitar ColorPro User manual

Navitar
Navitar 10K User manual

Navitar
Navitar 560 User manual

Navitar
Navitar VIDEOMATE 2030P User manual

Navitar
Navitar VideoMate 2300 User manual

Navitar
Navitar VideoMate 6100 User manual

Navitar
Navitar VideoMate 5000 User manual

Navitar
Navitar VideoMate 5000 User manual

Navitar
Navitar VideoMate 7500XY User manual

Navitar
Navitar VIDEOMATE 2030 User manual