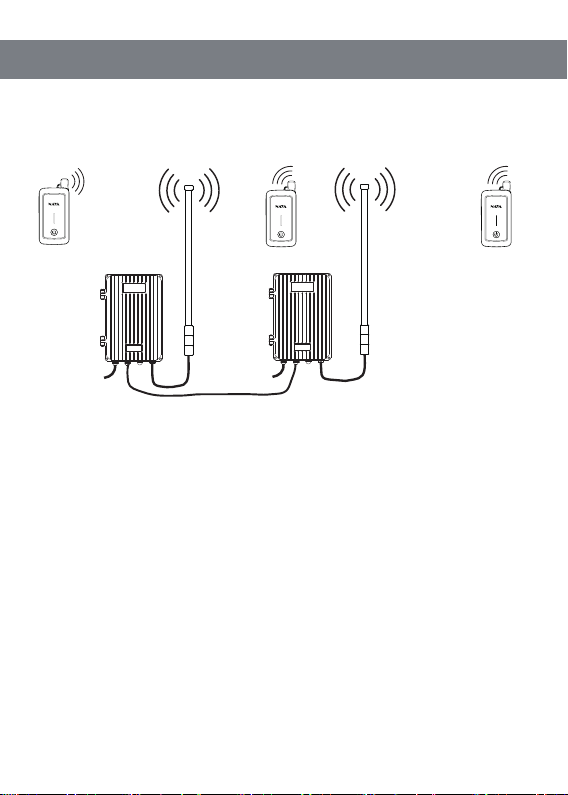
5 Using instructions of multi-repeaters
Channel 85 Channel 85
N AYA N AYA
Networking cable
Note: The channel layout in this manual is for the installation solution reference only.
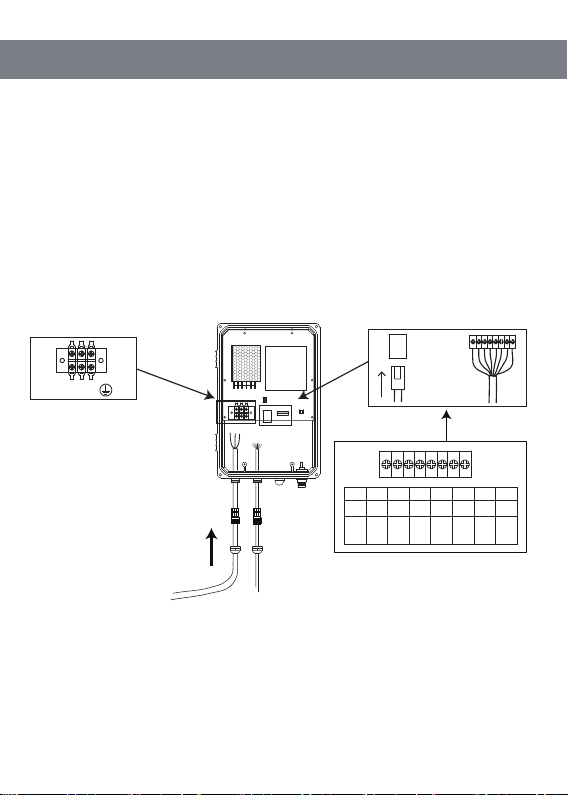
◆In the multi-relay mode, please ask the dealers to pre-configure channels and networking
parameters of multiple repeaters, and then the configured multiple repeaters can be
connected through the network cable when powered on. At this time, the handheld terminal
channel should be adjusted to the correct channel according to the requirements of the
dealer.
◆After the above configuration is completed, the handheld terminal can be powered on to
conduct the conversation. All handheld terminals under different repeaters are interconnect-
ed.
◆When a handheld terminal enables the roaming function: if the terminal moves from
coverage of one repeater to the coverage of another repeater, its channel will automatically
switch to the same channel of the repeater with a stronger signal for call, without manual
switching.
◆The handheld terminal roaming channel is a multi-relay channel, and the specific channel
is configured according to the requirements of the dealer. To modify the repeater channel,
please contact your dealer.
Channel 85
PNI-HT2100
Channel 85
PNI-HT2100
Channel 85
PNI-HT2100
9
Focus on R&D Stable and reliable