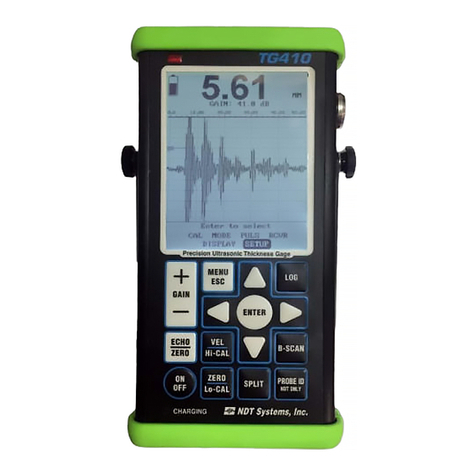
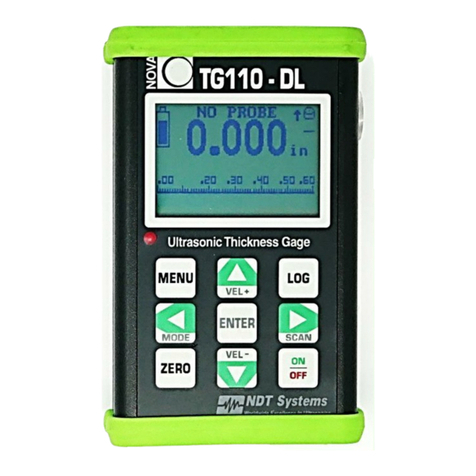
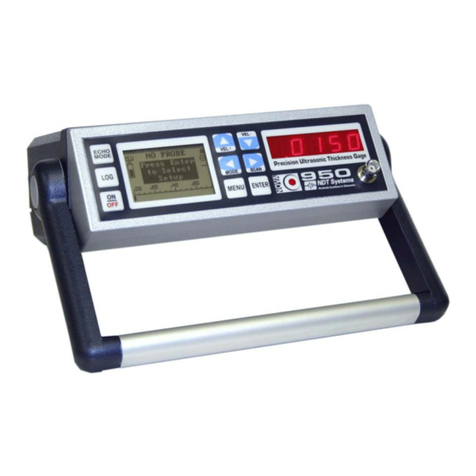
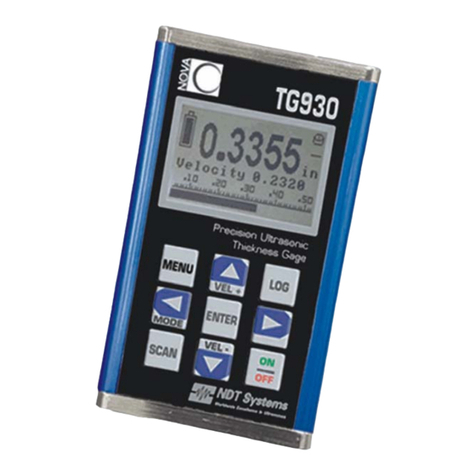
NDT Systems NovaScope 5000 User manual


Manual No. OM5000
Jan X/04 Ver 1.40 ii
www.ndtsystems.com
TABLE OF CONTENTS
Section Page
SAFETY SUMMARY ................................................................... v
WARRANTY .........................................................................vi
SPECIFICATIONS .................................................................... vii
2. INTRODUCTION .................................................................... 2
3. GENERAL APPLICATIONS ........................................................... 3
3.1 BASIC MATERIAL REQUIREMENTS ............................................... 3
3.2 SUITABLE MATERIALS .......................................................... 3
3.3 TYPICAL PRODUCT CONFIGURATIONS ........................................... 3
3.4 GAGING STATIONARY PRODUCTS ............................................... 3
3.5 MONITORING IN-MOTION PRODUCTS ............................................ 3
4. GENERAL OPERATING PRINCIPLES .................................................. 4
4.1 ULTRASONIC PRINCIPLES ...................................................... 4
4.1.1 Nature of Ultrasound ........................................................ 4
4.1.2 Thickness Gaging Concept .................................................. 5
4.2 INSTRUMENTATION CONCEPTS ................................................. 6
4.2.1 Basic Pulse-Echo Circuit .................................................... 6
4.2.2 Scope Display ............................................................. 7
4.2.3 A-Scan Presentation ........................................................ 8
4.2.4 Resolving Power and Sensitivity .............................................10
4.3 THICKNESS GAGING MODES ...................................................12
4.3.1 Contact Mode ............................................................ 12
4.3.2 Immersion/Delay Line Mode .................................................12
4.4 GATES ......................................................................14
5. FUNCTIONAL DESCRIPTION OF NovaScope CONTROLS ................................16
5.1 GENERAL TOUCH INTERFACE INSTRUCTIONS .................................... 16
5.2 SCOPE SWEEP SPEED ........................................................ 18
5.2.1 VARIABLE SWEEP SPEED CONTROL ........................................18
5.3 SCOPE INTENSITY ............................................................ 18
5.4 SCOPE FOCUS ...............................................................18
5.5 SCOPE TRACE ROTATION .....................................................18
5.6 POWER ..................................................................... 18
5.7 READOUT RANGE ............................................................18
5.8 READOUT CAL ............................................................... 18
5.9 ZERO .......................................................................18
5.10 READOUT THICKNESS/VELOCITY SWITCH ...................................... 18
5.11 TRANSDUCER DAMPING .....................................................18
5.12 TRANSDUCER T/R ...........................................................18
5.13 RECEIVER GAIN ............................................................. 18
5.14 RECEIVER GAIN/AGC ........................................................ 19
5.15 RECEIVER REJECT ........................................................... 19
5.16 RECEIVER VIDEO ............................................................ 19
5.17 RECEIVER DB ATTEN ........................................................ 19
5.18 SYNC SWEEP ............................................................... 19
5.19 SYNC T-GATE ............................................................... 19

Manual No. OM5000
Jan X/04 Ver 1.40 iii
5.20 GATE DISPLAY SWITCH ......................................................19
5.21 GATE DISPLAY "T" ...........................................................21
5.22 GATE DSPLAY "IP" (Initial Pulse, or Main Bang) .................................... 21
5.23 GATE DISPLAY "IF" ...........................................................21
5.24 GATE DISPLAY "TAC" .........................................................21
5.25 ALARM ..................................................................... 24
5.26 Setup Button .................................................................24
5.27 Save and Recall Screen ........................................................ 24
FRONT ......................................................................24
DELETE .....................................................................24
RECALL .....................................................................24
STORE ......................................................................24
EDIT ........................................................................24
NEW ........................................................................24
EXT .........................................................................24
5.29 Pulser ...................................................................... 24
5.28 Store Button .................................................................. 26
5.30 T-GATE/START/STOP ........................................................27
5.31 ANALOG OUTPUT OFFSET ....................................................27
5.32 CONTACT - DELAY/IMMERSION ................................................27
5.33 ALARMS .................................................................... 27
5.34 PULSE RATE ................................................................27
5.35 MAT'L ...................................................................... 27
6. OPERATIONAL SETUP ............................................................. 28
6.1 CONTACT THICKNESS GAGING SETUP ..........................................28
6.1.1 Getting Started ............................................................ 28
6.1.2 Turn Power On ........................................................... 28
6.1.3 Select Transducer .........................................................28
6.1.4 SYNC SWEEP ........................................................... 28
6.1.5 Initial SCOPE SWEEP SPEED Adjustment ..................................... 28
6.1.6 Adjusting Echo Amplitude ...................................................28
6.1.7 SYNC SWEEP DELAY .....................................................30
6.1.8 Setting DAMP Control ......................................................30
6.1.9 Setting IP-GATE .......................................................... 30
6.1.10 Setting T-GATE ......................................................... 30
6.1.11 Choice Between AGC and Manual Gain ......................................34
6.1.12 Thickness Calibration .....................................................34
6.1.13 Gaging Difficulties ........................................................ 34
6.2 DELAY LINE AND IMMERSION GAGING SETUP .................................... 34
6.2.1 To Start .................................................................34
6.2.2 Turn Power On ........................................................... 34
6.2.3 Select Transducer .........................................................34
6.2.4 SYNC SWEEP ........................................................... 34
6.2.5 Initial SCOPE SWEEP SPEED Adjustment ..................................... 34
6.2.6 Immersion Transducer Only ................................................. 34
6.2.7 Adjusting Echo Amplitudes ..................................................35
6.2.8 SYNC SWEEP DELAY .....................................................35
6.2.9 Setting DAMP Control ......................................................35
6.2.10 Setting IP-Gate .......................................................... 38
6.2.12 Setting T-Gate ...........................................................38
6.2.13 Choice Between AGC and Manual Gain ......................................38
6.2.14 Thickness Calibration .....................................................35
6.2.15 Immersion/Delay Line Gaging Limits ......................................... 39
6.2.16 Gaging Difficulties ........................................................ 39
6.3 PULSE RATE (PRF) SELECTION ................................................. 41

Manual No. OM5000
Jan X/04 Ver 1.40 iv
6.4 SUPPLEMENTAL FUNCTION ....................................................41
6.4.1 Special TAC-GATE ........................................................44
6.4.2 T-GATE START/STOP Switches for Contract Transducer Gaging ...................44
6.4.2.1 General ............................................................44
6.4.2.2 Setting T-GATE/STOP Switch .......................................... 44
6.4.3 T-GATE START/STOP Switches for Immersion or Delay Line Transducer Gaging ...... 45
6.4.3.1 General ............................................................45
6.4.3.2 Typical Echo Polarities ................................................ 45
6.4.3.3 START/STOP Switch Operational Concept ................................45
6.4.3.4 Gaging IF Echo - First Back Echo ........................................47
6.4.3.5 Gaging On Multiples ..................................................47
6.4.4 Blocking Actual IF Echo ....................................................49
6.4.5 HI RES/NORM Switch .....................................................49
7. CALIBRATION PROCEDURES ....................................................... 50
7.1 THICKNESS CALIBRATION WITH SAMPLES ....................................... 50
7.2 THICKNESS CALIBRATION WITH VELOCITY ...................................... 50
7.3 MATERIAL VELOCITY MEASUREMENT ........................................... 51
7.4 CALIBRATION OF ALARMS .....................................................51
7.4.1 To Calibrate Only the LO Control ............................................. 51
7.4.2 To Calibrate Only the HI Control .............................................51
7.4.3 To Calibrate for LO/HI Combination ........................................... 52
8. CALIBRATION SAMPLES ........................................................... 52
9. TRANSDUCER SELECTION ......................................................... 52
10. COUPLANT SELECTION ...........................................................52
11. AC POWER START-UP REQUIREMENTS .............................................53
11.1 SAFETY .................................................................... 53
11.2 AC LINE VOLTAGE SELECTION ................................................53
11.3 AC LINE FUSE ...............................................................53
11.4 POWER CORD ..............................................................55
11.4.1 Attachment To NovaScope ................................................55
11.4.2 Attachment To AC Power Source ........................................... 55
11.5 INSTRUMENT COOLING ......................................................55
11.6 INITIAL START-UP ...........................................................56
12. OUTPUT/INPUT PORTS ...........................................................57
12.1 ANALOG OUT ............................................................... 57
12.2 IP SYNC (Output) ............................................................. 57
12.3 EXT PRF (Input) .............................................................. 58
12.4 DATA PORT .................................................................58
12.4.1 High-Speed Binary Thickness Output .........................................59
12.4.2 RS-232C Interface ........................................................ 59
12.4.3 ALARMS Output ......................................................... 66
12.4.4 PortaScan RANGE/UNITS Output ...........................................66
13. STANDARD NOVASCOPE MODEL OPTIONS ..........................................66

Manual No. OM5000
Jan X/04 Ver 1.40 v
SAFETY SUMMARY
This summarized safety summary is intended for both operating and service personnel.
WARNING TERMS OF INSTRUMENT
Caution means a personal injury hazard that is not immediately accessible as the
markings are read, or a property/instrument hazard. DANGER means a personal injury
hazard that is immediately accessible as the marking is read.
POWER SOURCE
This NovaScope is intended to operate from an AC power source that supplies either a
nominal 115 VAC to 230 VAC (rms) between the supply conductors or between either
supply conductor and ground. Before applying AC power, the LINE VOLTAGE must be
within the AC power voltage - otherwise, a safety hazard or equipment damage could
occur.
GROUNDING THE PRODUCT
The NovaScope is grounded through the grounding conductor of the power cord. To
avoid electrical shock, plug the power cord into a properly wired receptacle before making
any connections to the NovaScope input or output terminals. A protective ground
connection, by way of the grounding conductor in the power cord, is essential for
safe operation.
DANGER ARISING FROM LOSS OF GROUND
Upon loss of the protective-ground connection, all accessible conductive parts -- including
knobs and controls that may appear to be insulating -- could render a dangerous electric
shock.
USE THE PROPER POWER CORD
Use only the power cord and connector specified for the NovaScope.
Use only a power cord that is in good condition.
Read Section 11 for power-cord and connector information.
USE THE PROPER FUSE
To avoid fire hazard, use only a fuse of the correct type, voltage rating and current rating
specified on the back panel of the NovaScope and in Table V.
DO NOT OPERATE IN AN EXPLOSIVE ATMOSPHERE
To avoid explosion, do not operate the NovaScope in an explosive atmosphere.
REMOVAL OF COVERS OR PANELS
Because of the dangerous high voltages inside the NovaScope, only skilled, authorized
technicians should remove the cover/panels when either setting internal adjustments (see
Section 12) or for servicing. Do not operate the NovaScope without the covers and
panels properly installed.

Manual No. OM5000
Jan X/04 Ver 1.40 vi
LIMITED WARRANTY
1. WARRANTY: NDT Systems, Inc. warrants that reasonable care was used in the choice of materials and the
manufacture of this instrument, and that the instrument conforms to the published ratings and characteristics
applicable to the instrument at the time the instrument is shipped to the Buyer. This warranty shall extend for a period
of one year from the date of shipment of the instrument (FOB Seller's plant) and shall in no event extend beyond such
term. The Buyer shall notify NDT Systems, Inc. within the time and in the manner specified herein shall constitute a
waiver of any such claim of defect or breach of warranty. The final determination of the existence of a defect or breach
of this warranty shall be made by NDT Systems, Inc. This warranty shall extend to the buyer only, and shall not be
assignable or transferable to any other person.
2. DISCLAIMER OF WARRANTIES THERE ARE NO WARRANTIES, EXPRESS OR IMPLIED, INCLUDING ANY
IMPLIED WARRANTY OF MERCHANTABILITY OR FITNESS FOR A PARTICULAR PURPOSE, OTHER THAN
THOSE WARRANTIES SET FORTH IN THE PARAGRAPH ENTITLED "WARRANTY" ABOVE.
The above warranty shall not apply to digital panel meters and items with a limited life, such as batteries,
probes or cables, nor to any instruments which have been subjected to misuse, improper installation or repair,
alteration, or use beyond the published rating of the instrument.
3. BUYER'S REMEDIES: The Buyer's sole exclusive remedy for breach of the above warranty shall be the repair or
replacement of the instrument by NDT Systems, Inc., free of charge. The Buyer shall return the instrument to NDT
Systems, Inc., transportation prepaid. NDT Systems, Inc. shall promptly repair or replace the instrument and return
same to Buyer, FOB Seller's Plant, collect.
If, for any reason, NDT Systems, Inc. is unable or unwilling to repair or replace the instrument or, because of
circumstances, the exclusive remedy provided herein fails of its essential purpose, or operates to deprive either party
of the substantial value of its bargain, then the Purchaser's exclusive remedy will be the return of the purchase price
for the instrument. The liability of NDT Systems, Inc. shall in no event be greater than the full amount of the purchase
price for the instrument.
Any attempt by NDT Systems, Inc. to repair or replace any instrument sold hereunder shall not constitute an
admission that the instrument, or any part thereof, is defective within the meaning of the above warranty, nor that NDT
Systems, Inc. has any legal responsibility to make such repair or effect such replacement.
Any such attempts, if unsuccessful, shall not create any liability on the part of NDT Systems, Inc. and the
purchaser is limited to the remedy set forth herein.
4. LIMITATION ON LIABILITY: NDT Systems, Inc. shall not, under any circumstances, be liable for direct, incidental
or consequential damages for any breach of contract, breach of warranty or misrepresentations, including the
negligence of NDT Systems, Inc., including, but not limited to, damages resulting directly or indirectly from the use, or
loss of use, of the instrument sold hereunder, or the business of the Buyer or third persons wherein the instrument is
utilized.
The above warranty, and the obligations of NDT Systems, Inc. hereunder, are expressly in lieu of, and the
Buyer expressly waives, any other liability of NDT Systems, Inc. based upon warranty, express or implied, contract, or
the negligence of NDT Systems, Inc., including, but not limited to, negligence in the design of the instrument or in the
choice of the materials therefor, or negligence in the repair or replacement of the instrument, whether such repair or
replacement is required by the terms hereof or is voluntary, upon the part of NDT Systems, Inc.
Except as provided herein, no person is authorized to assume on behalf of NDT Systems, Inc. any other or
additional liability or responsibility in connection with the instrument. These terms and warranty are applicable to and
part of all quotations, sales and transactions with the Buyer, and by placement of a purchase order, Buyer signifies
complete acceptance of such a binding legal agreement.

Manual No. OM5000
Jan X/04 Ver 1.40 1
1. SPECIFICATIONS
DIGITAL DISPLAY Four Digit “Virtual” (LED), With 0.05 Second Update
DIMENSIONAL READOUT English And Metric (Selector Switch)
GAGING RANGE English: 0.005-10"; Metric: 0.13mm To 100mm (Depending Upon Material)
DIGITAL RESOLUTION English Metric
±0.0001" On 1" Range ±0.001mm On 10mm Range
±0.001" On 10" Range ±0.01mm On 100mm Range
GAGING MODE CONTROL Sets Mode For Contact, Delay Line Or Immersion Transducers
THICKNESS/VELOCITY SWITCH Selects Digital Display Of Thickness Or Velocity
PULSER Risetime
Selectable Amplitude
Selectable Rep Rate
5 To 10 ns Into 50 Ohms, Depending On Pulser Voltage
90, 150 And 300 Volts Peak Into 50 Ohms
625, 1200, 2500 And 5000 pps
RECEIVER
Manual Gain Mode
AGC Mode
Reject
Bandwidth
Attenuator
72 dB
40 dB Dynamic Range, 72 dB Gain
Variable Threshhold To Full-Scale Display
30 MHz (6 dB Down), 20 MHz (3 dB Down)
0, 10 And 20 dB Selectable
DAMP CONTROL To Optimize Echo Waveshape, 15-350 Ohms
SCOPE DISPLAY
Sweep Speed
Bandwidth
Dual Trace
A-Scan Video
Sweep Delay
T-Gate
IP-Gate
IF-Gate
T-Gate Start/Stop
TAC Gate
Switchable To 50 ns/Div. + Continuously Adjustable
50 MHz
A-Scan + Selectable Gate Traces (IP, IF, T or TAC)
Full RF, Positive and Negative Rectified
Delay Sync 1 us To 80 us
Thickness Gate, Adjustable Sync
0.25 To 20 us On Contact, 1.0 To 90 us On Delay And Immersion
0.1 To 8.0 us
Selects Polarity Of Echo's Leading Half-Cycle
Multi-Adjustable Time Compensated Gain:
Start Control........................0.2 To 6 us
Amplitude Control................0 To 17 dB
Slope Control.......................1 To 50 us
ALARMS Three-Function, LO, HI, LO & HI
OUTPUTS/INPUTS Multi-Pin Port With High-Speed Binary Output, RS-232C I/O, PortaScan Outputs, And
HI/LO Alarm; Input Of External PRF Sync; IP Sync Output; Analog Thickness Output ( 0-
5V)
AC POWER REQUIREMENTS
Line Input Voltages
Line Frequency
Power Consumption (Max)
Nominal 115 V - 220VAC (90-264V)
47 - 63 Hz
70 Watts
OPTIONSSingle/Double Transducer Mode
Model 5000L
Two Transducer Connectors And Switch For Single Pulse-Echo, Dual (Pitch-Catch) And
Through Transmission Modes.
Addition Of On-Board Datalogger And Hand Command Module To Standard 4500 Model.
SIZE 5.4" (138mm)H x 12.9" (327mm)W x 17.2" (438mm)D. Inclusion Of Tilt Handle Increases
W To 15.0" (380mm) And D (Fully Extended) To 20.1" (511mm).
WEIGHT 16 Lbs. (7.3 Kg)

Manual No. OM5000
Jan X/04 Ver 1.40 2
2. INTRODUCTION
The NovaScope 5000 is the most significant improvement in the NovaScope series of precision
ultrasonicthicknessgagesandrepresentsthemostversatileandprecisedigitalultrasonicthickness
gage available on the market today. By means of its dual-trace CRT based scope display and
varietyof“virtual”TouchScreencontrols,theNovaScope5000isspecificallydesignedforcomplex,
difficult and ultra-critical gaging applications (where the more common portable/non-scope
ultrasonic thickness gages either won't operate or are too risky in their interpretation to use).
Operating on the ultrasonic pulse-echo principle, the NovaScope 5000 gages sectional thickness
withaccesstoonlyonesurfaceofthematerial. Furthermore,itsversatiledesignpermitsthegaging
of both stationary or in-motion products-using either a manual or automatic mode of operation.
The NovaScope, which operates from either a standard nominal 115 or 230 VAC power outlet. It
alsofeaturesahighlyversatiledualdigitalport.ThisportoffersbothhighspeedbinaryorRS-232C
digital interfacing with peripheral equipment, computers, printers, other test instruments and NDT
Systems, Inc’s PortaScan portable ultrasonic imaging system.
Awide selection of specifically designed NovaScope thickness-gaging transducers (probes) are
available to further optimize application performance. The use of various other types, sizes and
frequenciesofcontact, delay line and non-contact immersion (focused or non-focused) transducer
are included. When required to suit specific customer applications, NDT Systems’ transducer
engineeringdepartmentcancustomdesignandfabricatetransducerstomeetvirtuallyanysituation.
Many other features of the NovaScope 5000 will become evident upon reading and understanding
this Operating Manual.

Manual No. OM5000
Jan X/04 Ver 1.40 3
3. GENERAL APPLICATIONS
3.1 BASIC MATERIAL REQUIREMENTS - The basic criterion for gaging suitability is that the
material must be ultrasonically conductive and ultrasonically uniform. Geometrically, the two
surfaces of the sectional thickness to be gaged must be virtually parallel.
3.2 SUITABLE MATERIALS - A very large number of common industrial materials and products
typically qualify for ultrasonic gaging suitability. Included are metals, plastics, glass, certain
ceramics,manyrubber/elastomericmaterials,advancedaerospacecompositesandfiberglass. The
actual gaging range and accuracy depend upon the properties of the specific material involved.
3.3 TYPICALPRODUCTCONFIGURATIONS-Someofthecommonproductconfigurationswhich
can be gaged with the NovaScope include:
tubing
pipe
sheet
plate
extrusions
billets
rounds
bars
ingots
castings
stampings
graphite composites
KevlarTM composites
fiberglass composites
liners and casings
turbine blades
chem-milled parts
valves
forgings
tires
cladding
heat exchangers
machined parts
light bulbs
bottles
cans
lenses
tanks/drums
pressure vessels
corrosion/erosion
discs
drawn/spun parts
blow-moldings
3.4 GAGINGSTATIONARYPRODUCTS-Manyproductswithsimpleorcomplexshapes/contours
can be gaged manually with small handheld transducers (contact or delay line types). For gaging
on particularly sharp contours or in very small spots, effective results can be obtained using a
bubbler (or immersion transducer with a finely-focused ultrasonic beam).
Anon-contactimmersion-type transducer (mounted in a miniature water jetsquirter assembly) can
be automatically scan-indexed across a product's surface to collect thickness data with the
NovaScope. The data processed by the NovaScope can be presented as a familiar C-scan or fed
(via rear panel digital or analog outputs) to a computer, recorder/logger or NDT Systems portable
ultrasonic imaging system, PortaScan.
3.5 MONITORINGIN-MOTION PRODUCTS-TheNovaScopecanmonitorthesectionalthickness
of in-motion products by employing a non-contact water jet squirter/immersion type transducer
mounted in proximity to the product's surface. The product can be presented in a continuous form
(i.e., a web); discreet lengths (i.e., pipe); or as rapidly-indexed small parts (i.e., bottles or forgings).
Various digital and analog outputs of thickness data and alarms are available on the rear panel to
interface with recorders, controllers, loggers or computers. Such system setups permit automatic
thickness monitoring and, in certain situations, process feedback control.

Manual No. OM5000
Jan X/04 Ver 1.40 4
4. GENERAL OPERATING PRINCIPLES
This section presents an elementary overview of the ultrasonic principles and general
instrumentationconceptsfortheNovaScope.Detaileddiscussionsonthespecificcontrols/features
and operational/calibration procedures for the NovaScope are presented in subsequent sections.
Thesmall amount of time spent in review of this section will lead to a more thorough understanding
if thickness gaging in general.
4.1 ULTRASONIC PRINCIPLES
4.1.1 Nature of Ultrasound - The basic physical principle behind the NovaScope is ultrasound.
Ultrasound refers to sound waves whose frequency (pitch) lies beyond the upper limit of hearing
forhumans, which is about 20 kHz (kilohertz). The NovaScope employs high frequency ultrasound
(and electronics) in the range of about 0.1 - 50 MHz (megahertz).
Ultrasound, like any frequency of sound, is basically mechanicalvibrations that propagate or travel
through a medium (gas, liquid or solid) in a wave-like fashion. The velocity at which ultrasonic
wavestravel depends upon thephysicaland chemicalproperties,as well as the temperature of the
medium. If these properties are virtually constant throughout the medium supporting the
ultrasound, then velocity is also constant. Table I lists the nominal velocity for a variety of common
materials. Note that sound waves travel relatively slowly through gases (like air), with medium
velocities through liquids, and fastest through solids (metals).
As a sound wave travels through a material, it loses a portion of its energy due to a process known
as attenuation (a combination of wave scattering from inhomogeneities and absorption). Sound
waves typically attenuate much more in gases than in many common liquids and solids. Also,
attenuation normally increases rapidly with frequency (for example, high frequency [MHz-range]
ultrasonic energy travels only exceedingly short distances through air before it is virtually
attenuated).
Ultrasonic waves behave quite similarly to light waves and microwaves (radar) in that they also
reflect, refract, interfere, and travel as beams (radiation patterns).Higher frequencies permit
ultrasound to be shaped into fairly well-collimated and even sharply-focused beams.
Ultrasound is highly reflective at boundaries (surfaces) between most dissimilar materials
(technically, those with substantially different acoustic impedances). The greater the impedance
mismatch between two materials, the greater the reflection at their interface.
Ultrasound is almost totally reflected at a solid-gas (i.e., solid-air) interface.The ultrasonic
reflectively is so high at a metal-air interface that even the interface between two pieces of flat
polished metal tightly pressed together still contains enough air molecules to produce a strong
reflection. Typically, the great majority of energy in an ultrasonic beam is reflected from a solid-
liquid interface, while considerably less is typically reflected from a molecularly-bonded solid-solid
interface (between dissimilar solids).
Because of its beam-shaping and high reflectivity characteristics, plus the ability to travel through
opticallyopaquematerials(likemetals),ultrasoundisverywellsuitedformeasuringthedimensions
of and inspecting the interior of solid materials, while requiring access to only one surface of the
material.

Manual No. OM5000
Jan X/04 Ver 1.40 5
TABLE I
Characteristic Ultrasonic Velocities for Some Selected
Common Materials (At Room Temperature,
Unless Otherwise Noted)
MATERIAL
ACRYLIC RESIN
AIR (20EC)
ALUMINUM
BRASS, NAVAL
BRONZE,PHOSPHO
R
CAST IRON
COPPER
GLASS, WINDOW
GLYCERINE
HYDROGEN (0EC)
INCONEL
IRON
MAGNESIUM
MONEL
MOTOR OIL
NICKEL
STEEL, MILD
STEEL, 4340
STEEL, 303 CRES
TITANIUM
WATER (20EC)
ZIRCONIUM
VELOCITY - in/us
0.105*
0.014
0.249
0.174*
0.139*
0.181*
0.183*
0.267*
0.076
0.050
0.225*
0.232
0.248
0.237
0.069
0.222
0.232
0.230
0.223
0.239
0.058
0.183
VELOCITY - mm/us
2.67*
0.34
6.32
4.43*
3.53*
4.60*
4.66*
6.79*
1.92
1.28
5.72*
5.90
6.31
6.02
1.74
5.63
5.90
5.85
5.66
6.07
1.48
4.65
* may exhibit wide velocity variations depending upon alloy or type
NOTE: These reported ultrasonic velocities are only approximations because of
effects due to chemical and physical variations.
4.1.2 Thickness Gaging Concept - The NovaScope operates on a pulse-echo principle quite
similar to that used for ranging with both sonar and radar. With regard to the NovaScope, a very
short pulse (burst) of megahertz-frequency ultrasonic energy is introduced into the material to be
gaged for thickness. The pulse travels through the material and reflects back an echo from the
opposite parallel surface of the material. The period of time for this pulse-echo round trip to occur
is related to the material thickness and the characteristic ultrasonic velocity for that material
according to the simple ratio relationship:

Manual No. OM5000
Jan X/04 Ver 1.40 6
t'2x
v
Figure 1
where t = pulse-echo round trip across material sectional thickness
x = material sectional thickness
v = characteristic ultrasonic velocity for material
2 = compensation factor for the fact that the round trip time
represents twice the time for the ultrasonic energy to travel
across the material thickness.
This relationship shows that, for a given material (of constant ultrasonic velocity), the pulse-echo
timeperiodwilldoubleifthethicknessdoubles. Also,thislinearrelationshipindicatesthatitspulse-
echo time period will be only half as long if the material's characteristic ultrasonic velocity is twice
that for another material of the same thickness. Thus, measurement of the pulse-echo time period
alone cannot sort out the individual effects of material thickness or ultrasonic velocity. The pulse-
echo period will determine (yield) a material's thickness only if the material's ultrasonic velocity is
known or compensated for (and vice-versa).
Fortunately, the characteristic velocity for a given applicable material is usually constant enough
(doesn't exhibit excessive unknown, inherent velocity variations) to permit accurate thickness
measurement. In fact, many common industrial materials have velocities so constant that very
precise measurements can be made. However, changes in composition, grain structure/direction
and even temperature or residual/applied stress can affect the characteristic velocity for a given
material-resultinginthicknessgagingerrors(themagnitudedependinguponthedegreeofchange
in the material).
All factors considered, the ultrasonic pulse-echo ranging concept is a practical and well-proven
method to measure material thickness.
4.2 INSTRUMENTATION CONCEPTS
4.2.1 Basic Pulse-Echo Circuit - Figure
1shows a highly simplified functional
diagram for the NovaScope. The basic
components of this functional circuit
includeapulser,transducer,receiver,and
display (digital readout plus scope).
The pulser is an electronic circuit that
generates a very short-duration electrical
pulse, having an adjustable amplitude
typically in the range of 90 to 350 volts
(peak). Since the risetime of the pulse is
about 10 nanoseconds (billionths of a
second), it has electrical characteristics (spectral) well into the desired megahertz region.
The transducer is generally an ultrasonic transceiving probe that contains a piezoelectric material

Manual No. OM5000
Jan X/04 Ver 1.40 7
whichconvertselectricalenergyintomechanicalenergyandvice-versa. Thepiezoelectricmaterial
inthetransducerisshapedintoathinwaferwhosethicknessisresonantattheultrasonicfrequency
range desired. An ultrasonic (mechanical) damping agent is bonded to the back surface of the
wafer so that the transducer pulse duration (pulse width) is very short.
The receiver collectively consists of a high-frequency, broadband amplifier and signal
processing/timing circuits capable of handling the relatively low amplitude electrical signals.
The display is a digital readout of material thickness with a supplemental scope for presentation of
the ultrasonic echo patterns and other information.
Aliquidcouplant(ultrasoniccouplant)mustbeappliedbetweenthetransducerandthetestmaterial
surface. This couplant, usually consisting of a light oil film, gel film or water, is necessary to allow
thehighfrequencyultrasonicvibrations(pulses)topassbackandforthbetweenthetransducerand
test material.
Operationally, the pulser applies a short electrical pulse, known as the IP (Initial Pulse) or main bang
to the transducer. The transducer, in turn, transmits a corresponding short ultrasonic pulse. This
ultrasonicpulseiscoupledfromthetransducerintothetestmaterial. Aportionoftheultrasonicpulse
reflects as an echo from the material surface adjacent to the transducer, while the remainder of the
pulse propagates through the material and reflects back as an echo from the opposite parallel
surface.
These two echos from the material surfaces sequentially impinge on the transducer and are thereby
convertedintosimilarly-shapedandsimilarly-time-sequencedelectricalpulses. Thispairofelectrical
pulses (echos) is fed to the receiver for amplification and processing.
The period (time duration) between the pair of electrical pulses represents the travel time the
ultrasound needed to make a round trip back and forth across the material thickness. Material
thickness, a direct function of the echo round-trip time and ultrasonic velocity is then electrically
determined via calibration controls (in accordance with the principles discussed in Section 4.1.2).
Once the above-described pulse-echo cycle is completed, it is again repeated at some prescribed
pulse repetition frequency (PRF),or rep rate.NovaScope rep rates typically range from 625 to 5000
pulses per second.
4.2.2 Scope Display - A scope can graphically display the shape of a waveform on its CRT
(Cathode Ray Tube) by showing waveform amplitude as a function of time.This is accomplished by
sweeping the CRT trace at a constant speed, called sweep speed, starting from left to right across
the face of the CRT.
Figure 2(a) shows the full (entire) waveform or RF display for a typical highly damped ultrasonic
pulse. The amplitude of the pulse is shown vertically,while the elapsed time is shown horizontally.

Manual No. OM5000
Jan X/04 Ver 1.40 8
Figure 2
Figure 3b
Thehorizontalaxisacrosswhichnosignaloccurs(zeroamplitude)
is called the baseline. such a
time-amplitude display readily depicts the vibrational nature of the
ultrasonic pulse as a burst of damped oscillations (damped
sinusoid) at a given frequency (spectral central frequency).
Inaddition to thefullwaveform RF display,twoother displays from
the RF are commonly used, namely the positive-rectified and
negative-rectified displays.Figure 2(b) shows that the positive-
rectified display shows only the upper (positive) half of the full RF
waveform, while Figure 2(c) shows that the negative-rectified (and
inverted)display shows only the negative half of the full RF
waveform.
Depending upon the application and setup, the polarity of the
waveform in Figure 2 can be inverted (or flipped). Thus, the side
of the subject waveform with only one peak (half-cycle) could be
oriented in either the positive or negative polarity direction.
Asingle half-cycle rectified display will be used in this Operating
Manual except where it is more informative to use the RF display.
4.2.3 A-ScanPresentation-Themostcommonscopedisplayfor
observing ultrasonic echo patterns taking place in the material
being gaged is called an A-scan presentation.Figure 3 shows the A-scan presentation for a
thickness gaging situation involving a thin and thick section of a given material. The scope A-scan
displays the ultrasonic echo amplitude in the vertical direction and the echo round-trip time for the
echo to return to the transducer in the horizontal direction.Stronger (higher amplitude) echos are
represented by higher pulses on the trace,while longer echo round trip times for greater material
thicknesses are shown increasing toward the right side of the scope.

Manual No. OM5000
Jan X/04 Ver 1.40 9
Figure 4
With respect to the transducer location, the echo on the left side of the A-scan is called the interface
echo, while the echo on the right side of the A-scan is called the first back surface echo. The time
durationbetween the occurrence oftheinterface echo and thefirst back surface echo isproportional
to the material thickness (see Section 4.1.2).
With all the other conditions being equal, the echo from a thickness twice as great will be displayed
twice as far to the right across the scope screen. As shown in Figure 3(b), the echo height from a
thicker section is normally reduced in amplitude due to the ultrasonic attenuation phenomenon
discussed in Section 4.1.1.
Theultrasonicvelocitydifferencesbetweentwomaterialsunderstandablyaffectstheechoround-trip
time. For a given thickness of two different materials, the echo round-trip time is longer in the
materialwitha slowercharacteristic ultrasonicvelocity. If onematerial istwiceas thickand hastwice
the velocity as that of another material, identical A-scans will result. Thus, it is not possible to
differentiate between material thickness and velocity variations by using the pulse-echo ultrasound
method-evenwiththeA-scanscopereadout. Fortunately, forapplicablematerials,changesinecho
round-trip time essentially can be ascribed to thickness changes rather than ascribed to unknown,
inherent velocity variations in a given material.
One fundamentally important
scope (instrument) control which
affects the A-scan appearance is
the sweep speed control. The
sweep speed control changes the
time base along the horizontal axis
of the A-scan trace. This feature,
as shown in Figure 4, permits the
space (not the time) between the
two echos to be conveniently
expanded (spread apart) or
compressed (squeezed together).
For ease of operation, it is
particularly valuable to spread out
the display between echos too
closely spaced together. For the
same reason, slowing the sweep
speed will "bring" an echo onto the
display which otherwise falls so far
out in round-trip time that it is "off"
the right-hand side of the scope.
It is important to understand that
sweep speed only affects the
horizontal aspect of the display
and does not change the time
(duration) of the actual ultrasonic
echo period (which is related to
material thickness and velocity).

Manual No. OM5000
Jan X/04 Ver 1.40 10
Figure 5
Another fundamentally very important electronic control which affects the A-scan appearance is the
receiver gain control. The gain control changes the amplitude scale along the vertical axis of the A-
scan trace. A gain control permits the height of the echos to be either conveniently increased or
decreased.
If a material is somewhat attenuative,it may be necessary to increase the receiver gain until the
echos are readily observable. On the other hand, if the gain is too high for a given material, the
echosmay detrimentally saturatethe receiver orcausean excessively noisybaseline on the A-scan.
Normally, when a material is not too attenuative or too thick, the A-scan will actually indicate a series
of equally-spaced echos, known as multiples (see Figure 5). These multiples are secondary inter-
reflections of the initial ultrasonic pulse reverberating back and forth between the two surfaces of the
material. The spacing between any two successive multiples represents the echo round-trip time in
the material and, thus, also can be used for gaging thickness (in addition to the initially described
interface to first back surface echo period). The dotted curve across the tips of the echos in Figure
5shows the rate at which the amplitude of the echo multiples decreases or decays and is related to
the degree of ultrasonic attenuation for a given material. This entire echo pattern of such multiples
is sometimes called a ringing pattern.
4.2.4 ResolvingPower andSensitivity-Oneoftheperformancecharacteristicsalwaysassociated
withpulse-echoultrasonicsand A-scan presentations is range resolving power (resolution).It refers
to the instrument and transducer’s ability to clearly separate two sequential echos along the A-scan
trace. Figure 6 shows pairs of completely resolved, partially resolved and unresolved echos.
The resolving power of an instrument is defined as the closest echo separation it can make,
expressed in terms of time (i.e., nanoseconds), or more commonly, in terms of some minimum
specified material thickness. The limiting ultrasonic factor is the pulse width (or pulse length) of the
echos, as inferred in Figures 6a, b & c. Thus, highly damped, high frequency transducers produce
much better resolving power (shorter ultrasonic pulse lengths) than lowly-damped, low-frequency
transducers. It follows that instrumentation with short IPs (main bangs), broadband receiver
amplifiers and high-speed processing circuits have higher resolving power.

Manual No. OM5000
Jan X/04 Ver 1.40 11
Figure 6
It is more difficult to resolve the interface echo and a very quickly
following first back surface echo (because of the high amplitude of
the interface echo) than it is to resolve echo multiples. Thus, echo
multiples can generally allow the gaging of thinner sections as
compared to the interface-to-first back surface echo (if the material
permits multiples).
Another performance characteristic associated with pulse-echo
ultrasonics and A-scan presentations is sensitivity.For thickness
gaging,itreferstotheoverallequipmentability(bothinstrumentand
transducer) to detect an echo from the back surface of a given
material. Equipment that detects back surface echos from thick
materialsorattenuativematerialsissaidtohaveahighersensitivity
thanequipment that isunable to detectsuch echos. Sensitivity can
be increased by using higher-amplitude pulsers, higher-gain
receivers and lower frequency or higher sensitivity (lower damped)
transducers. Thus, a thickness gaging application (material type
and thickness) requires a compromise between resolution and
sensitivity.

Manual No. OM5000
Jan X/04 Ver 1.40 12
Figure 7
4.3 THICKNESS GAGING MODES
TheNovaScopeofferstwobasicthicknessgagingmodeswhicharegovernedbythemethodselected
tocouple the ultrasonic energy between the transducer andthe material surface, namely the contact
mode and the immersion/delay line mode.
4.3.1 Contact Mode - The contact mode utilizes a contact transducer during the thickness gaging
procedure. The contact transducer is distinguished by having a thin wearplate face of some wear-
resistantmaterial(likealuminaceramic)whichisbondeddirectlytotheinternalpiezoelectricelement.
Thecontact transduceris manuallyplaced incontact withthe materialsurface whileemploying athin
film of couplant on the contacting region. During operation, the IP (main bang) and interface (IF)
echo are virtually superimposed because of the very close proximity of the piezoelectric element to
thematerial surface. During contact transducer gaging, the superimposed IPand interface echo are
simply referred to as only the IP. Due to its simplicity, this contact transducer mode of coupling was
"ideally" assumed throughout Section 4.2.3.
Figure 7 shows a contact transducer A-scan. For contact gaging, the material thickness is typically
determined by measuring the time from the IP (virtually time-coincident with the superimposed IF
echo) to the return of the first back surface echo. This is called synchronizing the thickness echo
periodmeasurementwiththeIP(ormainbang)or,morecommonly,IPsync. WithIP sync,thescope
sweep initiation is also synchronized with the IP. This is called IP sweep sync.
Note the distorted, non-ideal (and quite
wide) signal on the left side of the trace in
Figure 7 representing the complex
superposition of the IP and the IF echo.
Because of this wide IP-IF signal and a
receiver "dead" listening zone directly
following the IP (receiver amplifier
saturate, contact transducer gaging
doesn't generally permit the best
obtainable resolution needed for the
gaging of thin materials. However,
contact transducers usually permit
additional sensitivity for gaging thicker or attenuative materials by allowing relatively large amounts
of ultrasonic energy to be transmitted into the material.
4.3.2 Immersion/Delay Line Mode - The immersion/delay mode of coupling employs either a thick
"buffer" layer of liquid (water) or solid (usually plastic) between the transducer and the material
surface. An immersion transducer is used in conjunction with the water buffer coupling mode.
Immersion transducers have a thin waterproof plastic face which can be either flat for producing a
non-focused ultrasonic beam or curved (typically concave) to form an ultrasonic lens for producing
a frequently advantageous focused ultrasonic beam.Commonly, the immersion transducers are
categorized as either flat or focused types.

Manual No. OM5000
Jan X/04 Ver 1.40 13
Figure 8
The non-contact feature of the immersion coupling mode permits non-contact gaging of moving
materials or for non-contact scanning of the immersion transducer over the surface of a stationary
material. Immersion gaging can be accomplished by submerging the material in water and locating
the transducer at some selected distance above the surface or by placing the transducer in a water
squirter nozzle and accomplishing coupling via a small diameter water jet between the nozzle and
material surface. Sometimes a bubbler method is used which consists of the nozzle held in contact
with the test surface (or vice-versa) and a very slowly "bubbling" output of water for achieving
coupling.
A delay line transducer employs the solid buffer coupling mode. It typically has a plastic buffer rod
(ultrasonic delay line) attached to the piezoelectric element. This plastic tip can be permanently
bonded into the transducer housing to produce an integral delay line transducer,or the tip can be
replaceable with an accompanying screw-on metal collar to produce a removable delay line
transducer. The tip of delay line transducers is manually placed in contact with the material surface
while employing the thin film of couplant on the contacting region.
As shown in Figure 8, the immersion/delay line transducer coupling mode serves the important
purpose of delaying the initiation of the IF-echo until the receiver has fully recovered from being
undesirably saturated by the
high amplitude IP. Thus,
considerably better resolving
power and, hence, thinner
material gaging results when
compared to contact gaging.
Thethickerthebuffermaterial,
the longer it takes the
ultrasonic pulse to travel
through it and, hence, the
longer the time delay between
the IP and the IF echo.
For immersion/delay line transducer gaging, the material thickness is frequently determined two
different ways. First, thickness can be determined by measuring the echo period between the IF
echo and first back surface echo. Secondly, thickness can also be determined by measuring the
period between the first back surface echo and the first multiple echo, or by measuring the period
between two successive multiples.
The scope sweep start for immersion/delay line gaging is normally synchronized with the IF echo
(unlike contact gaging where IP sweep sync is used). This is called IF sync.Figure 9 shows the
standard IF sync A-scan for immersion/delay line gaging. Note that the IF echo appears at the
beginning of the scope sweep (extreme left side of display) and that the irrelevant IP and long delay
time period in the buffer material is conveniently eliminated from the display (compare Figures 8 and
9). Also, the echos can be conveniently "spread-out" (IF echo remaining on the left edge of the
display) for better visibility by increasing the scope sweep speed.

Manual No. OM5000
Jan X/04 Ver 1.40 14
Figure 9
4.4 GATES
GatesareimportantsupplementarycircuitsintheNovaScopethathelpgagethicknessandenhance
the overall performance of a gaging instrument. A gate is a time interval or "window" along the A-
scan which either permits or prevents an instrument response to an echo(s) occurring within that
window. Gates are designed to be constantly on (operational) or to be turned off whenever desired.
Furthermore, they can be manually or automatically adjustable, in terms of when and how long they
turn on or off.
Gates can be conveniently shown (time-aligned) on an additional trace located beneath the
respective A-scan trace, as shown in Figure 10(a). This standard type of gate shown has a
rectangular waveshape along the lower baseline trace which sweeps in synchronization with the
associated upper A-scan trace. The gate is on only during the time that the trace is elevated above
the normal gate baseline position. It turns off as soon as the trace falls back to the baseline (i.e., the
right-hand vertical edge of the pulse).
The length of time (duration) that the gate is on is known as the gate width (or length).When a gate
turns on, it is known as the gate start and when a gate turns off, it is known as the gate stop.
Standard Delay Line or Immersion
CouplingModeWithInterFaceSyncMode
Table of contents
Other NDT Systems Measuring Instrument manuals
Popular Measuring Instrument manuals by other brands

Keithley
Keithley SourceMeter 2430 Service manual

Ahlborn
Ahlborn ALMEMO 710 quick start guide

PASCO
PASCO WA-7428 Product guide

Endress+Hauser
Endress+Hauser Cerabar S PMC71 operating instructions

Lutron Electronics
Lutron Electronics MHT-381SD Operation manual

Suparule
Suparule 600E Instructions on the Safe Use