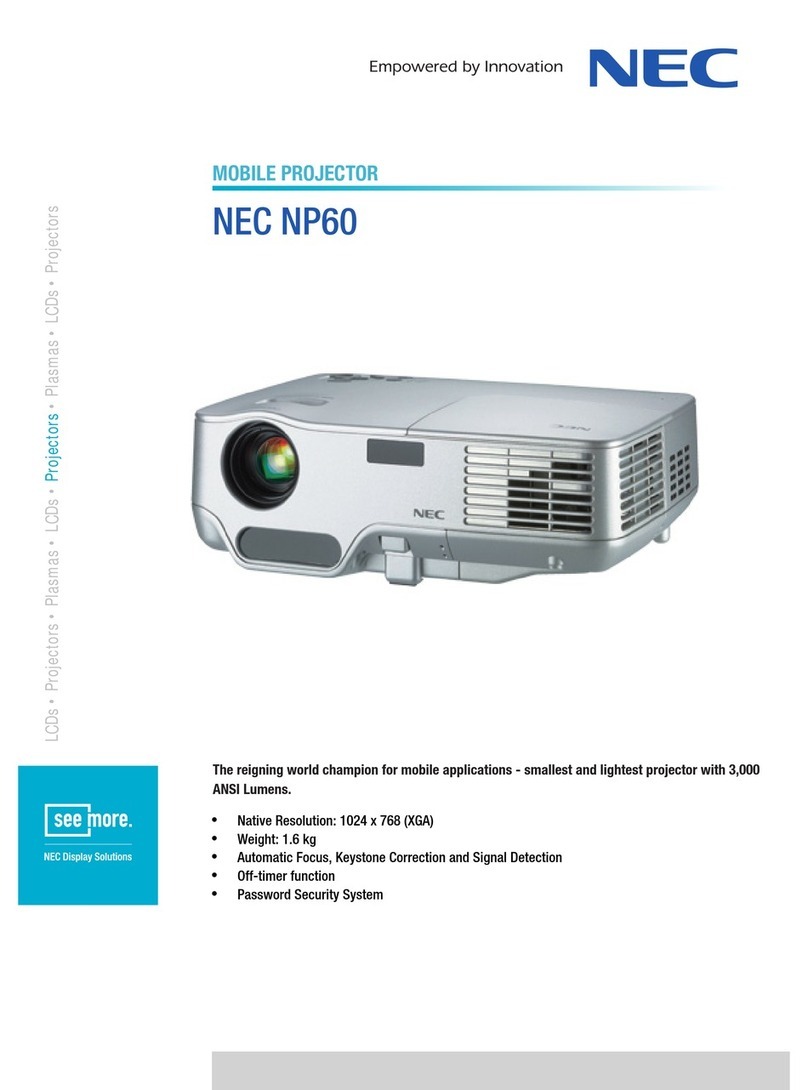
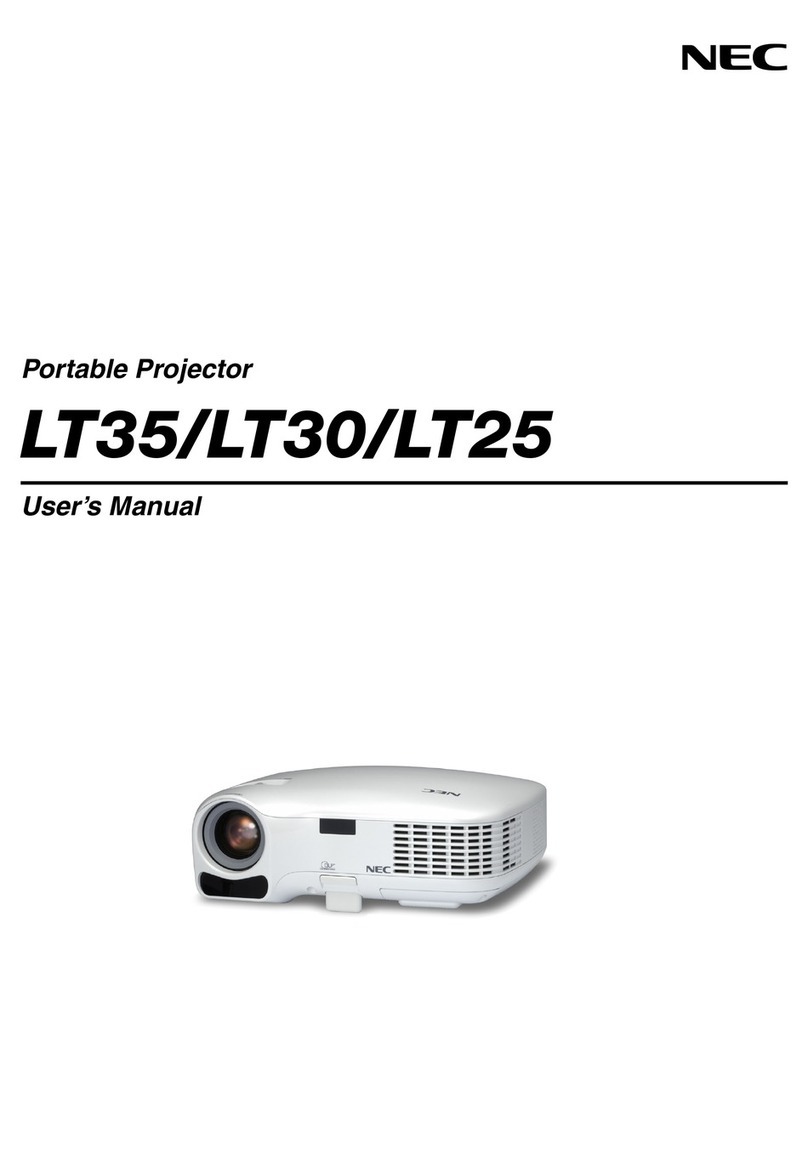
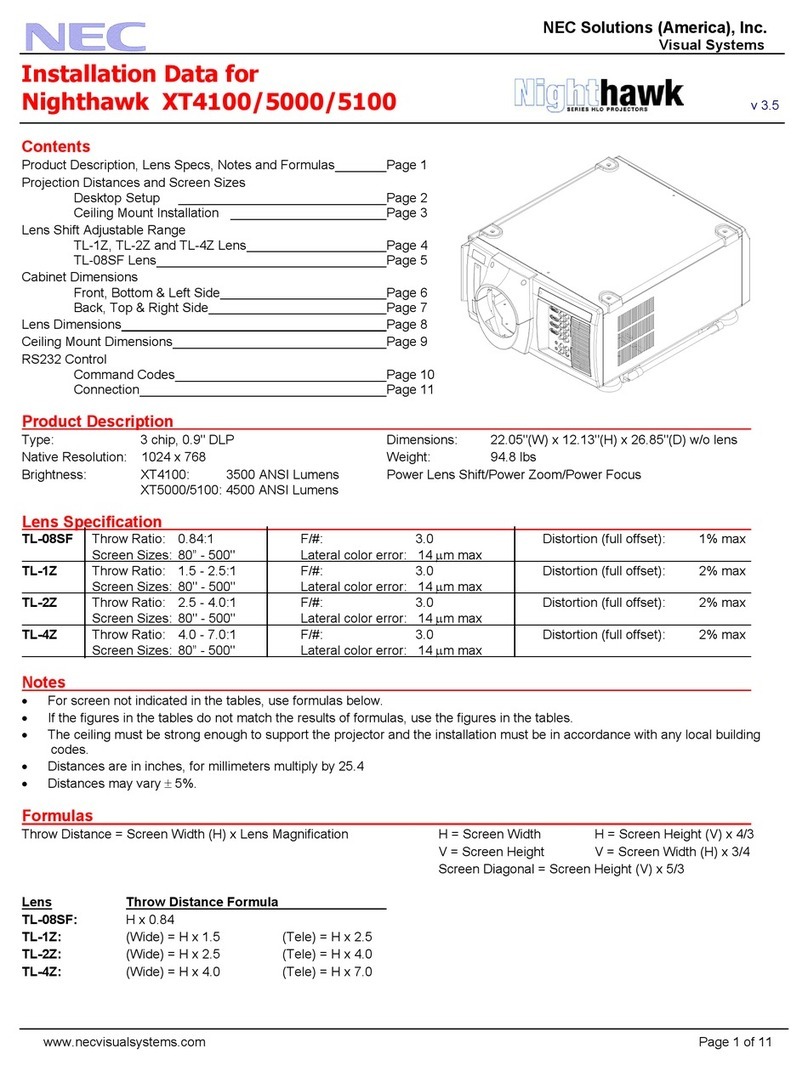
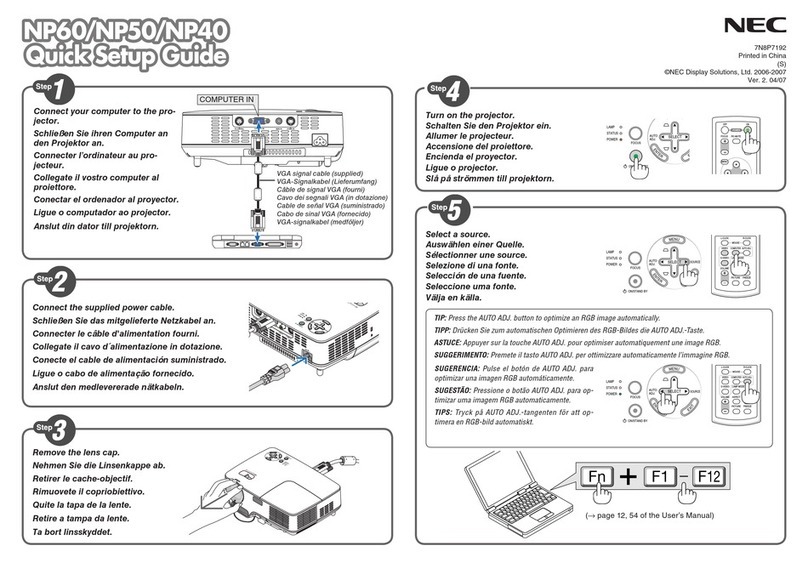
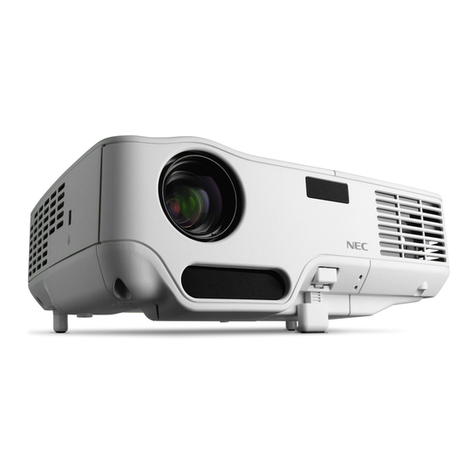
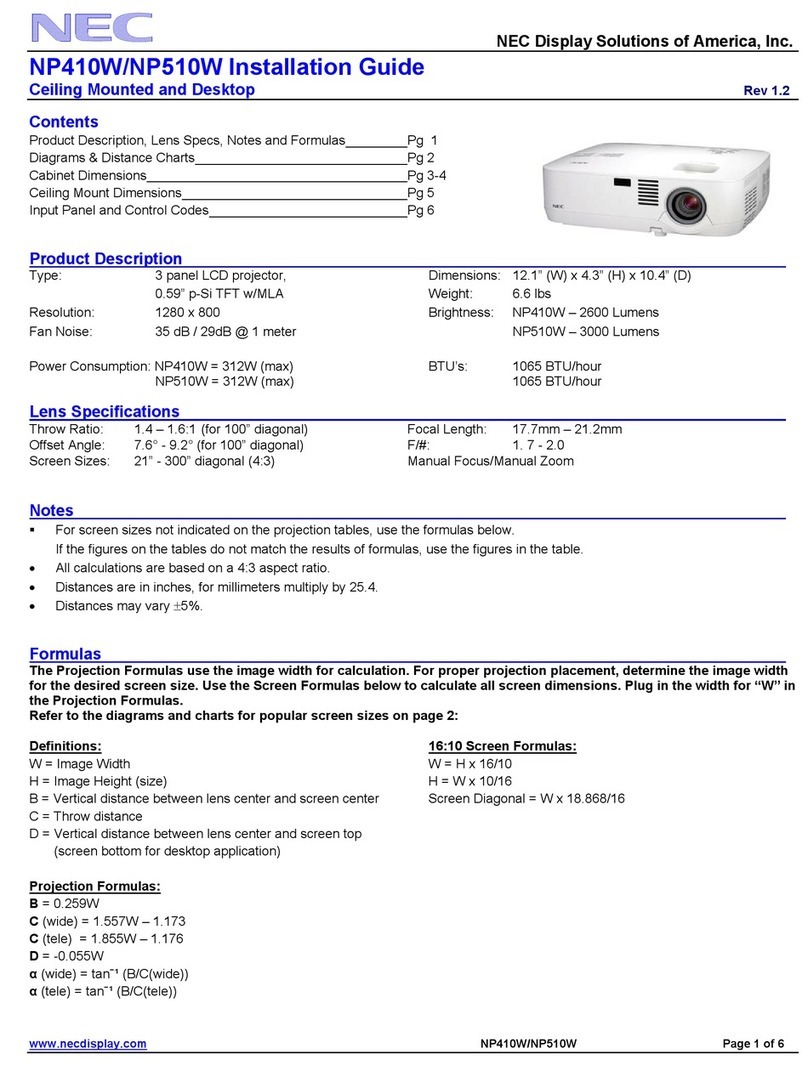
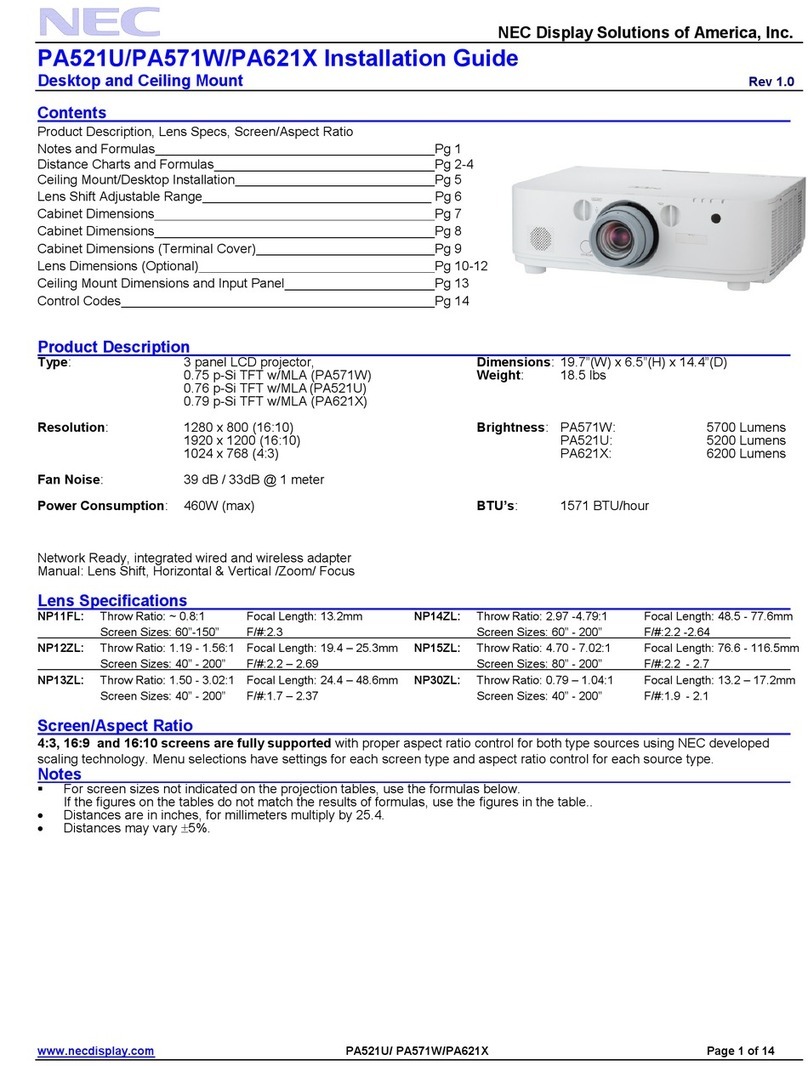
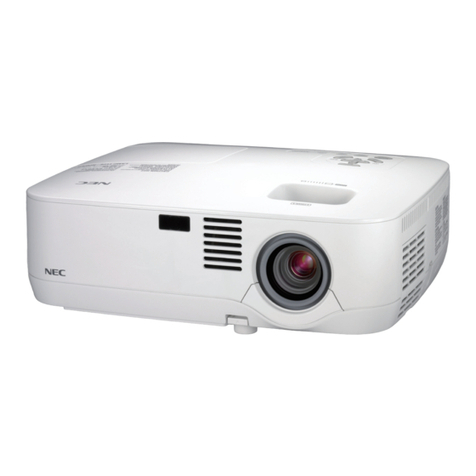
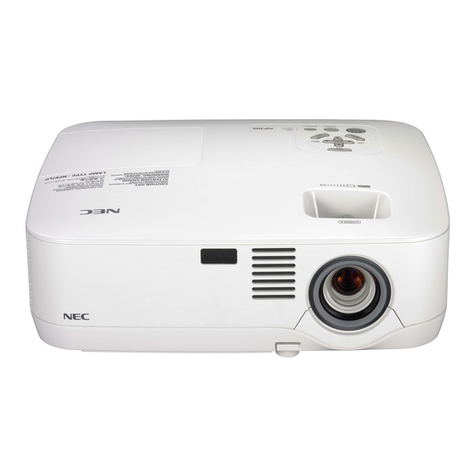
NEC NP41G User manual

Portable Projector
NP62/NP61/NP52/NP41
User’s Manual
• Theprojector's model name indicatedontheprojector's label isNP62,
NP61,NP41,NP62G,NP61G,NP52G,andNP41Grespectively.
AllthemodelsarereferredtoasNP62,NP61,NP52,andNP41throughout
theuser'smanualexceptsomeofthespecicationpages.
• TheNP52isnotdistributedinNorthAmerica.

2ndeditionAugust2008
• DLPandBrilliantColoraretrademarksofTexasInstruments.
• IBMisatrademarkorregisteredtrademarkofInternationalBusinessMachinesCorporation.
• Macintosh,MacOSXandPowerBookaretrademarksofAppleInc.,registeredintheU.S.andothercountries.
• Microsoft,Windows,WindowsVista,andPowerPointareeitheraregisteredtrademarkortrademarkofMicro-
softCorporationintheUnitedStatesand/orothercountries.
• VESAisaregisteredtrademarkofVideoElectronicsStandardsAssociation.
• MicroSaverisaregisteredtrademarkofKensingtonComputerProductsGroup,adivisionofACCOBrands.
• Otherproductandcompanynamesmentionedinthisuser’smanualmaybethetrademarksorregisteredtrade-
marksoftheirrespectiveholders.
• TheBluetooth®registeredtrademarkisownedbyBluetoothSIG,Inc.
• Containsthesoftware(UBQ-BlueBluetoothprotocolstack2.0+EDR(QDID:B010586))fromCanoni-tech,Inc
&CanonInformationTechnologiesPhilippines,Inc.
NOTES
(1) Thecontentsofthisuser’smanualmaynotbereprintedinpartorwholewithoutpermission.
(2) Thecontentsofthisuser’smanualaresubjecttochangewithoutnotice.
(3)Greatcarehasbeentakeninthepreparationofthisuser’smanual;however,shouldyounoticeanyquestion-
ablepoints,errorsoromissions,pleasecontactus.
(4) Notwithstanding article (3), NEC will not be responsible for any claims on loss of profit or other matters
deemedtoresultfromusingtheProjector.

Important Information
Safety Cautions
Precautons
PleasereadthismanualcarefullybeforeusingyourNECNP62/NP61/NP52/NP41projectorandkeepthemanual
handyforfuturereference.Yourserialnumberislocatedonthebottomofyourprojector.Recordithere:
CAUTION
Toturnoffmainpower,besuretoremovetheplugfrompoweroutlet.
Thepoweroutletsocketshouldbeinstalledasneartotheequipmentaspossible,andshouldbeeas-
ilyaccessible.
CAUTION
TOPREVENTSHOCK,DONOTOPENTHECABINET.
THEREAREHIGH-VOLTAGECOMPONENTSINSIDE.
REFERSERVICINGTOQUALIFIEDSERVICEPERSONNEL.
Thissymbolwarnstheuserthatuninsulatedvoltagewithintheunitmaybesufcienttocauseelectrical
shock.Therefore,itisdangeroustomakeanykindofcontactwithanypartinsideoftheunit.
Thissymbolalerts theuser that important informationconcerning theoperationand maintenanceof
thisunithasbeenprovided.
Theinformationshouldbereadcarefullytoavoidproblems.
WARNING: TOPREVENTFIREORSHOCK,DONOTEXPOSETHISUNITTORAINORMOISTURE.
DO NOTUSETHIS UNIT’S PLUGWITH ANEXTENSION CORD ORIN ANOUTLET UNLESSALL THE
PRONGSCANBEFULLYINSERTED.
DOC Complance Notce (for Canada only)
ThisClassBdigitalapparatusmeetsallrequirementsoftheCanadianInterference-CausingEquipmentRegula-
tions.
Machne Nose Informaton Regulaton - 3. GPSGV,
Thehighestsoundpressurelevelislessthan70dB(A)inaccordancewithENISO7779.
Dsposng of your used product
WARNING TO CALIFORNIA RESIDENTS:
Handlingthecablessuppliedwiththisproductwillexposeyoutolead,achemicalknowntotheStateofCalifor-
niatocausebirthdefectsorotherreproductiveharm.
EU-widelegislationasimplementedineachMemberStaterequiresthatusedelectricalandelectronic
productscarryingthemark(left)mustbedisposedofseparatelyfromnormalhouseholdwaste.This
includes projectors and their electrical accessories or lamps. When you dispose of such products,
pleasefollowtheguidanceofyourlocalauthorityand/orasktheshopwhereyoupurchasedtheprod-
uct.
Aftercollectingtheusedproducts,theyarereusedandrecycledinaproperway.Thiseffortwillhelp
usreducethewastesaswellasthenegativeimpactsuchasmercurycontainedinalamptothehu-
manhealthandtheenvironmentattheminimumlevel.
ThemarkontheelectricalandelectronicproductsonlyappliestothecurrentEuropeanUnionMem-
berStates.

Important Informaton
RF Interference (for USA only)
WARNING
TheFederalCommunicationsCommissiondoesnotallowanymodicationsorchangestotheunitEXCEPT
thosespeciedbyNECDisplaySolutionsofAmerica,Inc.inthismanual.Failuretocomplywiththisgovern-
ment regulationcouldvoidyourrightto operatethisequipment. Thisequipmenthas been tested and found
tocomplywiththelimitsforaClassBdigitaldevice,pursuanttoPart15oftheFCCRules.Theselimitsare
designedtoprovidereasonableprotectionagainstharmfulinterferenceinaresidentialinstallation.Thisequip-
mentgenerates,uses,andcanradiateradiofrequencyenergyand,ifnotinstalledandusedinaccordancewith
theinstructions,maycauseharmfulinterferencetoradiocommunications.However,thereisnoguaranteethat
interferencewillnotoccurinaparticularinstallation.
Ifthisequipmentdoescauseharmfulinterferencetoradioortelevisionreception,whichcanbedeterminedby
turningtheequipmentoffandon,theuserisencouragedtotrytocorrecttheinterferencebyoneormoreofthe
followingmeasures:
•Reorientorrelocatethereceivingantenna.
•Increasetheseparationbetweentheequipmentandreceiver.
•Connecttheequipmentintoanoutletonacircuitdifferentfromthattowhichthereceiverisconnected.
•Consultthedealeroranexperiencedradio/TVtechnicianforhelp.
ForUKonly:InUK,aBSapprovedpowercablewithmouldedplughasaBlack(veAmps)fuseinstalledforuse
withthisequipment.Ifapowercableisnotsuppliedwiththisequipmentpleasecontactyoursupplier.
Important Safeguards
Thesesafetyinstructionsaretoensurethelonglifeofyourprojectorandtopreventreandshock.Pleaseread
themcarefullyandheedallwarnings.
Installaton
• Donotplacetheprojectorinthefollowingconditions:
-onanunstablecart,stand,ortable.
-nearwater,baths,ordamprooms.
-indirectsunlight,nearheaters,orheatradiatingappliances.
-inadusty,smokyorsteamyenvironment.
-onasheetofpaperorcloth,rugsorcarpets.
• Ifyouwishtohavetheprojectorinstalledontheceiling:
-Donotattempttoinstalltheprojectoryourself.
-Theprojectormustbeinstalledbyqualiedtechniciansinordertoensureproperoperationandreducethe
riskofbodilyinjury.
-Inaddition,theceilingmustbestrongenoughtosupporttheprojectorandtheinstallationmustbeinaccor-
dancewithanylocalbuildingcodes.
-Pleaseconsultyourdealerformoreinformation.
10˚
Place the projector n a horzontal poston
Thetiltangleoftheprojectorshouldnotexceed10degrees,norshouldtheprojectorbeinstalledinanywayother
thanthedesktopandceilingmount,otherwiselamplifecoulddecreasedramatically.

Important Informaton
Fre and Shock Precautons
• Ensurethatthereissufcientventilationandthatventsareunobstructedtopreventthebuild-upofheatinside
yourprojector.Allowatleast4inches(10cm)ofspacebetweenyourprojectorandawall.
• Donottrytotouchtheventilationoutletontherightfront(whenseenfromthefront)asitcanbecomeheated
whiletheprojectoristurnedonandimmediatelyaftertheprojectoristurnedoff.
• Preventforeignobjectssuchaspaperclipsandbitsofpaperfromfallingintoyourprojector.Donotattemptto
retrieveanyobjectsthatmightfallintoyourprojector.Donotinsertanymetalobjectssuchasawireorscrew-
driverintoyourprojector.Ifsomethingshouldfallintoyourprojector,disconnectitimmediatelyandhavethe
objectremovedbyaqualiedservicepersonnel.
• Donotplaceanyobjectsontopoftheprojector.
• Donottouchthepowerplugduringathunderstorm.Doingsocancauseelectricalshockorre.
• The projector is designed to operate on a power supply of 100-240V AC 50/60 Hz (NP62/NP61/NP41) or
200-240VAC50/60Hz(NP62G/NP61G/NP52G/NP41G).Ensurethatyourpowersupplytsthisrequirement
beforeattemptingtouseyourprojector.
• Donotlookintothelenswhiletheprojectorison.Seriousdamagetoyoureyescouldresult.
• Keepanyitemssuchasmagnifyingglassoutofthelightpathoftheprojector.Thelightbeingprojectedfrom
thelensisextensive,thereforeanykindofabnormalobjectsthatcanredirectlightcomingoutofthelens,can
causeunpredictableoutcomesuchasreorinjurytotheeyes.
• Donotcoverthelenswiththeblacklenscaporequivalentwhiletheprojectorison.Doingsocanleadtomelt-
ingofthecapandpossiblyburningyourhandsduetotheheatemittedfromthelightoutput.
• Donotplaceanyobjects,whichareeasilyaffectedbyheat,infrontoftheprojectorlensoraprojectorexhaust
vent.
Doingsocouldleadtotheobjectmeltingorgettingyourhandsburnedfromtheheatthatisemittedfromthe
lightoutputandexhaust.
• Handlethepowercablecarefully.Adamagedorfrayedpowercablecancauseelectricshockorre.
- Donotuseanypowercablesthanthesuppliedone.
- Donotbendortugthepowercableexcessively.
- Donotplacethepowercableundertheprojector,oranyheavyobject.
- Donotcoverthepowercablewithothersoftmaterialssuchasrugs.
- Donotheatthepowercable.
- Donothandlethepowerplugwithwethands.
•Turnofftheprojector,unplugthepowercableandhavetheprojectorservicedbyaqualiedservicepersonnel
underthefollowingconditions:
- Whenthepowercableorplugisdamagedorfrayed.
- Ifliquidhasbeenspilledintotheprojector,orifithasbeenexposedtorainorwater.
- Iftheprojectordoesnotoperatenormallywhenyoufollowtheinstructionsdescribedinthisuser'smanual.
- Iftheprojectorhasbeendroppedorthecabinethasbeendamaged.
- Iftheprojectorexhibitsadistinctchangeinperformance,indicatinganeedforservice.
• Disconnectthepowercableandanyothercablesbeforecarryingtheprojector.
• Turnofftheprojectorandunplugthepowercablebeforecleaningthecabinetorreplacingthelamp.
• Turnofftheprojectorandunplugthepowercableiftheprojectorisnottobeusedforanextendedperiodof
time.

v
Important Informaton
CAUTION
• Donotusethetilt-footforpurposesotherthanoriginallyintended.Misusessuchasusingthetiltfoottocarry
orhang(fromthewallorceiling)theprojectorcancausedamagetotheprojector.
• Donotsendtheprojectorinthesoftcasebyparceldeliveryserviceorcargoshipment.Theprojectorinside
thesoftcasecouldbedamaged.
• Select[HIGH]inFanmodeifyoucontinuetousetheprojectorforconsecutivedays.(Fromthemenu,select
[SETUP]→[OPTIONS(1)]→[FANMODE]→[HIGH].)
• Donottrytotouchtheventilationoutletontheleftfront(whenseenfromthefront)asitcanbecomeheated
whiletheprojectoristurnedonandimmediatelyaftertheprojectoristurnedoff.
• DonotturnofftheACpowerfor60secondsafterthelampisturnedonandwhilethePOWERindicatoris
blinkinggreen.
Doingsocouldcauseprematurelampfailure.
Remote Control Precautons
• Handletheremotecontrolcarefully.
• Iftheremotecontrolgetswet,wipeitdryimmediately.
• Avoidexcessiveheatandhumidity.
• Donotheat,takeapart,orthrowbatteriesintore.
• Ifyouwillnotbeusingtheremotecontrolforalongtime,removethebatteries.
• Ensurethatyouhavethebatteries'polarity(+/–)alignedcorrectly.
• Donotusenewandoldbatteriestogether,orusedifferenttypesofbatteriestogether.
• Disposeofusedbatteriesaccordingtoyourlocalregulations.
Lamp Replacement
• Toreplacethelamp,followallinstructionsprovidedonpage72.
• Besureto replacethelampwhenthemessage[THE LAMP HAS REACHED THE END OF ITS USABLE
LIFE. PLEASE REPLACE THE LAMP.]appears.Ifyoucontinuetousethelampafterthelamphasreached
theendofitsusablelife,thelampbulbmayshatter,andpiecesofglassmaybescatteredinthelampcase.Do
nottouchthemasthepiecesofglassmaycauseinjury.
Ifthishappens,contactyourdealerforlampreplacement.
A Lamp Characterstc
Theprojectorhasahigh-pressuremercurylampasalightsource.
Alamphasacharacteristicthatitsbrightnessgraduallydecreaseswithage.Alsorepeatedlyturningthelamp
onandoffwillincreasethepossibilityofitslowerbrightness.
CAUTION:
• DONOTTOUCHTHELAMPimmediatelyafterithasbeenused.Itwillbeextremelyhot.Turntheprojector
offandthendisconnectthepowercable.Allowatleastonehourforthelamptocoolbeforehandling.
• When removingthelamp from aceiling-mountedprojector,makesurethat no oneis underthe projector.
Glassfragmentscouldfallifthelamphasbeenburnedout.
Note for US Resdents
The lamp in thisproduct contains mercury. Preasedispose accordingto Local,State or
FederalLaws.

v
Important Informaton
About Hgh Alttude mode
• Set[FANMODE]to[HIGHALTITUDE]whenusingtheprojectorataltitudesapproximately5000feet/1500me-
tersorhigher.
• Usingtheprojectorataltitudesapproximately5000feet/1500metersorhigherwithoutsettingto[HIGHALTI-
TUDE]cancausetheprojectortooverheatandtheprotectorcouldshutdown.Ifthishappens,waitacouple
minutesandturnontheprojector.
• Using the projector at altitudes less than approximately 5000 feet/1500 meters and setting to [HIGH ALTI-
TUDE]cancausethelamptoovercool,causingtheimagetoicker.Switch[FANMODE]to[AUTO].
• Usingtheprojectorataltitudesapproximately5000feet/1500metersorhighercanshortenthelifeofoptical
componentssuchasthelamp.
About Copyrght of orgnal projected pctures:
Pleasenotethatusingthisprojectorforthepurposeofcommercialgainortheattractionofpublicattentionina
venuesuchasacoffeeshoporhotelandemployingcompressionorexpansionofthescreenimagewiththefol-
lowingfunctionsmayraiseconcernabouttheinfringementofcopyrightswhichareprotectedbycopyrightlaw.
[ASPECTRATIO],[KEYSTONE],Magnifyingfeatureandothersimilarfeatures.

v
Table of Contents
Important Information........................................................................................ i
1. Introduction........................................................................................................ 1
➊What'sintheBox?........................................................................................................ 1
➋IntroductiontotheProjector......................................................................................... 2
➌PartNamesoftheProjector......................................................................................... 4
TopFeatures........................................................................................................... 6
TerminalPanelFeatures......................................................................................... 6
➍PartNamesoftheRemoteControl............................................................................... 7
BatteryInstallation............................................................................................. 8
RemoteControlPrecautions.............................................................................. 8
OperatingRangeforWirelessRemoteControl................................................. 8
2. Installation and Connections.................................................................. 9
➊SettingUptheScreenandtheProjector...................................................................... 9
SelectingaLocation................................................................................................ 9
ThrowDistanceandScreenSize.......................................................................... 10
➋MakingConnections................................................................................................... 12
ConnectingYourPCorMacintoshComputer....................................................... 12
ConnectingYourDVDPlayerwithComponentOutput......................................... 13
ConnectingYourVCR........................................................................................... 14
ConnectingtheSuppliedPowerCable................................................................. 15
3. Projecting an Image (Basic Operation)............................................ 16
➊TurningontheProjector............................................................................................. 16
NoteonStartupScreen(MenuLanguageSelectscreen).....................................17
➋SelectingaSource..................................................................................................... 18
➌AdjustingthePictureSizeandPosition...................................................................... 20
➍AdjustingFocusManually........................................................................................... 24
➎CorrectingKeystoneDistortionManually................................................................... 25
➏OptimizingRGBPictureAutomatically....................................................................... 26
➐AdjustingVolumeUp&Down..................................................................................... 27
❽TurningofftheProjector............................................................................................. 27
❾AfterUse..................................................................................................................... 28
4. Convenient Features................................................................................... 29
➊TurningOfftheImage................................................................................................. 29
➋FreezingaPicture....................................................................................................... 29
➌EnlargingandMovingaPicture.................................................................................. 29
➍ChangingLampMode............................................................................................... 30
➎PreventingtheUnauthorizedUseoftheProjector..................................................... 30
➏UsingtheOptionalRemoteMouseReceiver(NP01MR)............................................ 33

v
Table of Contents
5. Using the Viewer (NP62/NP52)............................................................. 35
➊WhatyoucandowiththeViewer............................................................................... 35
➋ProjectingimagesstoredinaUSBmemorydevice(Basicoperation)....................... 37
➌Operatingtheslidescreen.......................................................................................... 40
➍Operatingthethumbnailscreen................................................................................. 40
➎UsingtheBluetooth®wirelesstechnologytotransmitimages................................... 45
6. Using On-Screen Menu............................................................................. 48
➊UsingtheMenus......................................................................................................... 48
➋MenuElements........................................................................................................... 49
➌ListofMenuItems...................................................................................................... 50
➍MenuDescriptions&Functions[SOURCE]............................................................... 52
[COMPUTER]........................................................................................................ 52
[VIDEO]................................................................................................................. 52
[S-VIDEO].............................................................................................................. 52
➎MenuDescriptions&Functions[ADJUST]................................................................. 53
[BASIC].................................................................................................................. 53
[IMAGEOPTIONS]................................................................................................ 56
➏MenuDescriptions&Functions[SETUP]................................................................... 60
[GENERAL]........................................................................................................... 60
[INSTALLATION]................................................................................................... 62
[OPTIONS(1)]........................................................................................................ 65
[OPTIONS(2)]........................................................................................................ 66
➐MenuDescriptions&Functions[INFO.]...................................................................... 68
[USAGETIME]...................................................................................................... 68
[SOURCE]............................................................................................................. 69
[VERSION]............................................................................................................ 69
➑MenuDescriptions&Functions[RESET]................................................................... 70
7. Maintenance..................................................................................................... 71
➊CleaningtheLensandtheFocusSensor................................................................. 71
➋CleaningtheCabinet................................................................................................. 71
➌ReplacingtheLampandtheCoolingPump.............................................................. 72
8. Appendix............................................................................................................. 76
➊Troubleshooting......................................................................................................... 76
➋Specications............................................................................................................ 79
➌CabinetDimensions................................................................................................... 81
➍PinAssignmentsofD-SubCOMPUTERInputConnector........................................ 82
➎CompatibleInputSignalList...................................................................................... 83
➏PCControlCodesandCableConnection................................................................. 84
➐TroubleshootingCheckList....................................................................................... 85
➑TravelCareGuide....................................................................................................... 87
LAMP
STATUS
POWER
FOCUS
ON/STANDBY
SOURCE
AUTO
ADJ.
SELECT
➊What's in the Box?
Makesureyourboxcontainseverythinglisted.Ifanypiecesaremissing,contactyourdealer.
Pleasesavetheoriginalboxandpackingmaterialsifyoueverneedtoshipyourprojector.
Projector
Lens cap
(24FT9983)
Power cable
(US: 7N080228)
(EU: 7N080017)
VGA signal cable
(7N520052)
CD-ROM
User’s manual
(7N951221)
For North Amerca only
Registrationcard
Limitedwarranty
For Europe only
Guaranteepolicy
Quick Setup Guide
(7N8P8881)
Important Information
(7N8P8891)
1. Introduction
VOLUME
S-VIDEO
VIDEO
ENTER
EXIT
MENU
UP
PAGE
OFF
POWER
ON
DOWN
AUTOADJ.
COMPUTER
ASPECTHELP
FREEZE
PICTURE
LAMP MODE
MAGNIFYAV-MUTE
FOCUS
L
-
MOUSE
-
R
VIEWER
Remote control
(7N900841)
Batteries (AAA•2)
Soft case
(24BS7901)

. Introducton
➋Introduction to the Projector
Thissectionintroducesyoutoyournewprojectoranddescribesthefeaturesandcontrols.
Congratulatons on Your Purchase of the Projector
ThisDLP™projectorisoneoftheverybestprojectorsavailabletoday.Theprojectorenablesyoutoprojectpre-
ciseimagesupto300inches(measureddiagonally)fromyourPCorMacintoshcomputer(desktopornotebook),
VCR,DVDplayerordocumentcamera.
You canusetheprojector ona tabletopor cart,youcanusetheprojectorto projectimages frombehindthe
screen,andtheprojectorcanbepermanentlymountedonaceiling*1.Theremotecontrolcanbeusedwirelessly.
*1 Donotattempttomounttheprojectoronaceilingyourself.
Theprojectormustbeinstalledbyqualiedtechniciansinordertoensureproperoperationandreducethe
riskofbodilyinjury.
Inaddition,theceilingmustbestrongenoughtosupporttheprojectorandtheinstallationmustbeinaccor-
dancewithanylocalbuildingcodes.Pleaseconsultyourdealerformoreinformation.
Features you'll enjoy:
• AUTOFOCUSfunction
Whenyouturnonthepower,changethezoomorrepositiontheprojector,theAUTOFOCUSfunctionwillwork
instantly.
Thefocussensorontheprojectordetectsthedistancetothescreenandautomaticallyadjuststhefocusofan
imageaswellasreducingtherequiredset-uptime.
• Autoverticalkeystonecorrection
• Built-inWALLCOLORCorrectionpresetsprovideforadaptivecolorcorrectionwhenprojectingontonon-white
screenmaterial
• DirectPowerOff,AUTOPOWERON(AC),andAUTOPOWERON(COMP.)
Theprojectorhasafeaturecalled“DirectPowerOff”.Thisfeatureallowstheprojectortobeturnedoff(even
whenprojectinganimage)usingapowerstripequippedwithaswitchandabreaker.
TheAUTOPOWERON(AC)andAUTOPOWERON(COMP.)featureseliminatestheneedtoalwaysusethe
POWERbuttonontheremotecontrolorprojectorcabinet.
• HDTV(1080i,720p)andSDTV(576p,480p)compatibility
• Integratedde-interlacevideoprocessingtechnology
• Displaypopularwidescreenandfullscreenaspectratios–16:9and4:3
• Highresolutiondisplay-uptoUXGAcompatible,XGAnativeresolution.
• Multiplevideomodeselections(dependingonyoursource)
• SafetyprotectbySecurityfunction
Securityfeaturepreventsunauthorizedindividualsfromdisplayingimages.
• YoucancontroltheprojectorwithaPCorcontrolsystemusingthePCControlport.
• Easysetupandoperation
• Thecontemporarycabinetdesignislight,compactandcomplementsanyofce,boardroomorAuditorium.
• ViewersupportsUSBmemoryortheBluetooth®wirelesstechnology(NP62/NP52only)
TheNP62andNP52projectorshavetheViewer.
TheViewerallowsyoutoviewtheimagelesstoredinacommerciallyavailableUSBmemoryinsertedintothe
USBportoftheprojector.
ConnectingtheoptionalBluetooth®USBadaptor(NP01BA)totheprojectorwillallowyoutotransmitimages
wirelesslyfromyourcomputersormobilephoneswithBluetoothwirelesstechnologytotheprojector.
SeethelistofcountriesandareassupportedbytheoptionalBluetoothUSBadaptor(NP01BA)onpage35.

3
. Introducton
About ths user's manual
Thefastestwaytogetstartedistotakeyourtimeanddoeverythingrightthersttime.Takeafewminutesnowto
reviewtheuser'smanual.Thismaysaveyoutimelateron.Atthebeginningofeachsectionofthemanualyou'll
ndanoverview.Ifthesectiondoesn'tapply,youcanskipit.
Inthisuser'smanualthedrawingsoftheprojectorshowanexampleofNP61.

. Introducton
LAMP
STATUS
POWER
SOURCE
AUTO
ADJ.
SELECT
ON/STANDBY
FOCUS
VIDEOIN
COMPUTERIN
PCCONTROL
AUDIOIN
S-VIDEOIN
LAMP
STATUS
POWER
ON/STANDBY
SOURCE
AUTO
ADJ.
SELECT
FOCUS
➌Part Names of the Projector
Zoom Lever
(→ page 22)
Controls
(→ page 6)
Lens
Lens Cap
Built-in Security Slot ( )*
Adjustable Tilt Foot Button
(→ page 21)
Adjustable Tilt Foot
(→ page 21)
Remote Sensor
(→ page 8)
Front/Top
AC Input
Connect the supplied power cable's three-pin plug here, and plug
the other end into an active wall outlet. (→ page 15)
Terminal Panel
(→ page 6)
Rear
* ThissecurityslotsupportstheMicroSaver®SecuritySystem.
Ventilation (outlet)
Heated air is exhausted from here.
Focus Sensor
(→ page 22)
Ventilation (inlet)
Ventilation (inlet)
Speaker

. Introducton
Top Features
. POWER Button (ON / STAND BY) ( ) (→page
16,27)
. POWER Indcator (→page15,16,27,76)
3. STATUS Indcator (→page76)
. LAMP Indcator (→page72,76)
. FOCUS Button (→page24)
. MENU Button (→page48)
7. SELECT ▲▼◀▶ / SOURCE ▶ / AUTO ADJ ◀ /
Keystone ▲▼ Buttons (→page18,25,26)
8. ENTER Button
9. EXIT Button
Termnal Panel Features
. COMPUTER IN/ Component Input Connector
(Mn D-Sub Pn) (→page12,13)
. VIDEO IN Connector (RCA) (→page14)
3. S-VIDEO IN Connector (Mn DIN Pn)
(→page14)
. AUDIO IN Mn Jack (Stereo Mn)
(→page12,13,14)
. PC CONTROL Port (Mn DIN 8 Pn) (→page84)
Usethisporttoconnecta PCorcontrol system.
Thisenablesyoutocontroltheprojectorusingse-
rialcommunicationprotocol.Ifyouarewritingyour
ownprogram,typicalPCcontrolcodesareonpage
84.
. USB Port (Type A)
InsertingacommerciallyavailableUSBmemoryal-
lowsyoutoviewimagesstoredintheUSBmemory
(→page37)
Inserting the optional Bluetooth® USB adaptor
(NP01BA)allowsyoutotransmitimagesfromyour
computerormobile phonewithBluetooth wireless
technologytotheprojector.(→page46)
NOTE: The NP61 and NP41 do not have the USB port.
SOURCE
AUTO
ADJ.
ON/STAND BY
FOCUS
LAMP
STATUS
POWER
SELECT
8
12
4567
3
9
VIDEO IN
COMPUTER IN PC CONTROL
AUDIO IN
S-VIDEO IN
VIDEO IN
COMPUTER IN PC CONTROL
AUDIO IN
S-VIDEO IN U S B
1 5
6
NP61/NP41
NP62/NP52
2 3 4

7
. Introducton
❹Part Names of the Remote Control
. Infrared Transmtter (→page8)
. POWER ON Button (→page16)
3. POWER OFF Button (→page27)
. MAGNIFY (+) (–) Buttons (→page29)
. AV-MUTE Button (→page29)
. PAGE (UP) / (DOWN) Buttons* (→page34)
7. MENU Button (→page48)
8. SELECT ▲, ▼
, ◀, ▶ Buttons
9. ENTER Button
0. EXIT Button
. L-MOUSE-R Buttons* (→page34)
VOLUME
ENTER
EXIT
MENU
UP
MAGNIFY
FOCUS
PAGE
OFF
POWER
ON
AV-MUTE
DOWN
L
-
MOUSE
-
R
ASPECT HELP
FREEZE
PICTURE
S-VIDEO VIEWER
LAMP MODE
VIDEO
AUTO ADJ.COMPUTER
1
3
4
7
6
9
2
8
10
5
11
13
14
15
16
12
20
23
22
17
18
19
21
. FOCUS Button (→page24)
3. COMPUTER Button (→page18)
. VIDEO Button (→page18)
. S-VIDEO Button (→page18)
. VIEWER Button (→ page 37) (Notavailableon
NP61andNP41)
7. AUTO ADJ. Button (→page26)
8. LAMP MODE Button (→page30)
9. ASPECT Button (→page58)
0. HELP Button (→page68)
. VOLUME (+) (–) Buttons (→page27)
. PICTURE Button (→page53,55)
3. FREEZE Button (→page29)
*Availableonlywhentheoptionalremotemousereceiverisconnectedwithyourcomputer.

8
. Introducton
30°
30°
30°
30°
Remote Control Precautons
• Handletheremotecontrolcarefully.
• Iftheremotecontrolgetswet,wipeitdryimmediately.
• Avoidexcessiveheatandhumidity.
• Donotheat,takeapart,orthrowbatteriesintore.
• Ifyouwillnotbeusingtheremotecontrolforalongtime,removethebatteries.
• Ensurethatyouhavethebatteries'polarity(+/–)alignedcorrectly.
• Donotusenewandoldbatteriestogether,orusedifferenttypesofbatteriestogether.
• Disposeofusedbatteriesaccordingtoyourlocalregulations.
Operatng Range for Wreless Remote Control
Battery Installaton
Press rmlyand slidethe
batterycoveroff.
Install new batteries (AAA). En-
surethatyouhavethebatteries'
polarity(+/–)alignedcorrectly.
3Slipthe cover back over thebat-
teriesuntilitsnapsintoplace.Do
notmixdifferenttypesofbatteries
ornewandoldbatteries.
Remote sensor on
projector cabinet
Remote control 22 feet / 7 m
• Theinfraredsignaloperatesbyline-of-sightuptoadistanceofabout22feet/7mandwithina60-degreeangle
oftheremotesensorontheprojectorcabinet.
• Theprojectorwillnotrespondifthereareobjectsbetweentheremotecontrolandthesensor,orifstronglight
fallsonthesensor.Weakbatterieswillalsopreventtheremotecontrolfromproperlyoperatingtheprojector.
Remote control

9
Thissectiondescribeshowtosetupyourprojectorandhowtoconnectvideoandaudiosources.
2. Installation and Connections
➊Setting Up the Screen and the Projector
Selectng a Locaton
Thefurtheryourprojectorisfromthescreenorwall,thelargertheimage.Theminimumsizetheimagecanbeis
33"(0.84m)measureddiagonallywhentheprojectorisroughly57inches(1.44m)fromthewallorscreen.The
largesttheimagecanbeis300"(7.6m)whentheprojectorisabout484inches(12.3m)fromthewallorscreen.
Usethechartbelowasaroughguide.
Yourprojectorissimpletosetupanduse.
Butbeforeyougetstarted,youmustrst:
➊ Setupascreenandtheprojector.
➋ Connect your computer or video
equipmenttotheprojector.Seepages
12,13,14.
➌ Connect the supplied powercable.
Seepage15.
NOTE: Ensure that the power cable and any oth-
er cables are disconnected before moving the
projector. When moving the projector or when
it is not in use, cover the lens with the lens cap.
Distance (Unit: m/inch)
Lens center
Screen Size (diagonal: inch)
Screen Size (Unit: cm/inch)
609.6(W)×457.2(H) / 240(W)×180(H)
487.7(W)×365.8(H) / 192(W)×144(H)
406.4(W)×304.8(H) / 160(W)×120(H)
365.8(W)×274.3(H) / 144(W)×108(H)
304.8(W)×228.6(H) / 120(W)×90(H)
243.8(W)×182.9(H) / 96(W)×72(H)
203.2(W)×152.4(H) / 80(W)×60(H)
162.6(W)×121.9(H) / 64(W)×48(H)
121.9(W)×91.4(H) / 48(W)×36(H)
81.3(W)×61.0(H) / 32(W)×24(H)
300"
240"
200"
180"
150"
120"
100"
60"
40"
80"
12.3/484.3
9.8/385.8
8.2/322.8
7.4/291.3
6.1/240.2
4.9/192.9
4.1/161.4
3.3/129.9
2.4/94.5
1.6/63.0
NOTE:
• The distances are indicated by intermediate values between tele and wide. Use as a rule of thumb.
• The Zoom lever adjusts the image size up to +/-10%
• For more details on throw distance, see next page.
• Changing the image size starts the AUTO FOCUS to adjust the focus; changing the throw angle starts the Auto Keystone to
correct the vertical keystone distortion.
To the wall outlet.

0
. Installaton and Connectons
Throw Dstance and Screen Sze
Thefollowingshowstheproperrelativepositionsoftheprojectorandscreen.Refertothetabletodeterminethe
positionofinstallation.
Dstance Chart
C
D
B
Screen center
Lens center
Screen bottom
2.28"/58 mm
Projector bottom
ScreenSize BCDα
Diagonal Width Height wide - tele wide - tele
inch inch inch inch inch inch degree
33 26 20 13 - 57 3 - 12.6
40 32 24 15 57 - 69 3 15.0 - 12.5
60 48 36 23 87 - 105 5 14.9 - 12.4
67 54 40 26 97 - 117 6 14.9 - 12.4
72 58 43 28 104 - 126 6 14.9 - 12.4
80 64 48 31 116 - 140 7 14.8 - 12.3
84 67 50 32 122 - 147 7 14.8 - 12.3
90 72 54 35 130 - 158 8 14.8 - 12.3
100 80 60 38 145 - 176 8 14.8 - 12.3
120 96 72 46 174 - 211 10 14.8 - 12.3
150 120 90 58 219 - 264 13 14.7 - 12.3
180 144 108 69 263 - 317 15 14.7 - 12.3
200 160 120 77 292 - 353 17 14.7 - 12.3
220 176 132 84 321 - 388 18 14.7 - 12.3
240 192 144 92 351 - 423 20 14.7 - 12.3
260 208 156 100 380 - 459 22 14.7 - 12.3
280 224 168 107 409 - 494 23 14.7 - 12.3
300 240 180 115 439 - 530 25 14.7 - 12.3
ScreenSize BCDα
Diagonal Diagonal Width Height wide - tele wide - tele
inch mm mm mm mm mm mm degree
33 838 671 503 321 - 1440 70 - 12.6
40 1016 813 610 390 1450 - 1760 85 15.0 - 12.5
60 1524 1219 914 584 2200 - 2660 127 14.9 - 12.4
67 1702 1361 1021 653 2460 - 2970 142 14.9 - 12.4
72 1829 1463 1097 701 2640 - 3200 153 14.9 - 12.4
80 2032 1626 1219 779 2940 - 3560 169 14.8 - 12.3
84 2134 1707 1280 818 3090 - 3740 178 14.8 - 12.3
90 2286 1829 1372 877 3310 - 4010 191 14.8 - 12.3
100 2540 2032 1524 974 3690 - 4460 212 14.8 - 12.3
120 3048 2438 1829 1169 4430 - 5360 254 14.8 - 12.3
150 3810 3048 2286 1461 5550 - 6710 318 14.7 - 12.3
180 4572 3658 2743 1753 6670 - 8060 381 14.7 - 12.3
200 5080 4064 3048 1948 7420 - 8960 424 14.7 - 12.3
220 5588 4470 3353 2143 8160 - 9850 466 14.7 - 12.3
240 6096 4877 3658 2337 8910 - 10750 508 14.7 - 12.3
260 6604 5283 3962 2532 9650 - 11650 551 14.7 - 12.3
280 7112 5690 4267 2727 10400 - 12550 593 14.7 - 12.3
300 7620 6096 4572 2922 11140 - 13450 636 14.7 - 12.3
B=Verticaldistancebetweenlenscenterandscreencenter
C=Throwdistance
D=Verticaldistancebetweenlenscenterandbottomofscreen(topofscreenforceilingapplication)
α=Throwangle
NOTE: The values in the tables are design values and may vary.

. Installaton and Connectons
WARNING
* Installingyourprojectorontheceilingmustbedone
byaqualiedtechnician.ContactyourNECdealer
formoreinformation.
* Donotattempttoinstalltheprojectoryourself.
• Onlyuseyourprojectoronasolid,levelsurface.If
theprojectorfallstotheground,youcanbeinjured
andtheprojectorseverelydamaged.
• Donotusetheprojectorwheretemperaturesvary
greatly.Theprojectormustbeusedattemperatures
between41˚F(5˚C)and104˚F(40˚C).([ECO]mode
selectedautomaticallyat95°Fto104°F/35°Cto40°C.
Notethat[ECO]modewillbeselectedautomatically
at86°Fto104°F/30°Cto40°Cwhenusedin[HIGH
ALTITUDE].)
• Do notexpose the projector to moisture, dust,or
smoke.Thiswillharmthescreenimage.
• Ensure that you have adequate ventilation around
yourprojectorsoheatcandissipate.Donot cover
theventsonthesideorthefrontoftheprojector.
Reectng the Image
Using a mirrortoreflect your projector's image en-
ables you to enjoya much larger image when a
smallerspaceisrequired.ContactyourNECdealerif
youneedamirrorsystem.Ifyou'reusingamirrorsys-
tem and your image isinverted,use theMENUand
SELECTbuttons on yourprojector cabinet or your
remotecontroltocorrecttheorientation.(→page62)
This manual suits for next models
6
Table of contents
Other NEC Projector manuals

NEC
NEC NP-L50W User manual

NEC
NEC M300X Series User manual

NEC
NEC NP100 - SVGA DLP Projector User manual

NEC
NEC NP305 User manual

NEC
NEC NEC L51W LED Manual

NEC
NEC NP1000 Manual

NEC
NEC MultiSync MT 600 User manual

NEC
NEC LT157 - XGA LCD Projector Assembly instructions

NEC
NEC NP200 - XGA DLP Projector User manual

NEC
NEC NP2000 User manual

NEC
NEC VT800 Series User manual

NEC
NEC VT580 User manual

NEC
NEC NP61 Series User manual

NEC
NEC NP610 Series User manual

NEC
NEC MT1030+ User manual

NEC
NEC M350XS User manual

NEC
NEC GT950 - MultiSync XGA LCD Projector Assembly instructions

NEC
NEC PX803UL-WH User manual

NEC
NEC NP-NC900C-A User manual

NEC
NEC MultiSync MT830+ User manual