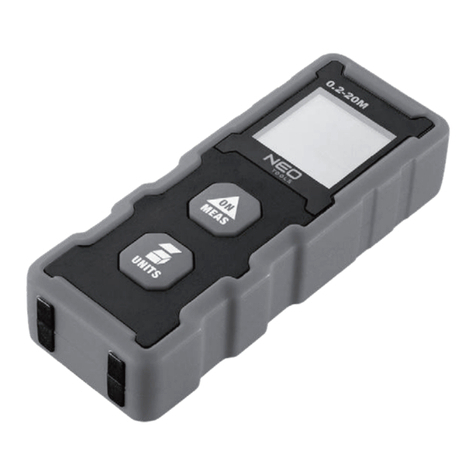
NEO TOOLS 75-203 User manual

1
neo-tools.comneo-tools.com
PL Instrukcja obsługi
GB Instruction manual
DE Gebrauchsanweisung
RU Инструкция по эксплуатации
UA Інструкція з експлуатації
HU Használati Utasítás
RO Instructiuni de deservire
CZ Návod k obsluze
SK Návod na obsluhu
IT Manuale d’uso

2
neo-tools.comneo-tools.com neo-tools.comneo-tools.com

neo-tools.comneo-tools.com
3
1
2
3
4
5

4
neo-tools.comneo-tools.com neo-tools.comneo-tools.com
PL
GB
DE
RU
UA
HU
RO
CZ
SK
IT
Dalmierz laserowy 5
Laser distance meter 13
Laser-entfernungsmesser 20
Лазерный дальномер 28
Далекомір лазерний 36
Lézeres távolságmérő 45
Telemetru cu laser 53
Laserový dálkoměr 61
Laserový diaľkomer 69
Telemetro laser 77
INSTRUKCJA ORYGINALNA (OBSŁUGI)
DALMIERZ LASEROWY :
75-203
UWAGA: Przed przystąpieniem do użytkowania urządzenia, należy
uważnie przeczytać niniejszą instrukcję i zachować ją do dalszego wykorzystania.
Nieprzestrzeganie zasad bezpieczeństwa zawartych w instrukcji obsługi może
doprowadzić do uszkodzenia urządzenia oraz być przyczyną obrażeń ciała.
OSTRZEŻENIE: Nie wolno patrzeć bezpośrednio w wiązkę światła
laserowego!
Należy przestrzegać niżej podanych zasad bezpieczeństwa:
1. Nie wolno wprowadzać żadnych modykacji w urządzeniu.
2. Urządzenie laserowe należy użytkować zgodnie z zaleceniami producenta.
3. Nigdy nie wolno umyślnie kierować wiązki laserowej w kierunku ludzi lub
zwierząt.
4. Nie wolno kierować wiązki światła laserowego ku oczom osób postronnych i
zwierząt. Promieniowanie lasera może uszkodzić narząd wzroku.
5. Zawsze należy się upewnić czy światło lasera nie jest skierowane na
powierzchnie odbijające. Powierzchnia odbijająca wiązkę lasera mogłaby
wówczas, odbić taką wiązkę w kierunku operatora, lub osób trzecich.
6. Nie należy pozwalać dzieciom na obsługę tego urządzenia. Nie dopuszczać
dzieci do miejsca pracy podczas ustawień i w czasie używania urządzenia.
7. Nieużywany sprzęt przechowywać w suchym miejscu niedostępnym dla
dzieci.
8. Nie wolno wymieniać zespołu laserowego na urządzenie innego typu.
Wszelkie naprawy powinny być wykonane przez serwis producenta.
9. Urządzenie zostało wyposażone w laser klasy 2 zgodny z EN 60825-1:2014.
PRZEZNACZENIE
Urządzenie przeznaczony jest jedynie do użytku prywatnego. Może
zostać użyte do pomiaru odległości jak również do pomiaru pola powierzchni
i objętości. Dodatkowo dalmierz posiada w funkcję pomiaru pośredniego
(zgodnie z twierdzeniem Pitagorasa) który pozwala na obliczanie wysokości
lub odległości. Pomiar dynamiczny pozwala na wykonanie ciągłego pomiaru.
Dodatkowo urządzenie wyposażone jest w automatyczną poziomnicę, dzięki
czemu na bieżąco umożliwia odczyt kąta w jakim znajduje się urządzenie.
Urządzenie należy użytkować wyłącznie w suchych pomieszczeniach.
W czasie pracy należy działać ściśle według poniższych instrukcji, aby
zapewnić jak najlepsze działanie urządzenia. Zastosowanie inne niż opisane
poniżej jest niedozwolone i może prowadzić do uszkodzenia produktu.

neo-tools.comneo-tools.com
5
INSTRUKCJA ORYGINALNA (OBSŁUGI)
DALMIERZ LASEROWY :
75-203
UWAGA: Przed przystąpieniem do użytkowania urządzenia, należy
uważnie przeczytać niniejszą instrukcję i zachować ją do dalszego wykorzystania.
Nieprzestrzeganie zasad bezpieczeństwa zawartych w instrukcji obsługi może
doprowadzić do uszkodzenia urządzenia oraz być przyczyną obrażeń ciała.
OSTRZEŻENIE: Nie wolno patrzeć bezpośrednio w wiązkę światła
laserowego!
Należy przestrzegać niżej podanych zasad bezpieczeństwa:
1. Nie wolno wprowadzać żadnych modykacji w urządzeniu.
2. Urządzenie laserowe należy użytkować zgodnie z zaleceniami producenta.
3. Nigdy nie wolno umyślnie kierować wiązki laserowej w kierunku ludzi lub
zwierząt.
4. Nie wolno kierować wiązki światła laserowego ku oczom osób postronnych i
zwierząt. Promieniowanie lasera może uszkodzić narząd wzroku.
5. Zawsze należy się upewnić czy światło lasera nie jest skierowane na
powierzchnie odbijające. Powierzchnia odbijająca wiązkę lasera mogłaby
wówczas, odbić taką wiązkę w kierunku operatora, lub osób trzecich.
6. Nie należy pozwalać dzieciom na obsługę tego urządzenia. Nie dopuszczać
dzieci do miejsca pracy podczas ustawień i w czasie używania urządzenia.
7. Nieużywany sprzęt przechowywać w suchym miejscu niedostępnym dla
dzieci.
8. Nie wolno wymieniać zespołu laserowego na urządzenie innego typu.
Wszelkie naprawy powinny być wykonane przez serwis producenta.
9. Urządzenie zostało wyposażone w laser klasy 2 zgodny z EN 60825-1:2014.
PRZEZNACZENIE
Urządzenie przeznaczony jest jedynie do użytku prywatnego. Może
zostać użyte do pomiaru odległości jak również do pomiaru pola powierzchni
i objętości. Dodatkowo dalmierz posiada w funkcję pomiaru pośredniego
(zgodnie z twierdzeniem Pitagorasa) który pozwala na obliczanie wysokości
lub odległości. Pomiar dynamiczny pozwala na wykonanie ciągłego pomiaru.
Dodatkowo urządzenie wyposażone jest w automatyczną poziomnicę, dzięki
czemu na bieżąco umożliwia odczyt kąta w jakim znajduje się urządzenie.
Urządzenie należy użytkować wyłącznie w suchych pomieszczeniach.
W czasie pracy należy działać ściśle według poniższych instrukcji, aby
zapewnić jak najlepsze działanie urządzenia. Zastosowanie inne niż opisane
poniżej jest niedozwolone i może prowadzić do uszkodzenia produktu.

6
neo-tools.comneo-tools.com neo-tools.comneo-tools.com
Parametr Wartość
Zakres pomiarowy od 0,2 do 40 m
Dokładność pomiarowa +/- 2mm/10m*
Temperatura pracy 0°C – 40°C
Pamięć dokonanych pomiarów 20
Klasa lasera 2
Długość fali świetlnej lasera 630 – 670 nm
Moc lasera < 1 mW
Typ baterii 2 baterie 1,5V typu AAA
Dostępne jednostki pomiarowe m/ft/in/ft+in
Wymiary 100 x 35 x 23 mm
Waga 58 g
*W niekorzystnych warunkach takich jak: zbyt intensywne światło słoneczne, pomiar do
powierzchni źle odbijającej promienie świetlne (np. czarne, matowe powierzchnie) lub zbyt wysoka
temperatura otoczenia, błąd pomiaru może wzrosnąć.
OBJAŚNIENIE ZASTOSOWANYCH PIKTOGRAMÓW
1. Uwaga promieniowanie laserowe!
2. Uwaga promieniowanie laserowe – nie patrzeć w wiązkę
3. Przeczytaj instrukcje Obsługi, przestrzegaj ostrzeżeń i warunków
bezpieczeństwa w niej zawartych.
4. Selektywna zbiórka
OPIS STRON GRAFICZNYCH
Poniższa numeracja odnosi się do elementów urządzenia przedstawionych na
stronach gracznych niniejszej instrukcji:
1. Ekran dotykowy
2. Przycisk pomiarowy
3. Włącznik
4. Gwint montażu statywu
5. Pokrywa baterii
* Mogą występować różnice między rysunkiem a wyrobem
OPIS UŻYTYCH ZNAKÓW GRAFICZNYCH
UWAGA
OSTRZEŻENIE
MONTAŻ / USTAWIENIA
INFORMACJA
WYPOSAŻENIE I AKCESORIA
Wymiana baterii
• naciśnij zaczep blokady, tak aby zdjąć pokrywę baterii (5),
• włóż 2 nowe baterie AAA, zwracając uwagę na ich prawidłową polaryzację,
• zamknij pokrywę baterii (5).
4
Baterie mogą wyciec, zapalić się lub wybuchnąć jeśli zostaną
nagrzane do wysokich temperatur lub zwarte. Nie należy nagrzewać
urządzenia do temperatury powyżej 50°C oraz przechowywać go w
samochodzie podczas upalnych i słonecznych dni.
Baterie należy przechowywać poza zasięgiem dzieci. Nie wolno
pozostawiać baterii w ich zasięgu, ponieważ mogą one zostać przez nie
połknięte.
Wytyczne dotyczące źródła zasilania urządzenia
• Należy wymienić baterię na nową, gdy poziom naładowania baterii jest
zerowy.
• Należy wyjąć baterię, gdy urządzenie nie jest używane przez dłuższy czas.
• Nie należy używać starych i nowych baterii jednocześnie. Mieszanie starych
i nowych baterii może doprowadzić do ich wylania co może spowodować
uszkodzenie urządzenia.
• Baterii nie należy wrzucać do odpadów domowych, nie wolno ich wrzucać
do ognia lub do wody. Uszkodzone lub zużyte akumulatory/baterie należy
poddawać prawidłowemu recyklingowi zgodnie z aktualną dyrektywą
dotyczącą utylizacji akumulatorów i baterii.

neo-tools.comneo-tools.com
7
OPIS UŻYTYCH ZNAKÓW GRAFICZNYCH
UWAGA
OSTRZEŻENIE
MONTAŻ / USTAWIENIA
INFORMACJA
WYPOSAŻENIE I AKCESORIA
Wymiana baterii
• naciśnij zaczep blokady, tak aby zdjąć pokrywę baterii (5),
• włóż 2 nowe baterie AAA, zwracając uwagę na ich prawidłową polaryzację,
• zamknij pokrywę baterii (5).
4
Baterie mogą wyciec, zapalić się lub wybuchnąć jeśli zostaną
nagrzane do wysokich temperatur lub zwarte. Nie należy nagrzewać
urządzenia do temperatury powyżej 50°C oraz przechowywać go w
samochodzie podczas upalnych i słonecznych dni.
Baterie należy przechowywać poza zasięgiem dzieci. Nie wolno
pozostawiać baterii w ich zasięgu, ponieważ mogą one zostać przez nie
połknięte.
Wytyczne dotyczące źródła zasilania urządzenia
• Należy wymienić baterię na nową, gdy poziom naładowania baterii jest
zerowy.
• Należy wyjąć baterię, gdy urządzenie nie jest używane przez dłuższy czas.
• Nie należy używać starych i nowych baterii jednocześnie. Mieszanie starych
i nowych baterii może doprowadzić do ich wylania co może spowodować
uszkodzenie urządzenia.
• Baterii nie należy wrzucać do odpadów domowych, nie wolno ich wrzucać
do ognia lub do wody. Uszkodzone lub zużyte akumulatory/baterie należy
poddawać prawidłowemu recyklingowi zgodnie z aktualną dyrektywą
dotyczącą utylizacji akumulatorów i baterii.

8
neo-tools.comneo-tools.com neo-tools.comneo-tools.com
OBSŁUGA EKRANU DOTYKOWEGO
Przewijanie lewo/prawo pozwala na zmianę funkcji:
• pomiar prosty,
• pośredni pomiar wysokości,
• pośredni, trójpunktowy pomiar wysokości,
• pomiar powierzchni,
• pomiar objętości,
• automatyczny pomiar odległości poziomej,
• automatyczny pomiar wysokości.
Przewijanie góra/dół pozwala na wejście w ustawienie pomiarowe. Kliknięcie
w odpowiednią ikonę pozwala na przejście do danej funkcji:
a)
b)
c)
a. zapamiętane pomiary,
b. zmiana jednostki,
c. punkt odniesienia pomiaru (pomiar rozpoczęty od powierzchni dolnej
dalmierza/od gwintu montażu statywu/od powierzchni górnej dalmierza).
DOKONANIE POMIARU PROSTEGO
Po włączeniu urządzenia przewijając lewo/prawo wybierz funkcję pomiaru
prostego . Przewijając góra/dół wybierz jednostkę pomiarową oraz
punkt odniesienia pomiaru.
Naciśnięcie przycisku pomiarowego (2) włączy funkcję pomiaru ciągłego. Po
ponownym wciśnięciu przycisku pomiarowego (2) wynik zostanie zapisany.
Ponowne wciśnięcie przycisku pomiarowego (2) spowoduje powrót do pomiaru
ciągłego. Na ekranie dotykowym będą wyświetlane trzy kolejne wyniki pomiaru.
POŚREDNI POMIAR WYSOKOŚCI (ZGODNIE Z TWIERDZENIEM PITAGORASA)
Po włączeniu urządzenia przewijając lewo/prawo wybierz funkcję pomiaru
pośredniego wysokości . Przewijając góra/dół wybierz jednostkę
pomiarową oraz punkt odniesienia pomiaru.
Aby wyznaczyć wysokość należy dokonać pomiaru górnej krawędzi trójkąta
pokazanej na ekranie dalmierza w kolorze czerwonym. Pomiaru należy dokonać
wciskając przycisk pomiaru (2). Następnie należy dokonać pomiaru dolnej
krawędzi trójkąta w identyczny sposób. Jako wynik zostanie podana odległość
pomiędzy powyższymi punktami pomiarowymi.
POŚREDNI TRÓJ PUNKTOWY POMIAR WYSOKOŚCI (ZGODNIE Z
TWIERDZENIEM PITAGORASA)
Po włączeniu urządzenia przewijając lewo/prawo wybierz funkcję trójpunktowego
pomiaru pośredniego wysokości . Przewijając góra/dół wybierz jednostkę
pomiarową oraz punkt odniesienia pomiaru.
Aby wyznaczyć wysokość należy dokonać pomiaru górnej krawędzi trójkąta
pokazanej na ekranie dalmierza w kolorze czerwonym. Pomiaru należy dokonać
wciskając przycisk pomiaru (2). Następnie należy dokonać pomiaru środkowej
oraz dolnej krawędzi trójkąta w identyczny sposób. Jako wynik zostanie podana
odległość pomiędzy pierwszym i ostatnim punktem pomiarowym.

neo-tools.comneo-tools.com
9
Naciśnięcie przycisku pomiarowego (2) włączy funkcję pomiaru ciągłego. Po
ponownym wciśnięciu przycisku pomiarowego (2) wynik zostanie zapisany.
Ponowne wciśnięcie przycisku pomiarowego (2) spowoduje powrót do pomiaru
ciągłego. Na ekranie dotykowym będą wyświetlane trzy kolejne wyniki pomiaru.
POŚREDNI POMIAR WYSOKOŚCI (ZGODNIE Z TWIERDZENIEM PITAGORASA)
Po włączeniu urządzenia przewijając lewo/prawo wybierz funkcję pomiaru
pośredniego wysokości . Przewijając góra/dół wybierz jednostkę
pomiarową oraz punkt odniesienia pomiaru.
Aby wyznaczyć wysokość należy dokonać pomiaru górnej krawędzi trójkąta
pokazanej na ekranie dalmierza w kolorze czerwonym. Pomiaru należy dokonać
wciskając przycisk pomiaru (2). Następnie należy dokonać pomiaru dolnej
krawędzi trójkąta w identyczny sposób. Jako wynik zostanie podana odległość
pomiędzy powyższymi punktami pomiarowymi.
POŚREDNI TRÓJ PUNKTOWY POMIAR WYSOKOŚCI (ZGODNIE Z
TWIERDZENIEM PITAGORASA)
Po włączeniu urządzenia przewijając lewo/prawo wybierz funkcję trójpunktowego
pomiaru pośredniego wysokości . Przewijając góra/dół wybierz jednostkę
pomiarową oraz punkt odniesienia pomiaru.
Aby wyznaczyć wysokość należy dokonać pomiaru górnej krawędzi trójkąta
pokazanej na ekranie dalmierza w kolorze czerwonym. Pomiaru należy dokonać
wciskając przycisk pomiaru (2). Następnie należy dokonać pomiaru środkowej
oraz dolnej krawędzi trójkąta w identyczny sposób. Jako wynik zostanie podana
odległość pomiędzy pierwszym i ostatnim punktem pomiarowym.

10
neo-tools.comneo-tools.com neo-tools.comneo-tools.com
POMIAR POLA POWIERZCHNI
Po włączeniu urządzenia przewijając lewo/prawo wybierz funkcję pomiaru pola
powierzchni . Przewijając góra/dół wybierz jednostkę pomiarową oraz
punkt odniesienia pomiaru.
Funkcja pomiaru powierzchni przeznaczona jest do pomiaru powierzchni
prostokątnych. Należy zmierzyć długość jednego z boków prostokąta wciskając
przycisk pomiaru (2). Długość drugiego boku prostokąta należy zmierzyć
identycznie. Jako wynik zostanie podane pole powierzchni prostokąta.
POMIAR OBJĘTOŚCI
Po włączeniu urządzenia przewijając lewo/prawo wybierz funkcję pomiaru
objętości . Przewijając góra/dół wybierz jednostkę pomiarową oraz punkt
odniesienia pomiaru.
Funkcja pomiaru objętości przeznaczona jest do pomiaru objętości
prostopadłościanu. Należy zmierzyć długość jednego z boków prostopadłościanu
wciskając przycisk pomiaru (2). Długość dwóch kolejnych boków
prostopadłościanu należy zmierzyć identycznie. Jako wynik zostanie podana
objętość prostopadłościanu.
AUTOMATYCZNY POMIAR ODLEGŁOŚCI POZIOMEJ
Po włączeniu urządzenia przewijając lewo/prawo wybierz funkcję automatycznego
pomiaru odległości poziomej . Przewijając góra/dół wybierz jednostkę
pomiarową oraz punkt odniesienia pomiaru.
Należy dokonać pomiaru długości górnego boku trójkąta zaznaczonej na ekranie
dalmierza na czerwony kolor wciskając przycisk pomiaru (2). Na podstawie tej
odległości oraz kąta przy którym dalmierz dokonał pomiaru automatycznie
wyznaczona zostanie wysokość (pionowa) oraz odległość (pozioma). Na ekranie
podane wartości to kolejno od góry: zmierzona odległość, wysokość, odległość.
AUTOMATYCZNY POMIAR WYSOKOŚCI
Po włączeniu urządzenia przewijając lewo/prawo wybierz funkcję automatycznego
pomiaru wysokości . Przewijając góra/dół wybierz jednostkę pomiarową
oraz punkt odniesienia pomiaru.
Należy dokonać pomiaru długości górnego boku trójkąta zaznaczonej na
ekranie dalmierza na czerwony kolor wciskając przycisk pomiaru (2). Następnie
należy dokonać pomiaru dolnego boku trójkąta w identyczny sposób. Na
podstawie zmierzonych boków oraz kąta przy którym dalmierz dokonał pomiaru
automatycznie wyznaczona zostanie wysokość (pionowa odległość pomiędzy
punktami pomiarowymi).
MOŻLIWE PROBLEMY I ICH SPOSÓB ROZWIĄZANIA
Błędy urządzenia zostaną wyświetlone na ekranie w postaci kodu. Opis kodów
wraz z ich rozwiązaniem podano w poniższej tabeli:

neo-tools.comneo-tools.com
11
AUTOMATYCZNY POMIAR ODLEGŁOŚCI POZIOMEJ
Po włączeniu urządzenia przewijając lewo/prawo wybierz funkcję automatycznego
pomiaru odległości poziomej . Przewijając góra/dół wybierz jednostkę
pomiarową oraz punkt odniesienia pomiaru.
Należy dokonać pomiaru długości górnego boku trójkąta zaznaczonej na ekranie
dalmierza na czerwony kolor wciskając przycisk pomiaru (2). Na podstawie tej
odległości oraz kąta przy którym dalmierz dokonał pomiaru automatycznie
wyznaczona zostanie wysokość (pionowa) oraz odległość (pozioma). Na ekranie
podane wartości to kolejno od góry: zmierzona odległość, wysokość, odległość.
AUTOMATYCZNY POMIAR WYSOKOŚCI
Po włączeniu urządzenia przewijając lewo/prawo wybierz funkcję automatycznego
pomiaru wysokości . Przewijając góra/dół wybierz jednostkę pomiarową
oraz punkt odniesienia pomiaru.
Należy dokonać pomiaru długości górnego boku trójkąta zaznaczonej na
ekranie dalmierza na czerwony kolor wciskając przycisk pomiaru (2). Następnie
należy dokonać pomiaru dolnego boku trójkąta w identyczny sposób. Na
podstawie zmierzonych boków oraz kąta przy którym dalmierz dokonał pomiaru
automatycznie wyznaczona zostanie wysokość (pionowa odległość pomiędzy
punktami pomiarowymi).
MOŻLIWE PROBLEMY I ICH SPOSÓB ROZWIĄZANIA
Błędy urządzenia zostaną wyświetlone na ekranie w postaci kodu. Opis kodów
wraz z ich rozwiązaniem podano w poniższej tabeli:

12
neo-tools.comneo-tools.com neo-tools.comneo-tools.com
Kod błędu Przyczyna Rozwiązanie problemu
204 Błąd obliczeniowy Powtórz pomiar zgodnie z instrukcją
obsługi
208 Nadmierne
natężenie prądu
Skontaktuj się z producentem
220 Wyczerpana
bateria
Wymień baterie
252 Zbyt wysoka
temperatura
Wystudź urządzenie tak aby jego
temperatura nie przekraczała 40°C
253 Zbyt niska
temperatura
Ogrzej urządzenie tak aby jego
temperatura nie była niższa niż 0°C
255 Zbyt słaby sygnał
pomiarowy/zbyt
długi czas trwania
pomiaru
Użyj tarczy celowniczej lub dokonaj
pomiaru na powierzchni dobrze
odbijającej promienie świetlne
256 Zbyt silny sygnał
pomiarowy
Użyj tarczy celowniczej lub dokonaj
pomiaru na powierzchni mniej
oświetlonej
261 Poza zakresem
pomiarowym
Wybierz punkt pomiarowy w zakresie
pomiarowym
500 Błąd
oprogramowania
Wyłącz i włącz urządzenie. Jeśli kod
nadal się wyświetla skontaktuj się z
producentem
KONSERWACJA
Do czyszczenia należy używać czystej wilgotnej szmatki, aby usunąć kurz. Nie
należy stosować substancji żrących lub lotnych aby wyczyścić urządzenie.
Elementy optyczne należy czyścić podobnie jak okulary lub obiektywy aparatów.
OCHRONA ŚRODOWISKA
Produktów zasilanych elektrycznie nie należy wyrzucać wraz z
domowymi odpadkami, lecz oddać je do utylizacji w odpowiednich
zakładach. Informacji na temat utylizacji udzieli sprzedawca produktu
lub miejscowe władze. Zużyty sprzęt elektryczny i elektroniczny zawiera
substancje nieobojętne dla środowiska naturalnego. Sprzęt nie poddany
recyclingowi stanowi potencjalne zagrożenie dla środowiska i zdrowia
ludzi.
BATERIE/AKUMULATORY
Akumulatorów/baterii nie należy wrzucać do odpadów domowych,
nie wolno ich wrzucać do ognia lub do wody. Uszkodzone lub zużyte
akumulatory należy poddawać prawidłowemu recyklingowi zgodnie z
aktualną dyrektywą dotyczącą utylizacji akumulatorów i baterii. Zużyte
baterie można oddawać w punktach zbiórki a także wszędzie tam, gdzie
prowadzi się sprzedaż baterii/akumulatorów.
ORIGINAL MANUAL (INSTRUCTION)
LASER DISTANCE METER :
75-203
CAUTION: Before using the device read this manual carefully and keep it
for future reference. Failure to follow safety rules from this manual may cause tool
damage or body injuries.
WARNING: Do not look directly at the source of laser beam.
Follow the below safety rules.
1. Do not modify the tool.
2. Use the laser device in accordance with the manufacturer’s instructions.
3. Do not intentionally point the laser beam at people or animals.
4. Do not point the laser beam at bystanders’ or animals’ eyes. Laser radiation
may damage your vision.
5. Always make sure the laser beam is not directed at reective surfaces.
Reective surface could project the beam at operator or bystanders.
6. Do not allow children to operate the device. Do not allow children in the
workplace when setting up and using the device.
7. When not using, store the device in a dry place, beyond reach of children.
8. Do not replace the laser unit with device of other type. All repairs must be
carried out by the manufacturer service.
9. The tool is equipped with class 2 laser device compliant with EN 60825-
1:2014.
INTENDED USE
The device is designed for personal use only. It can be used to
measure length, area and volume. Additionally, the range nder features
option of indirect measurements, that uses Pythagorean theorem to calculate
height or distance. Dynamic measurement allows for continuous
measurements. Additionally, the device is equipped with automatic level that
allows for continuous readout of the device angle. The device also features
USB socket that allows to charge the device batteries easily.
Observe the following instructions when working for the best device
operation. Use other than described below is not allowed and may cause damage
to the product.
Parameter Value
Measurement range 0.2 to 40 m
Measurement accuracy +/- 2mm/10m*
Operating temperature 00– 400
Measurement memory storage 20
Laser class 2

neo-tools.comneo-tools.com
13
ORIGINAL MANUAL (INSTRUCTION)
LASER DISTANCE METER :
75-203
CAUTION: Before using the device read this manual carefully and keep it
for future reference. Failure to follow safety rules from this manual may cause tool
damage or body injuries.
WARNING: Do not look directly at the source of laser beam.
Follow the below safety rules.
1. Do not modify the tool.
2. Use the laser device in accordance with the manufacturer’s instructions.
3. Do not intentionally point the laser beam at people or animals.
4. Do not point the laser beam at bystanders’ or animals’ eyes. Laser radiation
may damage your vision.
5. Always make sure the laser beam is not directed at reective surfaces.
Reective surface could project the beam at operator or bystanders.
6. Do not allow children to operate the device. Do not allow children in the
workplace when setting up and using the device.
7. When not using, store the device in a dry place, beyond reach of children.
8. Do not replace the laser unit with device of other type. All repairs must be
carried out by the manufacturer service.
9. The tool is equipped with class 2 laser device compliant with EN 60825-
1:2014.
INTENDED USE
The device is designed for personal use only. It can be used to
measure length, area and volume. Additionally, the range nder features
option of indirect measurements, that uses Pythagorean theorem to calculate
height or distance. Dynamic measurement allows for continuous
measurements. Additionally, the device is equipped with automatic level that
allows for continuous readout of the device angle. The device also features
USB socket that allows to charge the device batteries easily.
Observe the following instructions when working for the best device
operation. Use other than described below is not allowed and may cause damage
to the product.
Parameter Value
Measurement range 0.2 to 40 m
Measurement accuracy +/- 2mm/10m*
Operating temperature 00– 400
Measurement memory storage 20
Laser class 2

14
neo-tools.comneo-tools.com neo-tools.comneo-tools.com
Laser wavelength 630–670 nm
Laser power < 1 mW
Battery type 2 x AAA 1.5 V batteries
Available measurement units m/ft/in/ft+in
Dimensions 100 x 35 x 23 mm
Weight 58 g
*Measurement error may increase in unfavourable conditions, such as too strong sunlight,
measurement towards surface that poorly reects light (e.g. black, matt surfaces) or too high ambient
temperature. Error values specied in parentheses are for measurements in poor conditions.
EXPLANATION OF USED SYMBOLS
1. Caution, laser radiation!
2. Caution, laser radiation – do not look in the laser beam
3. Read the instruction manual, observe warnings and safety conditions therein.
4. Segregated waste collection
DESCRIPTION OF DRAWING PAGES
Below enumeration refers to the device elements depicted on the drawing pages
of this manual:
1. Touch screen
2. Measurement button
3. Switch
4. Tripod mount thread
5. Battery lid
*Dierences may appear between the product and drawing
MEANING OF SYMBOLS
CAUTION
WARNING
ASSEMBLY / SETTINGS
INFORMATION
EQUIPMENT AND ACCESSORIES
Battery replacement
• Press the lock catch to remove the battery lid (4).
• Insert 2 new AAA batteries, observe correct polarity.
• Close the battery lid (4).
4
Batteries may leak, set on re or explode when heated to high
temperature or short-circuited. Do not heat the device to temperature above
50°C, do not keep it in a car in hot and sunny days.
Store batteries beyond reach of children. Do not leave batteries
within reach of children to prevent from swallowing.
Guidelines for the device power source
• Replace batteries with new ones when batteries are empty.
• Remove batteries when the device will not be used for a long time.
• Do not use old and new batteries together. Mixing new and old batteries
may cause their damage or leakage and consequently damage of the device.
• Do not dispose of the batteries with household wastes, do not throw in re
or water. Damaged or worn out batteries should be properly recycled in
accordance with applicable directive for battery disposal.
OPERATING TOUCH SCREEN
Swiping left/right allows to change function:
• single measurement,
• indirect height measurement,
• indirect, three point height measurement,
• area measurement,
• volume measurement,
• automatic measurement of distance in horizontal plane,
• automatic height measurement.

neo-tools.comneo-tools.com
15
EQUIPMENT AND ACCESSORIES
Battery replacement
• Press the lock catch to remove the battery lid (4).
• Insert 2 new AAA batteries, observe correct polarity.
• Close the battery lid (4).
4
Batteries may leak, set on re or explode when heated to high
temperature or short-circuited. Do not heat the device to temperature above
50°C, do not keep it in a car in hot and sunny days.
Store batteries beyond reach of children. Do not leave batteries
within reach of children to prevent from swallowing.
Guidelines for the device power source
• Replace batteries with new ones when batteries are empty.
• Remove batteries when the device will not be used for a long time.
• Do not use old and new batteries together. Mixing new and old batteries
may cause their damage or leakage and consequently damage of the device.
• Do not dispose of the batteries with household wastes, do not throw in re
or water. Damaged or worn out batteries should be properly recycled in
accordance with applicable directive for battery disposal.
OPERATING TOUCH SCREEN
Swiping left/right allows to change function:
• single measurement,
• indirect height measurement,
• indirect, three point height measurement,
• area measurement,
• volume measurement,
• automatic measurement of distance in horizontal plane,
• automatic height measurement.

16
neo-tools.comneo-tools.com neo-tools.comneo-tools.com
Scrolling up/down allows to enter measurement settings. Click an icon to
navigate to corresponding function.
a)
b)
c)
a. stored measurements,
b. change of unit,
c. measurement reference point (measurement starts on the range nder
bottom surface/tripod mount thread/upper surface).
HOW TO MAKE A SINGLE MEASUREMENT
Switch on the device and swipe left/right to choose the single measurement mode
. Scroll up/down and choose measurement unit and the measurement
reference point.
Press the measurement button (2) to switch on the continuous measurement
function. When you press the measurement button (2) again, the result will be
stored. When you press the measurement button (2) again, the device will go
back to continuous measurement. The touch screen will show three subsequent
measurement results.
INDIRECT HEIGHT MEASUREMENT (USING PYTHAGOREANTHEROEM)
Switch on the device and swipe left/right to choose the indirect height
measurement mode . Scroll up/down and choose measurement unit and
the measurement reference point.
Determine height by measuring the upper triangle side that is shown in red on the
range nder screen. Press the measurement button (2) to make the measurement.
Next measure the bottom (cathetus) side of the triangle in the same way. The result
given is the distance between abovementioned measurement points.
INDIRECT THREE-POINT HEIGHT MEASUREMENT (USING PYTHAGOREAN
THEROEM)
Switch on the device and swipe left/right to choose the indirect three-point height
measurement mode . Scroll up/down and choose measurement unit and
the measurement reference point.
Determine height by measuring the upper triangle side that is shown in red on the
range nder screen. Press the measurement button (2) to make the measurement.
Next measure the middle and the bottom side of the triangle in the same way.
The result given is the distance between the rst and the last measurement point.
HOW TO MEASURE AREA
Switch on the device and swipe left/right to choose the area measurement mode
Scroll up/down and choose measurement unit and the measurement
reference point.
The area measurement mode is used to measure rectangular areas. Press the
measurement button (2) to measure one of the sides of a rectangle. Make the
measurement of the second rectangle side in the same way. The result shown is
the rectangle area.

neo-tools.comneo-tools.com
17
Switch on the device and swipe left/right to choose the indirect height
measurement mode . Scroll up/down and choose measurement unit and
the measurement reference point.
Determine height by measuring the upper triangle side that is shown in red on the
range nder screen. Press the measurement button (2) to make the measurement.
Next measure the bottom (cathetus) side of the triangle in the same way. The result
given is the distance between abovementioned measurement points.
INDIRECT THREE-POINT HEIGHT MEASUREMENT (USING PYTHAGOREAN
THEROEM)
Switch on the device and swipe left/right to choose the indirect three-point height
measurement mode . Scroll up/down and choose measurement unit and
the measurement reference point.
Determine height by measuring the upper triangle side that is shown in red on the
range nder screen. Press the measurement button (2) to make the measurement.
Next measure the middle and the bottom side of the triangle in the same way.
The result given is the distance between the rst and the last measurement point.
HOW TO MEASURE AREA
Switch on the device and swipe left/right to choose the area measurement mode
Scroll up/down and choose measurement unit and the measurement
reference point.
The area measurement mode is used to measure rectangular areas. Press the
measurement button (2) to measure one of the sides of a rectangle. Make the
measurement of the second rectangle side in the same way. The result shown is
the rectangle area.

18
neo-tools.comneo-tools.com neo-tools.comneo-tools.com
HOW TO MEASURE VOLUME
Switch on the device and swipe left/right to choose the volume measurement
mode . Scroll up/down and choose measurement unit and the
measurement reference point.
The volume measurement mode is used to measure rectangular cuboid volumes.
Press the measurement button (2) to measure one of the cuboid edges. Make the
measurement of the other two cuboid edges in the same way. The result shown is
the rectangular cuboid volume.
AUTOMATIC HORIZONTAL DISTANCE MEASUREMENT
Switch on the device and swipe left/right to choose the horizontal distance
measurement mode . Scroll up/down and choose measurement unit and
the measurement reference point.
Press the measurement button (2) and measure length of the upper side of the
triangle, indicated in red on the range nder screen. Based on the distance and
the angle measured by the range nder, it will automatically determine height
(vertical) and distance (horizontal). The screen will show the following values, up
to bottom: measured distance, height, distance.
AUTOMATIC HEIGHT MEASUREMENT
Switch on the device and swipe left/right to choose the automatic height
measurement mode .. Scroll up/down and choose measurement unit and
the measurement reference point.
Press the measurement button (2) and measure length of the upper side of the
triangle, indicated in red on the range nder screen. Next measure the bottom side
of the triangle in the same way. Based on the side lengths and the angle measured
by the range nder, it will automatically determine height (vertical distance
between measurement points).
PROBLEMS AND TROUBLESHOOTING
The device displays errors using error codes. The table below shows code
descriptions and solutions.
Error code Cause Solution
204 Calculation error Repeat the measurement
accordingly to the manual
208 Too high current Contact the manufacturer
220 Depleted battery Replace batteries
252 Too high temperature Let the device cool down to
temperature below 40°C
253 Too low temperature Warm up the device to temperature
above 0°C
255 Too weak
measurement
signal/too long
measurement time
Use aim board or make
measurements using surface that
reects light
256 Too strong
measurement signal
Use aim board or make
measurement on less illuminated
surface
261 Beyond
measurement range
Choose measurement point in the
measurement range
500 Software error Switch the device o and on. If the
display still shows the code, contact
the manufacturer

neo-tools.comneo-tools.com
19
AUTOMATIC HEIGHT MEASUREMENT
Switch on the device and swipe left/right to choose the automatic height
measurement mode .. Scroll up/down and choose measurement unit and
the measurement reference point.
Press the measurement button (2) and measure length of the upper side of the
triangle, indicated in red on the range nder screen. Next measure the bottom side
of the triangle in the same way. Based on the side lengths and the angle measured
by the range nder, it will automatically determine height (vertical distance
between measurement points).
PROBLEMS AND TROUBLESHOOTING
The device displays errors using error codes. The table below shows code
descriptions and solutions.
Error code Cause Solution
204 Calculation error Repeat the measurement
accordingly to the manual
208 Too high current Contact the manufacturer
220 Depleted battery Replace batteries
252 Too high temperature Let the device cool down to
temperature below 40°C
253 Too low temperature Warm up the device to temperature
above 0°C
255 Too weak
measurement
signal/too long
measurement time
Use aim board or make
measurements using surface that
reects light
256 Too strong
measurement signal
Use aim board or make
measurement on less illuminated
surface
261 Beyond
measurement range
Choose measurement point in the
measurement range
500 Software error Switch the device o and on. If the
display still shows the code, contact
the manufacturer

20
neo-tools.comneo-tools.com neo-tools.comneo-tools.com
MAINTENANCE
Use clean, damp cloth for cleaning to remove dust. Do not use caustic or volatile
substances to clean the device. Clean optical elements like glasses or camera
lenses.
ENVIRONMENT PROTECTION
Do not dispose of electrically powered products with household
wastes, they should be utilized in proper plants. Obtain information
on waste utilization from your seller or local authorities. Used up
electric and electronic equipment contains substances active in natural
environment. Unrecycled equipment constitutes a potential risk for
environment and human health.
BATTERIES
Do not dispose of the batteries with household wastes, do not throw in re
or water. Damaged or worn out batteries should be properly recycled in
accordance with applicable directive for battery disposal. Hand over worn
out batteries to special collection points and sales points where batteries
are available.
ORIGINALANLEITUNG (GEBRAUCHSANWEISUNG)
LASER-ENTFERNUNGSMESSER :
75-203
ACHTUNG: Bevor Sie das Gerät benutzen, lesen Sie dieses Handbuch
sorgfältig durch und bewahren Sie es an einem sicheren Ort auf. Die
Nichtbeachtung der Sicherheitshinweise in der Betriebsanleitung kann zu
Schäden am Gerät und zu Verletzungen führen.
WARNUNG: Nicht direkt in den Laserstrahl schauen!
Die folgenden Sicherheitshinweise sind zu beachten:
1. Nehmen Sie keine Veränderungen am Gerät vor.
2. Das Lasergerät muss gemäß den Anweisungen des Herstellers verwendet
werden.
3. Richten Sie den Laserstrahl niemals absichtlich auf Menschen oder Tiere.
4. Richten Sie den Laserstrahl nicht auf die Augen von Personen oder Tieren.
Laserstrahlung kann die Augen schädigen.
5. Achten Sie immer darauf, dass das Laserlicht nicht auf die reektierenden
Flächen gerichtet ist. Die reektierende Oberäche des Laserstrahls könnte
dann den Strahl zum Bediener oder zu Dritten reektieren.
6. Lassen Sie Kinder nicht mit diesem Gerät arbeiten. Lassen Sie Kinder während
des Aufbaus und der Benutzung nicht in den Arbeitsbereich.
7. Bewahren Sie das Gerät außerhalb der Reichweite von Kindern auf, wenn es
nicht benutzt wird.
8. Ersetzen Sie die Lasereinheit nicht durch einen anderen Gerätetyp. Alle
Reparaturen sollten von der Serviceabteilung des Herstellers durchgeführt
werden.
9. Das Gerät ist mit einem Laser der Klasse 2 nach EN 60825-1:2014 ausgestattet.
Verwendung
Das Gerät ist nur für den privaten Gebrauch bestimmt. Es kann
sowohl zur Abstandsmessung als auch zur Flächen- und Volumenmessung
eingesetzt werden. Zusätzlich verfügt der Entfernungsmesser über eine
indirekte Messfunktion (laut Pythagoras), mit der Sie Höhe oder Entfernung
berechnen können. Die dynamische Messung ermöglicht eine kontinuierliche
Messung. Zusätzlich ist das Gerät mit einer automatischen Wasserwaage
ausgestattet, dank derer der Winkel, in dem sich das Gerät ständig bendet,
abgelesen werden kann. Das Gerät darf nur in trockenen Räumen eingesetzt
werden.
Befolgen Sie während des Betriebs die nachstehenden Anweisungen,
um den bestmöglichen Betrieb des Geräts zu gewährleisten. Eine andere als die
nachfolgend beschriebene Verwendung ist nicht zulässig und kann zu Schäden
am Produkt führen.
Parameter Wert
Messbereich von 0,2 m bis 40 m
Messgenauigkeit +/- 2mm/10m*
Arbeitstemperatur 0°C – 40°C
Speicherung der durchgeführten
Messungen
20
Klasse des Lasers 2
Laserlichtwellenlänge 630 – 670 nm
Laserleistung < 1 mW
Batterietyp 2 Batterien 1,5V Typ AAA
Verfügbare Maßeinheiten m/ft/in/ft+in
Abmessungen 100 x 35 x 23 mm
Gewicht 58 g
*Bei ungünstigen Bedingungen, wie z.B.: zu starkes Sonnenlicht, Messung an einer schlecht
reektierenden Oberäche (z.B. schwarze, matte Oberächen) oder zu hohe Umgebungstemperatur,
kann sich der Messfehler erhöhen (die Fehlerwerte in Klammern beziehen sich auf Messung unter
ungünstigen Bedingungen).
Table of contents
Languages:
Other NEO TOOLS Measuring Instrument manuals
Popular Measuring Instrument manuals by other brands
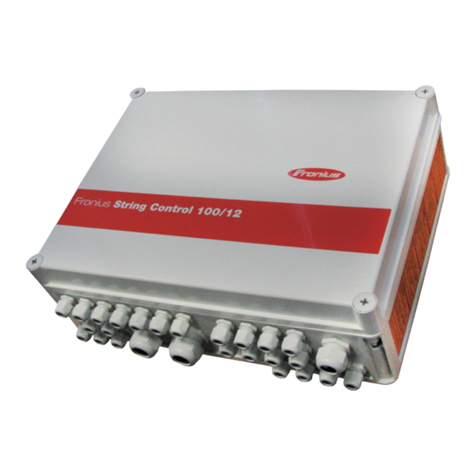
FRONIUS
FRONIUS String Control 100/12 operating instructions
FRONIUS
FRONIUS Datamanager Galvo Installation
EGAmaster
EGAmaster EGAtronik 51664 operating instructions
Applied Instruments
Applied Instruments DIRECTV SWM SL5s Application note
Accu-Flo Meter Service Ltd.
Accu-Flo Meter Service Ltd. MID COM 8000 Calibration instructions
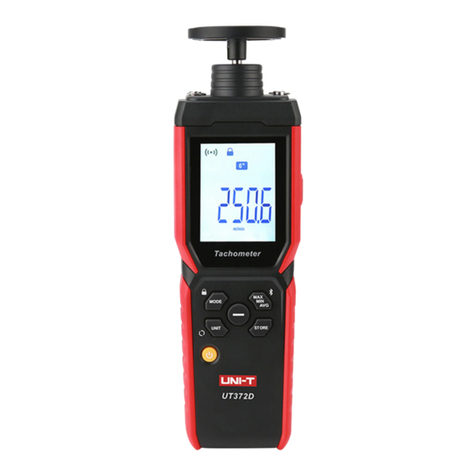
Unit
Unit UT372D user manual
