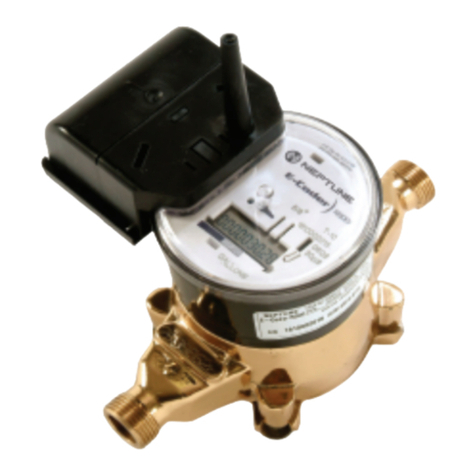
Neptune Technology R450 Product manual

R450™ Data Collector Installation and Maintenance Guide
R450™ Data Collector Installation and Maintenance Guide


R450™ Data Collector Installation
and Maintenance Guide

Copyright
This manual is an unpublished work and contains the trade secrets and confidential
information of Neptune Technology Group Inc., which are not to be divulged to third parties
and may not be reproduced or transmitted in whole or part, in any form or by any means,
electronic or mechanical for any purpose, without the express written permission of
Neptune Technology Group Inc. All rights to designs or inventions disclosed herein,
including the right to manufacture, are reserved to Neptune Technology Group Inc.
Neptune engages in ongoing research and development to improve and enhance its
products. Therefore, Neptune reserves the right to change product or system
specifications without notice.
Trademarks Used in this Manual
R450 Data Collector is a trademark of Neptune Technology Group Inc. R450 is a
trademark of Neptune Technology Group Inc. N_SIGHT is a trademark of Neptune
Technology Group Inc. R450 System is a trademark of Neptune Technology Group Inc.
Other brands or product names are the trademarks or registered trademarks of their
respective holders.
FCCNotice
This device complies with Part 15 of the FCC Rules. Operation is subject to the following
two conditions: (1) this device may not cause harmful interference, and (2) this device
must accept any interference received, including interference that may cause undesired
operation.
NOTE: This equipment has been tested and found to comply with the limits for a Class A
digital device, pursuant to Part 15 of the FCC Rules. These limits are designed to provide
reasonable protection against harmful interference in a residential installation. This
equipment generates, uses, and can radiate radio frequency energy and, if not installed
and used in accordance with the instructions, may cause harmful interference to radio
communications. However, there is no guarantee that interference will not occur in a
particular installation. If this equipment does cause harmful interference to radio or
television reception, which can be determined by turning the equipment off and on, the
user is encouraged to try to correct the interference by one or more of the following
measures:
lReorient or relocate the receiving antenna.
lIncrease the separation between the equipment and receiver.
lConnect the equipment into an outlet on a circuit different from that to which the
receiver is connected.
lConsult the dealer or an experienced radio/TV technician for help.
RF Exposure Information
This equipment complies with the FCC RF radiation requirements for uncontrolled
environments. To maintain compliance with these requirements, the antenna and any
radiating elements should be installed to ensure that a minimum separation distance of
100 cm is maintained from the general population.

Changes or modifications not expressly approved by the party
responsible for compliance could void the user's authority to
operate the equipment.
Les changements ou modifications non expressément approuvés
par la partie responsable de la conformité pourraient faire perdre à
l’utilisateur son droit à utiliser cet équipement.
Professional Installation
In accordance with Section 15.203 of the FCC rules and regulations, the R450 Data
Collector must be professionally installed by trained utility meter installers. Changes or
modifications not expressly approved by the party responsible for compliance could void
the user's authority to operate the equipment.
Industry Canada
This Class A digital apparatus meets all requirements of the Canadian Interference
Causing Equipment Regulations. Operation is subject to the following two conditions: (1)
this device may not cause harmful interference, and (2) this device must accept any
interference received, including interference that may cause undesired operation.
Cet appareillage numérique de la classe A répond à toutes les exigences de l'interférence
canadienne causant des règlements d'équipement. L'opération est sujette aux deux
conditions suivantes: (1) ce dispositif peut ne pas causer l'interférence nocive, et (2) ce
dispositif doit accepter n'importe quelle interférence reçue, y compris l'interférence qui
peut causer l'opération peu désirée.

Important Safety Precautions
Review the following precautionary measures prior to installation.
Refer installation and service to qualified service personnel only.
Important Safety Precautions
- Review the following precautionary measures prior to installation.
Connections to the AC mains must be performed by a licensed
electrician. No user-installable parts inside.
- Installation must be done in accordance with the instructions
contained in this manual.
- Installation must be done in accordance with the National
Electrical Code (NEC), NFPA 70 or Canadian Electrical Code
(CEC), CSA C22.2, No. 1.
- In particular, installation must be done in accordance with N.E.C.
Article 810 or C.E.C Section 54.
- This unit is not intended to be powered directly from the Mains
Distribution System.
Mesures de sécurité importantes
- Examinez les mesures de précaution suivantes avant
l’installation.
- Examinez les mesures de précaution suivantes avant
l’installation. Les raccordements au secteur alternatif doivent être
effectués par un électricien qualifié. Aucune pièce ne peut être
installée par l’utilisateur à l’intérieur.
- L’installation doit être effectuée conformément aux instructions
contenues dans le présent manuel.
- L’installation doit être effectuée conformément au National
Electrical Code (N.E.C.), selon la méthode NFPA 70 ou au Code
canadien de l’électricité (C.C.E.), selon la norme CSA C22.2, no 1.
- Plus précisément, l’installation doit être faite conformément à
l’article 810 du N.E.C. ou la section 54 du C.C.E.
- Cet appareil n’a pas été conçu pour être alimenté directement par
le réseau de distribution principal.

CAUTION: Risk of explosion if battery is replaced by an incorrect
type. Dispose of used batteries according to the manufacturer's
instructions.
MISE EN GARDE : Risque d’explosion si la batterie est remplacée
par un type de batterie inapproprié. Disposez des batteries
usagées conformément aux instructions du fabricant.
Double Pole / Neutral Fusing.
Fusible bipolaire/neutre.
R450™ Data Collector Installation and
Maintenance Guide
Literature No. IMR450 Data Collector 05.2020
Part No. 12835-001
Neptune Technology Group Inc.
1600 Alabama Highway 229
Tallassee, AL 36078
Tel: (800) 633-8754
Fax: (334) 283-7293
Copyright © 2003 - 2020
Neptune Technology Group Inc.
All Rights Reserved

This page intentionally left blank.

Contents
Chapter 1: Product Description 1
General Product Overview 1
Four Types of R450 DC Installations 2
Determining How to Install the R450 DC 3
Mounting Components 4
Wall Mount 4
R450 DCStand 5
Pole Installation 5
Performance Issues with the R450 System 6
Optimizing the Performance of a New System 6
Maintaining the Performance of the R450 System 8
R450 DC Kits 8
GPRS Modem 8
Wi-Fi Modem 9
Ethernet 9
CDMA Modem 10
Chapter 2: General Installation Guidelines 11
R450 DC Specifications 11
Electrical Specifications 11
Environmental Conditions 11
Mechanical Specifications 11
R450 DCFootprint 11
Safety Approval 11
Storage 12
Unpacking 12
R450 DC Installation Kits 12
Tools and Materials 13
R450 MIU and Magnet 14
Chapter 3: Installation of the R450 DC 15
Mounting the R450 DC to a Pole 15
Locating the Site 15
R450 Data Collector Installation and Maintenance Guide vii

Seating the Pole 16
Mounting the R450 DC to the Pole 16
Attaching Cables for the R450 DC 18
Attaching the RF 450 MHz Antenna Cable 19
Connecting the Ground Wire 20
Mounting the GPRS or Wi-Fi Antenna 20
Weatherizing the Cable Connections 23
Connecting AC Power to the R450 DC (120V AC) 24
Connecting the AC-Power Wires 25
Configuring the GPRS Modem 26
Configuring the CDMA Modem 27
Configuring the Collector with the USB Flash Drive 27
Activating the Power 28
Completing the Installation 29
Testing the Connections 29
Swiping the MIU 30
If No Email is Received 31
Manually Configuring the GPRS Modem 32
Required Equipment 32
Configuring the GPRS Modem 33
Securing the R450 DC 33
Installing a Wall Mount System 34
Mounting the R450 DC to a Wall 35
35
Connecting the Cables to the R450 DC 36
Mounting the Antennas and Antenna Mast 36
Mounting the Antenna Mast to the Building 37
Mounting the Appropriate Communications Antenna 38
Mounting the GPRS or Wi-Fi Antenna 38
Attaching the Horizontal Crossbar 38
Attaching the Antenna 39
viii R450 Data Collector Installation and Maintenance Guide
Contents

R450 Data Collector Installation and Maintenance Guide ix
Connecting the Ethernet Cable 40
Connecting the Cables to the R450 DC 42
Chapter 4: I Uninterruptible Power Supply 43
UPSSpecifications 43
Mechanical Specifications 43
Regulatory Specifications 44
Electrical Specifications 45
Output 45
Safety Checklists 46
UPSSafety Checklists 46
Battery Safety Checklist 49
Unpacking and Inspection Checklist 52
Save the Shipping Container 52
Read This Manual 52
The Novus Micro Secure 53
Site Preparation Checklist 55
Grounding 55
Branch Circuit Breaker Protection 55
Disconnects 56
Site Requirements 56
Mounting the UPS 57
Wall Mounting 57
Pole Mounting 57
Steel or Concrete Pole Mounting 57
Wooden Pole Mounting 58
Connecting the UPS 58
Tools and Materials Required 58
Procedure 59
Step 1:Wiring the Input and Output Connectors 59
Step 2: Installing and Wiring the Batteries 60
Connection Finished 61
Powering ONthe UPS 61
62
Contents

Installation and Powering On Finished 62
Chapter 5: CDMA Modem Conversion Kit Installation 65
Overview 65
Tools Needed 65
Parts Included 65
Switching Modems Using the Conversion Kits 65
GPRS/Ethernet Connection 65
Serial Connection 67
Serial to Ethernet Connection (Sierra Wireless Modems Model 775 and
875) 67
Activating the CDMA Modem 68
Accessing the Modem's Homepage 68
Setting the Auto Connect Option 68
Sprint Modem 69
Verizon Modems 70
Chapter 6: Troubleshooting 73
Equipment Required 73
PC Notebook Configuration 74
Additional Equipment Required for the Computer 74
Potential R450 DCProblems 74
Multiple R450 DCs Not Syncing with Host Database 74
Storm Damage Affecting Multiple Sites 75
First Steps 75
Initial Site Activities 75
Checking the General Health of Each of the Modules 76
Visual Check of CPU Board Power 76
Visual Check of Radio Power 76
Visual Check of Backhaul Modem Power and Connectivity 76
Cal Amp LandCell Modem 76
Wi-Fi Modem 77
Additional Detail Checks 77
Verify Main Power 77
x R450 Data Collector Installation and Maintenance Guide
Contents

R450 Data Collector Installation and Maintenance Guide xi
Verifying CPU Board Power 78
Verifying Radio Power 79
Verifying Backhaul Modem Power 79
Cal Amp LandCell Modem 79
Verifying Backhaul Modem Connectivity 80
Cal Amp LandCell Modem 80
Ethernet 80
Wi-Fi Modem 80
Verifying Radio Functionality Using an MIU 80
R450 DC is Syncing but Not Supplying MIU Data 81
Initial Observations 81
Transmitter Transmits but ALM Indicator Flashes 82
Measuring the VSWR 82
The Radio Never Transmits 83
Reduction in Amount of Data Collected 83
Contacting Customer Support 84
By Phone 84
By Email 84
Appendix A: RF Antenna Installation 85
RF Antenna Overview 85
Mounting the Antennas 85
Site Recommendations 85
Feed Line and Antenna Recommendations 86
Feed Line 86
Feed Line Requirements 86
Neptune Part Numbers 87
Antenna 89
Requirements 89
System Certification 90
Power Measurement 90
Coax Cable Loss 94
VSWRCalculation 95
Using a Wattmeter and a Handheld 450MHz Radio 95
Contents

Using the AEA 140-525 Antenna Analyzer 96
Taking the Reading and Calculating VSWR 96
General Installation Guidelines 97
Unpacking 97
RF Antenna Installation Kit 97
Tools and Materials 98
Installing the RF Antenna 99
Locating the Site 99
Mounting the RF 450 Antenna 100
Attaching the RF 450 MHz Antenna Cable 101
Weatherizing the Cable Connections 102
Troubleshooting the RF Antenna 102
Equipment Required 102
Appendix B: Flash Drive Configuration for R450 DC 105
Overview 105
Creating a Collector 105
Creating a New Collector 105
Editing Collector Information 108
Deleting a Collector 108
Using Collector Search 109
Building a USB Drive for Collector Configuration 110
Appendix C: Ethernet Termination 111
Straight-Through Ethernet Cable 111
RJ-45 Crossover Ethernet Cable 111
Determining if You Need a Crossover Cable 112
Glossary 113
Index
xii R450 Data Collector Installation and Maintenance Guide
Contents
117

Figures
Figure 1 – R450 Data Collector 1
Figure 2 – Site Selection 3
Figure 3 – Wall-Mount Installation 4
Figure 4 – Stand Installation 5
Figure 5 – Pole Installation 5
Figure 6 – R450 DC 12
Figure 7 – R450 MHz Antenna P/N 12896-001 12
Figure 8 – RF 450 MHz Antenna Cable and Trench 15
Figure 9 – Pole Seated in Ground 16
Figure 10 – Assembling Strut Channels 17
Figure 11 – Mounting Hardware Stack Detail 17
Figure 12 – Positioning the Strut Channel 17
Figure 13 – Tightening the Bolts of the Strut Clamps 18
Figure 14 – RF 450 MHz Antenna Connection 18
Figure 15 – Antenna Connections 19
Figure 16 – Ground Wire 20
Figure 17 – Items for GPRS or Wi-Fi Antenna 20
Figure 18 – Attaching the GPRS or Wi-Fi Antenna 21
Figure 19 – Tighten Bolt for GPRS Antenna 21
Figure 20 – Cable to GPRS Antenna 22
Figure 21 – GPRS Antenna Connection at Base 22
Figure 22 – Weatherizing Connections 23
Figure 23 – Weatherizing the BaseConnection 23
Figure 24 – Weatherizing the AntennaConnection 24
Figure 25 – ACWiring Threaded Through Base (120V AC Installation) 25
Figure 26 – Attaching the Black Wire 25
Figure 27 – Attaching White Wire 26
Figure 28 – R450 DC Wiring Diagram (120V AC Illustration) 26
Figure 29 – USB Port on CPU Board 27
Figure 30 – Main Disconnect Breaker Switch 28
R450 Data Collector Installation and Maintenance Guide xiii

Figure 31 – Power-On R450 DC 28
Figure 32 – Activating the MIU 31
Figure 33 – Email Sent from R450 DC 31
Figure 34 – Bottom Lock of Unit 33
Figure 35 – Top Lock of Unit 33
Figure 36 – R450 DC Mounted on Wall 35
Figure 37 – Adding Cables to the R450 DC 36
Figure 38 – Securing the Pole Bracket 38
Figure 39 – Lining Up Second Bracket 38
Figure 40 – Securing the Crossbar 39
Figure 41 – Mounting the GPRS or Wi-Fi Antenna 39
Figure 42 – Securing the Wiring 40
Figure 43 – Ethernet Port Connection 41
Figure 44 – Ethernet Feed-Through Assembly 41
Figure 45 – RJ45 Ethernet Housing 41
Figure 46 – Connecting the R450 DC 42
Figure 47 – Novus Micro Secure - Cable Version 53
Figure 48 – Novus Micro Secure - Surveillance Version 53
Figure 49 – Output Connectors and Monitoring LEDs 54
Figure 50 – Wall Mounting 57
Figure 51 – Steel or Concrete Pole Mounting 57
Figure 52 – Wooden Pole Mounting 58
Figure 53 – Wire Input and Output Connectors 59
Figure 54 – Battery Locations 60
Figure 55 – Battery Wiring Diagram 61
Figure 56 – Battery Fuse 61
Figure 57 – R450 DC with CDMA Modem ConversionKit Installed 66
Figure 58 – Browser Connection Log on Dialog 68
Figure 59 – Auto Connect Option 69
Figure 60 – Provisioning Tab 69
Figure 61 – PPP Status 70
xiv R450 Data Collector Installation and Maintenance Guide
Figures

R450 Data Collector Installation and Maintenance Guide xv
Figure 62 – Verizon Provisioning via OTASP 70
Figure 63 – Verizon CDMA Connection Status after Provisioning 71
Figure 64 – Verizon Cell Connection Tab 71
Figure 65 – PPPStatus 72
Figure 66 – Ethernet Status LED 76
Figure 67 – Radio LEDs on Front Panel 76
Figure 68 – Modem Power Indicator 77
Figure 69 – Red and Black Leads 78
Figure 70 – Positive and Negative Pins 79
Figure 71 – CalAmp Modem with RSSI LED 80
Figure 72 – RF 450 MHz Antenna 97
Figure 73 – RF 450 MHz Antenna Cable and Trench 99
Figure 74 – RF 450 MHz Antenna to be Mounted 100
Figure 75 – RF 450 MHz Antenna Connection 101
Figure 76 – Antenna Connections 101
Figure 77 – Weatherizing the RF Antenna Connection 102
Figure 78 – Create a New Collector Window 105
Figure 79 – Collector Network Setting Tab 107
Figure 80 – Delete Confirmation Dialog Box 108
Figure 81 – Collector Search 109
Figure 82 – Collector Search Results 110
Figure 83 – Straight-Through Ethernet Cable 111
Figure 84 – RJ-45 Crossover Ethernet Cable 111
Figures

This page intentionally left blank.
xvi R450 Data Collector Installation and Maintenance Guide
Tables

Tables
Table 1 – GPRS Modem Parts List 12799-000 8
Table 2 – Wi-Fi Modem Parts List 12799-200 9
Table 3 – Ethernet Parts List 12799-300 9
Table 4 – CDMA Modem Parts List - 12799-010 (Verizon), 12799-020 (Sprint) 10
Table 5 – Recommended Tools and Materials 13
Table 6 – AC Wiring (120V AC) 24
Table 7 – Lights on the CPU Board 30
Table 8 – Installing a Wall Mount System 34
Table 9 – UPS Safety Checklist (Liste de vérification de sécurité de l’ASI) 47
Table 10 – Battery Safety Checklist 50
Table 11 – UPS LED Descriptions 62
Table 12 – UPS Troubleshooting 62
Table 13 – Neptune Part Numbers for Cable and Connectors 87
Table 14 – Connectors and Accessories 88
Table 15 – Power Measurement to Return Loss and VSWR Conversion Table -Part I 90
Table 16 – Power Measurement to Return Loss and VSWR Conversion Table -Part II 91
Table 17 – Coax Cable Loss Table 94
Table 18 – Recommended Tools and Materials 98
Table 19 – Collector Details 106
Table 20 – Collector Network Settings 107
Table 21 – Cable Color Code Table 112
R450 Data Collector Installation and Maintenance Guide xvii

This page intentionally left blank.
xviii R450 Data Collector Installation and Maintenance Guide
Tables
Other manuals for R450
1
This manual suits for next models
2
Table of contents
Other Neptune Technology Data Logger manuals


