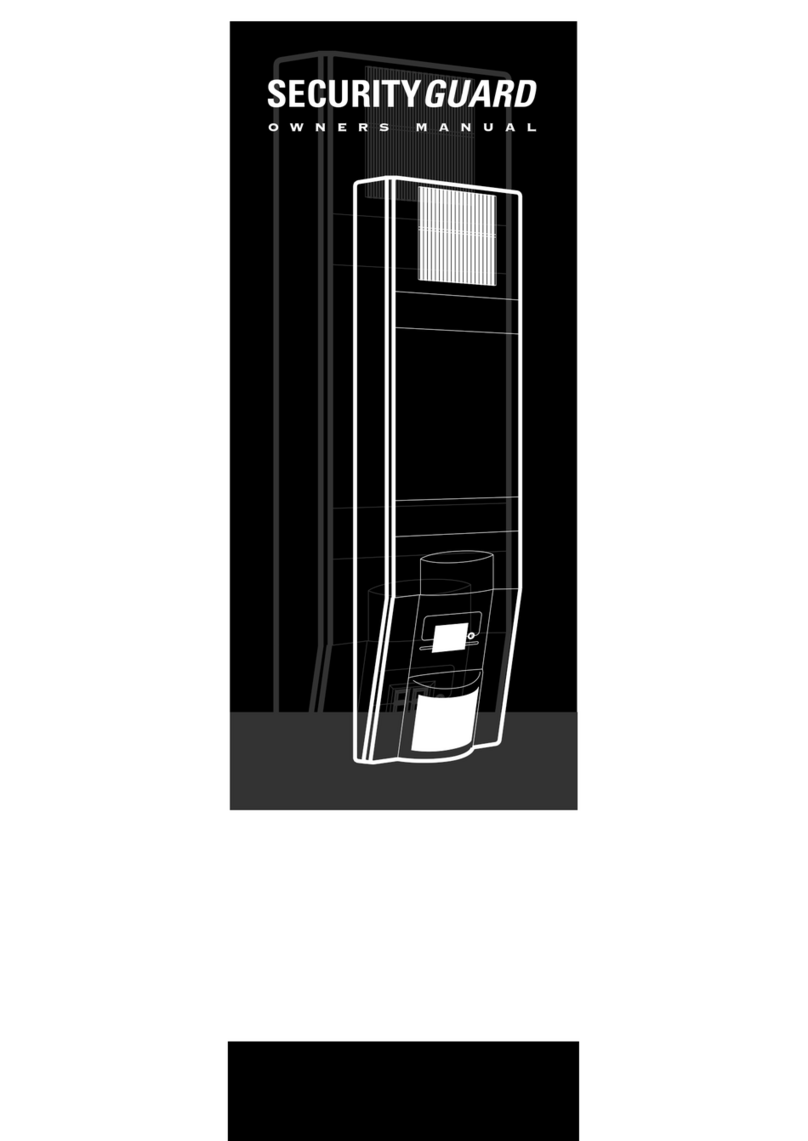
Ness Security Products Securityguard III Operating instructions

Doc ID. SG3PROG00103_03_2014.DOC
1
Securityguard III
Programming Guide
Please, Please Read Me

Doc ID. SG3PROG00103_03_2014.DOC
2
FEATURES
SGIII will be similar to SGII with Radio Dialler in format, installation and operation. It will include all the
features and functions of SGII as well as the following changes and additions:
•24 supervised and encrypted radio devices (minimum 1 key and 1 detector)
•backwards-compatible with existing non-supervised non-encrypted devices
•contemporary modernised case
•display with 6 characters with visibility comparable to existing display
•voice annunciation on SGIII unit (status, events, user instructions)
•second HOME mode
•variable volume of beeps and voice
•strobe light differentiation for arm and disarm
•doorbell
•fixed panic button (supervised)
•improved event memory (locally accessible)
•full up/downloadable
•two push-buttons on front of main unit providing volume control for voice & internal beeps
DEVICE CATEGORIES
There are two categories of devices:
1. Keys (devices operated by buttons)
User key
Medical key
Doorbell
Fixed Panic button
2. Detectors
PIR
Reed switch
DEVICE ALLOCATION
The allowable number of keys is 1-23, denoted as KEY 1-23.
The allowable number of detectors is 1-23, denoted as SENSOR 1-23.
The maximum allowable number of keys and detectors is 24, e.g. 4 keys + 20 detectors.
There are a total of 24 device slots. KEY 1 must be programmed first, with a radio key device.
SENSOR 1 is permanently allocated to the main unit integral PIR. The remaining slots can be
programmed with any combination of radio devices.

Doc ID. SG3PROG00103_03_2014.DOC
3
OPERATION
START UP
SecurityGuard restarts by either the key switch turning on and powering up the unit, or by a system
reset caused by possible electrical interference.
When the unit is restarted it briefly allows entry into PROGRAM mode (refer to section 0). Following
this, the unit enters the previous operational mode. If the unit was in ARMED, HOME, or HOME 2
mode, it will show the mode on the display for 30 seconds. During this period triggers from the main
PIR are ignored, allowing it time to settle. After this, the unit resumes normal operation in the mode
displayed. This process will occur silently, without the usual arming sounds.
USER MODES
The system can be in one of four user modes, DISARMED, HOME, HOME 2 and ARMED.
From the DISARMED mode, an ON press enters ARMED mode, a second ON press enters HOME
mode, and a third ON press enters HOME 2 mode (provided devices are programmed for these
modes), as detailed in the following sections.
ARMED
Press ON button once to ARM the system.
Display ARMED Display for exit delay duration
OK Light OFF
Voice “Armed” If V-ARM option enabled
Siren 1 chirp internal at start of
exit delay (if V-ARM option
disabled), and 1 chirp at end
of exit delay
1 chirp external (if enabled)
at start of exit delay
Strobe flash for 2 seconds
When the display extinguishes, the system is fully armed. An optional exit delay may be programmed
if desired.
HOME
Press ON button two times (less than 4 seconds apart) to enter HOME mode.
When display extinguishes system is armed in HOME mode. HOME mode may only be entered if
programmed and SecurityGuard is DISARMED.
Display HOME Display for exit delay duration
OK Light flash once every 2 seconds Indicates SecurityGuard is in HOME mode
Voice “Home” If V-ARM option enabled
Siren Internal: HOME arming tone If V-ARM option disabled
Strobe flash for 5 seconds

Doc ID. SG3PROG00103_03_2014.DOC
4

Doc ID. SG3PROG00103_03_2014.DOC
5
HOME 2
Press ON button three times (successive presses less than 4 seconds apart) to enter HOME 2 mode.
When display extinguishes system is armed in HOME 2 mode. HOME 2 mode may only be entered if
programmed and SecurityGuard is DISARMED.
Display HOME 2 Display for exit delay duration
OK Light double flash every 2
seconds Indicates SecurityGuard is in HOME 2 mode
Voice “Home two” If V-ARM option enabled
Siren Internal: HOME 2 arming
tone If V-ARM option disabled
Strobe flash for 5 seconds
DISARMED
Press OFF button once to DISARM or silence an alarm.
Display OFF Display for 5 seconds
OK Light flash once every 5 seconds Indicates SecurityGuard is functioning normally
Voice “Disarmed” If V-ARM option enabled
Siren 3 chirps internal
3 chirps external (if enabled,
and only if disarming from
ARMED mode)
If alarm has occurred, then disarming from ARM,
HOME, or HOME 2 modes gives chirps:
•Internal: if V-ARM option enabled then warning
message after chirps; if V-ARM option disabled
then rapid chirps for 5 seconds
•External: rapid chirps for 5 seconds even if
external chirps disabled
Strobe flash for 4 seconds Note: this is twice the flash interval of ARMED mode
for differentiation
An optional entry delay may be programmed if desired.
KEY TYPES
USER KEY
•3-button pendant key
•Program option KEY or DURESS
•Not supervised
•Disable Panic on Radio Key
MEDICAL KEY
•Pendant key
•Program option MEDIC
•Not supervised
FIXED PANIC BUTTON
•Fixed single button panic
•Program option KEY or DURESS
•Supervised

Doc ID. SG3PROG00103_03_2014.DOC
6

Doc ID. SG3PROG00103_03_2014.DOC
7
DOORBELL
•Fixed single button doorbell
•Program option BELL
•Not supervised
PANIC/DURESS OPERATION
Panic/duress alarms may be sent by either a
•User Key PANIC button (button delay)
•Fixed Panic Button (no button delay)
The panic alarm described above can be programmed as either:
•Panic Alarm - Internal and external sirens sound immediately and the strobe flashes. Panic alarm
reported on dialler if fitted. Press OFF to silence
•Duress Alarm - Panic alarm reported silently on dialler. Sirens and strobe are not activated
OK LIGHT
A visual indication of correct functioning of the unit shall be provided as a light on the front panel, with
the behaviour shown:
Mode Behaviour
DISARMED, ARMED, HOME, HOME 2
modes See section above for description
Battery charging from mains Inverse of behaviour above, i.e. light ON and flashes
OFF briefly (not PROGRAM mode). After 24 hour
charging period has expired, light reverts to normal
operation even if mains is still connected.
Main PIR trigger OK light turns on for a few seconds when PIR triggers
in:
1. PROGRAM mode when RANGE or PULSE
selected
2. DISARMED mode (after triggering in DISARM
mode, the main PIR is locked out for 4 minutes to
conserve the battery) similar to radio PIR’s
Reed switch Check mode programmed OK light turns on when device is selected in
PROGRAM mode and is a reed switch programmed
in Check mode.
FRONT PANEL PUSHBUTTONS
The font panel buttons allow the user to program the options shown below. Press the Left Button to
step through each option; press the Right Button to step through the various values for the selected
option (the last value selected becomes the new programmed value).
Selected options and values are annunciated as well as displayed. The display extinguishes after a
short period of inactivity.
VOLUME VOICE ANNUNCIATION & BEEP VOLUME (default = 3)
1-4 Volume level (1=quietest)
BELL DOORBELL SOUNDS (default = BELL 1)
BELL 1 “ding-dong”
BELL 2 “ding”
BELL 3 “fog horn”
BELVOL DOORBELL VOLUME (default = 3)
OFF Doorbell disabled
1-4 Volume level (1=quietest)

Doc ID. SG3PROG00103_03_2014.DOC
8

Doc ID. SG3PROG00103_03_2014.DOC
9
ALARMS
INTRUDER ALARMS
Following this type of alarm the internal and external sirens sound and strobe flashes. The siren will
turn off after the programmed siren time and the strobe will flash for 1 hour or 12 hours while mains
power is connected.
The OFF button cancels any alarm and puts the SecurityGuard into the DISARMED state.
When disarming after an alarm, the SecurityGuard will indicate an alarm has occurred. The strobe
flashes and siren will beep rapidly for 5 seconds (both internal and external, even if external chirps are
disabled).
This warning may indicate that an intruder is still present.
The source of the alarm is then displayed for 5 minutes. Intruder alarms are not indicated when the
system is in ARMED, HOME or HOME 2 modes.
A time stamp is appended to each of the following alarm messages displayed when displayed. For
example, if the alarm occurred within 24 hours, the time stamp is appended as: ... < 2 HRS < 15 MIN
< AGO; for events older than 24 hours: ... < 1 DAY < 13 HRS < AGO.
DISPLAY DESCRIPTION
ALARM <
SENSOR <
1
ALARM SecurityGuard integral detector
ALARM <
SENSOR <
2-23
ALARM from peripheral radio detector
TAMPER <
SIREN <
BOX
SIREN TAMPER
Tamper is excluded if unsealed when powered up.
SIREN < TAMPER < EXCLUD is flashed on the
status display and warning beeps sound to indicate
tamper is excluded. Arming and then Disarming the
system will clear this display and disable the tamper
function.
When not excluded, a Tamper activation will:
1. In ARMED mode, sound a full alarm
2. In HOME, HOME 2 or DISARMED modes, sound
a low-volume warning sound. The warning will
sound again for further Tamper
deactivation/reactivations
Tamper deactivation will cause an alarm restore,
however the Alarm log will only clear after an
Arm/Disarm cycle.
After Arm/Disarm, if the Tamper is still active, it will
remain in the Alarm log. If it is then deactivated, the
Alarm log will immediately clear.
TAMPER <
SENSOR <
2-23
Sensor has reported a tamper alarm.
Tamper activation will:
1. In ARMED mode, sound a full alarm
2. In HOME, HOME 2 or DISARMED modes, sound
a low-volume warning sound.
Tamper deactivation will cause an alarm restore and

Doc ID. SG3PROG00103_03_2014.DOC
10
re-arm for subsequent Tamper activations. The
Alarm log will clear only after an Arm/Disarm cycle,
whether or not Tamper deactivation has occurred.
PANIC <
KEY
(or BUTTON
or MEDIC) <
1-23
PANIC ALARM from key or fixed panic button or
medical key
On silencing a PANIC alarm (OFF button), the status
display indicates which key caused the alarm.
RADIO <
JAMMED Radio jamming signal detected.
RADIO <
TAMPER Radio intentional message substitution detected.
Event Log
Intruder alarm events are logged in memory and displayed with the time elapsed since the alarm
occurred.
In DISARMED mode, press OFF to step through the log. Once all logged alarms have been displayed,
pressing OFF will clear the display. Pressing OFF again will redisplay the first event in the log, etc.
To clear the log, enter ARMED, HOME or HOME 2 modes.
The alarm event log will store up to 5 events. If the log is full, logging a new event causes the oldest
event to be discarded. Events older than 100 days will be discarded.

Doc ID. SG3PROG00103_03_2014.DOC
11
SYSTEM ALARMS
System alarms are listed following, and are indicated by flashing the messages shown on the display
for 5 minutes. The siren also chirps for 3 seconds.
System alarms are not indicated when the system is in ARMED, HOME or HOME 2 modes.
See section 0 for details of corresponding voice messages. A time stamp is appended to each of the
following alarm messages when displayed (as shown is section 0).
DISPLAY DESCRIPTION
BATTRY <
KEY
(or BUTTON
or MEDIC
or BELL) <
1-23
LOW BATTERY key or fixed panic button or medical
key or doorbell
Indicates a low battery condition. Low battery alarms
occur when a detector or a key operates with a low
battery.
BATTRY <
SENSOR <
2-23
LOW BATTERY detector
Indicates a low battery condition. Low battery alarms
occur when a detector or a key operates with a low
battery.
FAIL <
SENSOR < 1-
23
1. Non-supervised detector (existing)
A detector has not operated for 20 ARM/OFF
cycles. The detector should be checked to
ensure it is operating correctly.
2. Supervised detector (new for SGIII)
A radio supervisory message has not been
received from this detector for 4 hours. The
detector should be checked to ensure it is
operating correctly
Note: This alarm is only active if the SUPERVISED
DETECTORS option is enabled. FIRE detectors are
not checked.
OPEN <
SENSOR <
2-23
REED SWITCH: open on ARMING
A reed switch detector programmed for Check mode
operation was unsealed when entering ARMED,
HOME or HOME 2 modes. The detector should be
checked to ensure that it has sealed. Sound Warning
tone on ARMING (at end of EXIT DELAY).
LOW <
MAIN <
BATTRY
LOW BATTERY SecurityGuard
The main unit battery is load-tested on SecurityGuard
every 24 hours and when the system is disarmed. A
low battery condition is cleared immediately when
mains power goes from off to on.
DIALER <
RADIO <
FAIL
DIALLER RADIO FAIL
Indicates SecurityGuard was not able to
communicate with the dialler over the radio link.
DIALER <
POWER <
FAIL
DIALLER MAINS FAIL
Indicates AC mains to Dialler is not connected or
power is off
DIALER <
BATTRY <
LOW
DIALLER LOW BATTERY
Indicates battery on Dialler is missing, low, or unable
to hold charge
DIALER < DIALLER CALL FAIL

Doc ID. SG3PROG00103_03_2014.DOC
12
CALL <
FAIL Indicates dialler was not able to successfully contact
the monitoring station.
DIALER <
LINE <
FAULT
DIALLER LINE FAULT
Indicates minimum telephone line DC voltage was not
detected for over 2 minutes.
Event Log
System alarm events are logged in memory.
In DISARMED mode, press OFF to step through the log. Once all logged alarms have been displayed,
pressing OFF will clear the display. Pressing OFF again will redisplay the first event in the log, etc.
Entries in the log will cleared only when the cause of the alarm has been rectified, or when power is
turned off using the key switch.
The alarm event log will store up to 5 events. If the log is full, logging a new event causes the oldest
event to be discarded. Events older than 100 days will be discarded.
ENTRY & EXIT DELAY
EXIT DELAY is the time between pressing the ON button to system ARMED, during which detector
activations are ignored. The siren will chirp once when the ON button is pressed to indicate EXIT
DELAY start and chirp once at exit delay end to indicate ARMED.
Warning tone at the end of EXIT DELAY indicate a reed switch is unsealed, displayed as specified.
ENTRY DELAY is the time between a detector activation to system DISARMED, during which detector
activations do not cause an alarm. During ENTRY DELAY the siren will chirp once a second. When
the OFF button is pressed the siren chirps 3 times to indicate DISARMED. If the OFF button is not
pressed within the ENTRY DELAY, the siren sounds and strobe flashes.

Doc ID. SG3PROG00103_03_2014.DOC
13
ABORT DELAY
When an alarm event occurs, the siren sounds when ENTRY DELAY expires. The alarm sent to
monitoring station only after ABORT DELAY expires. ABORT DELAY commences immediately after
ENTRY DELAY expires. This gives the user time to abort the sending of an accidental alarm by
pressing the OFF button within the ABORT DELAY period.
ABORT DELAY is a programmable option. If ABORT DELAY is programmed to 0, then an alarm will
be sent at the expiry of ENTRY DELAY, i.e. not user CANCEL can be sent. If the OFF button is
pressed before ABORT DELAY expires, a user CANCEL message will be sent. (CANCEL is a non-
actionable event for the monitoring station, but it makes the monitoring station aware that the system
had been briefly triggered before a user cancel.)
LOCKOUT
Alarm lockout inhibits multiple activation’s of the same alarm (excluding panic), i.e. the external siren
will not sound again until the OFF button is pressed (alarm cleared). The internal siren will always
sound if the option is OFF.
If the option is ON both the external and internal sirens will be locked out. Required by AS2201.1
RUNAWAY
Runaway limits the number of times an alarm from a particular device will be sent to the monitoring
station. After 3 alarms have been sent, no further alarms for that device will be sent to the central
station until the system is DISARMED and ARMED.
This feature prevents a large customer phone bill being incurred if, for example, a door protected by a
reed switch is left unlatched and swings open and shut many times. Runaway is permanently enabled.
PROGRAMMING
SGIII is programmed in a similar way to SGII. The main difference is in the way radio devices are
programmed in. SGIII uses a common “LEARN” mode to listen for programming messages from new
devices. The installer does not specify a slot number, instead the unit allocates the next available slot
when a device is accepted.
LEARNING NEW DEVICES
1. Using the key switch, turn SecurityGuard off then on.
2. The software revision number is displayed briefly.
3. If unit has no keys programmed, it will display LEARN / KEY 1 until a key is programmed,
otherwise the unit flashes LEARN and waits 10 seconds to receive a radio key message:
•If OFF is pressed on a programmed key, the unit enters PROGRAM mode, displaying the
first programmed key.
•If ON is pressed on a programmed key, the unit enters PROGRAM mode, flashing
READY and listening for a LEARN message from a new device (key or detector).
•If a LEARN message is received from an unprogrammed key, the unit will add the key to
the next available slot and display the new slot number, then allow the user to configure
the new key.
•If none of the above occur after 10 seconds, the unit enters OPERATE mode. This is only
the case if there is at least one radio key programmed in.

Doc ID. SG3PROG00103_03_2014.DOC
14
4. To cause a device to send a LEARN message:
Device Mode Learn Procedure
Unencrypted Press any button 3 times
Key Encrypted Hold down PANIC button for approx. 8 seconds
Unencrypted Trigger device
Sensor Encrypted Disconnect & reconnect battery
If the device is successfully programmed, SecurityGuard will give a BEEP, BEEP, BEEP-BEEP. The
unit will add the new device to the next available slot, display the new slot number, and allow the user
to configure the new device. If the key or device is already programmed an error BBRRRR sound will
occur.
This also applies if the method of programming an encrypted key or device is incorrect. eg. If you try
programming an encrypted key in by pressing the OFF button three times the error BBRRRR sound
will be heard.
Press OFF to return to LEARN.
Press ON to flash READY and learn another device, or press OFF to step through devices and
program options.
CONFIGURING DEVICES & OPTIONS
In PROGRAM mode, devices (programmed keys and detectors) and system options (e.g. EXIT
TIME) are displayed steady. The current programmed value for each of device/option is displayed
flashing when viewed. Various beeps (as per SGII) give audible feedback during the programming
process.
•Press OFF (on a programmed key) to step through the devices/options.
•Press ON to view the value for that option. The programmed value will be displayed (flashing).
Press the ON button to step through alternative values, which will be displayed steady.
•Press the PANIC button to store the displayed value (causing it to flash).
•Press OFF to step to next device/option.
PROGRAMMING NOTES
Program stepping requires a programmed key.
Each time a programming change is made, the new value will be flashing and is stored immediately in
non-volatile memory..
A programmed device can be erased by selecting ERASE. The display will then show LEARN, giving
the user the option of reprogramming a new device into this particular slot. This allows a faulty device
to be replaced while keeping the same slot number.
SecurityGuard will flash FULL if an attempt is made to program a device when no slot is available. It
will allow programmed devices to be viewed in sequence and erased if desired.
A key cannot be used to erase itself. A device cannot be programmed more than once. SecurityGuard
will give a long warning beep if either are attempted.
SecurityGuard will automatically exit PROGRAM mode after 10 minutes of inactivity.

Doc ID. SG3PROG00103_03_2014.DOC
15
RADIO DIALLER
Local Programming
1. Ensure Radio Dialler is powered up. Radio Dialler need only to be powered off and on if a different
Client Account Number is to be programmed into SGIII.
2. Power up SGIII and press OFF to enter PROGRAM mode.
3. To program Radio Dialler, the SGIII must have at least the PHONE1 Option set to a value other
than the default value of “-”.
4. Finish programming SGIII and exit PROGRAM mode. If PHONE1 has been programmed, then if
data transfer to Radio Dialler has not been successful within a short period of time, SGIII will
display a system alarm indicating radio link failure with the Dialler.
After SGIII has been operating continuously for 30 days, then in PROGRAM mode the Options
CLIENT, PHONE1, and PHONE2 will no longer appear and therefore cannot be changed locally. They
may be changed using the Up/download facility at any time, and local programming of them can be re-
enabled using Up/download.
Remote Programming
1. Ensure Radio Dialler is powered up. Radio Dialler does not need to be powered off and on.
2. Power up SGIII and press OFF to enter PROGRAM mode. Radio Dialler will now be ready to
answer incoming calls for the next 5 minutes. If the Dialler answers a call but does not verify within
30 seconds it will hang-up. Once a connection is established, the Dialler will unconditionally hang-
up after 5 minutes if a hang-up is not requested sooner by the remote end.
3. Once a connection is established, program the SGIII/Radio Dialler system as required.
4. SGIII will exit PROGRAM mode when the Up/down connection is terminated, or when the SGIII
PROGRAM mode timer expires, whichever occurs first. If PHONE1 has been programmed, then if
data transfer to Radio Dialler has not been successful within a short period, SGIII will raise a
system alarm indicating radio link failure with the Dialler.
Supervision
SGIII transmits supervision messages to Radio Dialler every hour. A system alarm is raised if the
Dialler does not acknowledge the message after the programmed number of hours (Option SUPVIS
value).
Alarms
SGIII places alarm events for transmission to the Radio Dialler on a queue. It transmits the next
message on the queue, and if no acknowledge is received from the Dialler, SGIII re-transmits the
message for a total of 10 attempts. If still unsuccessful, SGIII ceases transmitting until a new event
occurs and raises a system alarm.
The oldest messages on the queue is sent first. If the queue is full (10 messages), a new message will
overwrite the oldest message.
Dialler Status
Dialler status in sent to SGIII when a condition changes, and SGIII raises a system as required.

Doc ID. SG3PROG00103_03_2014.DOC
16
PROGRAMMING OPTIONS:
KEY 1-23 KEY 1-23 (default = KEY)
KEY USER KEY Alarm system user key
DURESS DURESS User key with PANIC button programmed for “DURESS”
operation
MEDIC MEDICAL Medical help key (behaves like Duress alarm)
BELL DOORBELL Doorbell
NO PAN NO PANIC Stops the Panic button from operating
ERASE ERASE Remove previously programmed key
SENS 1 DETECTOR 1 (main unit detector, permanently allocated; default = ALARM)
ALARM ALARM Active when ARMED, inactive when DISARMED
HOME HOME Active when ARMED or HOME modes
HOME 2 HOME 2 Active when ARMED, HOME or HOME 2 modes
FIRE FIRE 24 hour alarm, always active
CHIME CHIME Chime* when DISARMED, inactive when ARMED, HOME
or HOME 2 modes
ACHIME ALARM/CHIME Alarm when ARMED, chime** when DISARMED, inactive
when in HOME or HOME 2 modes
HCHIME HOME/CHIME Alarm when ARMED mode, chime** when in HOME or
HOME 2 modes, inactive when DISARMED
EXCLUD EXCLUDE Detector is excluded
(*) Chime tone
(**) Warning tone
SENS 2-23 DETECTOR 2-23 (default = ALARM)
To learn a new detector:
Display shows LEARN
Non-encrypted restoring detector (e.g. reed switch):
•As per existing (close reed for Check mode, open reed for non-Check mode
operation. OK light turns on when Check mode operation successfully
programmed)
Non-encrypted non-restoring detector (e.g. PIR):
•Activate detector 3 times. SecurityGuard beeps each activation and gives 2 beeps
when code accepted and flashes SENS 2-23
Encrypted restoring detector (e.g. reed switch):
•Power the detector off then on by momentarily disconnecting the battery with
close reed for Check mode, open reed for non-Check mode operation. OK light
turns on when Check mode operation successfully programmed. SecurityGuard
gives 2 beeps when code accepted and flashes SENS 2-23
Encrypted non-restoring detector:
•Power the detector off then on by momentarily disconnecting the battery.
SecurityGuard gives 2 beeps when code accepted and flashes SENS 2-23
ALARM ALARM Active when ARMED, inactive when DISARMED
HOME HOME Active when ARMED or HOME modes
HOME 2 HOME 2 Active when ARMED, HOME or HOME 2 modes
FIRE FIRE 24 hour alarm, always active.
CHIME CHIME Chime* when DISARMED, inactive when ARMED, HOME
or HOME 2 modes
ACHIME ALARM/CHIME Alarm when ARMED, chime** when DISARMED, inactive
when in HOME or HOME 2 modes
HCHIME HOME/CHIME Alarm when ARMED mode, chime** when in HOME or
HOME 2 modes, inactive when DISARMED
ERASE ERASE Detector is erased

Doc ID. SG3PROG00103_03_2014.DOC
17
(*) Chime tone
(**) Warning tone

Doc ID. SG3PROG00103_03_2014.DOC
18
RANGEDETECTOR RANGE (default = LOW)
LOW Low range 8m
HIGH High range 14m
Note: OK light turns on each time PIR is activated.
PULSE DETECTOR PULSE COUNT (default = 3)
1-4 Number of times (1-4) a detection beam needs to crossed before an alarm occurs
Note: OK light turns on each time PIR is activated.
SIGNAL SIGNAL CHECK: Check signal strength of radio detectors and keys
SecurityGuard registers the first device received and displays the signal strength (1-9), and
beeps a corresponding number of times.
•Press ON to activate Signal Check display shows “SEND DEVICE”
•For a key, press PANIC; for a detector, activate the detector
•Listen to beeps, view display
•Press OFF to exit Signal Check
•Press ON to re-activate Signal Check
-- No detectors received
SENS 2-23 Detector x received
KEY 1-23 Key x received
1-9 Signal strength
Note: OK light indicates main detector trigger
RADJAM RADIO JAMMING (default = OFF)
In the event of a SecurityGuard sensing a continuous (>30 secs) source of Radio Frequency
Interference (RFI), it can generate a CHIME alarm in DISARMED or HOME or HOME 2
modes, and a full alarm in ARMED modes.
ON Enabled
OFF Disabled
RADSUB RADIO INTENTIONAL MESSAGE SUBSTITUTION (default = OFF)
In the event of a SecurityGuard sensing a radio message with a recognised device ID but
failing decryption, it can generate a CHIME alarm in DISARMED or HOME or HOME 2 modes,
and a full alarm in ARMED modes.
ON Enabled
OFF Disabled

Doc ID. SG3PROG00103_03_2014.DOC
19
SUPVIS SUPERVISION STATUS (default = 8)
Non-supervised devices: If enabled, a system alarm will occur if the detector has not
triggered for 20 ARM/DISARM operations. The count starts after the device’s first
transmission following PROGRAM mode exit. If the warning is ignored, the display will come
back until the detector transmits and does not trigger again for another 20 ARM/DISARM
operations.
Supervised devices: If enabled, a system alarm will occur if a valid supervisory message has
not been received from the detector within the period set in this option. Supervised devices
send a poll message every hour (with a random factor of +- 2min to eliminate collisions) If the
main system does not receive a signal for Xconsecutive hours then a warning will be
displayed.
1,4,8,16,2
4 Supervision alarm occurs if no supervisory message is received within set period
(in hours)
OFF Supervision alarms disabled
LOKOUT DETECTOR LOCKOUT (default = OFF)
If DETECTOR LOCKOUT is enabled, all devices will only sound the external siren the first
time they alarm. Any subsequent alarms from these detectors will only sound the internal siren
and flash the strobe.
ON Enabled
OFF Disabled
ENTRY ENTRY DELAY TIME (default = 10)
5-30 Time in seconds; values in 5 second steps
EXIT EXIT DELAY TIME (default = 5)
5-60 Time in seconds; values in 5 second steps
SIREN SIREN RESET TIME (default = 5)
1, 2, 5 Reset time in minutes
CHIRPS EXTERNAL SIREN CHIRPS (default = ON)
External siren chirps on ARM and DISARM. External siren does chirp when activating or
deactivating HOME or HOME 2 modes, even when this option is enabled.
ON Enabled
OFF Disabled

Doc ID. SG3PROG00103_03_2014.DOC
20
V-ARM VOICE ANNUNCIATION ARM/DISARM (default = ON)
OFF Armed and disarmed events not annunciated
ON Armed and disarmed events annunciated
V-ALRM VOICE ANNUNCIATION ALARM (default = ON)
OFF Alarm events not annunciated
ON Alarm events annunciated
V-BATT VOICE ANNUNCIATION LOW BATTERY (default = ON)
OFF Low battery events not annunciated
ON Low battery events annunciated
V-FALTVOICE ANNUNCIATION FAULT (default = ON)
OFF System faults not annunciated
ON System faults annunciated
V-FAI VOICE ANNUNCIATION FAI (default = OFF)
OFF Sales presentation not annunciated
ON Sales presentation annunciated
OPEN OPEN/CLOSE REPORTS (default = OFF)
Open/close reports are messages sent to the monitoring station each time the system is
ARMED or DISARMED, including which user (user ID) operated the system.
ON Enabled
OFF Disabled
LOWBAT LOW BATTERY REPORTING (default = NONE)
NONE No low battery reporting
MAIN Report low main battery
SENSOR Report low detector batteries
ALL Report low main and detector batteries
CLIENT CLIENT ACCOUNT NUMBER (default = 0000)
After a period of 30 days following PROGRAM mode EXIT, this option can only be
reprogrammed via remote Up/download (option hidden in local PROGRAM mode).
•Press ON to view programmed client account number. The first digit will flash.
•Press ON to step through values for the first digit (0-9).
•Press PANIC to store the digit. The second digit will now flash.
•Repeat for remaining digits.
•Press PANIC to store last digit, and first digit will flash.
•Repeat programming procedure to make corrections, or press OFF to return to top level
0000- Client Account number
Table of contents
Other Ness Security Products Security System manuals
Popular Security System manuals by other brands
PhoneWatch
PhoneWatch Smart Alarm user manual

First Alert
First Alert FA 270 instruction manual
Honeywell
Honeywell Gamewell-FCI Velociti MS-7AF quick start guide
Ropam elektronik
Ropam elektronik OptimaGSM Series installation guide
Elmdene
Elmdene ELM-PA-G3 series user guide
Pima Wireless
Pima Wireless AlarmView user guide

