Netgate SG-3100 User manual

Security Gateway Manual
SG-3100
© Copyright 2022 Rubicon Communications LLC
Jul 22, 2022

Security Gateway Manual SG-3100
This Quick Start Guide covers the first time connection procedures for the Netgate® 3100 Firewall Appliance and will
provide the information needed to keep the appliance up and running.
Tip: Before getting started, a good practice is to download the PDF version of the Product Manual and the PDF
version of the pfSense Documentation in case Internet access is not available during setup.
© Copyright 2022 Rubicon Communications LLC 1

CHAPTER
ONE
OUT OF THE BOX
1.1 Getting Started
The basic firewall configuration begins with connecting the Netgate® appliance to the Internet. The Netgate appliance
should be unplugged at this time.
Connect one end of an Ethernet cable to the WAN port (shown in the Input and Output Ports section) of the Netgate
appliance. The other end of the same cable should be inserted into a LAN port on the ISP CPE device, such as a cable
or fiber modem. If the CPE device provided by the ISP has multiple LAN ports, any LAN port should work in most
circumstances.
Next, connect one end of a second Ethernet cable to the LAN port (shown in the Input and Output Ports section) of
the Netgate appliance. Connect the other end to the computer.
2

Security Gateway Manual SG-3100
1.1.1 What next?
To connect to the GUI and configure the firewall in a browser, continue on to Initial Configuration.
To connect to the console and make adjustments before connecting to the GUI, see Connecting to the Console Port.
Warning: The default IP Address on the LAN subnet on the Netgate firewall is 192.168.1.1/24. The same
subnet cannot be used on both WAN and LAN, so if the default IP address on the ISP-supplied modem is also
192.168.1.1/24,disconnect the WAN interface until the LAN interface on the firewall has been renumbered
to a different subnet (like 192.168.2.1/24) to avoid an IP Address conflict.
To change an interface IP address, choose option 2 from the Console Menu and walk through the steps to change
it, or from the GUI, go through the Setup Wizard (opens at first boot, also found at System > Setup Wizard) and
change the IP address on Step 5. Complete the Wizard and save the changes.
© Copyright 2022 Rubicon Communications LLC 3

Security Gateway Manual SG-3100
1.2 Initial Configuration
Plug the power cable into the power port (shown in the Input and Output Ports section) to turn on the Netgate®
Firewall. Allow 4 or 5 minutes to boot up completely.
Warning: If the CPE on WAN (e.g. DSL or Cable Modem) has a default IP Address of 192.168.1.1,
disconnect the Ethernet cable from the WAN port on the Netgate 3100 Security Gateway before proceeding.
Change the default LAN IP Address of the device during a later step in the configuration to avoid having conflicting
subnets on the WAN and LAN.
1. From the computer, log into the web interface
Open a web browser (Google Chrome in this example) and enter 192.168.1.1 in the address bar. Press
Enter.
Fig. 1: Enter the Default LAN IP Address
2. A warning message may appear. If this message or similar message is encountered, it is safe to proceed. Click
the Advanced Button and then click Proceed to 192.168.1.1 (unsafe) to continue.
Fig. 2: Click Advanced and then Proceed to 192.168.1.1 (unsafe)
3. At the Sign In page, enter the default pfSense®Plus username and password and click Next.
• Default Username: admin
© Copyright 2022 Rubicon Communications LLC 4

Security Gateway Manual SG-3100
• Default Password: pfsense
1.2.1 The Setup Wizard
The following steps will step through the Setup Wizard for the initial configuration of the firewall.
Note: Ignore the warning to reset the ‘admin’ account password. One of the steps in the Setup Wizard is to change
the default password.
1. Click Next to start the Setup Wizard.
Fig. 3: Click Next
2. Click Next after reading the information on Netgate Global Support.
3. On the General Information page, use the following as a guide to configure the firewall.
Hostname Any desired name can be entered. For the purposes of this guide, the default hostname
pfsense is used.
Domain The default home.arpa is used for the purposes of this tutorial.
DNS Servers For purposes of this setup guide, use the Google public DNS servers (8.8.8.8 and
8.8.4.4).
4. Use the following information for the Time Server Information page.
Time Server Hostname Use the default time server address.
Timezone Select the time zone for the location of the firewall. For this guide, the Timezone will be
set to America/Chicago for US Central time.
5. The WAN interface is the Public IP address the network will use to communicate with the Internet. Use the
following information for the WAN configuration page.
DHCP is the default and is the most common type of interface for home cable modems.
Default settings for the other items on this page should be acceptable for normal home users.
© Copyright 2022 Rubicon Communications LLC 5

Security Gateway Manual SG-3100
Fig. 4: Type in the DNS Server information and Click Next
Fig. 5: Change the Timezone and Click Next
© Copyright 2022 Rubicon Communications LLC 6

Security Gateway Manual SG-3100
Fig. 6: Default Settings Should be Acceptable. Click Next
6. Configuring LAN IP Address & Subnet Mask. The default LAN IP address of 192.168.1.1 and subnet mask
of 24 is usually sufficient.
Tip: If the CPE on WAN (e.g. DSL or Cable Modem) has a default IP Address of 192.168.1.1, disconnect
the Ethernet cable from the WAN port on the Netgate 3100 Security Gateway before proceeding.
Change the default LAN IP Address of the device during a later step in the configuration to avoid having
conflicting subnets on the WAN and LAN.
7. Change the Admin Password. Enter the same password in both fields.
8. Click Reload to save the configuration.
9. After a few seconds, a message will indicate the Setup Wizard has completed. To proceed to the pfSense®Plus
dashboard, click Finish.
10. A final notification screen will appear with the Copyright and Trademark Notices. Read and click Accept
to continue to the dashboard.
If the Ethernet cable was unplugged at the beginning of this configuration, reconnect it to the WAN port now.
This completes the basic configuration for the Netgate appliance.
© Copyright 2022 Rubicon Communications LLC 7

Security Gateway Manual SG-3100
Fig. 7: Read and Click Accept
© Copyright 2022 Rubicon Communications LLC 8

Security Gateway Manual SG-3100
1.3 pfSense Plus Software Overview
This page provides an overview of the pfSense®Plus dashboard and navigation. It also provides information on how to
perform frequent tasks such as backing up the pfSense®Plus software and connecting to the Netgate firewall console.
1.3.1 The Dashboard
pfSense®Plus software is highly configurable, all of which can be done through the dashboard. This orientation will
help to navigate and further configure the firewall.
Fig. 8: The pfSense®Plus Dashboard
Section 1 Important system information such as the model, Serial Number, and Netgate Device ID for this Netgate
firewall.
Section 2 Identifies what version of pfSense®Plus software is installed, and if an update is available.
Section 3 Describes Netgate Service and Support.
Section 4 Shows the various menu headings. Each menu heading has drop-down options for a wide range of config-
uration choices.
© Copyright 2022 Rubicon Communications LLC 9

Security Gateway Manual SG-3100
1.3.2 Re-running the Setup Wizard
To re-run the Setup Wizard, navigate to System > Setup Wizard.
Fig. 9: Re-run the Setup Wizard
1.3.3 Backup and Restore
It is important to backup the firewall configuration prior to updating or making any configuration changes. From the
menu at the top of the page, browse to Diagnostics > Backup/Restore.
Click Download configuration as XML and save a copy of the firewall configuration to the computer con-
nected to the Netgate firewall.
This backup (or any backup) can be restored from the same screen by choosing the backed up file under Restore
Configuration.
Note: Auto Config Backup is a built-in service located at Services > Auto Config Backup. This service will save
up to 100 encrypted backup files automatically, any time a change to the configuration has been made. Visit the Auto
Config Backup page for more information.
© Copyright 2022 Rubicon Communications LLC 10

Security Gateway Manual SG-3100
Fig. 10: Backup & Restore
Fig. 11: Click Download configuration as XML
© Copyright 2022 Rubicon Communications LLC 11

Security Gateway Manual SG-3100
1.3.4 Connecting to the Console
There are times when accessing the console is required. Perhaps GUI console access has been locked out, or the
password has been lost or forgotten.
See also:
Connecting to the Console Port. Cable is required.
Tip: To learn more about getting the most out of a Netgate appliance, sign up for a pfSense Plus Software Training
course or browse the extensive Resource Library.
1.4 Input and Output Ports
1.4.1 Rear Side
Fig. 12: Rear view of the Netgate 3100 Firewall Appliance
The items in this image are described by entries in Routed Ethernet,Switched Ethernet, and Other Ports.
Routed Ethernet
Interface Name Port Name Port Type
WAN mvneta2 RJ-45
OPT1 mvneta0 RJ-45
Table 1: RJ-45 LEDs Configuration
LED Pattern Description
Left LED only green Flashes with 1Gb traffic, solid with link.
Both LEDs green Both flash with 100Mb traffic, solid with link.
Right LED only green Flashes with 10Mb traffic, solid with link.
© Copyright 2022 Rubicon Communications LLC 12

Security Gateway Manual SG-3100
Switched Ethernet
Interface Name Port Name Port Type
LAN1 mvneta1 RJ-45
LAN2 mvneta1 RJ-45
LAN3 mvneta1 RJ-45
LAN4 mvneta1 RJ-45
The four LAN Ethernet ports are switched ports. By default all of these ports as a single switch uplinked to the LAN
interface on the firewall.
Note: For more details on how the switch operates, see Switch Overview.
For instructions on how to configure the switch see Configuring the Switch Ports.
Table 2: RJ-45 LEDs Configuration
LED Pattern Description
Both LEDs green Left Flashes with 1 Gb traffic, solid with link.
Left LED only green Left flashes with 100 Mb traffic, solid with link.
Right LED only green Left Flashes with 10 Mb traffic, solid with link.
Note: Prior to pfSense® software version 2.4.3, the switched Ethernet ports on the SG-3100 did not support auto
MDI-X and required crossover cable unless the client-side connection supported auto MDI-X. This was resolved with
2.4.3 and later versions and a crossover cable is no longer required.
Warning: The LAN ports do not support the Spanning Tree Protocol (STP). Two or more ports connected to
another Layer 2 switch, or connected to 2 or more different interconnected switches, could create a flooding loop
between the switches. This can cause the router to stop functioning until the loop is resolved.
Other Ports
1. Power
• 12VDC 3.33A with threaded locking connector
• Power Consumption 5W (idle)
2. Recessed Reset Button (performs a hard reset, immediately turning the system off)
3. USB 3.0 Port
4. Micro SIM
5. Mini-USB Serial Console
Warning: A hard reset of the system could cause data corruption and should be avoided. Halt or reboot the
system through the console menu or the GUI to avoid data corruption.
© Copyright 2022 Rubicon Communications LLC 13

Security Gateway Manual SG-3100
USB Ports
USB ports on the device can be used for a variety of purposes.
The primary use for the USB ports is to install or reinstall the operating system on the device. Beyond that, there
are numerous USB devices which can expand the base functionality of the hardware, including some supported by
add-on packages. For example, UPS/Battery Backups, Cellular modems, GPS units, and storage devices. Though the
operating system also supports wired and wireless network devices, these are not ideal and should be avoided.
1.4.2 Front Side
Fig. 13: Front view of the Netgate 3100 Firewall Appliance
LED Patterns
Description LED Pattern
Boot in Process Circle, then square, then diamond all rapidly flash blue
Boot Completed/Ready Diamond slowly flashes blue
Upgrade Available Square slowly flashes orange
Upgrade in Progress Square slowly flashes orange
© Copyright 2022 Rubicon Communications LLC 14

Security Gateway Manual SG-3100
1.5 Hardware Specifications
© Copyright 2022 Rubicon Communications LLC 15

Security Gateway Manual SG-3100
Category Description
CPU
ARM v7 Cortex-A9 @ 1.6 GHz with NEON SIMD
and FPU
CPU Cores
Dual Core
Networking
Two 1 Gigabit Ethernet Ports,
configured as dual WAN or one WAN one LAN
plus four-port 1 Gbps Marvell 88E6141 switch,
uplinked at 2.5 Gbps to the third port on the SoC
for LAN.
Storage
8 GB eMMC Flash onboard,
upgradable to 32 GB M.2 SATA SSD
Memory
2 GB DDR4L
Expansion
2x M.2 ‘B’ key sockets (SSD, LTE)
1x M.2 ‘E’ key socket (2230 form factor) for WiFi /
Bluetooth
1x miniPCIe (WiFi)
microSIM
Console Port
MiniUSB (console cable included)
USB Ports
1x 3.0 port
LED
3 user-controllable full-color RGB LEDs
Enclosure
Desktop 1.56” tall x 7” deep x 8” wide
Form Factor
Standard mini-ITX 170mm x 170mm
Cooling
Passive (no fan)
Power
External ITE P/S AC/DC 100-240V, 50-60 Hz, 12V
3.33A,
threaded barrel connector
AC Inlet: IEC320-C14 (3 PIN)
One US, UK, EU or ANZ power cord included
US Power Cord: NEMA 5-15P to IEC320-C13
UK Power Cord: BS 1363 to IEC320-C13
EU Power Cord: CEE7/16 to IEC320-C13
ANZ Power Cord: AS 3112 to IEC320-C13
Environmental
32°F (0°C) to 149°F (65°C)
Certifications
FCC, CE, RoHS, UL, IEC-60950
© Copyright 2022 Rubicon Communications LLC 16

Security Gateway Manual SG-3100
1.6 Safety and Legal
1.6.1 Safety Notices
1. Read, follow, and keep these instructions.
2. Heed all warnings.
3. Only use attachments/accessories specified by the manufacturer.
Warning: Do not use this product in location that can be submerged by water.
Warning: Do not use this product during an electrical storm to avoid electrical shock.
1.6.2 Electrical Safety Information
1. Compliance is required with respect to voltage, frequency, and current requirements indicated on the manu-
facturer’s label. Connection to a different power source than those specified may result in improper operation,
damage to the equipment or pose a fire hazard if the limitations are not followed.
2. There are no operator serviceable parts inside this equipment. Service should be provided only by a qualified
service technician.
3. This equipment is provided with a detachable power cord which has an integral safety ground wire intended for
connection to a grounded safety outlet.
a) Do not substitute the power cord with one that is not the provided approved type. If a 3 prong plug is
provided, never use an adapter plug to connect to a 2-wire outlet as this will defeat the continuity of the
grounding wire.
b) The equipment requires the use of the ground wire as a part of the safety certification, modification or
misuse can provide a shock hazard that can result in serious injury or death.
c) Contact a qualified electrician or the manufacturer if there are questions about the installation prior to
connecting the equipment.
d) Protective grounding/earthing is provided by Listed AC adapter. Building installation shall provide appro-
priate short-circuit backup protection.
e) Protective bonding must be installed in accordance with local national wiring rules and regulations.
1.6.3 FCC Compliance
Changes or modifications not expressly approved by the party responsible for compliance could void the user’s au-
thority to operate the equipment. This device complies with Part 15 of the FCC Rules. Operation is subject to the
following two conditions:
1. This device may not cause harmful interference, and
2. This device must accept any interference received, including interference that may cause undesired operation.
© Copyright 2022 Rubicon Communications LLC 17

Security Gateway Manual SG-3100
Note: This equipment has been tested and found to comply with the limits for a Class B digital device, pursuant
to part 15 of the FCC Rules. These limits are designed to provide reasonable protection against harmful interference
when the equipment is operated in a residential environment.
1.6.4 Industry Canada
This Class B digital apparatus complies with Canadian ICES-3(B). Cet appareil numérique de la classe B est conforme
à la norme NMB-3(B) Canada.
1.6.5 Australia and New Zealand
This is a AMC Compliance level 2 product. This product is suitable for domestic environments.
1.6.6 CE Marking
CE marking on this product represents the product is in compliance with all directives that are applicable to it.
1.6.7 RoHS/WEEE Compliance Statement
English
European Directive 2002/96/EC requires that the equipment bearing this symbol on the product and/or its packaging
must not be disposed of with unsorted municipal waste. The symbol indicates that this product should be disposed
of separately from regular household waste streams. It is your responsibility to dispose of this and other electric and
electronic equipment via designated collection facilities appointed by the government or local authorities. Correct
disposal and recycling will help prevent potential negative consequences to the environment and human health. For
more detailed information about the disposal of your old equipment, please contact your local authorities, waste
disposal service, or the shop where you purchased the product.
Deutsch
Die Europäische Richtlinie 2002/96/EC verlangt, dass technische Ausrüstung, die direkt am Gerät und/oder an der
Verpackung mit diesem Symbol versehen ist, nicht zusammen mit unsortiertem Gemeindeabfall entsorgt werden darf.
Das Symbol weist darauf hin, dass das Produkt von regulärem Haushaltmüll getrennt entsorgt werden sollte. Es liegt in
Ihrer Verantwortung, dieses Gerät und andere elektrische und elektronische Geräte über die dafür zuständigen und von
der Regierung oder örtlichen Behörden dazu bestimmten Sammelstellen zu entsorgen. Ordnungsgemäßes Entsorgen
und Recyceln trägt dazu bei, potentielle negative Folgen für Umwelt und die menschliche Gesundheit zu vermeiden.
Wenn Sie weitere Informationen zur Entsorgung Ihrer Altgeräte benötigen, wenden Sie sich bitte an die örtlichen
Behörden oder städtischen Entsorgungsdienste oder an den Händler, bei dem Sie das Produkt erworben haben.
© Copyright 2022 Rubicon Communications LLC 18
Other manuals for SG-3100
2
Other Netgate Gateway manuals
Netgate
Netgate FXS Series User manual
Netgate
Netgate SG-3100 User manual
Netgate
Netgate Netgate-2100 User manual
Netgate
Netgate SG-2100 User manual
Netgate
Netgate SG-1100 User manual
Netgate
Netgate XG-7100-1U User manual
Netgate
Netgate Netgate-4100 User manual
Netgate
Netgate SG-5100 User manual
Netgate
Netgate SG-4860 User manual
Netgate
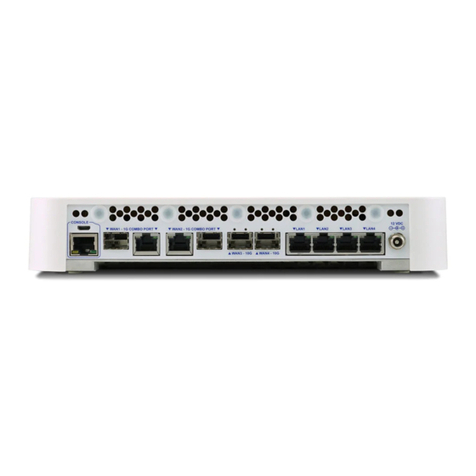
Netgate Netgate-6100 User manual


