manuals.online logo
Brands
  1. Home
  2. •
  3. Brands
  4. •
  5. NETGEAR
  6. •
  7. Adapter
  8. •
  9. NETGEAR PA101 User manual

NETGEAR PA101 User manual

PC*
Phone line behind the wall
RJ-11
connectors
PC with network
card installed
Telephone
(optional)
PA101 Phoneline10X USB adapter
Cable/ADSL
modem
*PC with FA310 Ethernet PCI card installed to interface
with the Cable or ADSL modem
START HERE
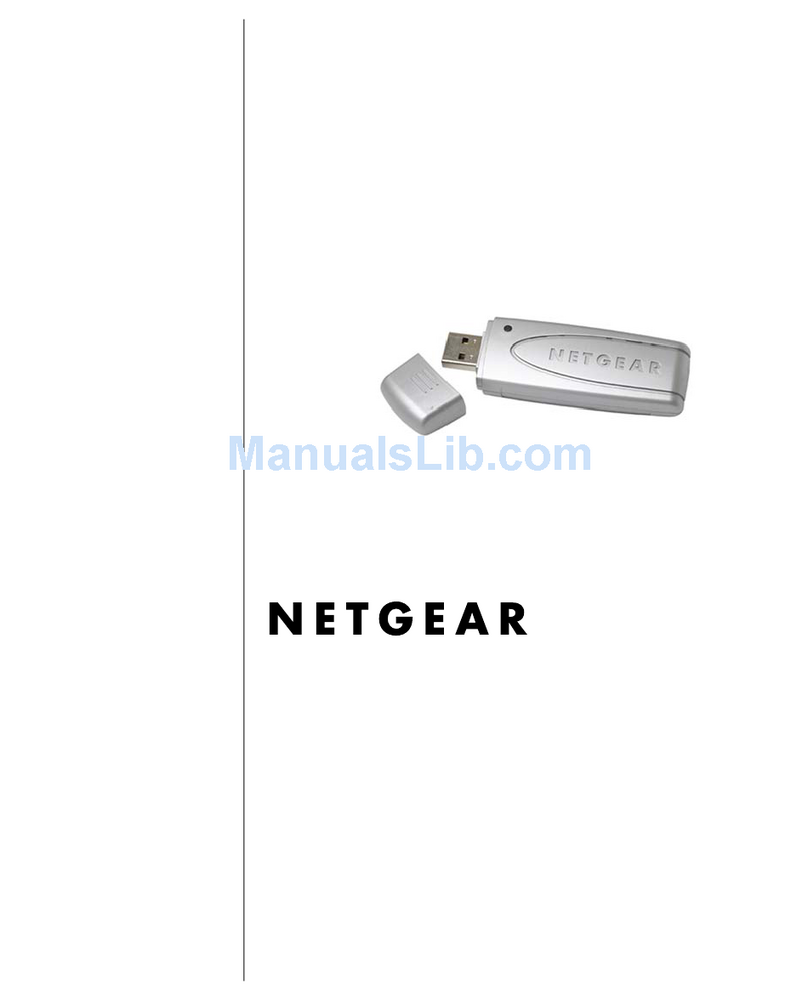
This guide provides instructions to install the Model PA101
Phoneline10X USB Adapter,using Windows®98.
The following six easy steps are provided in this guide for installing
your Phoneline10X USB Adapter:
1. Verify Package Contents
2. Install the Model PA101 Phoneline10X USB Adapter
3. Connect the Telephone Cables
4. Install the Network Driver
5. Install the FirstGear Software
6. Access the Network Printer
As a final step,be sure to register your NETGEAR™product at the
www.NETGEAR.com address.
VERIFY PACKAGE CONTENTS
Unpack the package contents and verify that you have the following:
Verify PC Requirements
The instructions given in this guide are for using the Phoneline10X
USB Adapter in a PC that has Microsoft®Windows 98.
INSTALL THE ADAPTER
To install the Phoneline10X USB Adapter:
1. Insert the Phoneline10X USB Adapter into the USB
(universal serial bus) as shown in the illustration.
Some PCs have two USB ports.The Phoneline10X USB
Adapter can be inserted into either port.
2. Turn on power to the PC,if you have chosen to install the
adapter with the power turned off.
CONNECT THE TELEPHONE CABLES
Using the telephone cable provided in the NETGEAR package,
connect one end of the telephone cable to the port labeled
“WALL”on the adapter and the other end of the cable to an
available wall jack,as illustrated above.
Using the cable shipped with your telephone or modem, connect
that cable to the port labeled “PHONE”on the adapter.
For External Modem
If you are using an external analog modem to connect to the
Internet,refer to the following illustration that shows the connec-
tions for the wall jack,Phoneline10X USB Adapter,external
modem, and phone.Note that the captions on the USB adapter,
and modem direct you to the outlets where you connect
the cables.
For Internal Modem
The illustration below depicts the configuration with an internal
modem and shows a closeup of the connections for the wall jack,
modem adapter, Phoneline10X USB Adapter, and phone.Note that
the caption on the modem adapter and USB adapter direct you to
the outlets where you connect the cable from the wall jack and the
cable that connects to the phone.
Note: For optimal performance,the Phoneline10X USB
Adapter should be plugged directly into a wall jack, and the
modem should be plugged directly into the USB adapter.
For Cable or ADSL Modem
If you are using a cable or ADSL modem to connect to the Internet,
refer to the following illustration that shows the connections for
the wall jack, Phoneline 10X USB Adapter, and the cable/ADSL
modem. Note the captions on the USB adapter direct you to the
outlets where you connect the cables.
INSTALLTHE NETWORK DRIVER
This guide provides instructions for installing theWindows
Network Driver.The steps given are for users ofWindows 98.
However, because all versions ofWindows 98 might not respond
the same,windows that are different from those shown in these
instructions might open but prompt you for the same information,
or windows might open in a different order than shown in these
instructions.
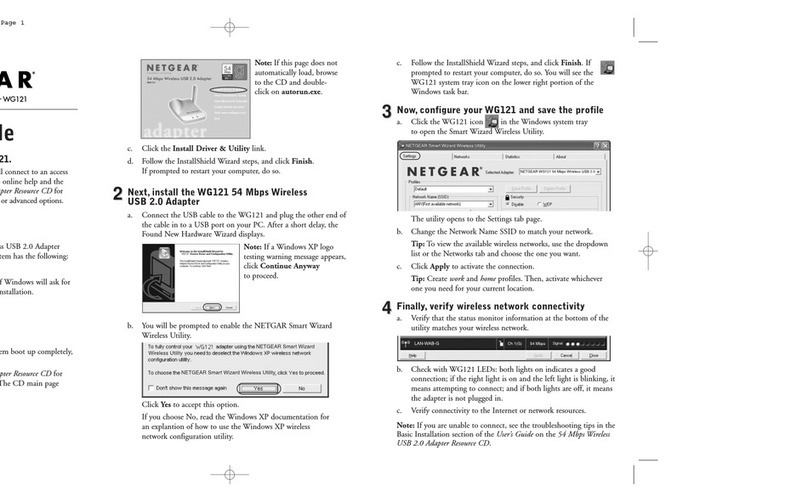
Note:You must install the USB adapter before installing
the network driver.You need to have the Windows 98 CD and
the NETGEAR Phoneline10X Resource CD ready to use in
the installation process.
If you have not yet named your PC and your network,before you
proceed with the installation steps,decide on a name for your
network and for each PC.You will be using these names in the
section,“Install the FirstGear Software.”
Note:If the Insert CD window opens and the “Please insert
the CD labeled Windows”message appears at any time during
the installation process,insert the Windows CD and click
OK.Then proceed with the following steps.
To install the network driver:
1. Turn on the power to the computer to startWindows 98,
if you have chosen to install the adapter with the power
turned off.
Click Next to continue.
2.
Select “Search for best driver for your device”.
Click Next to continue.
3.
Insert the NETGEAR Phoneline10X Resource CD.
Make sure the CD Rom drive check box is selected and
click Next.
4.
Windows is now ready to load the drivers.Click Next to start
copying the drivers.
5.
Click Finish. It may take several minutes for the operating
system to complete the driver installation.
6.
ClickYes to restart the computer. If the System Settings
Change window does not open,restart your PC by using the
Start menu; select Shut down,click Restart your computer,
and then clickYes.
10X
Phoneline Home Network
USB ADAPTER
Installation Guide
™
NETGEAR
NETGEAR, Inc.
4401 Great America Parkway
Santa Clara, CA 95054 USA
Phone: 888-NETGEAR
http://WWW.NETGEAR.com
™
NETGEAR
Phoneline10X USB Adapter
Telephone cable (10ft)
Resource CD
Installation Guide
Phoneline10X
USB Adapter
Phone
Telephone
wall jack PC
Telephone wire
Serial cable PhoneExternal modem
Telephone
wall jack
Phoneline10X USB adapter PC with internal modem
USB Port
PC with PA101 Phoneline10X
USB adapter installed
Phone line
behind the wall
RJ-11
connectors
PA101 Phoneline 10X
USB adapter
Printer (optional)
Telephone
(optional)
Laptop
PA101QCard_eng_r2.qxd4 12/15/00 12:59 PM Page 1
NETGEAR, Inc.
4401 Great America Parkway
Santa Clara, CA 95054 USA
Phone: 888-NETGEAR
http://WWW.NETGEAR.com
Support Information
Phone:
Australia: 1 800-142-046 Korea: 0308-11-0319
Austria: 00800-06384327 New Zealand: 0800-444-626
France: 0800-90-2078 Sweden: 020-79008
Germany: 00800-06384327 Switzerland: 00800-06384327
Japan: 0120-66-5402 United Kingdom: (44) 171-571-5120
Holland: 00800-023-0981 U.S. / Canada: 800-211-2069
Internet / World Wide Web
Go to http://www.NETGEAR.com for the NETGEAR Web page.
Defective or damaged merchandise can be returned to your point-of-sale representative.For more information about customer support and
technical specifications, refer to the NETGEARWeb site:http://www.NETGEAR.com/
©2000 by NETGEAR,Inc. All rights reserved.
Trademarks
NETGEAR™is a trademark of NETGEAR Inc.Other brand and product names are trademarks or registered trademarks of their respective
holders. Information is subject to change without notice.All rights reserved.
Statement of Conditions
In the interest of improving internal design, operational function,and/or reliability, NETGEAR reserves the right to make changes to the
products described in this document without notice.
NETGEAR does not assume any liability that may occur due to the use or application of the product(s) or circuit layout(s)
described herein.
Federal Communications Commission (FCC) Compliance Notice:Radio Frequency Notice
Note: Modifications to this device change it from the original state it was in when tested and may alter the device so that it no
longer complies with FCC testing limitations for Class B digital devices.According to FCC regulations, the user could be
prohibited from operating this equipment if it is modified.
This device complies with Part 15 of the FCC Rules. Operation is subject to the following two conditions:
1. This device may not cause harmful interference.
2. This device must accept any interference received, including interference that may cause undesired operation.
Note:This equipment has been tested and found to comply with the limits for a Class B digital device,pursuant to Part 15 of
the FCC Rules.These limits are designed to provide reasonable protection against harmful interference in a residential
installation.This equipment generates, uses,and can radiate radio frequency energy and,if not installed and used in accordance
with the instructions, may cause harmful interference to radio communications.However, there is no guarantee that interference
will not occur in a particular installation.If this equipment does cause harmful interference to radio or television reception,
which can be determined by turning the equipment off and on,the user is encouraged to try to correct the interference by one or
more of the following measures:
•Reorient or relocate the receiving antenna.
•Increase the separation between the equipment and receiver.
•Connect the equipment into an outlet on a circuit different from that to which the receiver is connected.
•Consult the dealer or an experienced radio/TV technician for help.
This device complies with Part 68 of the FCC Rules. All direct connections to telephone network lines must be made using
standard plugs and jacks compliant with FCC Part 68.
IMPORTANT!
Please register online.YOU MUST REGISTER TO OBTAINTECHNICAL SUPPORT. PLEASE RETAIN PROOF OF PURCHASE and this
warranty information. To get product support, or to obtain product information and NETGEAR product documentation,direct your Web
browser to the http://www.NETGEAR.com Web page.
To register online, direct your Web browser to the http://www.gearguy.com/pub/registration Web page.If you do not have access to the
World Wide Web,you can print a registration card and mail it to NETGEAR customer service.The card is included on your Drivers and
Diagnostics disk as a Microsoft Word document file called register.doc.Download the file,print the form,and fill in the information.
Then mail the completed form to:
NETGEAR, Inc.
P.O.Box 58185
Santa Clara, CA 95052-9912
INSTALLTHE FIRSTGEAR SOFTWARE
After the system restarts, be sure that the NETGEAR
Phoneline10X Resource CD is inserted in your CD drive.
Note:If you have an Ethernet adapter installed,you can use
the adapter to share an Internet connection.Connect the
Ethernet adapter to a cable modem,ADSL modem, or
router. However, if the adapter is connected to an Ethernet
network,instead of a modem or router, you will not be able
to share files and printers between the Phoneline network
and the Ethernet network.
After the system restarts, be sure that the NETGEAR
Phoneline10X Resource CD is inserted in your CD drive.
To install the FirstGear software:
1. Once the system reboots, FirstGear Installation will launch
automatically.If you wish to launch the installation manually,
go to the Start menu and section Run. At the prompt,type
the following:D:\setup.exe (“D:”represents the CD drive
letter),and click OK to open the Welcome window.
FirstGear™software verifies that all the necessaryWindows
network services are installed.If any of the services are
missing,FirstGear installs them. FirstGear also helps you to
setup the network, share files,printers,and the Internet. If
there are any services to be installed,the following FirstGear
Network Services Installed window opens:
Click OK to restart your PC.
When the PC restarts, the Welcome page opens.
2.
Click Next and follow the step by step instructions presented
on screen.
ACCESS THE NETWORK PRINTER
The following steps should be applied when you wish to share a
printer attached to another PC.The other PC must already have a
Phoneline10X PCI and USB adapter installed and connected to
the network.
To install the network printer:
1. For each PC that is to make use of the shared printer,
double-click on the NETGEAR Network Configuration icon
on your desktop to open the FirstGear-Install Network
Printer window.
2.
Click Add Network Printer to open the Browse for
Printer window.
3.
Choose the PC that you set up earlier to share printers.
4. Select a network printer.
5. Follow the instructions in the subsequent Windows screens.
Declaration of Conformity
Model PA101 Phoneline 10XUSB Adapter
FOR HOME OR OFFICE USE
Tested to comply
with FCC Standards
TROUBLESHOOTING
PA101 is not recognized byWindows
1. Make sure that the PA101 is plugged securely into the USB
port of the PC and the USB Power LED is ON.
2. The PC must be runningWindows 98 orWindows 2000.
3. Make sure that the USB ports and Plug & Play are enabled
in the BIOS.
Link LED is not ON
1. Make sure that the telephone cable is connected between the
PA101 “Wall”port and the telephone wall jack.
2. Make sure there is at least one other PC ON and connected
to the network.
Unable to see other computers in Network Neighborhood
1. Make sure that other PC’s are ON and connected to
the network.
2. Make sure that the “Link”LED is on all Phoneline10X
adapters (PCI or USB).
3. Make sure you have run FirstGear on each PC.
Unable to connect to the Internet
1. Make sure that PC,that is the Internet Gateway,is ON.
2. Make sure that the Modem is ON.
3. Check to make sure your Internet service provider is
not down.
4. Make sure the FirstGear Internet Sharing Software is installed
on the PC which is to act as a gateway to the Internet.
Unable to see a network printer
1. Make sure the Printer, as well as the PC it is attached to is
turned on.
2. Make sure the printer is designated to be shared in FirstGear.
3. Make sure that the PC,attached to the printer, has a
Phoneline10X PCI or USB adapter.
4. Make sure the link LED is on.
Unable to access the printer over the network
Note: Some older printers may require the printer drivers to be
upgraded before the printer can be accessed over the network.
1. Upgrade the printer drives by downloading them from the
manufacturer’s web site.
2. Follow the steps described in the section“Access the
Network Printer.”
Unable to launch AOL from all the PCs on the network
Note: FirstGear will automatically launch AOL on the PC connect-
ed directly to the Internet through a modem.All other PC’s must
launch a browser (Microsoft Explorer or Netscape Navigator)
instead of AOL, to access the Internet through the AOL connection.
1. Make sure the FirstGear Internet Sharing software is
installed on the PC which is to act as a gateway to
the Internet.
2. Make sure all other PCs are on and connected to the network.
3. Make sure the link LED is on.
4. Launch a browser from a PC other than the one designated
as the “Internet gateway.”This should cause the “Internet
gateway”PC to connect to AOL.
How can I change my Internet sharing settings?
1. Double-click on the FirstGear icon in theWindows System
Tray at the lower right hand corner.
How can I change my Network settings?
1. Double-click on the FirstGear Network configuration icon
on the desktop.
TECHNICAL SPECIFICATIONS
PHONELINE10X USB ADAPTER
Standards Compatibility
Compatible with HPNA 1.0 and HPNA 2.0
Supports Microsoft Windows 98
PCI 2.2 Plug and Play compatible
DC Operating Voltage
+5V + / - 5% @ 400 mA maximum
Physical Specifications
Dimensions:4.75 x 2.875 in. (12 x 7.1 cm)
Weight:0.22 lb (100 g)
Environmental Specifications
Operating temperature: 0°to 55°C
Operating humidity:10% to 90% noncondensing
Agency Compliance
FCC, Part 15,Class B, Part 68
Interface Options
Dual RJ-11 connector for connecting telephones and PCs
LEDs
1 green (ACT) Activity LED
1 green LINK LED
1 green USB Power LED
™
NETGEAR
PA101QCard_eng_r2.qxd4 12/15/00 12:59 PM Page 2

Other NETGEAR Adapter manuals

NETGEAR WNDA4100 User manual

NETGEAR

NETGEAR WNDA4100 User manual

NETGEAR XAV101 - Powerline AV EN Adapter Bridge User manual

NETGEAR

NETGEAR XAV101 - Powerline AV EN Adapter Bridge User manual

NETGEAR TA612V User manual

NETGEAR

NETGEAR TA612V User manual

NETGEAR WNDA3100v2 - RangeMax Dual Band Wireless-N USB 2.0... User manual

NETGEAR

NETGEAR WNDA3100v2 - RangeMax Dual Band Wireless-N USB 2.0... User manual

NETGEAR RangeMax WNDA3100 User manual

NETGEAR

NETGEAR RangeMax WNDA3100 User manual

NETGEAR RangeMax WN111v2 User manual

NETGEAR

NETGEAR RangeMax WN111v2 User manual

NETGEAR XAVB1501 User manual

NETGEAR

NETGEAR XAVB1501 User manual

NETGEAR WG111T - 108 Mbps Wireless USB 2.0 Adapter User manual

NETGEAR

NETGEAR WG111T - 108 Mbps Wireless USB 2.0 Adapter User manual

NETGEAR XAV1301v1/XAVB1301v1

NETGEAR

NETGEAR XAV1301v1/XAVB1301v1

NETGEAR XAV2602 User manual

NETGEAR

NETGEAR XAV2602 User manual

NETGEAR RangeMax WPNT511 User manual

NETGEAR

NETGEAR RangeMax WPNT511 User manual

NETGEAR Wg111v2 - Usb Wifi Card Includes Driver Cd Manual

NETGEAR

NETGEAR Wg111v2 - Usb Wifi Card Includes Driver Cd Manual

NETGEAR XE602 - Powerline Ethernet Adapter User manual

NETGEAR

NETGEAR XE602 - Powerline Ethernet Adapter User manual

NETGEAR WNHD3004 - High Performance Wireless-N HD Home Theatre... User manual

NETGEAR

NETGEAR WNHD3004 - High Performance Wireless-N HD Home Theatre... User manual

NETGEAR A6200 User manual

NETGEAR

NETGEAR A6200 User manual

NETGEAR XAVB5602 User manual

NETGEAR

NETGEAR XAVB5602 User manual

NETGEAR XAV5601 User manual

NETGEAR

NETGEAR XAV5601 User manual

NETGEAR XAVB1601 User manual

NETGEAR

NETGEAR XAVB1601 User manual

NETGEAR Arlo Go User manual

NETGEAR

NETGEAR Arlo Go User manual

NETGEAR WN311B User manual

NETGEAR

NETGEAR WN311B User manual

NETGEAR XAVB5201 User manual

NETGEAR

NETGEAR XAVB5201 User manual

NETGEAR RangeMax Wireless USB 2.0 Adapter WPN111  WPN111NA... User manual

NETGEAR

NETGEAR RangeMax Wireless USB 2.0 Adapter WPN111 WPN111NA... User manual

NETGEAR 85 Mbps Wall-Plugged Ethernet Adapter XE103 User manual

NETGEAR

NETGEAR 85 Mbps Wall-Plugged Ethernet Adapter XE103 User manual

NETGEAR Powerline 500 Nano User manual

NETGEAR

NETGEAR Powerline 500 Nano User manual

Popular Adapter manuals by other brands

ST AD-ICD/DS8Z-01 user manual

ST

ST AD-ICD/DS8Z-01 user manual

KUS NKC 42 user manual

KUS

KUS NKC 42 user manual

Sonnet PRESTO GIGABIT SERVER PCIe quick start guide

Sonnet

Sonnet PRESTO GIGABIT SERVER PCIe quick start guide

Allied Telesis AT-WCU200G user guide

Allied Telesis

Allied Telesis AT-WCU200G user guide

TP-Link TL-WN721N user guide

TP-Link

TP-Link TL-WN721N user guide

Cablexpert A-PSU2S-01 user manual

Cablexpert

Cablexpert A-PSU2S-01 user manual

IMC Networks iMcV-Modules Operation manual

IMC Networks

IMC Networks iMcV-Modules Operation manual

HMS Networks Anybus Communicator ABC4014 user manual

HMS Networks

HMS Networks Anybus Communicator ABC4014 user manual

Cornelius Pressurized Liquid Base Beverage Dispense... installation instructions

Cornelius

Cornelius Pressurized Liquid Base Beverage Dispense... installation instructions

Tyco HSM3WiFi manual

Tyco

Tyco HSM3WiFi manual

Cisco PA-4B-U Installation and configuration

Cisco

Cisco PA-4B-U Installation and configuration

U-Media WUB-375L user guide

U-Media

U-Media WUB-375L user guide

Cisco CVA122 Hardware installation guide

Cisco

Cisco CVA122 Hardware installation guide

TP-Link TL-WPA8631P Quick installation guide

TP-Link

TP-Link TL-WPA8631P Quick installation guide

Avaya 1101GT Quick install guide

Avaya

Avaya 1101GT Quick install guide

Peg-Perego PRIMO VIAGGIO 4-35 quick start guide

Peg-Perego

Peg-Perego PRIMO VIAGGIO 4-35 quick start guide

Third Reality RealityAdapter manual

Third Reality

Third Reality RealityAdapter manual

REED SL-417 instruction manual

REED

REED SL-417 instruction manual

manuals.online logo
manuals.online logoBrands
  • About & Mission
  • Contact us
  • Privacy Policy
  • Terms and Conditions

Copyright 2025 Manuals.Online. All Rights Reserved.