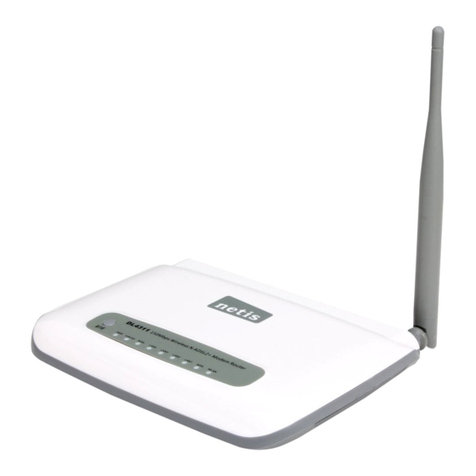
Netis DL4422V User manual

netis Wireless N VDSL2 VoIP IAD
Quick Installation Guide
R

1.Package Contents
netis Wireless N VDSL2 Modem Router Quick Installation Guide
1
2.Hardware Connection
Wireless N VDSL2
VoIP IAD Power Adapter VDSL Splitter Ethernet Cable Telephone Cable *2 QIG
MODEM
neti s Wirel ess N ADSL 2+ Mode m Route r
Quic k Insta llati on Guid e
2.1. Connect the DSL line with the attached telephone cable.
Connect the LINE port of VDSL Splitter to the wall jack with a telephone cable.
Connect the MODEM port of VDSL Splitter to the DSL port on netis Modem Router with the other telephone cable.
Connect your telephone to the PHONE port of VDSL Splitter.
Tip: If no telephone is needed, please connect the DSL port on netis Modem Router to the wall jack with the
phone cable directly.
2.2. Connect your computer to one of the LAN port on netis Modem Router with an Ethernet cable.
2.3. Plug the provided Power Adapter into the DC-IN jack of netis Modem Router and the other end to a standard
electrical socket.
2.4 If you need VoIP service, please connect your telephone to the PHONE port on the modem with a telephone cable
2.5 Connect your 3G dongle or USB storage to the USB port on the modem
Tip: If the LED indicators display abnormally, please check if all the cables are well connected. If the DSL LED is
off or flashing, please contact your ISP (Internet Service Provider) to check the Internet connection.
PHONE
V
3G dongle
(or USB s tor age devic e)

3. Configure the Modem Router via Web
Management Page
3.1. Necessary Information before the configuration.
For a successful setup, you're recommended to contact your ISP first and ask for the
following network parameters which will be required during the configuration procedures.
a. VPI/VCI;
b. Connection Type;
c. Encapsulation Type (Optional);
d. Username & Password (Optional, according to your Connection Type).
3.2. Set the IP address of the wired network adapter on your computer
as “Automatic” or “DHCP”.
For Windows 8/ 7/Vista
1) Go to “Settings” (Win 8)/“Start” (Win 7/Vista)> “Control Panel”.
2) Left-click on “Network and Internet”> “Network and Sharing Center”> “Change
adapter settings” (Win 8/7)/“Manage network connections” (Win Vista).
3) Right-click on “Local Area Connection” and left-click on “Properties”.
4) Double-click on “Internet Protocol Version 4 (TCP/IPv4)”.
5) Select “Obtain an IP address automatically” and “Obtain DNS server
address automatically” then left-click on “OK”.
For Windows XP/2000
1) Go to “Start”> “Control Panel”.
2) Left-click on “Network and Internet Connections”> “Network Connections”.
3) Right-click on “Local Area Connection” and left-click on “Properties”.
4) Double-click on “Internet Protocol (TCP/IP)”.
5) Select “Obtain an IP address automatically” and “Obtain DNS server
address automatically” then left-click on “OK”.
For MAC OS
1) Click on the “Apple” menu> “System Preferences”.
2) Click on the “Network” icon.
3) Click on “Ethernet” in the left side box and click on “Advanced” in the lower
right corner.
4) In the top options, select “TCP/IP”.
5) In the pull-down menu next to “Configure IPv4” select “Using DHCP”.
6) Click “OK” then “Apply”.
192.168.1.1
3.3. Open your browser and type 192.168.1.1 in the address field.
Then type in the username guest and password guest to login
the web management page.
2
netis Wireless N VDSL2 Modem Router Quick Installation Guide

3.4. After you login the web management page, you can go to "Wizard" to
do basic configurations step by step
1) Step 1: ISP Connection Type. Select the ISP Connection Type that given by your
ISP. After selection, please click NEXT to continue.
3
netis Wireless N VDSL2 Modem Router Quick Installation Guide
2) Step 2, PPPoE/PPPoA. When PPPoE/PPPoA is selected, Enter the PPPoE/PPPoA information
provided to you by your ISP. Click NEXT to continue

netis Wireless N VDSL2 Modem Router Quick Installation Guide
4
4)Step 4, the Setup Wizard has completed. Click on BACK to modify changes or mistakes.
Click NEXT to save the current settings.
Tip 1:
Default IP address: 192.168.1.1 Default login username: guest
Default SSID: netis Default login password: guest
Default wireless password: password
Tip 2:
After the basic Internet settings, you may open some popular websites to
check your Internet connection. If you cannot access the Internet, please
refer to the instructions in “Troubleshooting”.
3)Step 3, Wireless Settings, You may enable/disable Wireless, change the Wireless SSID and
Authentication type in this page. Click NEXT to continue.

5
netis Wireless N VDSL2 Modem Router Quick Installation Guide
How do I restore my netis Modem Router's configuration to its default settings?
With the router powered on, use a pin to press and hold the Default button on
the rear panel for 8 to 10 seconds before releasing it. The router will reboot and
all configurations are back to factory default.
Q
A
4.Troubleshooting
What can I do if my Internet cannot be accessed?
1) Check to verify the hardware connections are correct.
Please refer to the “Hardware Connection” step.
2) Login to netis Modem Router's web management page and ensure that
you input the correct network parameters.
You'd better contact your ISP to make sure that the VPI/VCI, Connection Type,
Username & Password are correct.
3) If you still cannot access the Internet, please restore your Modem Router
to its factory default settings and try the “Wizard” again.
4) Please feel free to contact netis Technical Support if possible.
Q
A
Technical Support:
USA/ Canada:
Toll Free: +1 866 71 network (+1 866 716 3896)
E-mail: usa_support@netis-systems.com
Other Regions:
E-mail: support@netis-systems.com

6
Federal Communication Commission Interference Statement
This equipment has been tested and found to comply with the limits for a Class B digital
device, pursuant to Part 15 of the FCC Rules. These limits are designed to provide
reasonable protection against harmful interference in a residential installation. This
equipment generates, uses and can radiate radio frequency energy and, if not installed
and used in accordance with the instructions, may cause harmful interference to radio
communications. However, there is no guarantee that interference will not occur in a
particular installation. If this equipment does cause harmful interference to radio or
television reception, which can be determined by turning the equipment off and on, the
user is encouraged to try to correct the interference by one of the following measures:
— Reorient or relocate the receiving antenna.
— Increase the separation between the equipment and receiver.
— Connect the equipment into an outlet on a circuit different from that to which the
receiver is connected.
— Consult the dealer or an experienced radio/TV technician for help.
FCC RF Radiation Exposure Statement:
1. The equipment complies with RF exposure limits set forth for an uncontrolled
environment. The antenna(s) used for this transmitter must not be co-located or
operating in conjunction with any other antenna or transmitter.
2. This equipment complies with FCC RF radiation exposure limits set forth for an
uncontrolled environment.
3. This equipment should be installed and operated with a minimum distance of 20
centimeters between the radiator and your body.
FCC Caution: Any changes or modifications not expressly approved by the party
responsible for compliance could void the user's authority to operate this equipment.
This device complies with Part 15 of the FCC Rules. Operation is subject to the
following two conditions:
(1) this device may not cause harmful interference and
(2) this device must accept any interference received, including interference that may
cause undesired operation

PKUM05755
NETIS SYSTEMS CO., LTD.
www.netis-systems.com
MADE IN CHINA
Table of contents
Other Netis Modem manuals
Popular Modem manuals by other brands
Bausch Datacom
Bausch Datacom InduBox PSTN III Installation & configuration manual
Access
Access RAD ASMi-54 Installation and operation manual
Devolo
Devolo dLAN 550+ WiFi Installation
Sierra Wireless
Sierra Wireless AirPrime WP7601 Hardware integration guide
SMC Networks
SMC Networks EZ Connect SMC7003-USB user guide
Comtech EF Data
Comtech EF Data CDM-750 Installation and operation manual
