Netkia ScreenShare User manual

0

1
CONTENTS
1. Checking package contents __________________ 05
2. Introduction ______________________________ 06
3. Functionalities of ScreenShare _______________ 08
. Installation of 3.5” Hard Disk Drive (HDD)_______ 11
5. Connect ScreenShare to Computer ____________ 1
6. Connect ScreenShare to TV set________________ 16
7. Getting Started ____________________________ 20
8. Basic Operations ___________________________ 21
9. Advanced Operations_______________________ 2
10. Setup Menu ______________________________ 30
11. System Requirements and Specifications _______ 32
12. Declaration of Conformity ___________________ 33

2
Warnings and Safety Instructions
Warnings and Cautions
It is normal that the surface becomes hot when using it as a player but do not cover
anything over the device.
The product may generate heat when used for long period of time.
Do not attempt to disassemble this product. Doing so may cause fire, electric shock or
electrical leakage, and defectiveness in the product itself.
In the event of unusually abnormal sounds, strange orders or smoke, stop using this
product immediately. Please shut down your computer, TV set and peripheral devices
promptly.
Do not use handle, shake or try to remove this product while hard drive is writing and
reading data
Do not expose this product to the following conditions
Strongly vibration or shock
Direct sunshine or dusty, hot and/or humid conditions
Extreme temperature fluctuations or near magnetic fields
Regular backup is recommended to preserve and store your valuable data.
Before unplugging power you should stop playing first. Then use the POWER or
STANDBY/ON button to enter standby mode (the standby LED turns red). Do not unplug
the power when playing. If the player is disconnected suddenly during file transfer, it
may cause data loss and harm the hard disk.
The hard disk must be set as master. When the device is used as a player, make sure that
all partitions are primary (not extended). The file system is recommend to use FAT32
(NTSF will be supported in the future). When used as USB storage device extended
partitions, FAT32 and NTFS is supported.
The hard disk can be fragmented after using a period of time. This can affect playing
movie files from your hard disk. It is recommended that you assign a partition for file
storage while another partition is for movies. Alternatively you may de-fragment your
hard disk.

3
Limited Liability
The manufacturer, importer, and dealer can not be held responsible for accidental damage,
including personal injury or any other damage, due to inappropriate usage of the product.
Information in the user manual is written for the current specification of the product. The
manufacturer continues to provide additional functions and apply new technology to it. All
specifications may be changed without prior notice to individual user.
Manufacturer should not be liable for any special, incidental or consequential damages. Even
if informed of possibility there of in advance.
Furthermore, warranty does not apply to:
Damages or problems resulting from misuse, abuse, accident, alteration or incorrect
electrical current or voltage.
Any product tampered-with or damaged warranty seal or serial number barcode or
serial number label.
Any product without a warranty or serial number barcode or serial number label
AC adapter and any consumable items delivered with or in the equipment.
ScreenShare TV Media Player 3.5” is not designed or intended to, and may not be used to
violate any copyrights or other IP (Intellectual Property) rights. Each user of ScreenShare
may only use it in connection with materials legally owned by or licensed to the user and only
extend such ownership or license rights that will permit such use.

4
1. Checking Package Contents
Select the check boxes to confirm that all items are included in the package. Should you find
any missing item, please contact local dealer.
Package Contents
ScreenShare TV Media Player 3.5” (no hard drive included)
Infrared Remote Control (3 Volt CR2025 Lithium battery included)
A/V Cable (Composite Video RCA and Audio L/R RCA)
S-Video Cable
Component-YPbPr Cable
USB 2.0 High Speed Cable
USB Driver CD for Windows 98/SE
Screw bag for hard drive (with screws 4pcs)
User’s Manual
External Power Adapter
Keep the box and packing materials/cables in a safe place and use them when
transporting the product for the purpose of repair or other service

5
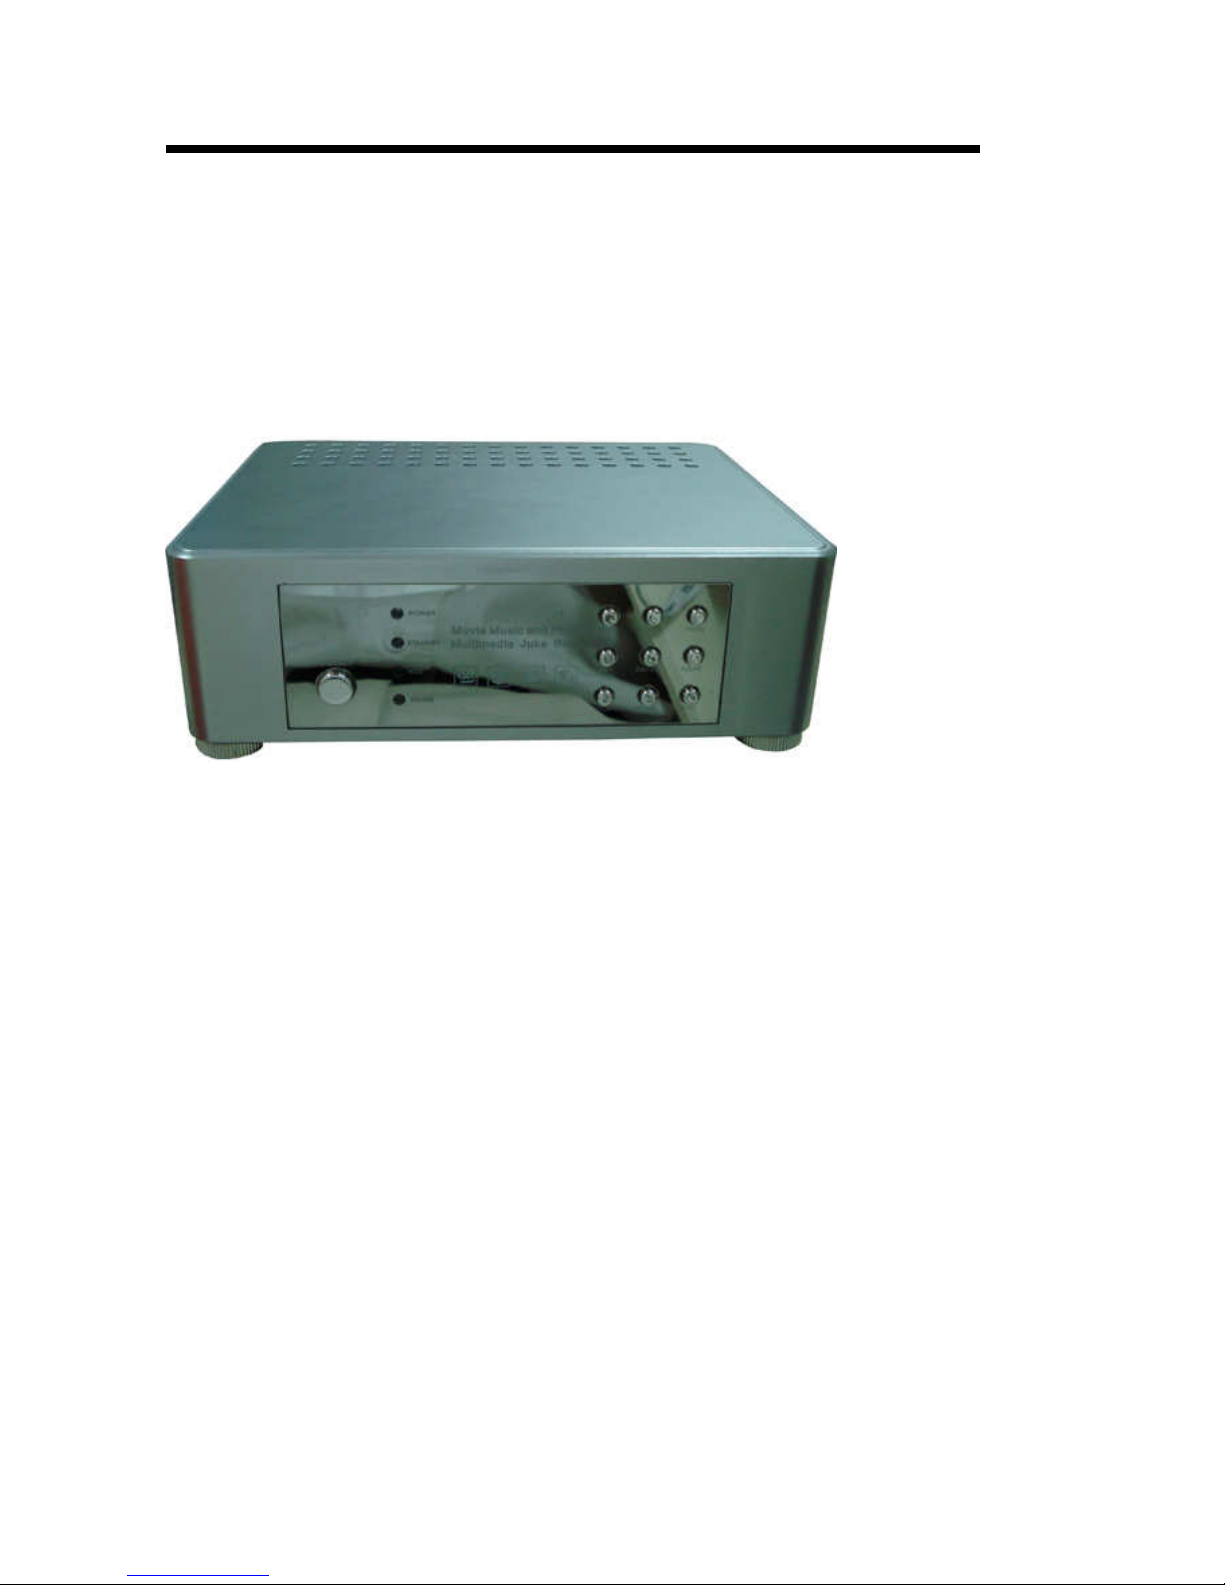
2. Introduction
A TV Multimedia Center anywhere, anytime
Thank you for your choice of this exciting ScreenShare product.
The ScreenShare TV Media Player 3.5" is a standalone type of MPEG4 & DivX Media Player
which supports 3.5" Hard Drive. The ScreenShare TV Media Player 3.5" provides robust video
& audio playback functions, including movie playback and multilingual subtitle
functions, photo slideshow and music play back. The player is designed with brand new GUI
(Graphic User Interface) which provides user-friendly operation for user. The case outlook is
just like an audio & video device in your living room.
The ScreenShare TV Media Player 3.5" is plug and play and works standalone. Thanks to the
big storage capacity and easy set up, you can connect it directly to your TV and select
anything you would like to play back. First connect it to the PC and download all the movies,
music and photo albums (directly from internet) to the player. Then simply connect it to any
TV in your home, hotel or at your neighbors and your personal selected movie marathon is a
fact! The player works standalone (without computer) and supports all popular file formats
like DivX, XviD, MPEG 1/2/4, BMP, JPEG, MP3, AVI, SVCD, CD and VCD
Powerful Multilingual Subtitle Languages*
Support multiple subtitle languages for movie playback. ScreenShare has been designed for
entire globe. With sophisticated unicode character handling, it supports ten (10) kinds of
subtitle languages, including English subtitle, rench subtitle, German subtitle,
Italian subtitle, Spanish subtitle, Portuguese subtitle, Swedish subtitle, Danish
subtitle, Norwegian subtitle and innish subtitle. *This functions depends on sold
model
Powerful Multilingual OSD Languages*
Support eight kinds of multiple OSD (On Screen Display) languages for media playback or
system operation, including English, rench, German, Italian, Spanish, Portuguese,
Swedish and Danish. *This functions depends on sold model
Home Theater & Car Theater**
Store your video files and data on ScreenShare and enjoy your personal movies, music or
photos wherever you go. It can handle 3.5" hard disk space up to 400GB, which means
storage space for 560 movies** or 200,000 songs** or 1,600,000 photos**. But it can also
play back DivX films, which means there's an almost endless playback time for about 200
DivX films at home or at car**. *To support ScreenShare playback at car, an optional
purchased car pack is necessary. Please contact your distributor or dealer for details of
optional purchased car pack. **Estimation is based on movie file size is 71 MB, music file
size is 2MB and photo file size is 250KB

6
MP3 Music Player and Music Jukebox
Save your music sound files on ScreenShare and enjoy music through TV speaker or existing
audio device. It can store and play back MP3, WAV, AC3 and WMA music files about
maximum 200,000 songs if installed a 400GB HDD.
Digital Photo Album
Use ScreenShare to share thousands of your digital photos which are high resolution image
with your family or friends. You can also enjoy a photo slideshow in a big TV screen at home
or demo some photos for commercial purpose. Support photo files with BMP, JPG, JPEG,
motion JPG (15fps/30fps).
Data Storage Box
Backup all files on ScreenShare and use it as a portable external disk drive and storage
device. This could be done through USB 2.0 interface at high speed 480Mbps and transfer all
data from PCs or Mac.
irmware Update
You can download latest updated features via firmware upgrade. Please contact with you
local dealer or importer for latest firmware.
Powerful Media Processor
The heart of ScreenShare device is a powerful media processor supporting the demanding
MPEG-4, MPEG-2, MPEG-1, DivX and XviD decoding.
Comprehensive Graphic User Interface (GUI) Menu
ScreenShare is designed with comprehensive graphic user interface menu to make the
operation more user- friendly while media playback.
USB 2.0 High Speed Data Transfer
Support USB 2.0 with maximum data transfer rate 480Mbps.
7
3. Functionalities of ScreenShare
3.1 Elegant Outlook and Smart Design
The outlook design of ScreenShare is quite elegant. It looks like an audio device nearby TV in
living room. Four stands of enclosure are not only stands but also works as smart screw to
guarantees you no need to bring screw driver tool when you want to put in or take off 3.5”
Hard Disk Driver (HDD) from ScreenShare.
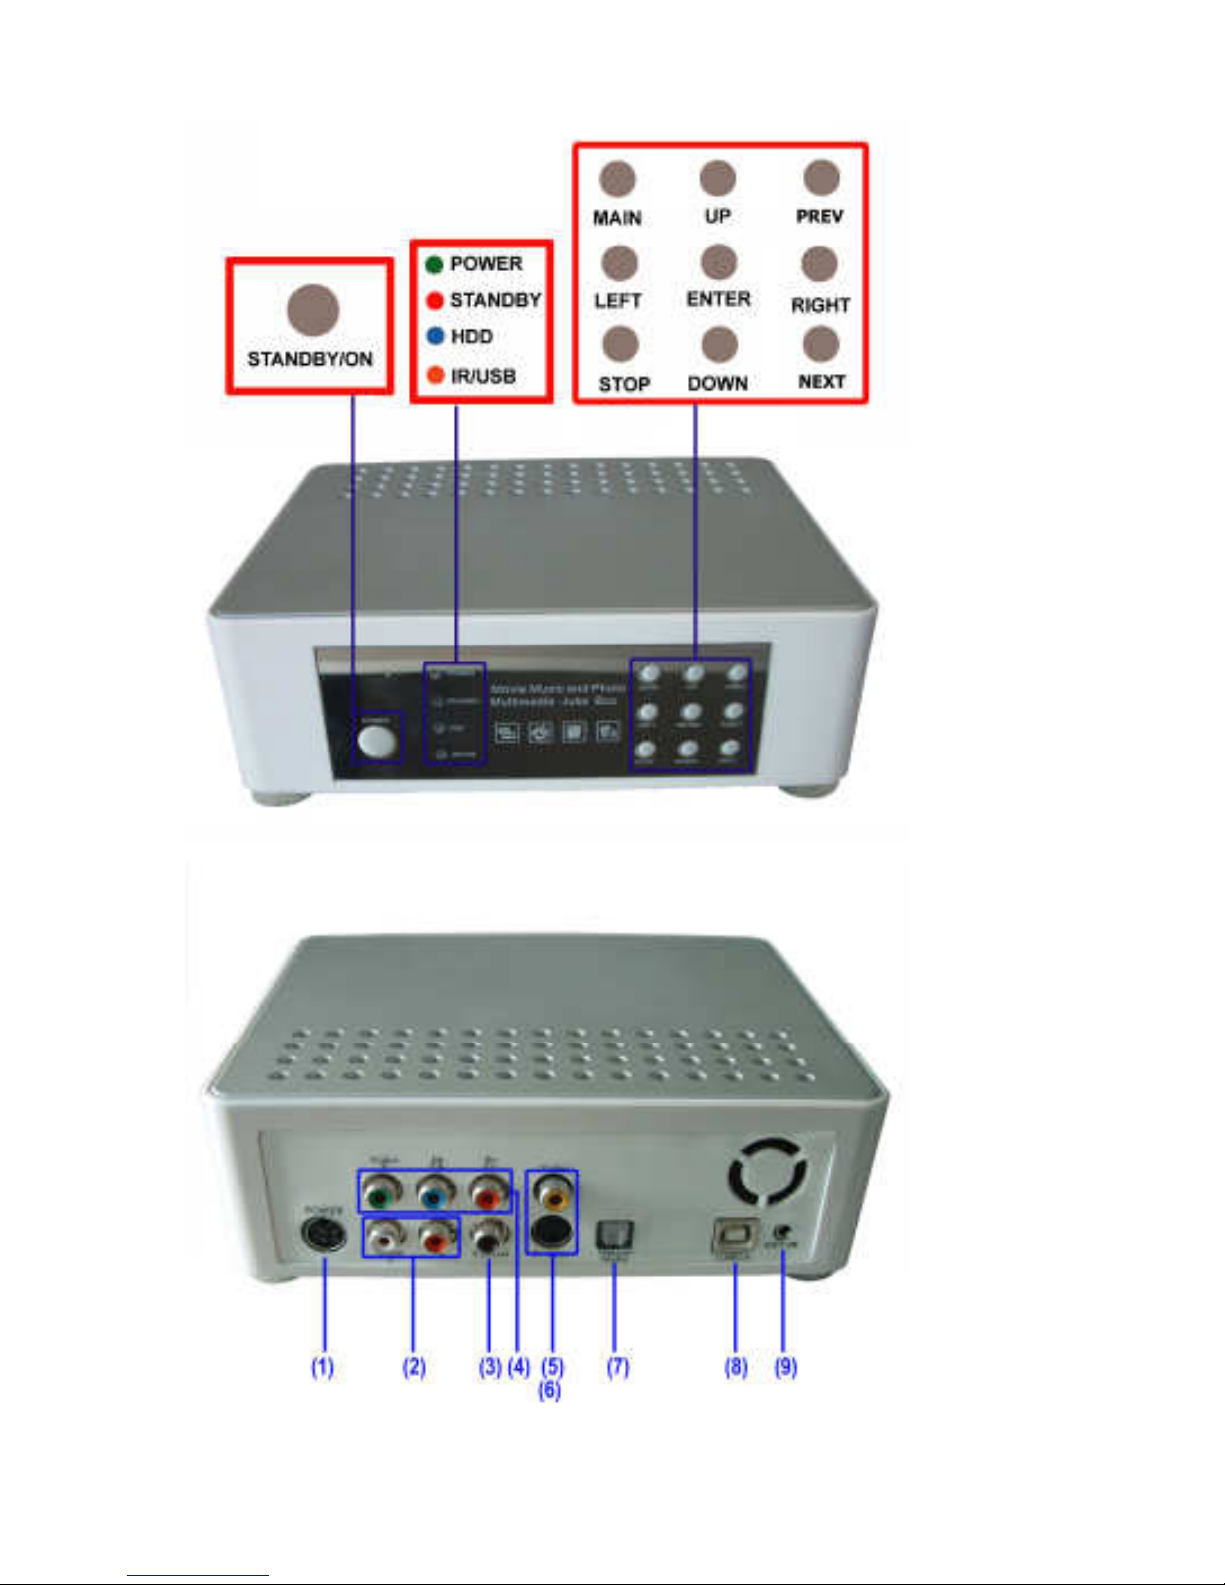
3. Identify the parts of ScreenShare
Front Panel View:
(1) POWER LED -- Power ON LED, Green color at power-on mode
(2) STANDBY LED –- Enter standby mode, Red color when system enter standby mode
(3) HDD LED --– Blue blinking color when data is reading and hard disk is at activity
(4) IR/USB LED –-- At TV mode, this is Infrared Remote Control LED, Orange blinking
color whenever the remote control signal is received At PC model, this is USB connection
LED, Orange blinking color as long as USB port is connected to PC
(5) IR Receiver --- The sensor window of the Infrared Remote Control
Rear Panel View:
(1) POWER in --– DC input, provide 12V/5V power adapter for TV Play mode or PC mode.
(2) Audio L/R out -– Stereo analog audio L/R output to TV set or audio device
(3) Audio Coaxial out -– Digital Coaxial audio output to TV set or audio device
(4) Video Y, Pb/Cb, Pr/Cr out -– Component video output Y,Pb/Cb,Pr/Cr to TV set
(5) Video out -– Composite video output to TV set
(6) S-Video out -- S-video video output to TV set
(7) Audio Optical out -– Digital optical SPDIF audio output to TV set or audio device
(8) USB 2.0 –-- connect to PC USB 2.0/USB 1.1 port providing power and transferring data
(9) EXT. IR –-- extension of Infrared Remote Control sensor
8
9
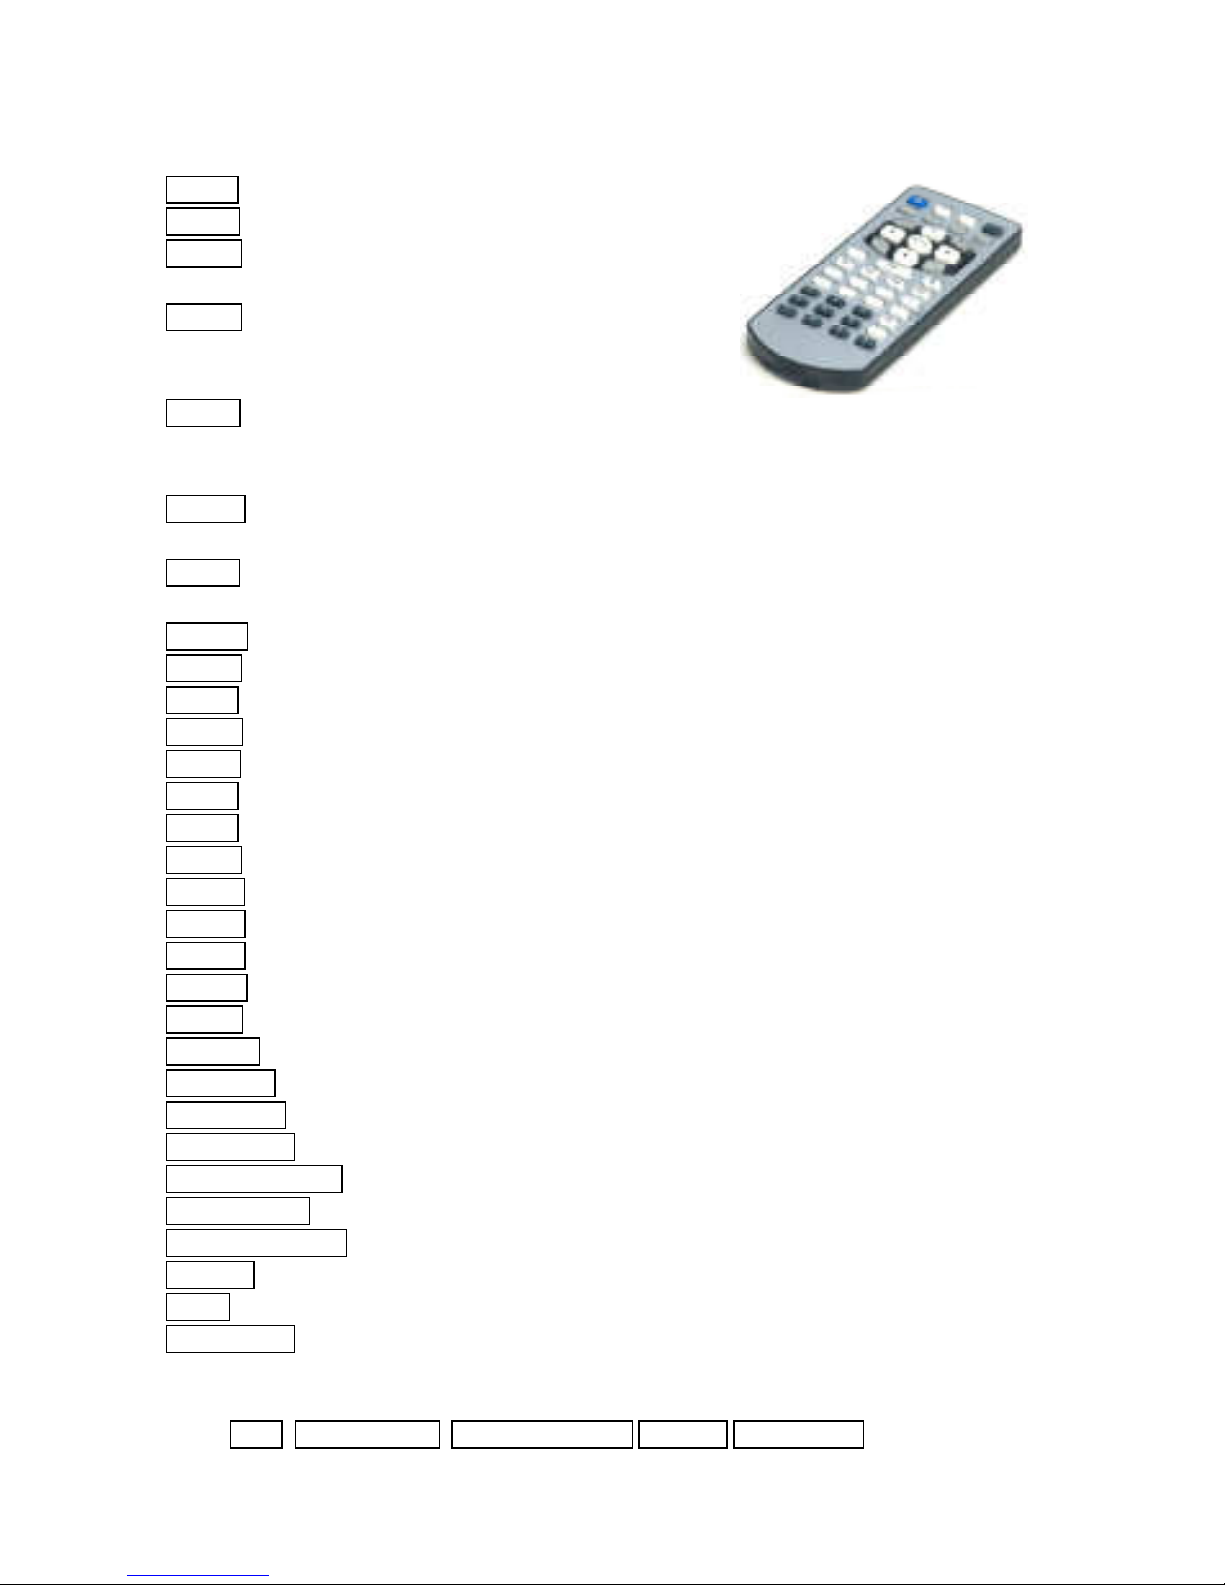
3.3 Explanation of the Remote Control
POWER Enter or exit standby mode
SETUP Enter function Setup Menu
TV-OUT Select TV video output (Composite,
S-Video, YPbPr, YCbCr, VGA)
MOVIE Press the button to enter Movie Menu,
all movies are shown in directory
structure
MUSIC Press the button to enter Music Menu, all
music are shown in directory
Structure on the screen
PHOTO Press the button to enter Photo Menu, a photo preview window will show on
the screen and all photos are shown in directory structure
FILE Press the button to enter File Menu, all media will show on the screen in
directory structure
DISPLAY Display/close a transparent menu of media information when playback
ENTER Confirm selection (it is equal to PLAY/PAUSE button)
STOP Stop playing
REW Rewind, play reverse fast
FF Fast Forward, play forward fast
PageUp Page Up or Previous, move to previous page or previous file
PageDn Page Down or Next, move to next page or next file
REPEAT Select repeat mode
ROTATE Rotate selected photo
ZOOM Zoom in/Zoom off selected photo
S-TIME Select Slideshow interval time
S-Mode Select Slideshow transition mode between the photos
MUTE Volume mute On/Off
SUBTITLE Select MPEG4 subtitles
MAIN PAGE Press the button to enter/jump to Main Menu directly
VOLUME +/- Adjust volume
PLAY/PAUSE Start to play back or confirmation the selection or pause playback
Navigation Buttons Move cursor up, down, right and, left
TIME SEARCH* Jump to specific time position when movie playback
Number Keys 0~9* Input specific time at Time Search function
CANCEL* Reset key for Time Search function
N/P * Select TV type to NTSC or PAL
SlideShow* Perform slide show function
Do not drop the remote control and do not put it in wet place
When the remote control becomes insensitive, please replace a new battery.
N/P *, TIME SEARCH*, Number Keys 0~9* CANCEL* SlideShow* function buttons
are not available now and will be supported in the future

10
4. Installation of 3.5” Hard Disk Dri e (HDD)
4.1 Cautions before Starting Installation
We strongly recommend you read below cautions before starting installation.
Please carefully read and follow instructions in this user’s manual
Please use the supplied AC power adapter, all video/audio cables and USB able with
ScreenShare when purchase
3.5” HDD is sold separately and installed by end user. Please pay high attention not to
damage the PCB inside Case and prevent water from getting into Case during
installation
Don’t touch ScreenShare by wet hands, it may cause electric shock
We strongly recommend you to backup existing data inside 3.5” HDD to another safe
area before starting installation. We are not responsible for any data damage/loss
during installation
Please do not power off ScreenShare while any movie, music or photo is being played.
Unexpected power-off action to ScreenShare will cause data loss or a serious system
hang-up
If unformatted 3.5” HDD is inserted into ScreenShare, PCs cannot detect ScreenShare
due to 3.5” HDD is not exist. Please make sure any 3.5” HDD is well formatted before
installed to ScreenShare.
We strongly recommend to unplug the AC power adapter when you don’t use for a
long time
Regular backup is recommended to preserve and store your valuable data.
It is normal that the surface becomes hot when using it as a player but do not cover
anything over the device.
Before unplugging power you should stop playing first. Then use the POWER or
STANDBY/ON button to enter standby mode (the standby LED turns red). Do not unplug
the power when playing. If the player is disconnected suddenly during file transfer, it
may cause data loss and harm the hard disk.
The hard disk must be set as master. When the device is used as a player, make sure that
all partitions are primary (not extended). The file system is recommend to use FAT32
(NTSF will be supported in the future). When used as USB storage device extended
partitions, FAT32 and NTFS is supported.
The hard disk can be fragmented after using a period of time. This can affect playing
movie files from your hard disk. It is recommended that you assign a partition for file
storage while another partition is for movies. Alternatively you may de-fragment your
hard disk.

11
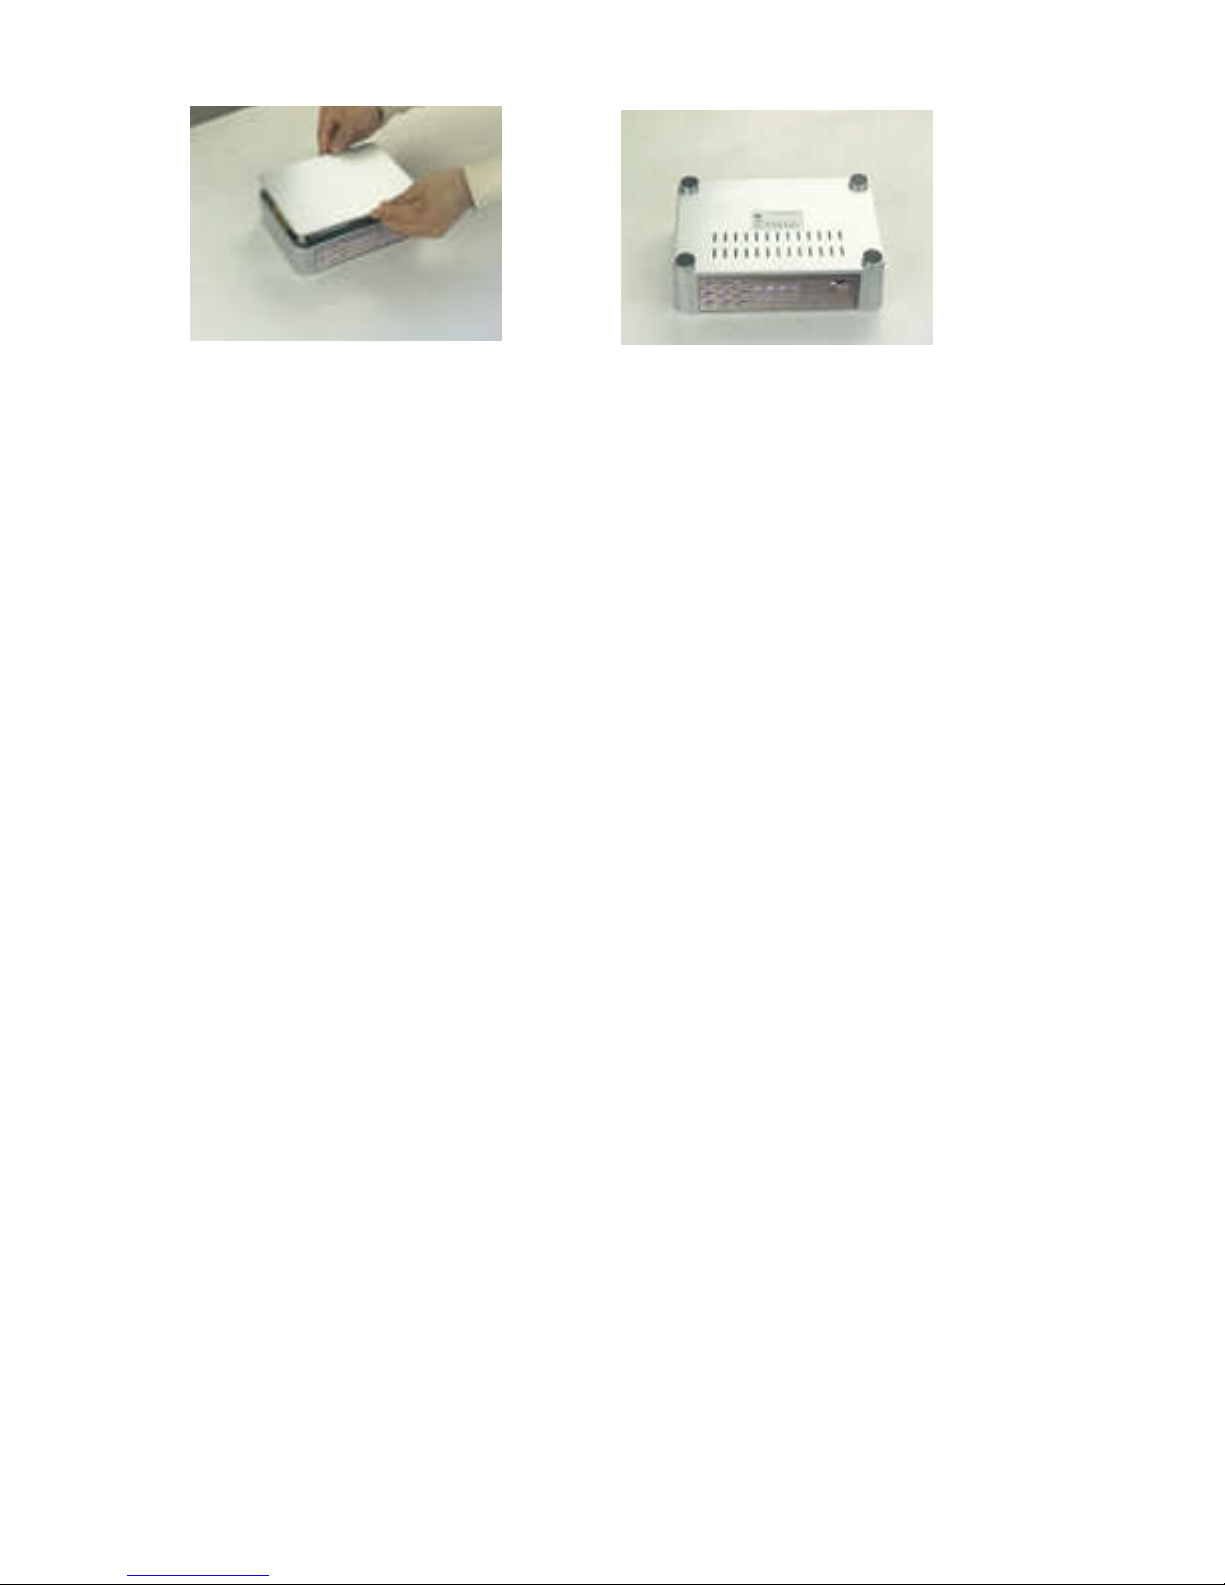
4. How to assemble and install a HDD
Power off first before HDD installation to prevent risks of electric shock
and damage HDD
HDD must be set to “Master” mode when inserted to ScreenShare. If HDD
is set to “Slave” or “ uto-detect” mode, this HDD will not work with
ScreenShare properly. Normally, the HDD you first purchase is factory
default setting as “Master”.
1. Screw the stands off 2. Open the top cover
3. Screw HDD holder off 4. Screw HDD holder on
5. Connect power cable and
HDD IDE cable
6. Put HDD well inside case
12
7. Close the top cover 8. Screw the stands on
9. inish HDD installation

13
5. Connect ScreenShare to Computer
Connect to Computer (PC or Mac), through USB
5.1 Connect ScreenShare to a PC (Windows XP/ME/ 000)
No need install any driver before connect ScreenShare to a PC.
Use the supplied USB cable to connect ScreenShare to PC USB port.
Although PCs can provide certain power to ScreenShare through USB cable, it cannot
guarantee that supplied power from PC is good enough or stable enough to make
ScreenShare working properly.
Normally, the USB port provides enough power to power on ScreenShare. However, it
depends on USB port of your PC. If your PC cannot power on ScreenShare, it is
recommends connect the supplied AC power adapter to ScreenShare.
When ScreenShare connects to PC, a new HDD volume will be detected and shown on
“My computer”.
Now the installation of ScreenShare is successful. Next step, you can save any data,
movie, music, photo files to the HDD.
5. Connect ScreenShare to a PC (Windows 98/SE)
If the OS of a PC is Windows 98/SE, please don’t connect ScreenShare to a PC before
the USB driver is installed.
Insert the supplied “USB driver CD of Windows 98/SE” to a PC and install USB driver to
Windows 98/98SE.

14
After installation of USB driver, use the supplied USB cable to connect ScreenShare to
PC USB port.
When ScreenShare connects to PC, a new HDD volume will be detected and shown on
“My computer”. Now the installation of ScreenShare is successful.
Next step, you can save any data, movie, music, photo files to the HDD of
ScreenShare.
5.3 Connect ScreenShare to a Mac
No need to install any driver before connect ScreenShare to a Mac OS 10.0 or higher
version.
Use the supplied USB cable to connect ScreenShare to Mac USB port
When power on ScreenShare, ScreenShare is detected and an icon is shown.
Now the installation of ScreenShare is successful
Next step, you can save any data, movie, music, photo files to the HDD of
ScreenShare

15
6. Connect ScreenShare to TV set
Connection between PC and TV set
ScreenShare supports several video output cables to meet your requirements. The TV
connection is straight forward. Refer to the following procedure and connect proper video &
audio cables to your TV set.
6.1 Video Connections of TV Mode
Connect to a TV set, through Video Composite output
SETUP MENU Setting : Select TV output to S-Video/Composite
Note: TV-OUT button can be pressed only at Main Menu but not any other Menu.

16
Connect to a TV set, through Video S-video output
SETUP MENU Setting : Select TV output to S-Video/Composite
Note: TV-OUT button can be pressed only at Main Menu but not any other Menu.
Connect to a TV set, through Video Y, Pb/Cb, Pr/Cr
17
SETUP MENU Setting : Select TV output to YPbPr
Note: TV-OUT button can be pressed only at Main Menu but not any other Menu.
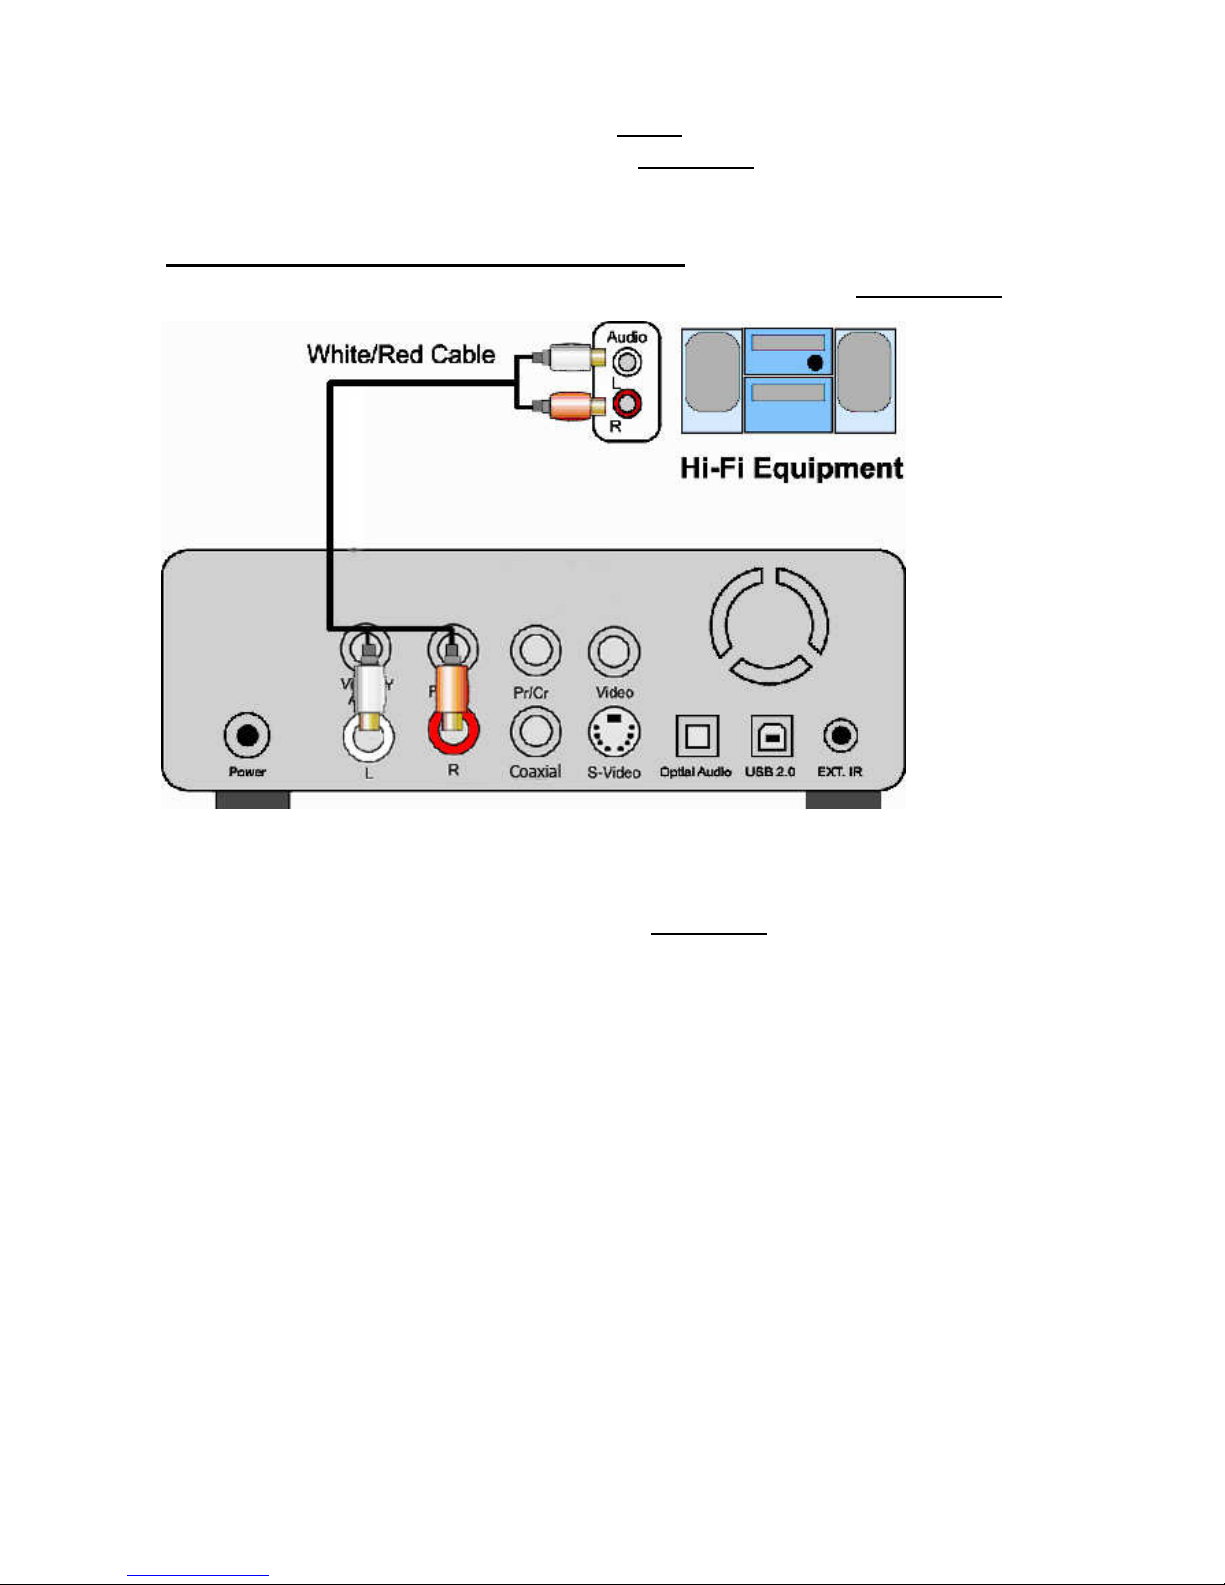
6.2 Auido Connections of TV Mode
Connect to TV set or Hi-Fi equipment, through Stereo L/R
SETUP MENU Setting : Select Audio output to Stereo L/R

18
Connect to TV set or Hi-Fi equipment, through Digital
Coaxial
SETUP MENU Setting : Select Audio output to Stereo L/R
Connect to TV set or Hi-Fi equipment, through Digital
Optical SPDIF
SETUP MENU Setting : Select Audio output to Digital Optical SPDI /RAW or

19
Digital Optical SPDI /PCM
7. Getting Started
After connecting proper video & audio cables to your TV set and ScreenShare, now, you can
start to operate ScreenShare step by step.
Power on ScreenShare
Power on your TV set first
Connect ScreenShare to TV set (refer to
Chapter 7).
Power on ScreenShare by pressing
STANDBY/ON button or by remote control
POWER button
Press TV-OUT button on the top side of remote control to select proper video output
to current TV set connection. Repeat pressing TV-OUT button until TV screen
appears proper Main Menu screen above.
Note: TV-OUT button can be pressed only at Main Menu but not any other
Menu
When press TV-OUT button, it switch video output in following sequence.
S-Video/Composite -- YCbCr -- YPbPr -- VGA
The first time power on ScreenShare may not appear proper Main Menu screen on TV
set. This is due to the default setting of video output (Composite) may not match to
your current TV setting. Before go to Setup Menu to adjust proper video output, press
TV-OUT button is the best way to search available video output.
Once Main Menu screen is properly shown on TV set, press SETUP button to adjust
proper TV type (NTSC or PAL) and Video Output (S-Video/Composite, YCbCr,
YPbPr, VGA)
If the TV is still blank screen after finishing above installation, be sure to set the TV to
correct video input type (AV mode) and channel. Refer to the TV manual for details.
If the TV is black and white, press TV-OUT button to adjust proper video output
mode.
If the TV is distorted or flicking, press SETUP button and select TV type to match your
TV system, NTSC or PAL.
Table of contents


