NetPing 813S2 User manual

[ENG] NetPing Light Sensor 813S2, User guide

[ENG] NetPing Light Sensor 813S2, User guide -
2
Содержание
[ENG] [813S2] 1. Introduction..................................................................................... 4
[ENG] [813S2] 2. Copyright and Disclaimer................................................................ 5
[ENG] [813S2] 3. Shipping Kit ..................................................................................... 6
[ENG] [813S2] 4. Sensor overview and main features ............................................... 8
Sensor purpose .................................................................................................................................. 8
Appearance ........................................................................................................................................ 8
Operating status indication............................................................................................................................................... 9
General characteristics .................................................................................................................... 10
[ENG] [813S2] 5. Connection to actuators and initial setup. .................................. 11
Description of terminals .................................................................................................................. 11
Installation and connection ............................................................................................................ 12
Connection steps ............................................................................................................................. 12
Step 1. ............................................................................................................................................................................... 12
Step 2. ............................................................................................................................................................................... 13
Setting .............................................................................................................................................. 13
Step 1. ............................................................................................................................................................................... 13
Step 2. ............................................................................................................................................................................... 14
[ENG] [813S2] 6. Warranty ........................................................................................ 15
[ENG] [813S2] 7. Precautions.................................................................................... 16
[ENG] [813S2] 8. Operating and storage conditions................................................ 17
[ENG] [813S2] 9. Additional Documents and Links.................................................. 18

[ENG] NetPing Light Sensor 813S2, User guide -
–

[ENG] NetPing Light Sensor 813S2, User guide -[ENG] [813S2] 1. Introduction
[ENG] [813S2] 1. Introduction
–
•
•
•
[ENG] [813S2] 1. Introduction
This user guide helps to become familiar with an operation of a NetPing Light Sensor 813S2device and get an idea
about its functionality and technical specifications as well as prepare a device for an operation.
A User Guide is designed for network administrators and users, who set up or operate a device. To work with a
device properly, a user must have an idea about the principles of building and functioning of local networks as well
as possess the next knowledge and skills:
Basic knowledge in the area of local and global networks;
Basicknowledgeintheareaofarchitectureandprinciples of work ofTCP/IPnetworks;
Basic knowledge in the area of architecture and principles of work of Ethernetnetworks.

[ENG] NetPing Light Sensor 813S2, User guide -[ENG] [813S2] 2. Copyright and Disclaimer
[ENG] [813S2] 2. Copyright and Disclaimer
–
[ENG] [813S2] 2. Copyright and Disclaimer
The information, contained in this document, can be changed by a manufacturer without a prior notice.Although
every effort was made to make the information in this document accurate and without errors, a manufacturer is not
liable for their possible presence and for the consequences that may result from the errors herein. A manufacturer is
not liable if supplied equipment, software and this user guide does not correspond to expectations of a user and
his/her opinion about where and how to use all the above.All copyrights on supplied devices, described in this User
Guide, as well as firmware and software of devices and this User Guide belong to NetPing global Ltd. Copying,
replication and translation of this user guide to other languagesare not allowed without a prior written permission
of a rightholder. Copying, replication, changing, disassembling of provided softwareare not allowed without a prior
written permission of a rightholder.For the part of software that is provided in source codes, there is a separate
license agreement, which defines an order of its use and modification. Other trademarks used in this description
belong to corresponding rightholders.
Developer and manufacturer:
NetPing east Co Ltd.
www.netpingdevice.com

[ENG] NetPing Light Sensor 813S2, User guide -[ENG] [813S2] 3. Shipping Kit
[ENG] [813S2] 3. Shipping Kit
–
•
•
•
•
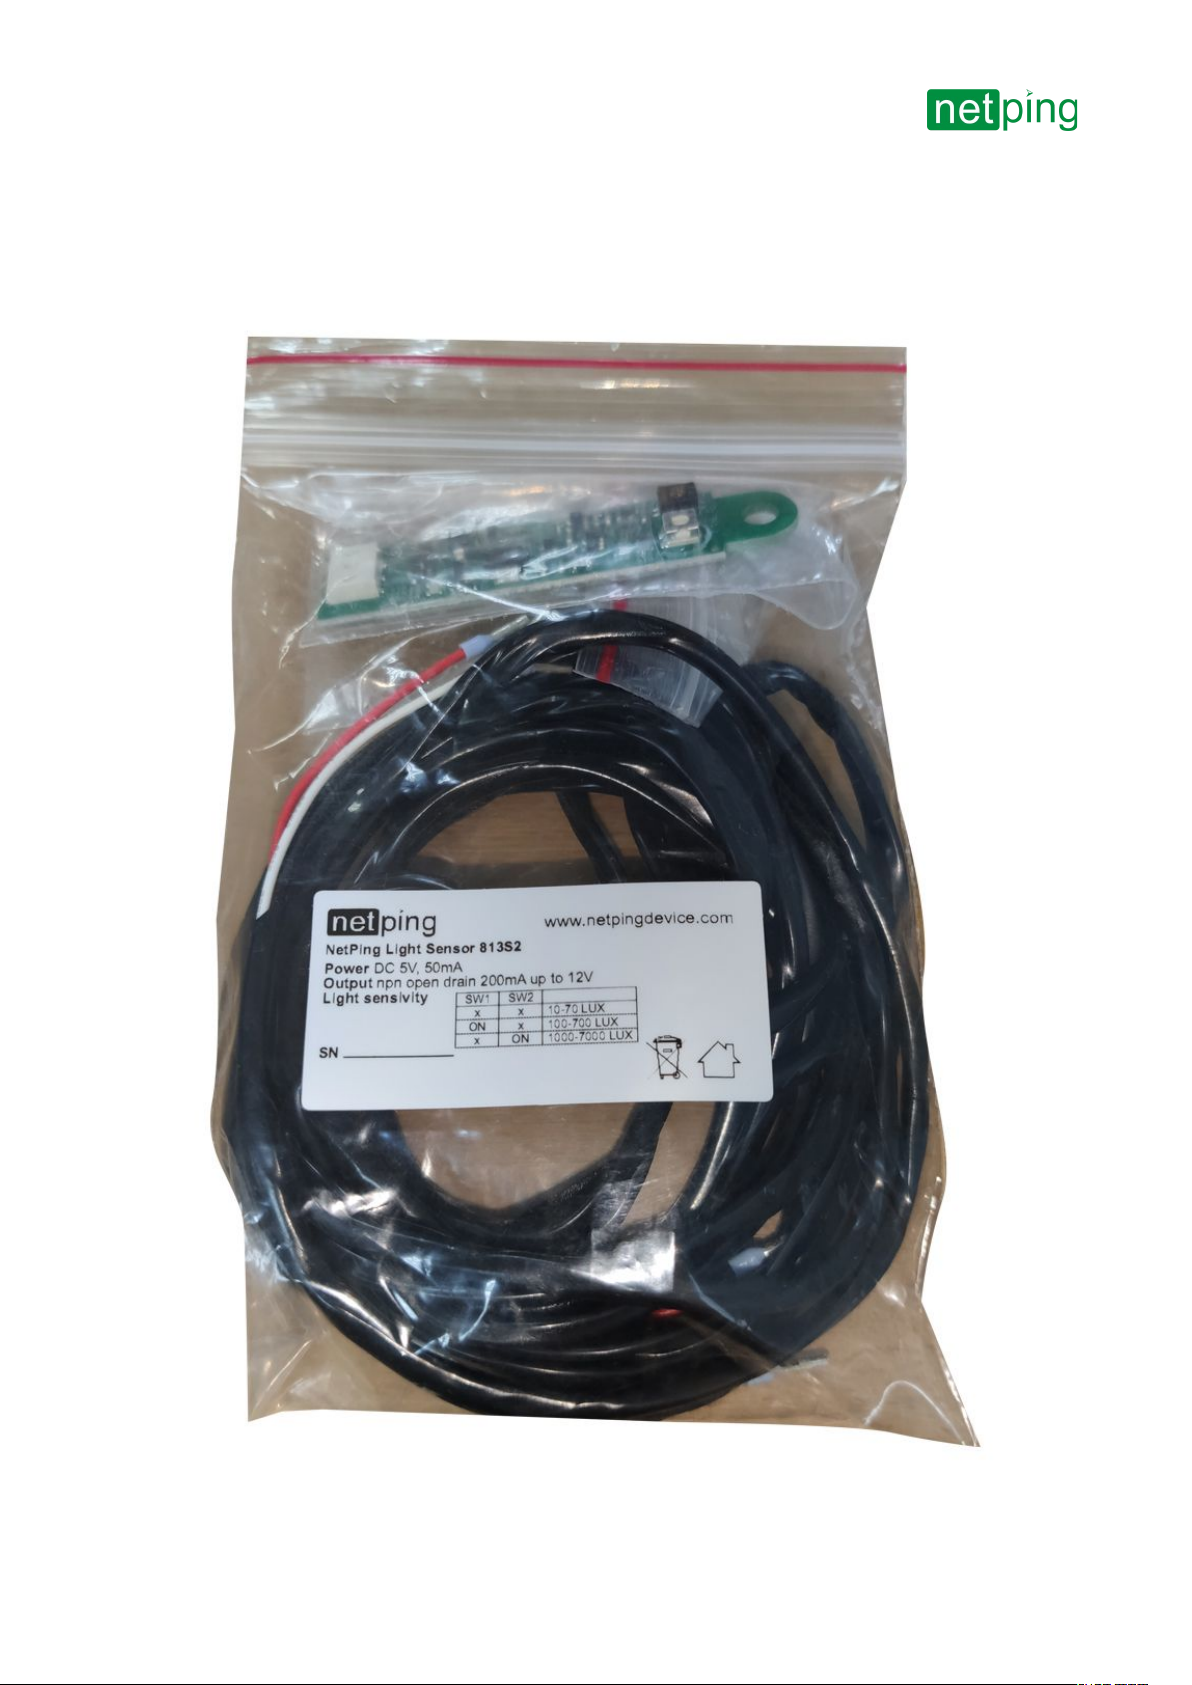
[ENG] [813S2] 3. Shipping Kit
NetPing Light Sensor 813S2 — 1 pc.;
Connecting cable;
Packing
zip package.
[ENG] NetPing Light Sensor 813S2, User guide -[ENG] [813S2] 3. Shipping Kit
[ENG] [813S2] 3. Shipping Kit
–

[ENG] NetPing Light Sensor 813S2, User guide -[ENG] [813S2] 4. Sensor overview and main features
[ENG] [813S2] 4. Sensor overview and main features
–
•
•
•
•
•
•
•
•
•
•
•
•
•
•
•
•
•
[ENG] [813S2] 4. Sensor overview and main features
Sensor purpose
NetPing light sensor 813S2 is a compact sensor for sharing with NetPing host devices presented on the website
www.netpingdevice.com
The device can be used to ensure the security of remote border infrastructure (analogous to the operation of the
reed switch, only by light), monitor access to the room, to the cabinet, to the protected object, and also use it to
reserve the door sensor when the reed switch inside the door opening sensor does not work for some reason. These
security features can be applied to the following objects:
Server rooms;
Data center;
Base transmitting stations (cell towers);
Rooms with equipment;
Warehouses;
Secured premises.
The device also allows you to remotely monitor the presence of a luminous flux and automatically control light
sources, depending on the level of illumination of the surrounding space of the following objects:
Residential buildings;
Premises of administrative buildings;
Banking and insurance institutions;
Educational institutions, preschool institutions;
Leisure facilities;
General catering enterprises;
The shops;
Consumer service enterprises;
Hotels;
Medical institutions, pharmacies;
Road transport tunnels;
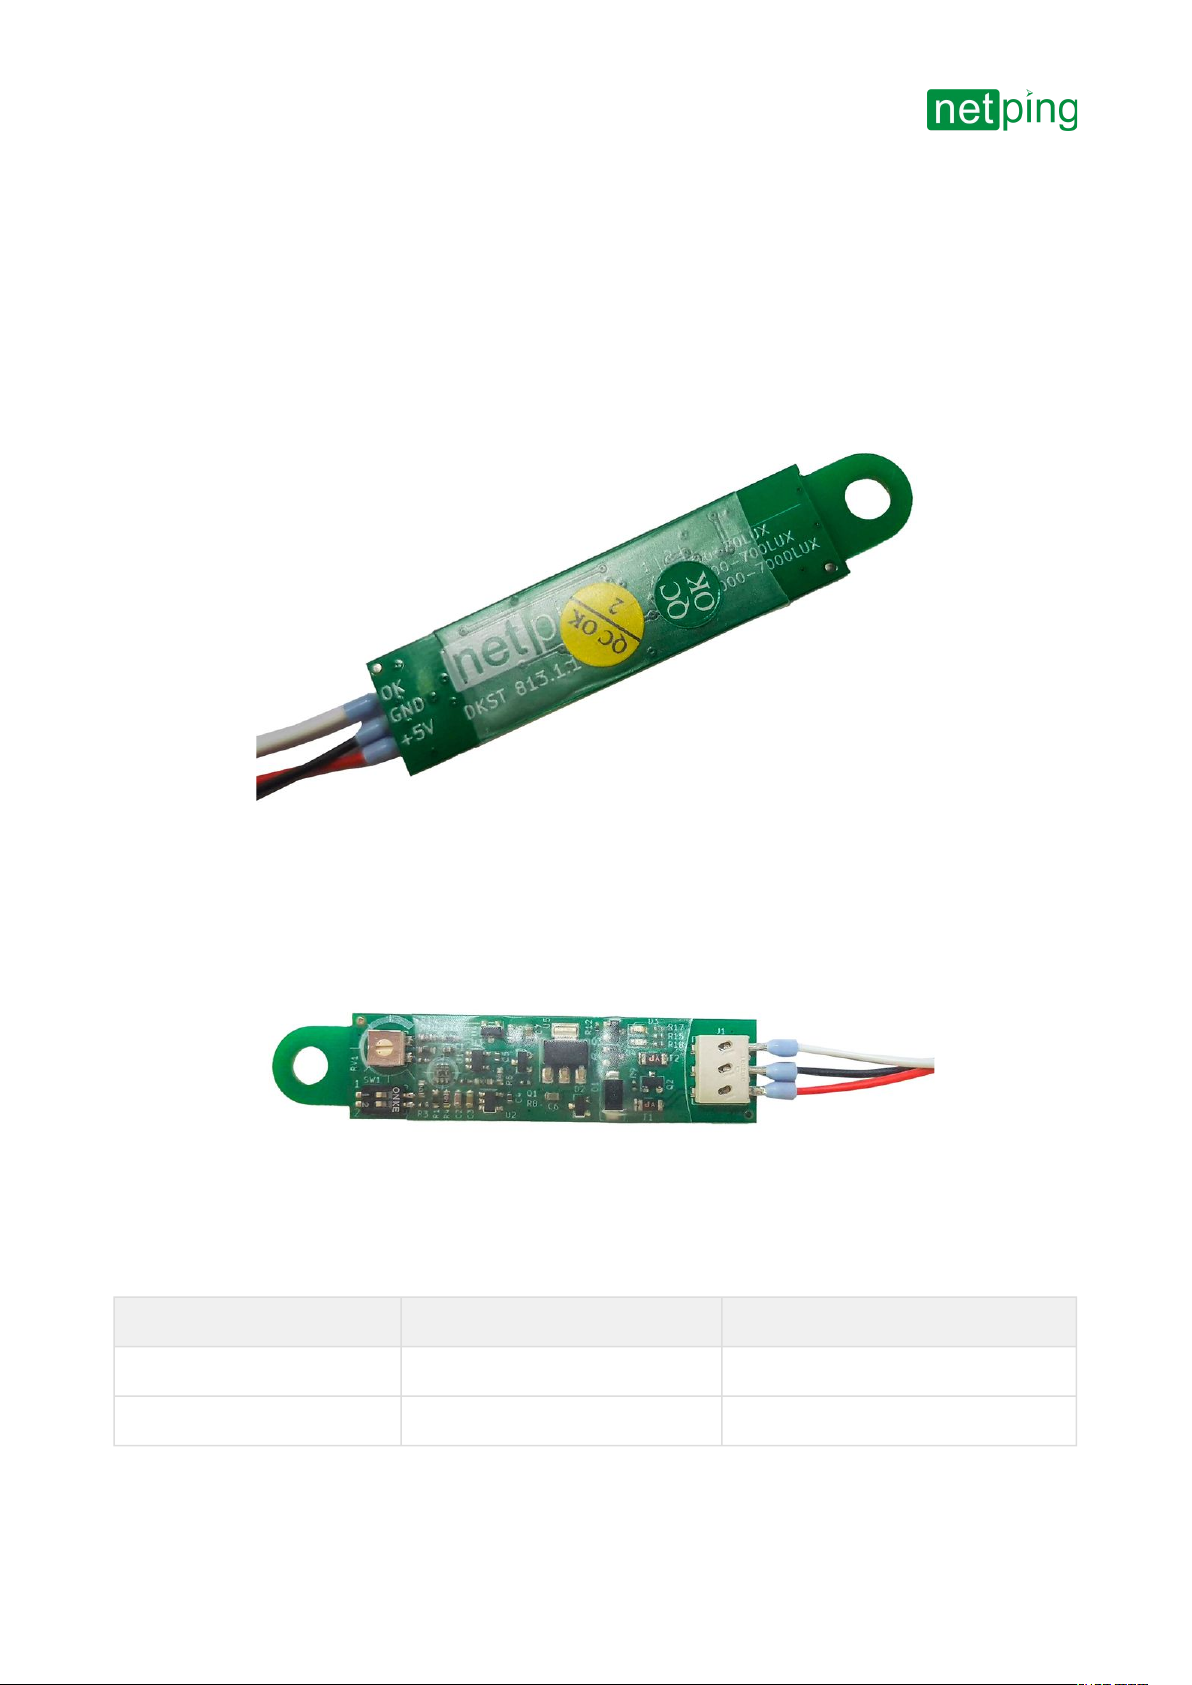
Appearance
General view of the sensor:

[ENG] NetPing Light Sensor 813S2, User guide -[ENG] [813S2] 4. Sensor overview and main features
[ENG] [813S2] 4. Sensor overview and main features
–
•
•
•
•
•
•
Dimensions of the sensor:
The device is made on an electronic board in a compact design with a width of 15 mm and a length of 68
mm;
In order to increase reliability, the electronic components of the sensor are covered with a polymer film;
For ease of installation, a hole with a diameter of 5 mm is made in the sensor housing, and a self-adhesive
surface is applied.;
On the board of the device there are two LEDs indicating the operating mode, green - "day", red - "night";
The design of the device includes a SW level switch that switches the measuring sensor to different response
ranges, as well as a tuning potentiometer RV1 to adjust the sensor response;
To ensure the reliability of the electrical contact connection, when connecting the signal line to the device,
there is a self-locking terminal block J1 on the device board, which provides a constant pressure contact
throughout the entire service life.
Operating status indication
When the light falls on the sensor, the green LED "Day" is triggered, signaling the presence of a luminous flux, in the
absence of a luminous flux, the red LED "nIght" works, signaling the sensor's standby mode.

[ENG] NetPing Light Sensor 813S2, User guide -[ENG] [813S2] 4. Sensor overview and main features
[ENG] [813S2] 4. Sensor overview and main features
–
General characteristics
Parameter Value
Illumination measurement range 1-10000 LUX
3 measuring ranges 10-70 LUX, 100-700 LUX, 1000-7000 LUX
Minimum measured threshold 3-5 LUX
Adjustment step 10-300 LUX
Viewing angle 25-30 degrees
Measurement accuracy 25 %
Hysteresis 20 %
Signal filtering time constant 4,4 с
Sensor response/release time From 1 to 20 seconds depending on the light level
Output type NPN open drain/dry contact connected to the IO line of the NetPing
device
Power supply 5V from the IO terminals of the NetPing device
Rated current consumption no more than 10 mA
Protections Protection against reverse polarity. Protection against connection to
12V - the sensor may not work, but it should not be damaged.
Working temperature --30..+50 C without condensation
Cable length 3 m
[ENG] NetPing Light Sensor 813S2, User guide -[ENG] [813S2] 5. Connection to actuators and initial setup.
[ENG] [813S2] 5. Connection to actuators and initial setup.
–
[ENG] [813S2] 5. Connection to actuators and initial setup.
Description of terminals
For the convenience of connecting sensors to the device, a terminal block is used. To fix the wires in the pad, use a
slotted screwdriver with a slot width of 2.5 mm. Pinout of the contacts on the terminal block is as follows:
Sensor terminal Sensor Loop (coloured) Device terminal
1 White - Open collector One of the IO or INPUT lines
2 Black - GND GND

[ENG] NetPing Light Sensor 813S2, User guide -[ENG] [813S2] 5. Connection to actuators and initial setup.
[ENG] [813S2] 5. Connection to actuators and initial setup.
–
•
•
•
•
•
•
Sensor terminal Sensor Loop (coloured) Device terminal
3 Red - +5 V +5V
White — normally open N.O. (open) contact;
Black wire - common;
Red — sensor power + 5V.
Installation and connection
The light sensor can be mounted on a horizontal or vertical surface.
The device has outputs of the "dry contact" type with a normally open contact and is connected to NetPing devices
like all sensors of this type.
When installing the sensor, the following restrictions must be taken into account:
Do not install the device near heat sources.
Do not open the device case.
Avoid getting liquid on the sensor, in particular in the connectors.
The length of the loop from the sensor to the caste device should not exceed 100 m. If necessary, the length of the
native loop can be increased by an extension cable of the Cable 4 extender, 4m Or independently using any wire
with a cross section of at least 0.4 mm2.
Important! When used in conjunction with devices with combined I/O contacts, the corresponding IO line
to which the signal wire from the sensor is connected must be switched to the "input" mode in the device
settings.
Connection steps
Step 1.
Connect the sensor to the device.

[ENG] NetPing Light Sensor 813S2, User guide -[ENG] [813S2] 5. Connection to actuators and initial setup.
[ENG] [813S2] 5. Connection to actuators and initial setup.
–
For detailed information on connecting this sensor to the connected device, see the manual of the tail device in the
section "Connecting devices of the "Dry contact" type.
Step 2.
Go to the web interface of the monitoring device to start configuration. The sensor configuration in
the device's web interface is specified in the description of the firmware, the section "Working with discrete I/O
channels" for the corresponding model
here: www.netpingdevice.com
Setting
Step 1.
With a 2.5 mm slotted screwdriver, adjust the position of the SW group switches and select one of the three ranges
according to the table:
SW1 SW2 Range
X X 10-70 LUX
ON X 100-700 LUX
X ON 1000-7000 LUX

[ENG] NetPing Light Sensor 813S2, User guide -[ENG] [813S2] 5. Connection to actuators and initial setup.
[ENG] [813S2] 5. Connection to actuators and initial setup.
–
Step 2.
To adjust the sensor response to a certain level of light output, it is necessary to adjust the RV1 potentiometer with
a 2.5 mm slotted screwdriver to the desired result.
To fine-tune the sensitivity of the light sensor, it is recommended to make settings near an adjustable light
source in conjunction with a trusted luxmeter.

[ENG] NetPing Light Sensor 813S2, User guide -[ENG] [813S2] 6. Warranty
[ENG] [813S2] 6. Warranty
–
•
•
•
•
•
•
•
[ENG] [813S2] 6. Warranty
The manufacturer guarantees normal operation of the product within 24 months from the date specified on the
warranty sticker if a buyer follows operating and storage conditions. Manufacturer warranty applies only to failure
of a device which occurred because of defects in manufacturing process of products and components used. If
during a warranty period the manufacturer receives a notice of such defects, it will repair or exchange the product
(by its own discretion). If the manufacturer is unable to repair or replace a flawed item during a period of time
determined by the current legislation, the manufacturer according to a customer’s wish can return the amount paid
for the product at the time of purchase. The manufacturer provides a limited warranty on firmware and device
configuration software. In case of detecting any errors in the software which became known to the manufacturer on
its own or from a customer, the manufacturer will fix these errors within a reasonable time and provide an update
for the customer. Only the errors that block normal use of the device at conditions and for performing functions
described in this User Guide are a subject to mandatory fix. This warranty does not apply to cases when defects
appear because of: a misuse of a device, any modifications of a device without a written permission of the
manufacturer, opening up a device (a warranty sticker on the case of a device is damaged)except cases foreseen by
this description; repairing by unauthorized personnel, using or storing a device out of the range of allowable
temperature and humidity, pressure, a software modification, and the reasons, listed below:
A device failed because of the problems in a public electric network, plugging a device into power supply
networks with invalid parameters, absence of grounding, etc. (power fluctuations and surges, overloading,
etc.);
A device failed because of having liquid inside;
A device failed as a result of extreme temperatures;
A device failed because of mechanical damage;
A device failed because of connecting a power supply unit with invalid output voltage or a defective power
supply unit;
There are foreign objects, insects, etc inside the enclosure;
During operation a voltage bigger than an allowable voltage range by the Ethernet standard has been
supplied to the ports of a device.

[ENG] NetPing Light Sensor 813S2, User guide -[ENG] [813S2] 7. Precautions
[ENG] [813S2] 7. Precautions
–
•
•
•
•
•
•
•
•
•
[ENG] [813S2] 7. Precautions
The next information will allow users to avoid both injuries and damaging a device as well as connected
equipment.
A device must be used only in a power supply network, indicated by a manufacturer. Using any other power
supply types may lead to damaging a device;
Do not use damaged power cords as well as insecurely fixed wall sockets;
Do not drop a device and avoid impact of force on it.
Protect a device from high humidity levels. It is prohibited to touch a device and a connected equipment
with wet hands;
Use devices only indoors;
Do not place a device at a surface or inside heating devices, such as microwaves, stoves and heaters;
Do not use a device in locations marked as potentially explosive, with a possibility of an explosion and a ban
on the use of wireless devices (works for devices with a built-in GSM modem);
Protect a device against fire and extreme temperatures;
Do not allow children to use a device.
Attention!Failure to comply with these conditions is a violation of the operating conditions of a device.

[ENG] NetPing Light Sensor 813S2, User guide -[ENG] [813S2] 8. Operating and storage conditions
[ENG] [813S2] 8. Operating and storage conditions
–
[ENG] [813S2] 8. Operating and storage conditions
The sensor is designed for continuous round-the-clock operation in enclosed spaces. In the operating conditions of
application, the sensor is resistant to air temperatures from -30 ° C to +50 ° C (without condensation of moisture, at
normal humidity). It should protect the sensor from direct moisture and sunlight.
The sensor design provides reliable uninterrupted operation for a long time without the need for special
maintenance.
Storage is carried out at temperatures from -40 ° C to +70 ° C.
In storage rooms, the content of dust, acid and alkali vapors, aggressive gases and other harmful impurities that
cause corrosion should not exceed the content of corrosive agents for type 1 atmosphere.

[ENG] NetPing Light Sensor 813S2, User guide -[ENG] [813S2] 9. Additional Documents and Links
[ENG] [813S2] 9. Additional Documents and Links
–
[ENG] [813S2] 9. Additional Documents and Links
Pages of devices on a manufacturer's website:
Manufacturer's website:http://www.netpingdevice.com/
Technical support contacts:http://www.netpingdevice.com/support
Telephone:+886-2-23121582
E-mail:[email protected]
Table of contents
Other NetPing Accessories manuals


