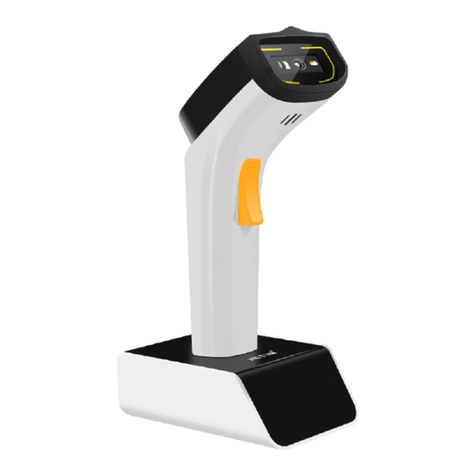
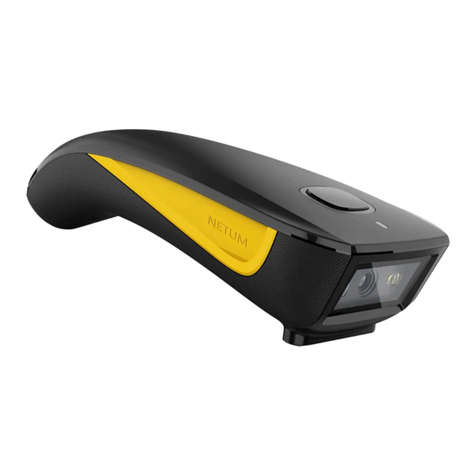
Netum NT-1698W User manual

Ver2.2
Wireless Laser Scanner Manual
Long distance wireless communication
Fast decoding speed with a large battery capacity
Built-in FLASH memory, supports breakpoint resume
Store 2000 pieces Code-128 codes under store mode
Supports Windows XP, Win7/8, Wince etc.
Package included:
* Scanner x 1
* USB Cable x 1
* Receiver x 1
* Manual x 1

Barcode Scanner Overview
Operation Instruction:
1. Choose Communication Mode
Working via USB Cable
Connect scanner with your device via USB cable. If you use US keyboard, it's
plug and play. If you use other type of keyboard , please refer to ‘keyboard
language ’to con�igure the keyboard language before use it.
Working via USB receiver
Plug the USB receiver on your device, then you can start to use it. US keyboard
is con�igured by default. If you use other type of keyboard , please refer to
‘keyboard language’ to con�igure the keyboard language before you use it.
2. Get started to scan normal barcode
① Scan barcode in a correct angel (±45+60°)
② Moving scanner towards the barcode back
and forth to �ind the best scanning distance.
- 1 -
2.4 GHz USB Receiver
USB Cable
USB receiver was
plugged in the boom

3. LED and Beeper Indication
Successful Scan Buzzer LED
Yes
Failed
One beep
Three beeps
Five beeps
Light On then OFF
Light �lash once then OFF
Important Note:
When scanner makes three beeps please con�igure the channel for it. Refer to
'Con�igure Working Channel'.
When scanner makes �ive beeps please charge power for it for 3-4 hours until
the LED light turns to solid blue.
Our barcode scanners are factory programmed for common terminal and
communications settings. If you need to change these settings, programming is
accomplished by scanning the bar codes in this guide. An asterisk (*) next to an
option indicates the default setting.
When you connect the scanner to the Host via a USB connection, you can
enable the USB-KBW feature by scanning the barcode below. It works on a Plug
and Play basis and no driver is required.
Barcode Programming
Communication Mode
USB -KBW *
- 2 -
USB -KBW *

In order to output the codes in a correct way after you scan a normal barcode,
you have to con�igure the keyboard language before you use it.
For example
If you use French Keyboard, scan command barcode of "French Keyboard", after
that scanner will output barcodes according to French keyboard layout. US
Keyboard is con�igured by default, if you use a US keyboard you can ignore this
this step.
Keyboard Language
- 3 -
US Keyboard*
Germany Keyboard
Portugal Keyboard
Turkey Keyboard UK keyboard
Spain Keyboard
Italy Keyboard
French Keyboard

Scanning this bar code will enable the scanner to enter manual trigger mode.
Scanning Mode
The scanner provides a shortcut for con�iguring the terminating character
suf�ix to CR or CRLF and enabling it by scanning the appropriate barcode
Terminator
Trigger Mode (Default)
This mode enables the engine to scan/capture, decode and transmit over and
over again.
Continuous Mode
- 4 -
Trigger Mode
Continuous Mode
Add Enter as terminator
Add TAB as terminator
No terminator

If you are heading for a working area which lies outside the signal range, you
may activate store mode of the scanner. Under store mode, all scanned data
will be stored directly into the buffer memory of the device. Furthermore, the
data entries will be permanently saved in the buffer memory prior to the
manual upload into the working station, so that you may upload them time and
again to your liking.
1. By scanning the following barcode, the store mode will be activated
2. By scanning the following barcode, all data in the buffer memory will be
deleted
3.By scanning the following barcode, all data entries in the buffer memory can
be uploaded after reconnecting to the working station .
4. By scanning the following barcode, the gross quantity of the uploaded data
entries will be summarised .
Working Mode (Only apply for wireless mode)
- 5 -
Store Mode
Clear All Memory
Uploading the Data
Summarising of Uploaded Data Entry Quantity

5. By scanning the following barcode, the device leaves the store mode, data
will be outputed immediately the moment when you scan a barcode.
Con�igure Idle time
Scanner will stay awake during the idle time that you set for it and turn to
sleep if you haven't used it during the whole idle time.
Sleep Mode can be disabled by scanning below command barcodes
- 6 -
Quick Store Mode*
$RF#ST02
Idle Time- 1 Min
$RF#ST20
Idle Time- 10Min
$POWER#OFF
Power Off
$RF#ST00
Disable Sleep Mode
$RF#ST60
Idle Time- 30Min
$RF#ST06
Idle Time- 3 Min

When scanner makes three beeps please con�igure channel to rebuild the
connection between scanner and receiver.
Con�igure the channel
Make sure you have removed the USB cable from the scanner before you
con�igure the channel
1. Scan one of below channel after that scanner will make beep beep... sound.
2.Plug the USB receiver, the beep sound will stop immediately.
(Con�igure successfully)
Steps:
- 7 -

Factory Restore
Start Wireless Scan
Con�igure the scanner to revert all con�igurations to factory defaults when
unkown issues have happened .
If there's beep sound after you scan a normal barcode but can not ouput any
data please scan below command barcode to start wireless scan.
Check scanner Version
Scanned below command bercode to check the scanner's version.
- 8 -
Factory Restore
Start Wireless Scan
Scanner Version

01400
Disable Pre�ix Code ID*
01401
Enable Pre�ix Code ID
0B140
Disable Suf�ix Code ID*
01402
Enable Suf�ix Code ID
Con�igure Code ID
A code ID character identi�ies the code type of a scanned bar code. This can be
useful when decoding more than one code type. The code ID character is
inserted between the pre�ix character (if selected) and the decoded symbol.
- 9 -

01261
Enable Code 11
01321
Enable Code11 Multi-Veri�ication
00221
Enable Code39
00251
Enable transmit Code39 check digit
00250
Disable transmit Code39 check digit
00220
Disable Code39
01320
Disable Code11 Multi-Veri�ication
01260
Disable Code11
Symbologies
Code 11
Code 39
Users usually need to know barcode type in the process of scanning
- 10 -

Code 32
Code 93
Enable FULL ASCII
Transmit Code 39
Start/Stop Character
Enable Code39 Multi-Veri�ication
Enable Code32
Enable Code93 Disable Code93
Disable Code32
Disable Code39 Multi-Veri�ication
Do not Transmit Code 39
Start/Stop Character
Disable FULL ASCII
- 11 -
00231 00230
00281 00280
00331 00330
00261 00260
00621 00620

- 12 -
Enable Code93 Multi-Veri�ication
Enable Code128
Enable Code128 Multi-Veri�ication
Enable Codabar Disable Codabar
Disable Code128 Multi-Veri�ication
Disable Code128
Disable Code93 Multi-Veri�ication
Code 128
Codabar
00681 00680
00691 00690
00841 00840
00851 00850

- 13 -
Transmit Codabar
Start/Stop Character
Enable Codabar Multi-Veri�ication
Enable Interleaved 2 of 5
Enable Interleaved 2 of 5
Multi- veri�ication
Enable Industrial 2 of 5 Disable Industrial 2 of 5
Disable Interleaved 2 of 5
Multi- veri�ication
Disable Interleaved 2 of 5
Disable Codabar Multi-Veri�ication
Do not Transmit Codabar
Start/Stop Character
Interleaved 2 of 5
Industrial 2 of 5
00861 00860
00951 00950
00961 00960
01051 01050
01061 01060

Enable Industrial 2 of 5
Multi- veri�ication
Enable China Post
Enable MSI
Enable MSI Multi-Veri�ication
Enable EAN-8 Disable EAN-8
Disable MSI Multi-Veri�ication
Disable MSI
Disable China Post
Disable Industrial 2 of 5
Multi-veri�ication
China Post
MSI
EAN-8
- 14 -
01141 01140
01571 01570
01151 01150
01251 01250
00371 00370

Transmit EAN-8 check digit
Enable EAN-13
Transmit EAN-13 Check Character
Enable Convert EAN-13 to ISBN
Enable Convert EAN-13 to ISSN Disable Convert EAN-13 to ISSN
Disable Convert EAN-13 to ISBN
Do not Transmit EAN-13
Check Character
Disable EAN-13
Do not transmit EAN-8 check digit
EAN-13
- 15 -
00471 00470
00361 00360
00461 00460
00481 00480
01501 01500

Enable UPC-A
Transmit UPC-A check digit
Enable Convert UPC-A to EAN-13
Enable UPC-E
Transmit UPC-E check digit Do not transmit UPC-E check digit
Disable UPC-E
Disable Convert UPC-A to EAN-13
Do not transmit UPC-A check digit
Disable UPC-A
UPC-A
UPC-E
- 16 -
00341 00340
00421 00420
00391 00390
00351 00350
00431 00430

Enable Convert UPC-E to UPC-A
*Disable UPC/EAN Add-on Digits
Enable 5-Digit Add-On Code
Enable UPC/EAN Multi- veri�ication Disable UPC/EAN Multi-veri�ication
Enable UPC/EAN 2 or 5 Digit
Add-on Code
Enable UPC/EAN 2-Digit Add-on Code
Disable Convert UPC-E to UPC-A
UPC/EAN Add-on Digits
- 17 -
00381 00380
00550 00551
00552 00553
00541 00540

Con�igure Pre�ix or Suf�ix
1. Scan code 'add suf�ix'. This step will clear all previous suf�ix con- �iguration.
Maximum you can add 32 codes.
Add Suf�ix
0C002
Con�igure Pre�ix or Suf�ix
Add Pre�ix
1. Scan code 'add pre�ix'. This step will clear all previous pre�ix con- �iguration.
Maximum you can add 32 codes.
2. Scan related pre�ix codes to con�igure the pre�ix.
For example :
① If you want to add 'MG' as pre�ixes, �irst scan code of M then scan Code of G.
② Scan 'Test' , there're pre�ixes of MG before Test. That's MGTEST.
- 18 -
Add Pre�ix
M G
0C001
$4D
TEST
$47

Hide Front/Back Codes
For example
Hide Front Codes
Scan barcode of ' Hide Front Codes'. All previous con�iguration will be cleared.
Scan the number that you want to hide. Maximum can hide 32 codes.
If you want to hide front 2 codes, scan code of $02
2.Scan related suf�ix codes to con�igure the suf�ix.
For example :
①If you want to add 'MG' as suf�ixes, �irst scan code of M then scan Code of G.
② Scan 'Test' , there're suf�ixes of MG after Test. That's TESTMG.
- 19 -
M G
$4D $47
Other manuals for NT-1698W
1
Table of contents
Other Netum Scanner manuals
Popular Scanner manuals by other brands
Reflecta
Reflecta xScan Film Scanner user manual

Epson
Epson 4180 - Perfection Photo Specifications
Canon
Canon 4400F - CanoScan - Flatbed Scanner quick start guide
Epson
Epson 1250 - Perfection Photo Flatbed Scanner Asetukset

Epson
Epson Perfection V100 Series Product information guide
Medion
Medion LIFE P82009 instruction manual
