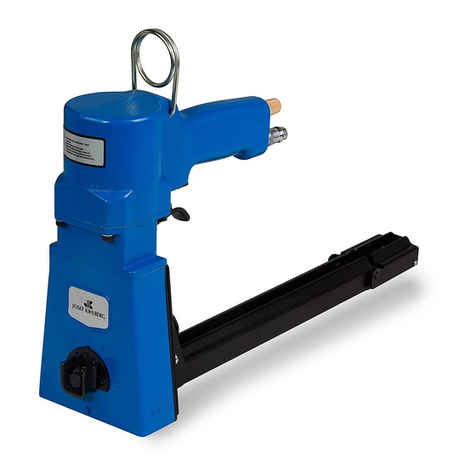
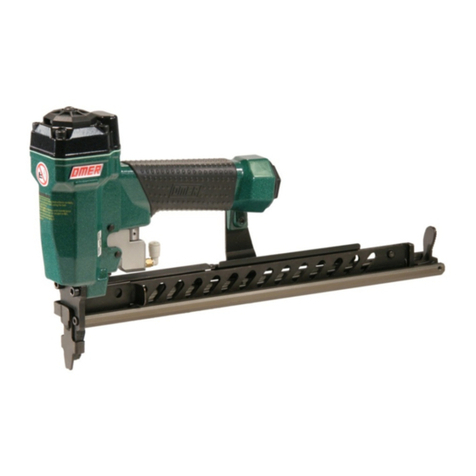
NEU MASTER NTC0040-AU User manual

CN
EN
DE
FR
IT
ES
PT
RU
JP
ID
SAVE THIS INSTRUCTION MANUAL FOR FUTURE REFERENCE.
电动钉枪
Electric tacker
Elektrotacker
Agrafeuse électrique
Pistola sparachiodi elettrica
Grapadora eléctrica
Pistola de pregos elétrica
Степлер электриуеский
電気タッカー
Stapler listrik
NTC0040-AU

NTC0040-AU
1
2
3 54
H
E
A
F
D
G
B
C
1.73Kg
2
Ι
2
a
aa=15-25 mm
a=5/8-1 inch
a=15, 20, 25, 30, 32 mm
a=5/8, 3/4, 7/8, 1,1¼ inch
230-240V
~
50/60Hz
5A

3
7
8
6
B
C
A
D
1
2
3

4
@
NO.
Wood Wood
hardness Length of nail
(
mm
)
Hand Operation
1 Beech Wood High 15
,
20
,
25
Two hands operation (see
pict re). One hand
operation is not s ggested.
2 Oak 15
,
20
,
25
3
Medium
Density
Fiberboard Medi m 15
,
20
,
25
4 Solid Wood 15
,
20
,
25
,
30
5 Pine
Low
15
,
20
,
25
,
30
,
32
6 plywood 15
,
20
,
25
,
30
,
32
7 Cedar 15
,
20
,
25
,
30
,
32
-1
0
9
!
G

5
@
NO.
Wood Wood
hardness
Length of staple
(
mm
)
Hand Operation
1 Beech Wood High
Two hands operation (see
pict re). One hand
operation is not s ggested.
2 Oak
3
Medium
Density
Fiberboard Medi m
4 Solid Wood
5 Pine
Low 6 plywood
7 Cedar
15 20
-
15 20
-
15 22
-
15 22
-
15 22
-
-2
15 16
-
15 16
-
13
1
2

6
GB
INTRODUCTION
•This tool is intended for stapling and nailing of
cardboard, insulating material, fabrics, foils, leather and
similar materials on surfaces of wood or materials
similar to wood
•Read and save this instruction manual 3
TECHNICAL SPECIFICATIONS 1
TOOL ELEMENTS 2
A
B
C
D
E
F
G
H
SAFETY
GENERAL SAFETY INSTRUCTIONS
WARNING! Read all instructions. Failure to follow all
instructions listed below may result in electric shock, fire
and/or serious injury. The term “power tool” in all of the
warnings listed below refers to your mains operated
(corded) power tool or battery operated (cordless) power
tool.
1) WORK AREA
a) Keep work area clean and well lit. Cluttered and dark
areas invite accidents.
b) Do not operate power tools in explosive
atmospheres, such as in the presence of flammable
liquids, gases or dust. Power tools create sparks
which may ignite the dust or fumes.
c) Keep children and bystanders away while operating
a power tool. Distractions can cause you to lose
control.
2) ELECTRICAL SAFETY
a) Power tool plugs must match the outlet. Never
modify the plug in any way. Do not use any adapter
plugs with earthed (grounded) power tools.
Unmodified plugs and matching outlets will reduce risk
of electric shock.
b) Avoid body contact with earthed or grounded
surfaces such as pipes, radiators, ranges and
refrigerators. There is an increased risk of electric
shock if your body is earthed or grounded.
c) Do not expose power tools to rain or wet conditions.
Water entering a power tool will increase the risk of
electric shock.
d) Do not abuse the cord. Never use the cord for
carrying, pulling or unplugging the power tool. Keep
cord away from heat, oil, sharp edges or moving
parts. Damaged or entangled cords increase the risk of
electric shock.
3) PERSONAL SAFETY
a) Stay alert, watch what you are doing and use
common sense when operating a power tool. Do not
use a power tool while you are tired or under the
influence of drugs, alcohol or medication. A moment
of inattention while operating power tools may result in
serious personal injury.
b) Use safety equipment. Always wear eye protection.
Safety equipment such as dust mask, non-skid safety
shoes, hard hat, or hearing protection used for
appropriate conditions will reduce personal injuries.
c) Remove any adjusting key or wrench before turning
the power tool on. A wrench or a key left attached to a
rotating part of the power tool may result in personal
injury.
d) Do not overreach. Keep proper footing and balance
at all times. This enables better control of the power
tool in unexpected situations.
e) Dress properly. Do not wear loose clothing or
jewellery. Keep your hair, clothing and gloves away
from moving parts. Loose clothes, jewellery or long
hair can be caught in moving parts.
f) If devices are provided for the connection of dust
extraction and collection facilities, ensure these are
connected and properly used. Use of these devices
can reduce dust related hazards.
4) POWER TOOL USE AND CARE
a) Do not force the power tool. Use the correct power
tool for your application. The correct power tool will
do the job better and safer at the rate for which it was
designed.
b) Do not use the power tool if the switch does not turn
it on and off. Any power tool that cannot be controlled
with the switch is dangerous and must be repaired.
c) Ensure the switch is in the off position before
making any adjustments, changing accessories, or
storing power tools. Such preventive safety measures
reduce the risk of starting the power tool accidentally.
d) Store idle power tools out of the reach of children
and do not allow persons unfamiliar with the power
tool or these instructions to operate the power tool.
Power tools are dangerous in the hands of untrained
users.
e) Maintain power tools. Check for misalignment or
binding of moving parts, breakage of parts and any
other condition that may affect the power tools
operation. If damaged, have the power tool repaired
before use. Many accidents are caused by poorly
maintained power tools.
f) Keep cutting tools sharp and clean. Properly
maintained cutting tools with sharp cutting edges are
less likely to bind and are easier to control.
I
Lever for loading magazine
Slider
Magazine
Non-marring nose tip
Soft grip handle
ON/OFF Switch
Trigger
Impact control adjustment knob
Contact safety

10
g) Use the power tool, accessories and tool bits etc., in
accordance with these instructions and in the
manner intended for the particular type of power
tool, taking into account the working conditions and
the work to be performed. Use of the power tool for
operations different from those intended could result in
a hazardous situation.
6) SERVICE
a) Have your power tool serviced by a qualified repair
person using only identical replacement parts. This
will ensure that the safety of the power tool is
maintained.
SAFETY INSTRUCTIONS FOR TACKERS
• Secure the workpiece (a workpiece clamped with
clamping devices or in a vice is held more securely than
by hand)
• Never push in the tacker head manually 4(there is
danger of injury when at the same time the trigger
is activated unintentionally)
• Never use the tool for fastening electrical wiring
(contact with electrical wires can lead to fire and electric
shock)
• Avoid damage that can be caused by screws, nails and
other elements in your workpiece; remove them before
you start working
• In case of electrical or mechanical malfunction,
immediately switch off the tool.
• PRULDE can assure flawless functioning of the tool only
when original accessories are used
• This tool should not be used by people under the age of
16 years
USE
• Loading staples/nails
6
• Operating the tool 8
- firmly press tacker head D against the workpiece until
it is pushed in a few millimeters.
- briefly press trigger F and then release again
- Trigger F is locked as long as you do not press tacker
head D against the workpiece,
thus preventing accidental operation
! remove all staples/nails from the magazine after
each use
• Impact control
9
With knob G the required impact level can be adjusted
in steps
- indicator G shows the selected impact level
- “-” for thin and light materials such as foils and
fabrics
- “+” for thick and tough materials such as hard
woods and walls
- before starting a job, find the optimal impact level by
testing out on spare material
APPLICATION ADVICE
• Fastening panels
0
• Do not use the tool for fastening ceiling panelling on
profiled wood or grooves
• Fixing textiles
!
• Avoid blank shots in order to reduce the wear of the
impact strike
• Do not expose tool to rain. 5
- At 20 shots/min,tacker should be allowed to cool down
after 30 minutes as it is only rated for short-time duty.
• Rougly, the hardness of wood is divided into 3 levels:
NAIL INSTRUCTIONS FOR TACKERS
@
• Nails of different length are applicable for different wood hardness
• The tool has a recoil when firing, so two hands operation is
- High
- Medium
- Low
suggested, to have a better control of the operation
UNBLOCKING JAMMED FASTENERS
• In the unlikely event that nails become jammed, follow these
instructions to remove them
- Remove the nose tip I
- Remove the plate retaining bolts
- Remove the safety mechanism retaining plate
- Remove the firing pin retaining plate
! Note the location as well as the order in which parts are
removed from the tacker, this will make it easier to rebuild it
1313
13
13
13
! unplug power cord from power source before removing
- tilt the tool or lay the tool flat, so the staples or nails will
- press lever A while pulling slider B backwards
- place the nail strip into magazine C (maximal capacity
90 nails)
- push slider B against tacker head D until it snaplocks
7
not drop out while loading
! Attention
Make sure that
- the nail strip is loaded with the tapered end aligning
with the bottom line of the magazine C, so the brad
nail head rest right into the grooves which corresponds
with the symbol of nail length on tacker head D
- the staple strip is loaded with the crown aligning
with the top line of the magazine C 6
5) Battery tool use and care
a) Ensure the switch is in the off position before inserting
battery pack. Inserting the battery pack into power tools
that have the switch on invites accidents.
b) Recharge only with the charger specified by the
manufacturer. A charge that is suitable for one type of
battery pack may create a risk of fire when used with
another battery pack.
c) Use power tools only with specifically desinated
battery packs. Use of any other battery packs may
create a risk of injury and fire.
d) When battery pack is not in use, keep it away from
other metal objects like paper clips, coins, keys, nails,
screws, or other small metal objects that can make a
battery terminals together may cause burns or a fire.
connection from one terminal to another. Shorting the
e) Under abusive conditions, liquid may be ejected from
the battery; avoid contact. If contact accidentally
occurs, flush with water. If liquid contacts eyes,
the battery may cause irritation or burns.
additionally seek medical help. Liquid ejected from

7
IB2100db.indd 7 06-06-2006 15:03:45
GUARANTEE
• Keep tool clean
! unplug power cord from power source before
cleaning
• This product is guaranteed in accordance with
statutory/country-specific regulations; damage due to
normal wear and tear, overload or improper handling will
be excluded from the guarantee
• In case of a complaint, send the tool or charger
undismantled together with proof of purchase to your
dealer or the nearest authorized service station
Table of contents
Other NEU MASTER Power Tools manuals
