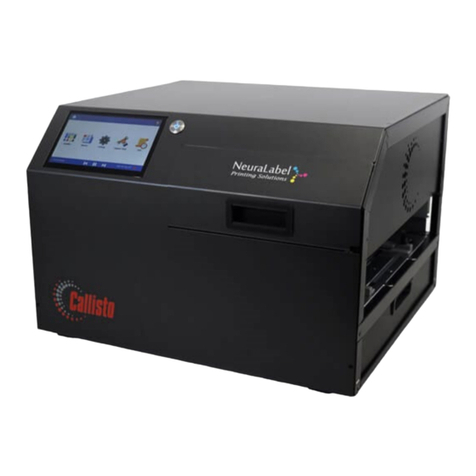
NeuraLabel Callisto User manual

NeuraLabel Callisto Service Guide
ii
© 2013-2020 Neuralog, LP
All rights reserved. No parts of this work may be reproduced in any form or by any means –graphic,
electronic, or mechanical, including photocopying, recording, taping, or information storage and retrieval
systems –without the written permission of the publisher.
Acknowledgments
Printed June 2022, Stafford, TX.

NeuraLabel Callisto Service Guide
iii
Table of Contents
Bar-in-Box Replacement.............................................................................................................4
Accessing the Bar-in-Box..........................................................................................................4
New BNB Installation.............................................................................................................12
Controller Board Replacement.................................................................................................18
Replacing the Controller Boards ............................................................................................18
Resetting the Host Name.......................................................................................................21
Main PCA Replacement............................................................................................................22
Removing the Electronics Tray...............................................................................................22
Replacing the Main PCA.........................................................................................................25

NeuraLabel Callisto Service Guide
4
Confidential –Not for Redistribution
BAR-IN-BOX REPLACEMENT
ACCESSING THE BAR-IN-BOX
To access the Bar-in-Box (BNB) and other internal components of the printer such
as printed circuit boards (PCBs), connectors, and cabling, the external enclosure
must be removed. Review the instructions and safety procedures before
disassembling the printer.
1. Locate the six Philips flat head screws. There are two on the front of the
printer and six on the top of the printer.

NeuraLabel Callisto Service Guide
5
Confidential –Not for Redistribution
2. Remove the six screws starting with the four screws on the top of the
external enclosure followed by the two screws on the front of the printer
using a Philips head screwdriver.
3. Lift up and rotate the front of the enclosure back to remove the enclosure
from the printer.

NeuraLabel Callisto Service Guide
6
Confidential –Not for Redistribution
4. Set the enclosure aside. Lift the electronics tray by the front metal
member. The electronics tray will pivot up and back.

NeuraLabel Callisto Service Guide
7
Confidential –Not for Redistribution
5. Rotate the kickstand and engage it with the pin on the side of the
electronics tray frame member so it stays locked in place.

NeuraLabel Callisto Service Guide
8
Confidential –Not for Redistribution
6. Unplug the three Flat Flexible Cables (FFCs) connecting the BNB to the
Main PCA by pulling the two white cables out of their connectors and
unlocking the black cable’s connector.
7. Locate the four screws securing the BNB to the Frame. There are two
Philips screws on the front and two on the back of the printer.
Front
Back

NeuraLabel Callisto Service Guide
9
Confidential –Not for Redistribution
8. Unscrew the four Philips screws using a Philips screwdriver.
9. Remove the top side panel from the input side of the printer by pulling
outwards from the bottom of the panel.
Front
Back

NeuraLabel Callisto Service Guide
10
Confidential –Not for Redistribution
10. Locate two Philips flat head screws on the input side of the printer.
11. Unscrew the two Philips flat head screws using a Philips head screwdriver.
The Sled Stop Latch will slide down from behind the Sled Stop Member.
Set the Sled Stop Latch aside for reinstallation later.
Sled Stop Latch

NeuraLabel Callisto Service Guide
11
Confidential –Not for Redistribution
12. The BNB is free from the frame and ready to be taken out from the
printer. Lift the BNB by the support beam above the printhead and the
cover for the ink housing.

NeuraLabel Callisto Service Guide
12
Confidential –Not for Redistribution
13. Lift the BNB away from the frame and set it aside.
NEW BNB INSTALLATION
1. Unbox the BNB. Set aside the temporary spittoon.
2. Remove all the blue tape. Keep the orange packing material in place.
3. Lift the BNB by the support beam above the printhead and the cover for
the ink housing. Set the BNB on the front and back members of the frame.

NeuraLabel Callisto Service Guide
13
Confidential –Not for Redistribution
4. The BNB sides have tabs that slide in to the slots on the front and back
members of the frame.
5. Screw the BNB to the frame using the four Philips head screws removed
earlier.
Slots
Tabs

NeuraLabel Callisto Service Guide
14
Confidential –Not for Redistribution
6. Slide the Sled Stop Latch between the Sled Stop and the BNB on the input
side of the printer. Attach it to the Sled Stop Member using the two
Philips flat head screws removed earlier.
7. Plug in the three FFCs from the BNB to the Main PCA. Carefully align the
black cable in the connector and close the lock. Misalignment will
damage the cable and require replacement of the BNB and will void the
warranty.
8. Remove all the orange packing material.
9. Locate the Ethernet, AC Power, and Power Switch on the power brick.
When the electronics tray is in the upright position, the power brick will
be facing inwards on the right side of the printer.
10. Plug in AC Power and Ethernet to the printer. Do not power on yet.
Power Brick
Ethernet | Power | Power Switch

NeuraLabel Callisto Service Guide
15
Confidential –Not for Redistribution
11. The Controller board is located on the top left of the electronics tray. Find
the two position DIP switch. Change switch “2” to the “ON” position. This
will boot the printer in to Manufacturing Mode on the next power up.
12. Turn the power on by using the power switch on the power brick.
13. The Operator Panel screen will indicate “Manufacturing Mode Off” in the
lower left corner of the screen once the printer fully boots up.
14. Navigate to Support Tools > Advanced > Printbar Replacement on the
Operator Panel.

NeuraLabel Callisto Service Guide
16
Confidential –Not for Redistribution
15. Click “Start”. This will automatically run the BNB replacement process.
The process should take five minutes.
16. Once complete, the “Status” box will be populated with several checks
indicating “Success”.
17. Hard power off the printer by flipping the power switch on the power
brick. The printer will purge shipping fluid the next time it is powered on.
18. Place the temporary spittoon on the output surface under the printhead.

NeuraLabel Callisto Service Guide
17
Confidential –Not for Redistribution
19. Power on the printer using the power switch on the power brick. The
printer will begin purging shipping fluid into the temporary spittoon. This
process will take approximately twenty minutes.
20. The printer will cap the printhead When the process is finished. Discard
the temporary spittoon being careful not to spill any shipping fluid that
was not absorbed by the spittoon.
21. Power off the printer using the silver power button on the electronics
tray.
22. Unplug the AC Power and Ethernet from the power brick.
23. Disengage the kickstand, rotate it back to its home position and lower the
electronics tray.
24. Place the enclosure over the frame by aligning the back of the cover and
rotating it to the front.
25. Use the six Philips flat head screws to secure the enclosure to the frame
using a Phillips screwdriver.

NeuraLabel Callisto Service Guide
18
Confidential –Not for Redistribution
CONTROLLER BOARD REPLACEMENT
REPLACING THE CONTROLLER BOARDS
1. Make sure no power is applied to the printer. Unplug Ethernet and AC
power from the power brick.
2. Remove the printer cover and raise the electronics tray as described
above in the Bar-in Box Replacement section.
3. With the Electronics Tray in the up position, locate the Controller boards.
They are located on the top left of the Electronics Tray.

NeuraLabel Callisto Service Guide
19
Confidential –Not for Redistribution
4. Unplug the three FFCs, the USB cable, and the Door Switch.
5. Unplug the Power Button Switch and the three Ethernet cables.

NeuraLabel Callisto Service Guide
20
Confidential –Not for Redistribution
6. Unplug the AC Power, HDMI, and two Ethernet cables on the left side of
the Controller boards
7. Locate the three Philips flat head screws holding the mounts for the
Controller boards. They are on the top side of the Electronics Tray.
Other manuals for Callisto
1
Table of contents
Other NeuraLabel Printer manuals


