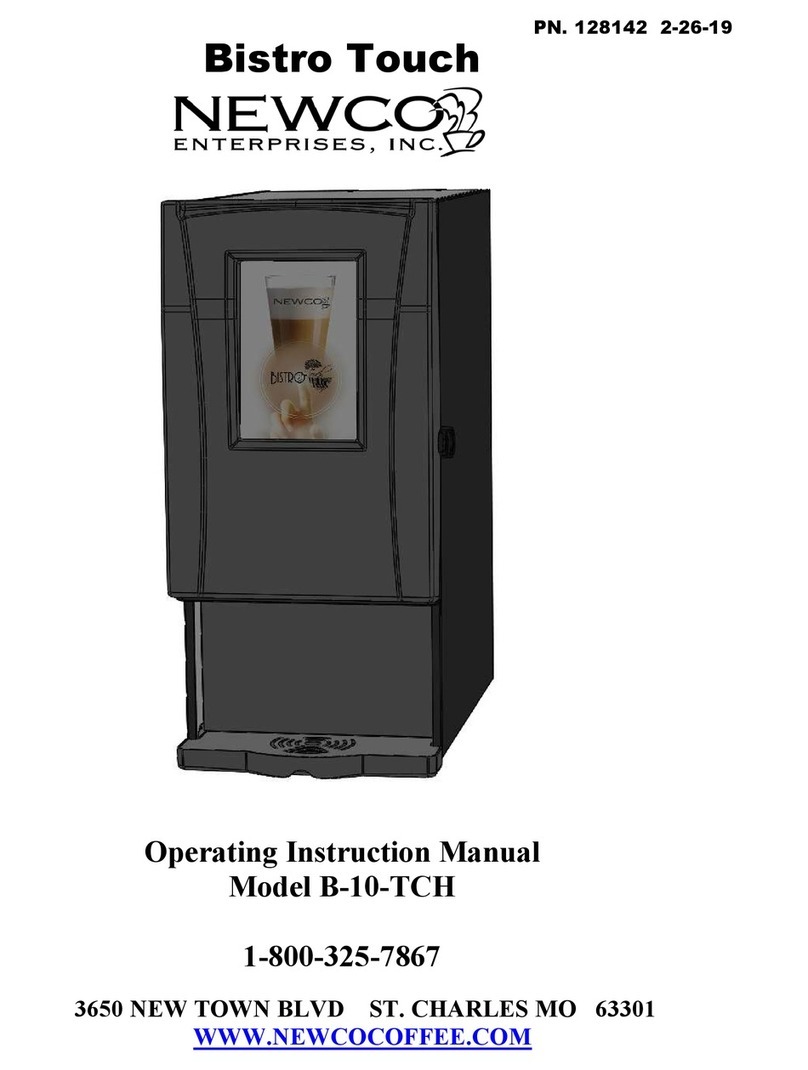
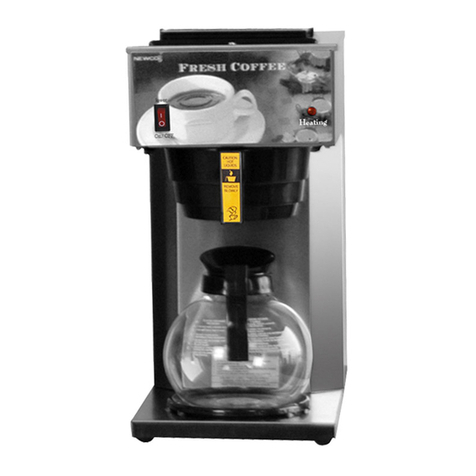
Newco Bistro Touch Instruction Manual

1
Bistro
Touch
Operating
Instruction Manual
Model BISTRO-TCH
1-800-325-7867
3650 NEW TOWN BLVD ST. CHARLES MO 63301
WWW.NEWCOCOFFEE.COM
PN. 128142
1-30-2018

2
Table of Contents
Introduction & Newco Product Warranty .................. 4
Machine Dimensions & Specifications......................... 5
Machine Features........................................................... 6
Plumbing Connections................................................... 7
Installation Instructions................................................. 8
Setup Instructions Bistro Touch..……...…
.
................... 9
Product Installation Procedure..................................... 9
Touch Screen Startup Instructions…........................ 12
Machine Startup Instructions......................................14
Operating Instructions………………......................... 15
Programming Instructions……………….................. 19
Custom Logo Setup...................................................... 18
Whipper Disassembly .................................................. 23
Cleaning & Sanitizing Instructions ............................ 24
Service Notes................................................................. 29
Wiring Diagram............................................................ 30

3
Warning Labels
! WARNING
DO NOT OVERLOAD CIRCUIT.
ALWAYS ELECTRICALLY GROUND THE
CHASSIS OR ADAPTOR PLUG.
DO NOT DEFORM PLUG OR CORD.
FOLLOW NATIONAL AND LOCAL
ELECTRICAL CODES.
KEEP COMBUSTIBLES AWAY.
FAILURE TO COMPLY RISKS EQUIPMENT
DAMAGE, FIRE OR SHOCK HAZARD.
READ THE ENTIRE OPERATING
MANUALBEFOREUSING THIS PRODUCT
NOTICE: Read and follow all notices posted on this machine.
Do not damage or destroy these notices as they are for your
protection

4
Introduction & Newco Product
Warranty
INTRODUCTION
This machine is intended to brew 8-12 ounce single servin
g
o
f
co
ff
ee and / or powdered hot
drinks into a cup. This machine will also dispense hot water for allied beverage use. It is
intended for indoor use only on a sturdy counter or shelf.
WARRANTY
Newco warrants equipment manufactured by it for 1 year parts and labor.
These warranty periods run from the date o
f
sale Newco warrants that the equipment
manufactured by it will be commercially free of defects in material and workmanshi
p
existing at the time of manufacture and appearing within the applicable warrant
y
period. This warranty does not apply to any equipment, component or part that was no
t
manufactured by Newco or that, in Newco’s judgment, has been affected by misuse
,
neglect, alteration, improper installation or operation, improper maintenance or repair
,
damage or casualty. This warranty is conditioned on the Buyer 1) giving Newco promp
t
notice of any claim to be made under this warranty by telephone at (800) 556-3926 or b
y
writing to PO Box 852, Saint Charles, MO 63302; 2) if requested by Newco, shipping th
e
defective equipment prepaid to an authorized Newco service location; and 3) receivin
g
prior authorization from Newco that the defective equipment is under warranty.
THE FOREGOING WARRANTY IS EXCLUSIVE
A
ND IS IN LIEU OF ANY OTHER
WARRANTY, WRITTEN OR ORAL, EXPRESS OR IMPLIED, INCLUDING, BUT NO
T
LIMITED TO, ANY IMPLIED WARRANTY OF EITHER MERCHANTABILITY OR FITNES
S
FOR A PARTICULAR PURPOSE. The agents, dealers or employees of Newco are no
t
authorized to make modifications to this warranty or to make additional warranties tha
t
are binding on Newco. Accordingly, statements by such individuals, whether oral o
r
written, do not constitute warranties and should not be relied upon.
I
f
Newco determines in its sole discretion that the equipment does not con
f
orm to the
warranty, Newco, at its exclusive option while the equipment is under warranty, shal
l
either 1) provide at no charge replacement parts and/or labor (during the applicabl
e
parts and labor warranty periods specified above) to repair the defective components
,
provided that this repair is done by a Newco Authorized Service Representative; or 2
)
shall replace the equipment or refund the purchase price for the equipment.
THE BU
Y
ER’S REMEDY AGAINST NEWCO FOR THE BRE
A
CH OF ANY OBLIGATION
ARISING OUT OF THE SALE OF THIS EQUIPMENT, WHETHER DERIVED FRO
M
WARRANTY OR OTHERWISE, SHALL BE LIMITED, AT NEWCO’S SOLE OPTION A
S
SPECIFIED HEREIN, TO REPAIR, REPLACEMENT OR REFUND.

5
Machine Dimensions &
Specifications
120 VAC-1600W HEATER-15A USA POWER SUPPLY
120 VAC-1400W HEATER-15A CANADIAN POWER SUPPLY
½ GALLON TANK
6-8-10-12-16 OZ CUP SIZES
5 LB HOPPERS
DRIPTRAY&
DRIPTRAY
GRATE
RINSEBUTTON
MILKHOPPER
CHOCOLATE
HOPPER
WHIPPER
CHAMBER
DISPENSE
NOZZLES
DECAFCOFFEE
REGULARCOFFEE
TOUCHSCREEN
ON/OFFSWITCH

6
M
ac
hi
ne
F
ea
t
ures
NO CALIBRATION NEEDED-PLUG & PLAY
DECAF BUTTON SWITCHES TO DECAF BIB WHIPPER RINSE
BUTTON
AUTOMATIC POWDER LEVEL RESET PRE-
PROGRAMMED DRINK RECIPES BUTTON ASSIGNMENT
FOR RECIPES INDEPENDENT POWDER HOPPER
COUNTDOWN & RESET
CUSTOM CALL FOR SERVICE NUMBER POWER SAVE &
POWER DOWN OPTION WATER FILTER MONITORING
OPTIONS BEEPER VOLUME CONTROL
PUSH & HOLD HOT WATER BUTTON DUMP VALVE DELIVERY
FOR POWDERS
5 LB HOPPER SIZE
THIS IS CONFIGURED AND READY
TO
DISPENSE 8-OUNCE DRINKS. TO
CHANGE
RECIPES SEE
PROGRAMMING
SECTION,
MACHINE
SET-UP
.

7
Pl
um
bi
n
g
C
onnect
i
ons
Plumber’s Installation Instructions
1)
2) Attach water line to water filter, rear of machine.
Flush water line before installing machine. Machine should be connected to COLD WATER LINE
ONLY.
Water pressure should be at least 40 lbs. For less than a 25 ft run, use 1/4" copper tubing and connect to
1/2" or larger water line. For longer runs, use 3/8" copper tubing & connect to 1/2" or larger water line
and provide an adapter fitting for connection to the brewer. A dedicated water line is necessary for
this machine. Minimum flow rate is 1GPM.
If installed with saddle valve, the valve should have a minimum of 1/8" porthole for up to 25 ft run, and
5/16" porthole for over 25 ft runs.
5) Manufacturer recommends connecting to copper tubing.
3)
4)
Electrical
Hook-Up
WARNING
The Machine must be disconnected from the power source until specifiedin Installation
Instructions.
Determine the available on-site electrical requirements
Refer to Data Plate on the Machine, and local/national electrical codes to determine circuit
requirements.
CAUTION – Improper electrical installation will damage electronic components.
CAUTION: Disconnect Power to machine before proceeding with plumbing installation.

8
Machine Installation Instructions
WARNING: - Read and follow installation instructions before plugging or wiring in machine to electrical
circuit. Warranty will be void if machine is connected to any voltage other than that specified on the
nameplate serial tag.
1) Machine must be on a flat and level surface. Plu
g
or wire in machine to appropriate volta
g
eas
noted on the brewer serial tag. Serial tag is located on inside of machine.
With water line connected, turn machine power ON (power switch located lower left rear of
machine). Install Drip tray and drip tray grate under brew area (slide tray between guide rails
until seated).
Tank will automatically fill, and machine will start heating. If tank does not fill in 8 minutes, a
“tank fill error” will occur. (Note: To reset error power machine on/off with power switch).
Allow 5 to 10 minutes for water in tank to heat to brewing temperature. (Additional water may
drip into drip tray on initial expansion of water in the tank). This will not occur thereafter.
Heater will turn on when tank is at probe level. When tank noise is no longer heard, machine is
ready to operate. If brew is initialized before tank temperature is reached, machine will displa
y
“Heating” until temp is reached, then will start dispensing.
2)
3)
4)
5)
7) In hi
g
her altitude locations (5000 feet above sea level) the thermostat ma
y
6) have to be ad
j
usted lo
w
er to prevent boilin
g
:
Brew water temperature is factory set at 202o F
(94.4o
C) Areas of high altitude will require lowering
this
temperature to prevent boiling. This chart should
be
used as a guide when readjusting the brew
water
temperature.
Altitude (Feet)
Boiling point
of water o F o
C
Recommended
water
temperature
o F o
C
-1000
213.8 101.0 200 93.3
-500
212.9 100.5 200 93.3
0
212.0 100.0 200 93.3
500
211.1 99.5 200 93.3
1000
210.2 99.0 200 93.3
1500
209.3 98.5 200 93.3
2000
208.4 98.0 200 93.3
2500
207.4 97.4 200 93.3
3000
206.5 96.9 199 92.8
3500
205.6 96.4 198 92.2
4000
204.7 95.9 197 91.7
4500
203.8 95.4 196 91.1
5000
202.9 94.9 195 90.6
5500
201.9 94.4 195 90.6
6000
201.0 93.9 194 90.0
6500
200.1 93.4 193 89.4
7000
7500
199.2 92.9
198.3 92.4 192 88.9
191 88.3
8000
197.4 91.9 190 87.8
8500
196.5 91.4 189 87.2
9000
195.5 90.8 188 86.7
9500
194.6 90.3 187 86.1
10000
193.7 89.8 186 85.6

9
Product Installation Procedure
Fig. 3
Fig. 2
Fig. 1
Remove the plastic insert from the BIB fitment as shown in
Figure 4.
Fig. 4
Open product box and remove the BIB product, Fig 1. Place in
Coffee BIB Tray, Fig. 2, (Newco PN 121929) as shown in Fig. 3.

10
Using finger and thumb only to prevent ove
r
-tightening,
thread the BIB connector on to the BIB fitment until seated
as shown in Figure 5.
Fig. 5
Place the product in the storage compartment as shown in
Figure 6.
Fig. 6
Product Installation Procedure Cont’d

11
Product Installation Procedure Cont’d
Fig. 7
Position the tubing as shown in Figure 7-repeat for 2nd BIB-
NOTE COFFEE BIB IS LH CONNECTOR AND DECAF BIB
IS RH CONNECTOR
NOTE:REFERTO“PRIMING”
INSTRUCTIONSAFTERFOLLOWING
MACHINESTARTUPPROCEDURES

12
Touch Screen Startup
Instructions
Note: This machine is designed to be run with power c
y
cled on at all
times. Refer to the Startup and Power down instructions below and also
attached to the inside o
f
the cabinet door for shutting down the Touch Screen
Display when the machine is not in use.
1.OPENDOOR,PRESSANDHOLDON/OFF
BUTTONFOR10SECONDS.RELEASE
BUTTONWHENDISPLAYSHOWS
STARTUPSCREEN
2.WAIT30SECONDS‐‐
THENCYCLEPOWER
SWITCHTO‘ON’
POSITION.

13
T
ouc
h
S
creen
Sh
u
td
own
Instructions
When storing machine, or i
f
loss o
f
power occurs, the tablet should
be shutdown using the following procedure:
Note: This machine is designed to be run with power c
y
cled on at all times.
Refer to the Startup and Power down instructions below and also attached to the
inside o
f
the sidecar door for shutting down the Touch Screen Display when the
machine is not in use.
1.OPENDOOR,PRESSANDHOLDON/OFF
BUTTONFOR10SECONDSRELEASE
WHENDISPLAYCHANGESTOPOWER
DOWNOPTIONS
2.CONFIRMSHUT
DOWN

14
Machine
Startup Instructions
Fill and install 2lb hoppers with nozzles tu
r
ned up, Chocolate on left and Milk on right.
Make sure “button” on bottom of hopper is seated in slot in sheet metal. Slight manual
rotation of the auger gear may be necessary to seat hopper in correct location.
Rotate dispense nozzles down into whipper bowl.
NOTE: TABLET MUST BE POWERED ON PRIOR TO
CYCLING
POWER TO THE
MACHINE
Insure that there is a prope
r
wate
r
supply connected to the machine
and water is turned on. Insure that the machine is plugged into a
proper power outlet and there is power supplied to the machine. Turn
machine power switch on, machine should start filling, will shut off
when full. The Touch Screen Display will indicate when the machine is
filling.
Heate
r
will turn on when wate
r
in tank is at probe level and will display
Heating: Please Wait. The heating process can take 10-15 minutes
before the machine is ready to brew.
When machine temperature reaches brew temp, display will change
to the Drink Instruction Screen. The machine is now ready for
operation.
Touchingthescreenwillbringupthe Drinks Menu Selection Screen
Place an empty cup in the b
r
ewing a
r
ea, open the powdered hopper
door, and depress the “Rinse” button next to the whipper bowl until the
water runs clear

15
B
r
ewing Drinks
To dispense a drink, place a cup under the dispense area, press a brew selection
Once a selection is made a Submenu for Drink Settings will appear-see page 13
ICEDCOFFEE IS SIZED FOR CUP TO
BEPRE‐FILLEDWITH2/3CUPOFICE
Hot
Water
Push and
Hold
To
Dispense
Shot Drinks
One Ounce Shot
(Coffee Topping)
SpecialtyDrinks
Small
–Medium-
Large Mild-
Regular-Bold
Espresso
Drinks
Single-Double-Triple
Coffee Drinks
Small
–
Medium-
Large Mild-
Regular-Bold

16
Drinks Submenu
Cycle
Cancel
Button
Stops
Brewing
Cycl
e
BrewButton
StartsBrewing
Return
Button
ReturnstoMain
DrinkSelection
Menu
Cup Strength Selections
Mild –Regular- Bold
Use to Change
Coffee Strength
Default Regular
Cup Size Selections
Small –Medium- Large
Use to Change
Cup Size
Default 8-10-12
CoffeeStren
g
th
Indicator
CupSize
Indicator

17
Programming
Instructions
Screen will change to P
r
ogram Menu Screen:
perature‐‐180Powder
T
racking On‐Off
Size—OFF,2‐50
ndsfromlast dispense till
on“Callfor
Use)
willstay awakebefore
DrinkSelectionMenu
AbilitytoturnDrinkSelect
io
ns
and/orCupSizesOnorOff
ExitDrinkSelectionMode
PrimaryNewcoServer
(FutureUse)Secondary
Server(Future
SleepTimeout—timebrewer
enteringsleepscreen
BrewingScreen‐Toggles
betweenSlates&Moviesor
displayInstalledLogoScreen
InstallLogo&LoadSoftware
Update*See Page 16
ExitLocalSetupMode
Totalruncycles‐Totaldrinks
dispensed
Podbrewcycles—Tea&Coffee
drinks
di
spensed
TotalWaterUsage—TotalGallonsof
water
di
spensed*
ChocolateGramsRemain‐‐Choco
l
ate
gramsremaininginHopper**
MilkGramsRemain‐‐Milkgrams
remaininginHopper**
ExitStatisticsMode
TRACKINGISDISABLED
**NOTSHOWNIFPOWDER
WaterFilterRemainingGal*
*NOT SHOWN IF NOT USING
AWATER FILTER
WaterfilterReset‐‐Se
l
ect
thisafterchangingfiltersto
resetwaterfilter
countdown*
WhipperSealRema
i
ning‐‐
Remainingpowdereddrink
cyclesbeforechangingthe
WhipperSeal
WhipperSealReset—Reset
countafterchanging
CleanPumps‐AccessPump
CleaningMenu**
PrimePumps‐AccessPump
PrimingMenu**
**SeePage45
ExitMaintenanceMode
WaterTem
–203
WasteBin
AirBlowStr
AirBlow
T
sec
o
WaterFilter
500‐300
0
CallForSer
v
beshown
Service
“
PowderTracking–Toggle
DegF
SetDCPumpSpeed,1‐87
EnergySaveMode—OFF,
e
ngth—3‐10SEMI,FULL
me—2‐15EnergySaveTime—Timer
EnergySavekicks
in
Size—OFF,
GallonsDefaultCupSize—SetsCup
SizedisplayedAsDefault
ice#‐‐#will
ScreensBelow
RestoreFactorySettings
ExitSetupMode
DrinkSelection Menu‐See
TAP3TIMESTOENTER
PROGRAMMING
MODE
IFABREWINGICONIS
ACCIDENTLY
TOUCHEDUSETHERETURNARROW
TO
TRY
AGAIN

18
Custom Logo--Wifi Setup
7.TURNONPOWER
TOBISTRO‐TOUCH
MACHINEUSING
SWITCHATREAR
LEFTOFMACHINE
8.RETURNTO
SELECTION
SCREEN
1. TOUCHTOACCESS
APPLICATIONICONS
3. PRESS“Wifi”ICONTOACCESSWIFI
SETUP&CONNECTTOLOCALWIFI
NETWORK
2. PRESS“Settings”ICONTO
ACCESSWIFI
SETTING UP ACUSTOM LOGO SCREEN
REQUIRES AWIFI CONNECTION TO THEBISTRO
INE.NOTETHATAFTERTHE
LOGO IS INSTALLED, THE WIFI CONNECTION
NEEDS TO BE TURNED BACK TO “OFF”STATUS
TOUCHMACH
4. TURN“WI‐FI”ON5. SELECT“WI‐FI”
NETWORK
6.ENTERPASSWORD
ANDCONNECT
TURNONPOWERTOMACHINE
USINGSWITCHATLOWERLEFT
REAROFMACHINE

19
INSTALL CUSTOM LOGO
Install Logo Instructions-Custom Sleep Screen
(Android
V
ersion)
3. TOUCHANDHOLDDOWN
IMAGEFILENAMETILLUP
ARROWAPPEARS.TOUCH
ARROWTOTRANSFERIMAGE
4. BISTRO‐TOUCHSCREENWILLCHANGE
TOFINISH.PRESSTOEXIT,THENEXIT
MENUS.
FINISH
TURN OFFWIFI,SEEPAGE 19.
2. TOUCHSITETOOPENCONNECTION,
SELECT“LOCAL”WHENCONNECTED
INSTALL“FTPEXPRESS”APPONTOA
LOCALPHONEORTABLET.CONNECT THE
LOCAL PHONE OR TABLET TO THE SAME WIFI
NETWORK AS THE BISTRO‐TOUCH.
APPLICATION EXAMPLE SHOWN IS “FTP
EXPRESS” FOR ANDROID
SETUPFTPCONNECTIONASSHOWN‐
INFORMATION FROM BISTRO‐TOUCH AS
SHOWNON
SCREEN‐NOTE‐EACH
MACHINE
HAS AUNIQUE IP ADDRESS
COPY
1. OPENTHEAPPANDCOPYSETTINGSFROM
BISTRO‐‐SAVESETUPWHENFINISHED
192.168.3.227
THIS ADDRESS IS UNIQUE FOR
EVERY
MACHINE. NOTE THAT IT IS USED
FOR
THE HOST ADDRESS WHEN SETTING
UP
COMMUNICATION
SITE
TAP3TIMESTOENTER
PROGRAMMING
MODE‐‐IFABREWINGICON
IS
ACCIDENTLYTOUCHEDUSETHE
RETURN
ARROWTOTRY
AGAIN

20
Install Logo Instructions-Custom Sleep Screen
(IOS Apple
V
ersion)
5.ENTERPORT2121,USERNAMEftp,PASSWORDftpTHEN
PRESSSaveBAR‐SERVERNAMEISNOWSHOWNASCX
6.TAPSERVERCXTOCONNECTTOBISTRO‐TOUCHMACHINE
/data/data/com.newcocoffee.cx3/cache
192.168.3.227
4.FORREMOTEPATHINFO
ENTER‐
/data/data/com.newcocoffee.cx
3/cache
3.FORHOSTIPADDRESS
COPYIPADDRESSINFO
FROMBISTRO‐TOUCH
2.FORSERVER
NAMEENTERCX
INSTALLTHE“ITRANSFER” APPONTOALOCAL
PHONEORTABLET.CONNECT THE LOCAL PHONE
OR TABLET TO THE SAME WIFI NETWORK AS THE
BISTRO‐TOUCH.
APPLICATION EXAMPLE SHOWN IS “ITRANSFER”
FOR I‐PHONE/IOS/APPLE
SETUPFTPCONNECTIONASSHOWN‐COPY HOST
ADDRESS FROM BISTRO‐TOUCH AS SHOWN ON
SCREEN‐NOTE‐EACH MACHINE HAS AUNIQUE
ADDRESS
PASSWORD
I
S
ft
1. OPENTHEAPPANDSLELCT
FTP/FTPS/SFTH,ADDSERVER,
Table of contents
Other Newco Coffee Maker manuals

Newco
Newco Bistro 10 T3 Instruction Manual

Newco
Newco NK Series Setup guide

Newco
Newco CX-TOUCH User manual

Newco
Newco FKP-3 User manual

Newco
Newco NB-LD Operation manual

Newco
Newco WonderBrew User manual

Newco
Newco KMA User manual

Newco
Newco FC 3 User manual

Newco
Newco BMF User manual

Newco
Newco OCS57-CG User manual

Newco
Newco AKH 1 User manual

Newco
Newco NKLP1A Setup guide

Newco
Newco Cafe Espresso 2.0 User manual

Newco
Newco CX-TOUCH Installation manual

Newco
Newco AK 1 User manual

Newco
Newco Bistro 10 Instruction Manual

Newco
Newco Cafe Espresso 2.0 User manual

Newco
Newco NKLDAF User manual

Newco
Newco GXF8D-TVT Installation guide

Newco
Newco GXDF-8D User manual