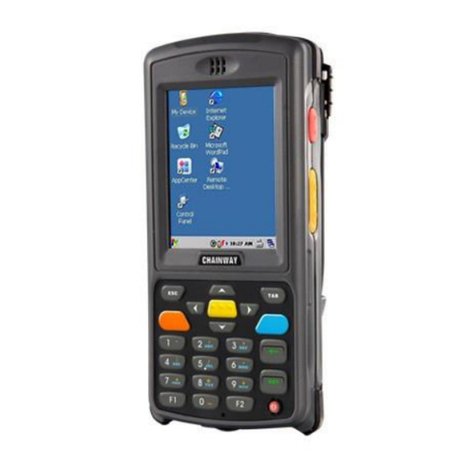
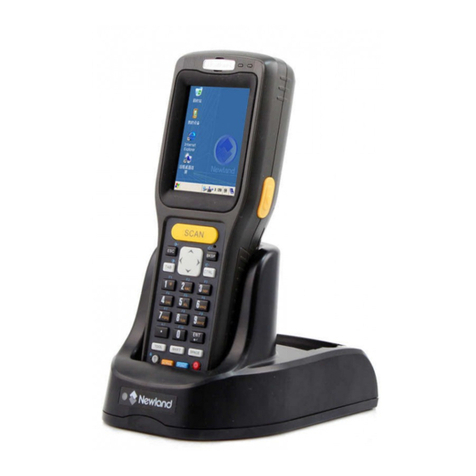
Newland NLS-PT30 Series User manual

NLS-PT30 Series
Mobile Computer
User Guide

Disclaimer
© 2012-2014 Fujian NewlandAuto-ID Tech. Co., Ltd. All rights reserved.
Please read through the manual carefully before using the product and operate it according to the manual. It is advised that you
should keep this manual for future reference.
Do not disassemble the device or remove the seal label from the device. Otherwise, Fujian Newland Auto-ID Tech. Co., Ltd.
does not assume responsibility for the warranty or replacement.
All pictures in this manual are for reference only and actual product may differ. Regarding to the product modification and
update, Fujian Newland Auto-ID Tech. Co., Ltd. reserves the right to make changes to any software or product to improve
reliability, function, or design at any time without notice. Besides, the information contained herein is subject to change without
prior notice.
The products depicted in this manual may include software copyrighted by Fujian Newland Auto-ID Tech. Co., Ltd or a third
party. The user, corporation or individual, shall not duplicate, in whole or in part, distribute, modify, decompile, disassemble,
decode, reverse engineer, rent, transfer or sublicense such software without prior written consent from the copyright holders.
This manual is copyrighted. No part of this publication may be reproduced, distributed or used in any form without written
permission from Newland.
Fujian Newland Auto-ID Tech. Co., Ltd. reserves the right to make final interpretation of the statement above.
Fujian Newland Auto-ID Tech. Co., Ltd.
3F, Building A, No.1, Rujiang Xi Rd., Mawei, Fuzhou, Fujian, P.R. China. 350015.
http://www.nlscan.com

Revision History
Changes to the original manual are listed below:
Version
Description
Date
V1.0
Initial release.
2012-04-12
V1.1
Corrected improper descriptions.
2012-05-16
V1.2
Updated the figures in Chapter 6.
2012-09-24
V1.3
Updated the screenshots of the PT30.
2014-07-04

Table of Contents
Chapter 1 About This Guide........................................................................................................................................................1
Introduction.................................................................................................................................................................1
Documentation Set.....................................................................................................................................................1
Specifications..............................................................................................................................................................1
Software Version.........................................................................................................................................................2
Chapter Descriptions ..................................................................................................................................................3
More Information.........................................................................................................................................................3
Service Information.....................................................................................................................................................3
Chapter 2 Getting Started............................................................................................................................................................4
Introduction.................................................................................................................................................................4
Unpacking...................................................................................................................................................................4
Accessories ................................................................................................................................................................4
Getting Started............................................................................................................................................................4
Installing the Main Battery..................................................................................................................................4
Charging the Battery ..........................................................................................................................................5
Keypad...............................................................................................................................................................5
Power On, Suspend, Wake Up and Power Off...................................................................................................6
Calibrating the Screen........................................................................................................................................6
Checking Battery Status.....................................................................................................................................7
Installing MicroSD Card......................................................................................................................................7
Installing SIM Card.............................................................................................................................................8
Adjusting the Hand Strap............................................................................................................................................8
Chapter 3 Using the PT30 Series ................................................................................................................................................9
Introduction.................................................................................................................................................................9
Status Icons................................................................................................................................................................9
Programs Icon ..........................................................................................................................................................10
Setting Programs Icon ..............................................................................................................................................12
Keypad......................................................................................................................................................................14
Numeric Keypad Input Mode............................................................................................................................15
Function Keys Introduction...............................................................................................................................15
Stylus........................................................................................................................................................................15
Adjust Volume...........................................................................................................................................................16
Peripheral Modules Power Control...........................................................................................................................17

Change Backlight Settings........................................................................................................................................18
Memory storage management..................................................................................................................................19
Resetting the PT30...................................................................................................................................................19
Warm Reset .....................................................................................................................................................19
Cold Reset........................................................................................................................................................19
Locking the PT30......................................................................................................................................................20
Barcode Settings ......................................................................................................................................................21
Scan engine parameters configuration.............................................................................................................21
Reading 1D barcode ........................................................................................................................................26
Reading 2D barcode ........................................................................................................................................27
Chapter 4 Using Bluetooth Communication............................................................................................................................28
Chapter 5 Using WiFi Communication .....................................................................................................................................30
Chapter 6 Using GPRS Communication...................................................................................................................................35
Make New Connection..............................................................................................................................................35
Setting Dial-Up Connection.......................................................................................................................................37
Check GPRS Connection Status ..............................................................................................................................38
Chapter 7 Using ActiveSync......................................................................................................................................................39
Introduction...............................................................................................................................................................39
Install ........................................................................................................................................................................39
Synchronize Information...........................................................................................................................................39
Chapter 8 Accessories...............................................................................................................................................................40
Battery ......................................................................................................................................................................40
Cradle.......................................................................................................................................................................40
Put PT30 into cradle.........................................................................................................................................40
Pick up PT30 from cradle.................................................................................................................................40
Charging...................................................................................................................................................................40
Use cradle charging .........................................................................................................................................40
Use AC adaptor charging .................................................................................................................................40
LED charging indicator .............................................................................................................................................41
LED indicator for Scanning/Decoding/Communication .............................................................................................41
Connect Host PC via USB cable...............................................................................................................................41
Connect Host PC via Cradle.....................................................................................................................................41
Chapter 9 Maintenance& Troubleshooting...............................................................................................................................42
Introduction...............................................................................................................................................................42
Considerations on using PT30..................................................................................................................................42

Disassembly and modification..........................................................................................................................42
Connect power source .....................................................................................................................................42
Abnormal situation............................................................................................................................................42
Drop Damage...................................................................................................................................................42
LCD Display .....................................................................................................................................................42
Stacking heavy objects.....................................................................................................................................42
Placed location.................................................................................................................................................42
Use occasion....................................................................................................................................................42
Caution.............................................................................................................................................................43
Battery safety guidelines ..................................................................................................................................43
Troubleshooting........................................................................................................................................................44

1
Chapter 1 About This Guide
Introduction
This guide provides information about using the NLS-PT30 series mobile computer and accessories.
Documentation Set
The documentation set for the NLS-PT30provides information for specific user needs and includes:
NLS-PT30 Series Quick Start Guide :Describes how to get the NLS-PT30 Series up and running.
NLS-PT30 Series User Guide :This is the manual, Describes how to use the NLS-PT30 Series.
API Software Development Manual :Describes how to use API for application development.
WinCE Software Utilities User Guide :Describes how to use Newland's WinCE utilities software.
Specifications
Performance
Processor
Marvell XScale PXA310, 806MHz CPU
Operating System
Microsoft Windows CE.NET 6.0
Memory
256MB RAM
256MB ROM for system area
4GB flash memory for user storage
Interface
RS-232, USB 2.0, supports USB charge
Physical
Dimensions (L x W x H)
189.5 x 76 x 45 mm (7.5 x 3 x 1.7 inch)
Weight
382g (Including battery)
Display
2.83” QVGA with backlight TFT Touch screen LCD, supports sunlight readable
Keyboard
30-key numeric keyboard with backlight
Notification
Vibrator, speaker and LED
Battery
Main
3.7V, 3500mAh rechargeable Li-Polymer battery
Backup
3.7V, 150mAh rechargeable Li-Polymer battery (supports 70-hour data backup)
Expansion
MicroSD memory slot
Power Adaptor
Output: DC 5V, ≥ 1.5A; Input: AC 100~240V, 50~60Hz
Environmental
Operating Temperature
-10℃to 50℃(14℉to 122℉)
Storage Temperature
-20℃to 60℃( -4℉to 140℉)
Humidity
5% ~ 95% (non-condensing)
Static Discharge
±15 kV (Air discharge), ±8 kV (Direct discharge)

2
Drop
1.2 m drop to concrete
Environmental Sealing
IP54 sealing
Barcode
1D Barcode
Laser (≥ 4 mil)
Code128, EAN-13, EAN-8, Code 39, UPC-A, UPC-E, Codabar, Interleaved 2 of 5,
ISBN/ISSN, Code 93, etc.
CCD (≥ 5 mil)
2D Barcode
CMOS (≥ 5 mil)
ALL 1D and PDF 417, QR Code, Data Matrix, Maxicode, Aztec, etc.
Wireless
WLAN
Summit IEEE 802.11 a/b/g, security supports EAP, WEP, WPA, WPA2, 802.1X
WWAN
2G
GSM/GPRS (850, 900, 1800, 1900 MHz)
WCDMA (900, 2100 MHz)
3G
WPAN
Bluetooth Class II V2.0
Certifications
FCC Part15 Class B, CE EMC Class B, CCC
Software Version
Firmware information query tool can detect and display terminal software and hardware version information and helpful
future updates or maintenance.
The firmware information query tool can detect the information:
A. To determine the operation system version.
B. To determine the firmware version.
C. To determine the system configuration, production date and other information.
D. To determine the version of WIFI module, and WIFI and Bluetooth MAC addresses.
E. To determine the type and version of barcode engine.
Tap “Start”→“Settings”→“Control Panel”→double click “Firmware Information”.
Figure 1.1: Firmware Information

3
Chapter Descriptions
Chapter 1, About This Guide : general description of this manual.
Chapter 2, Getting Started : provides information on getting the PT30 Series up and running for the
first time.
Chapter 3, Using the PT30 Series : provides basic instructions for using the PT30 Series,
Chapter 4, Using Bluetooth : explains how to use Bluetooth functionality.
Chapter 5, Using WiFi Communication : explains how to use WiFi functionality.
Chapter 6, Using GPRS Communication : explains how to use WiFi functionality.
Chapter 7, Using ActiveSync : synchronizes information on the mobile computer with information on
the host computer
Chapter 8, Accessories : describes the available accessories and how to use them with the PT30
Series.
Chapter 9, Maintenance & Troubleshooting : provides troubleshooting solutions for potential problems during PT30
Series operation.
More Information
For more product and support information, please visit our web site: http://www.nlscan.com。
Service Information
Newland China
Phone
+86-400-608-0591
Email
Newland Europe
Phone
+31(0)-345-870-033
Email
Newland Taiwan
Phone
+886-2-7731-5388
Email
Newland North America
Phone
+1-510-490-3888
Email

4
Chapter 2 Getting Started
Introduction
This chapter lists the parts and accessories for the PT30 Series and explains how to install and charge the batteries, and
power on the PT30 Series for the first time.
Unpacking
Carefully remove all protective material from the pack.
Verify that you received the following:
PT30 Mobile Computer
USB cable
AC adaptor
Li-Polymer battery
Tethered stylus
Hand strap
Quick Start Guide
Accessories
PT30 single slot cradle
PT30 cradle AC adaptor
USB cable
Getting Started
Installing the Main Battery

5
1. Figure 1 indicates the direction to unlock the latch.
2. Figure 2 indicates the direction to take out the battery cover.
3. Follow the instructions of figure 3 and 4 to insert the battery.
4. Follow the instructions of figure 5 to close down the battery cover.
5. Push the latch to the lock position.
Charging the Battery
There are two ways to charge the battery:
Charge the terminal battery via USB connection to PC. Charging time: around 6-8 hours.
Charge the terminal battery via AC adaptor. Charging time: around 3.5 hours.
Charge the terminal battery at least 8 hours before its first use.
Charging indication: Charging: red LED; fully charged: green LED.
Keypad
1
SCAN key
Barcode reading button.
2
TOOL key
Pop-up shortcut menu, or perform shortcuts.
3
Backlight key
Turn screen backlight on or off
*Press it down for 7.5s for a warm reset.
4
ALPHA key
Switch between alpha and numeric input.
5
FUNC key
User-defined function keys.
6
Power key
Power on/ suspend/ awaken the terminal.
7
SHIFT key
Switch between upper and lower case alphabet entry.
8
Reset key
Warm reset: Insert a straightened paper clip into the hole and press it in.
Cold reset: Hold down the Reset and Power keys.
8

6
Power On, Suspend, Wake Up and Power Off
Power On:
Press and hold the Power key for 2-3 seconds to turn the terminal on.
Suspend:
When the terminal is powered on, pressing the Power key down for 2 seconds will suspend the terminal.
If no operation is performed on the terminal for some time, it will go into suspend mode (in the case that auto suspend
is already enabled).
The timer for auto suspend can be set by:
Tap “Start”→“Settings”→“ControlPanel”→double-tap “Power”→“Schemes”.
Wake Up:
When the terminal in suspend mode, press the Power key to wake up the terminal.
Power Off:
Tap “Start”→“Shutdown”→“Shutdown”. The terminal will backup user data before shutdown.
Calibrating the Screen
The calibration tool is for calibrating the touch screen.
Tap “Start”→“Settings”→“ControlPanel”→ double-tap “Stylus”→”Calibration”.
Click “Recalibrate” button then the screen becomes as shown in Figure 2.2.Carefully press and briefly hold the tip of stylus
on the center of each target that appears on the screen. Repeat as the target moves around the screen then tap the
screen to continue.
Figure 2.1: Calibration
Figure 2.2: Recalibrate

7
Checking Battery Status
To check the charge status of the main battery in the terminal.
Tap “Start”→“Settings”→”System”→doubleclick “Power”.
Figure 2.3: Power Properties
Figure 2.4: Power Properties - Schemes
Power schemes has four status; “Running”, “User Idle”, “System Idle”and “Suspend”:
When user operates on the keypad or taps the touch screen, system is in the running state.
In running state, within the time set in the operating conditions no any operation, system turn to the user idle state.
In user idle state, within the time set in the operating conditions no any operation, system turn to the system idle state.
In system idle state, within the time set in the operating conditions no any operation, system turn to suspend state.
Installing MicroSD Card
The MicroSD card slot provides secondary non-volatile storage. The slot is located under the battery. Refer to the
documentation provided with the card for more information, and follow the manufacturer’s recommendations for use.
As shown below to install the MicroSD card, turn the card metal contact points face down then put into the slot.

8
Please note the following situations will lead to the MicroSD card is not working:
Card metal contact pads are not clean, battery voltage instability, the slot being squeezed, slot internal wire rust or bend
excessively, the card infected with a virus, the card is not properly formatted, damaged cards, slot damage.
Installing SIM Card
The SIM card slot is located under the battery, and only support in GPRS model of PT30 series.
1. Take out the battery and follow the figure 1 arrow indicate switch the SIM card cover to unlock position then open the
card cover.
2. Turn the SIM card metal contact points face down then put into the slot.
3. Switch the SIM card cover to lock position.
Adjusting the Hand Strap
The PT30 Series hand strap is attached to the bottom of the terminal. Adjust the hand strap to increase comfort when
holding the terminal for extended periods of time.

9
Chapter 3 Using the PT30 Series
Introduction
This chapter provides the detailed instructions for using and setting the PT30 Series.
Figure 3.1: Desktop Icons
Status Icons
The status bar at the bottom of the screen can contain the status icons listed in Table 3.1
Table 3.1 Status Icons.
Icon
Description
Bluetooth management tool.
Lowercase input. In state of digital input, pressed ALPHA key.
Uppercase input. In lowercase input state, pressed SHIFT key.
Uppercase lock. In lowercase input state, double pressed SHIFT key.
FUNC key pressed.
IP information.

10
USB connection status.
Indicates battery charging.
WiFi signal status.
Displays current time.
Keyboard panel.
Background running program selection window.
Programs Icon
Table 3.2 Software utilities icons.
Icon
Program Name
Description
Stylus
For the touch screen calibration settings.
Light Setting
For the screen and keyboard backlight settings.
Peripheral Switch
Used to offer power control function for peripheral module.
Calculator
For numeric calculation.
UnitConver
Unit conversion tool.
Microsoft WordPad
Microsoft WordPad text editing tool.

11
LockConfig
To keyboard and touch screen lock or unlock tool.
Wi-Fi
WiFi communication management and configuration tool.
Bluetooth Device
Properties
Bluetooth communication management and configuration tool.
Barcode Setting
Barcode engine configuration tool.
Autorun
Setting the programs and parameters which need to boot automatically.
SysBackupRestore
Backup/Restore system registry, configuration and data in storage
memory.
Firmware Information
For checking the system firmware information and version.
Putty
For Telnet terminal emulation tool.
RegEdit
System registry editing tool.
uEasyFileCE
Bluetooth file transfer utility.

12
Setting Programs Icon
Icon
Description
System volume adjuster.
Internet options setting tool.
Enable/Disable connects with host PC.
Memory storage management and configuration.
Battery and devices power status and system power schemes settings.
Password attributes (power on password and screen saver password) settings.
System date, time and time zone settings.
Region, language and input method settings.
Dialing configuration.

13
To remove programs that installed on the terminal.
Input panel setting.
Owner properties setting.
Network connects configuration.
System information.
Screen display interface and backlight configuration.
View the information about certificates installed on the terminal.

14
Keypad
1
SCAN key
Barcode reading button.
2
TOOL key
Pop-up shortcut menu, or perform shortcuts.
3
Backlight key
Turn screen backlight on or off.
*Press and hold it for 7.5s for a warm reset.
4
ALPHA key
Switch between alpha and numeric input.
5
FUNC key
User-defined function keys.
6
Power key
Power on/ suspend/ awaken the terminal.
7
SHIFT key
Switch between upper and lower case alphabet entry.
8
Reset key
Warm reset: Insert a straightened paper clip into the hole and press it in.
Cold reset: Hold down the Reset and Power keys.
8
Other manuals for NLS-PT30 Series
4
Table of contents
Other Newland Handheld manuals

Newland
Newland MT65 Beluga User manual

Newland
Newland Symphone N2S User manual

Newland
Newland N5S User manual

Newland
Newland NLS-PT30 Series User manual

Newland
Newland MT90 Orca User manual

Newland
Newland MT90 Orca User manual

Newland
Newland NLS-PT30 Series User manual

Newland
Newland NLS-PT30 Series User manual

Newland
Newland NLS-PT60 User manual

Newland
Newland NLS-PT980-II Series User manual