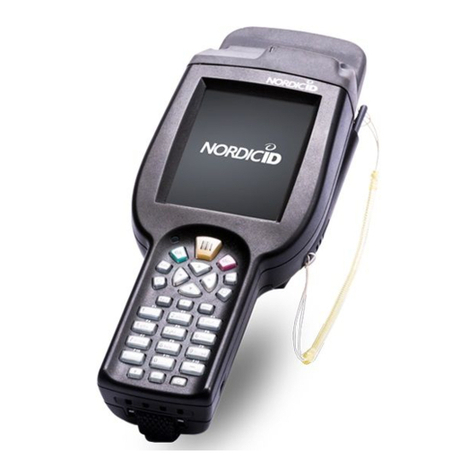
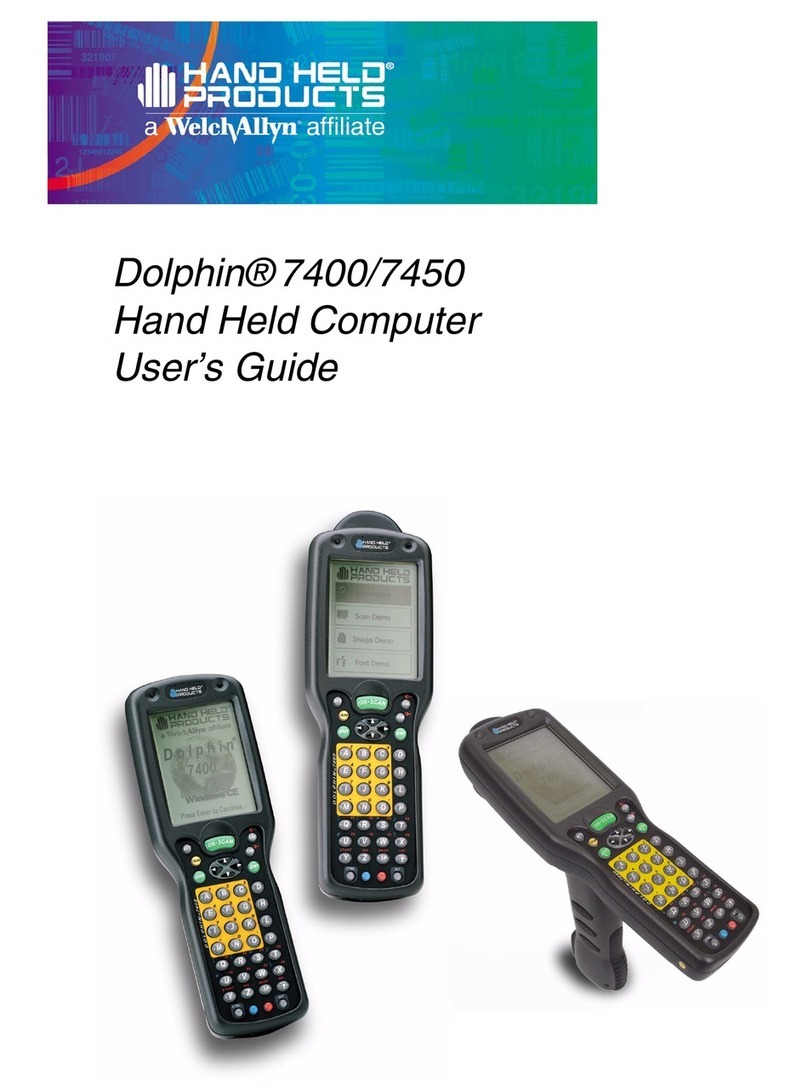
Nordic ID PL3000 User manual

USER MANUAL
Nordic ID PL3000

Contents
Notice 6
Copyright 6
Disclaimer 6
Trademarks 7
Latest information 7
1. Introduction 9
1.1 Nordic ID 9
1.2 Handheld computers –principle of operation 9
1.3 Nordic ID PL3000 9
1.4 Short introduction to typical applications 10
1.5 PL3000 configurations 10
1.6 PL3000 Accessories 11
2 Getting started 11
2.1 Unpacking the unit 11
2.2 Preparing the device 12
2.2.1 Installing SD/MMC memory card 12
2.2.2 Installing battery 13
2.2.3 Handstrap 14
2.2.4 Installing the charger 16
2.2.5 Charging the unit 16
2.3 Switching on the power 18
2.4 Testing the device 18
3 User interface 19
3.1 Main parts of the device 19
3.2 Keyboard 19
3.3 Indicator lights and connections 20
3.4 PL3000 casing 20
3.4.1 Stylus holder 21
4 PL3000 Features 21
4.1 Equipment features 21
4.1.1 Processor 21
4.1.2 Microsoft ® Windows ® CE 22
4.1.3 Memory 22

4.1.4 Display 22
4.1.5 Touch screen 22
4.1.6 Keypad 22
4.1.7 Keyboard backlight 22
4.1.8 Imager (optional) 23
4.1.9 Vibrating alarm (optional) 24
4.1.10 Automatic wakeup motion sensor 24
4.1.11 Battery 24
4.1.12 Loudspeaker 24
4.1.13 Headset jack 24
4.1.14 USB 25
4.2 Accessories 25
4.2.1 Charger 25
4.2.2 Power supply for the charger 25
4.2.3 USB cable 26
4.2.4 Headset with microphone 26
4.2.5 Spare battery pack 26
5 Handling the device 27
5.1 Cleaning the device 27
5.2 Using the keyboard 27
5.3 Using stylus and touch screen 27
5.4 Resetting the device 28
5.4.1 Software resets 28
5.4.2 Managing battery power 30
5.4.3 Changing the battery pack 30
5.4.4 File System Backup 31
5.4.5 Saving the registry 32
5.4.6 Setting time and date 33
5.4.7 Reading codes 34
5.4.8 Utilising virtual keyboard 34
6 Applications & tools 36
6.1 Start menu 36
6.1.1 Cisco 36
6.1.2 Demo 36
6.1.3 Nordic ID 37
Rotate 38
RegBackup 38
Version 39
6.1.4 Aircard Watcher 40
6.1.5 Command prompt 41
6.1.6 Internet explorer 41
6.1.7 Microsoft WordPad 42

6.1.8 Transcriber 42
6.1.9 WCF54G Wireless Network Monitor 44
6.1.10 Windows Explorer 45
6.2 The task bar 45
6.3 Pop-up menu 46
6.4 Shutdown menu 46
6.5 The Control Panel 47
6.5.1 Aironet Client Utility 47
6.5.2 APN Manager 51
6.5.3 Bluetooth Device Properties 51
6.5.4 Certificates 55
6.5.5 Date and Time 56
6.5.6 Dialing 56
6.5.7 Display 56
6.5.8 Input Panel 57
6.5.9 Internet Options 57
6.5.10 Keyboard 61
6.5.11 Mouse 61
6.5.12 Network and Dial-up Connections 61
6.5.13 NID Backlight 62
6.5.14 NID Indicators 62
6.5.15 NID Keymap 62
6.5.16 NID Power Button 63
6.5.17 NID Scanner 63
6.5.18 NID Tilt Switch 64
6.5.19 NID Touch Screen 65
6.5.20 NID Trigger Button 65
6.5.21 Owner 65
6.5.22 Password 65
6.5.23 PC Connection 65
6.5.24 Power 66
6.5.25 Regional Settings 67
6.5.26 Remove Programs 67
6.5.27 Storage Manager 67
6.5.28 Stylus 68
6.5.29 System 68
6.5.30 UMTS Configurator 69
6.5.31 Touch screen 69
6.5.32 Volume & Sounds 69
7 Safety warnings 70
7.1 User safety 70
7.2 Regulatory and safety agency approvals 70
7.2.1 Medical equipment compatibility 71
7.2.2 Wireless networks and microwave equipment 71

7.2.3 LED safety 71
7.2.4 Laser safety 71
7.3 Batteries 73
7.4 Charging and electrical safety 73
8 Warranty 73
8.1 Warranty coverage 74
8.2 Returning the unit for service (RMA) 74
8.3 Technical support 74
8.4 Type label 75
8.5 Recycling 75
Appendix A - Technical specifications 76
Appendix B - Code reading distances and requirements 77
Appendix C – Keyboard key mappings 83
Appendix D - Activesync 84
Appendix E - Creating Cisco WLAN connection 86
Appendix F - Creating Option GPRS connection 87
Appendix G - Application development 88
Appendix H - Configuring the Linksys WCF54G -card 90

©2005 Nordic ID Oy
Nordic ID PL3000 user manual, v. 2.4, March 2006 6
Notice
Information in this User Manual is subject to change. Nordic ID assumes no responsibility regarding the
information presented in this User Manual.
Copyright
Nordic ID Oy owns all rights to this manual. All rights reserved. Copying this manual without the written
permission from the manufacturer by printing, copying, recording or by any other means or the full or partial
translation of the manual to any other language including all programming languages using any electrical,
mechanical, magnetic, optical, manual or other methods or devices is forbidden.
Nordic ID reserves the right to change the technical specifications or functions of its products or to
discontinue manufacturing of any of its products without any written announcement and urges customers
to ensure that the information at their disposal is valid.
Disclaimer
Nordic ID products have not been designed, intended nor inspected to be used in any life support related
applications nor as a part of any other critical system and are not granted functional warranty if used in any
such applications.
Nordic ID urges its customers to arrange proper and adequate user training, which includes safety issues
for any personnel using, programming or otherwise handling the Nordic ID PL3000 handheld computers.

©2005 Nordic ID Oy
Nordic ID PL3000 user manual, v. 2.4, March 2006 7
Trademarks
Nordic ID and the Nordic ID logo are registered trademarks of Nordic ID Oy.
All terms mentioned in this User Manual that are known to be trademarks or service marks have been
appropriately marked in the list below with either the ©, ® or the ™ symbol or started with capital letter.
Nordic ID cannot attest to the accuracy of this information. Use of a term in this User Manual should not be
regarded as affecting the validity of any trademark or copyright.
Company/Owner of the Trademark
Microsoft Company
ARM Limited
CompactFlash Assosiation
Bluetooth SIG
Wi-Fi Alliance
Trademark
Microsoft® Windows® CE
Windows® CE
Visual Studio .NET 2003
Embedded Visual C/C++ 4.0®
ActiveSync
ARM
CompactFlash®
Bluetooth
Wi-Fi
Table 1, Identified trademarks used in this User manual
Latest information
For latest information on the PL3000 and on possible changes to this manual please consult our web site
at http://www.nordicid.com

©2005 Nordic ID Oy
Nordic ID PL3000 user manual, v. 2.4, March 2006 8

©2005 Nordic ID Oy
Nordic ID PL3000 user manual, v. 2.4, March 2006 9
1. Introduction
1.1 Nordic ID
Nordic ID develops, manufactures and markets handheld instruments for various industries. Nordic ID’s
headquarters are located at Salo in the south-western part of Finland.
An increasing part of the company’s turnover is invested in Research and Development. The Nordic ID
products are characterised by high quality, stylish design and excellent ergonomics with one-handed
operability.
1.2 Handheld computers –principle of operation
In general, handheld computers are a class of devices that have either a ¼-, or a half-, or a full sized VGA
screen with or without an integrated keyboard. Furthermore, they usually contain a standard package of
integrated applications, both wireless and wired connectivity (network) options, and typically also some
Windows application interfaces for developers of complete systems.
1.3 Nordic ID PL3000
The Nordic ID PL3000 is a configurable computer that can be equipped with various functionalities. Different
functionalities include various alternative auto ID methods, wireless communication methods and other
functionalities to make the PL3000 easy and comfortable to use. The Nordic ID PL3000 uses the Windows
CE operating system.
The PL3000 is lightweight and features a one hand operated keyboard with a guiding keyboard backlight
system and its rugged casing makes it suitable for rough conditions.

©2005 Nordic ID Oy
Nordic ID PL3000 user manual, v. 2.4, March 2006 10
1.4 Short introduction to typical applications
Typical systems that utilize handheld computers consist of one or more handheld computers connected via
a wireless network to a host computer. Examples of different systems are shown in the images below.
Fig.1 Network over WLAN Fig.2 Network over GSM/GPRS
The end user application itself depends on the software solution provided by the system providers, who will
be always introducing new IT applications compatible with the Nordic ID PL3000.
The PL3000 platform can be used with web-based, native software applications or with terminal emulation
solutions.
1.5 PL3000 configurations
The Nordic ID PL3000 handheld computer can be provided with or without Identification and communication
functionalities. For detailed information about the different configurations available contact your nearest
Nordic ID sales office.
It is possible to configure the PL3000 with different memory sizes. It is also available in different colours. The
PL3000 handheld computer’s technical specifications can be found in the Appendix A.

©2005 Nordic ID Oy
Nordic ID PL3000 user manual, v. 2.4, March 2006 11
1.6 PL3000 Accessories
There is several accessories available for the PL3000 handheld computer:
• Desktop/Wall mount/Vehicle charger
• USB cable
• Extra battery
• Multiple desktop charger
• Multiple battery charger
• Pistol grip
2 Getting started
2.1 Unpacking the unit
When you unpack the shipping carton containing a PL3000, please check that all items mentioned in the
delivery note are included. Make also sure that they are intact (no shipping damage).
Should shipping damage be suspected, please contact your local dealer or Nordic ID. Do not take the
equipment in the use.
The box containing the PL3000 includes:
• PL3000 handheld computer and stylus
• Lithium-ion battery pack
• Quick guide
• User manual cd
The additional PL3000 equipment will also include some or all of the following:
• Desktop charger
• Power supply and cable for power supply (European, UK or US)
• USB cable
• Spare battery
• Pistol grip
Other accessories are packed in separate shipping cartons.
Be careful when unpacking the components. In case the product has been stored or transported in cold or

©2005 Nordic ID Oy
Nordic ID PL3000 user manual, v. 2.4, March 2006 12
it has been left in cold temperatures for a prolonged time, allow sufficient time for the items to warm up and
reach normal room temperature and humidity before taking it into use.
2.2 Preparing the device
The battery in the device is normally fully discharged and must be charged for the first time for 8 hours prior
to using the PL3000.
2.2.1 Installing SD/MMC memory card
The SD/MMC card slot is located inside the battery compartment. The SD card cannot be installed when
battery is in place.
Open the SD/MMC card slot cover by lifting up the cover and removing the battery. Insert the SD/MMC card
so that the copper connectors of the card face down towards the front of the unit. Ensure that the cut corner
of the SD/MMC card is facing the upper right corner. Press the card into the slot until it clicks and the card
locks into place. You can remove the card by pressing it lightly to release the card lock. A spring in the slot
will push the card out of the slot. Close the SD/MMC card slot and replace the battery.
Fig.3 Taking the back cover off
1. Open the screw
2. Lift the
back cover
Use stylus as
a screwdriver
Fig.4 Removing the battery

©2005 Nordic ID Oy
Nordic ID PL3000 user manual, v. 2.4, March 2006 13
2.2.2 Installing battery
The battery is located in the compartment inside the PL3000 handle. Open the compartment by loosing the
screw at the bottom of the device and lifting off the back cover. Place the bottom end of the battery to the
bottom end of the battery compartment, as depicted in figure 8. Push it against the battery support foam
so that the connectors in the battery face the connectors in the device. Push the top end of the battery into
the compartment.
If you are using handstrap, note that it is easier to slip the strap under the holding bar when the battery cover
is not closed. Close the battery cover and tighten the screw. If the battery cover is not properly closed the
device looses the IP 54 rating.
Fig.8 Installing battery
Fig.5 Open the slot cover Fig.6 Install the SD/MMC card Fig.7 Close the slot cover

©2005 Nordic ID Oy
Nordic ID PL3000 user manual, v. 2.4, March 2006 14
2.2.3 Handstrap
The hand strap helps you to take a secure grip of the PL3000. In figures 9 to 13 you can see how to install
the handstrap to the PL3000.
Pull the handstrap until
the metal stick sets
up to its holes.
1.
2.
Soft part of the
handstrap up
1. Thread the metal stick through
the loop of the handstrap.
2. Pull the strap through the hole
on the upper part of the cover
so that the soft part of the hand-
strap is up.
Fig.10 & 11 Installing the handstrap to the PL3000
Fig.9 Remove the back cover

©2005 Nordic ID Oy
Nordic ID PL3000 user manual, v. 2.4, March 2006 15
3. Pull the handstrap to
the suitable size.
Fig.12 & 13 Installing the handstrap to the PL3000
1.Thread the handstrap
under the metal stick
on the lower part of the
PL3000 body.
2. Close the cover.
The handstrap has a sticker on it. This
way it is possible to change the size
of the handstrap more than once.

©2005 Nordic ID Oy
Nordic ID PL3000 user manual, v. 2.4, March 2006 16
2.2.4 Installing the charger
Follow the instructions from the Charger Quick Guide to assemble the swivel to the charger body. Connect
the power cord to the power supply unit. Connect the power supply to the charger body. There are power
cords with different plugs available. Use only a power supply supplied by Nordic Power AB. See the figure
14.
2.2.5 Charging the unit
Place the device into the charger as shown in figures 15. - 17. An indicator light on the top right corner
of the keyboard shows the charging status. When the battery is less than 90% capacity the light is red,
when there is 90-100% capacity the light is orange. When the battery is full the light changes to green. The
minimum charging time for the initial charging is approximately 8 hours. Normal charging time is about 2½
hours to 90% of the capacity and about 5 hours to full capacity.
Remove the PL3000 from the charger by pressing the release buttons on the side of the charger. The
indicator light illuminates only when the unit is switched on or is on suspend mode. If the power level is very
low (below about 5%) the red indicator light remains illuminated when the unit is removed from charger. In
this case charging should be continued.
Fig.14 Connect the power supply to the charger body
Charger body
Power connector
Power supply cabel
Mini USB-
Connector
Mini USB-cable

©2005 Nordic ID Oy
Nordic ID PL3000 user manual, v. 2.4, March 2006 17
Red indicator
light
Green indicator
light
Fig.16 Red indicator light shows that battery has less than
90% of the capacity
Fig.17 Green indicator light shows that battery is full
Fig.15 Placing the PL3000 to the charger

©2005 Nordic ID Oy
Nordic ID PL3000 user manual, v. 2.4, March 2006 18
Fig.18 Removing the PL3000 from the charger
Press release
buttons
Lift the device
from the charger
2.4 Testing the device
After the power is switched on and Windows has started you can test the different functions by following
the instructions in this User Manual.
Power key
Fig.19 Switching on the power
2.3 Switching on the power
Switch on the unit by pressing the power-key on the bottom row of the device’s keyboard. When the device
is turned on the display shows the Nordic ID start-up screen containing the text “loading Windows CE”.

©2005 Nordic ID Oy
Nordic ID PL3000 user manual, v. 2.4, March 2006 19
3.2 Keyboard
In figure 22 are the explanations of the Nordic ID PL3000 keyboard.
Programmable light
OK key (enter)
Tabulator
Navigation keys
Programmable key
Keypad mode
selection keys
Character/
numeric/
function keys
Shift
Charger indicator light
Delete
Escape
Navigation keys
Programmable key
Keypad mode
selection keys
Power key
Character/
numeric/
function keys
Fig.22
3 User interface
3.1 Main parts of the device
The main parts of the Nordic ID PL3000 are shown in the figures 20 and 21.
Imager (optional)
Fingerprint reader
(optional)
Stylus holder
Fig.20
Top cover
Headset connector
Loudspeaker
Handstrap
attachment point
Handstrap
Battery cover
screw
Handstrap
attachment point
Charger connector Fig.21
Keyboard
Screen

©2005 Nordic ID Oy
Nordic ID PL3000 user manual, v. 2.4, March 2006 20
3.4 PL3000 casing
The PL3000 casing is ergonomic yet robust in design. This gives a comfortable user experience and yet it
is tough enough to survive the hazards of every day use. The PL3000 has been drop tested from a height of
1.5 m onto concrete and has resist against dust and drop water (IP-rating of 54).
3.3 Indicator lights and connections
The following picture shows the indicator lights and connectors of the Nordic ID PL3000.
Fig.23 & 24 Indicator lights and connections
Charger
connector
Charger indicator
light
Light level sensor
Headset connector
covered with rubber
plug
Programmable
indicator light
Table of contents
Other Nordic ID Handheld manuals
