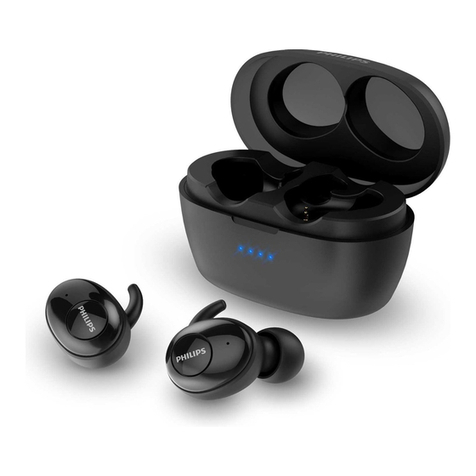
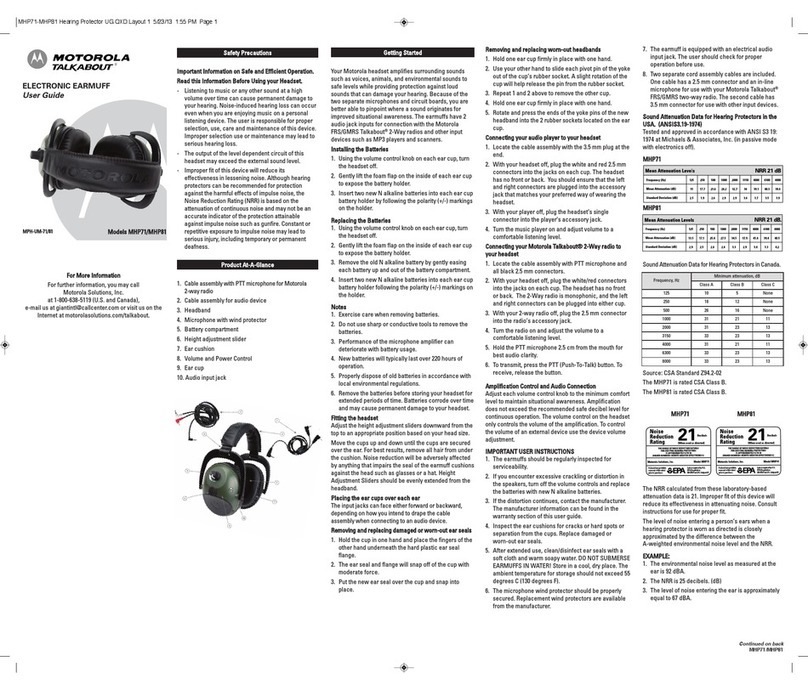
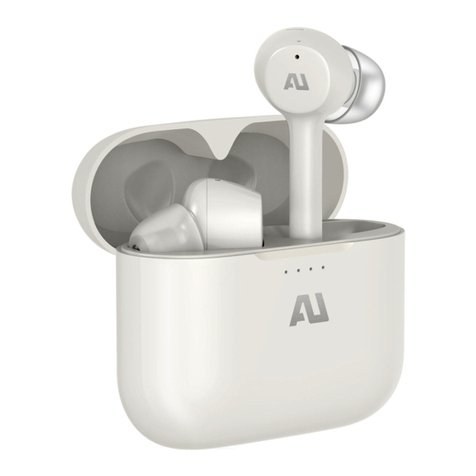
Nexigo Air T2 User manual

User Manual Air T2
Ultra Thin cVc Wireless Earbuds
Register to get EXTRA ONE year
warranty.Only valid in registering within
14 days of product delivery.
nexigo.com/warranty
EN

Before First Time Use
1. Take the earbuds out of the charging case.
2. Peel off the insulating plastic tabs covering the
charging prongs on the earbuds as shown below.
This will allow the earbuds to charge.
1
3. Place the earbuds back into the charging case
and close the cover. Fully charge the earbuds
before using them.
4. When the earbuds have fully charged, open the
charging case. The earbuds will enter pairing
mode when both earbud indicators flash blue.
5. Ensure that the Bluetooth on your device is
enabled. Select the Bluetooth device name
"NexiGo Air T2" and tap "Pair" to connect.
6. The earphones will respond with a "Connected"
voice prompt to indicate successful pairing. You
are now ready to enjoy the NexiGo Air T2 earbuds!
EN

Thank you for choosing the NexiGo Ultra Thin cVc
Wireless Earbuds. You are now part of an
exclusive club: the NexiGo family! It's our job to
make sure you enjoy your membership. If you
have any problems please contact us at
This product is covered by our industry leading
1-year manufacturers warranty. Register at
nexigo.com/warranty to get a FREE additional
1-year warranty!
From all of us here at NexiGo, we want to welcome
you again to the family. We thank you deeply for
your trust and for your business. We know you'll
love it here. We look forward to serving you again
in the near future.
Yours Sincerely,
The NexiGo Team
Welcome to the NexiGo Family!
2
EN

Indicator Lights
USB Type-C
Charging Port
Website: www.nexigo.com
Manufacturer: Nexight INC
E-mail: [email protected]
Tel: +1(458) 215-6088
Address: 11075 SW 11th St, Beaverton, OR,
97005, US
Contact Information
2 x Wireless Earbuds
1 x Charging Case
1 x Charging Cable for Case
1 x User Manual
Package Includes
Product Diagram
3
EN EN

Cover Latch
Microphone and
Indicator Light
Tap Control Area
Speaker
Tap Control Functions
You can select from the different available
functions by tapping the touch control area as
shown in the Product Diagram above.
The ● symbol in the chart below indicates the
number of taps necessary to activate the
corresponding function, and the L and R
indicate which earbud the selected function can
be adjusted on.
You can choose to use one or both earphones
at any time, this will not affect any other
operation.
4
EN

L ●●
R ●●
L R ●●●
L ●●●●
R ●●●●
Double Tap: Volume -
Double Tap: Volume +
Triple Tap: Play/Pause, Hang Up/Answer Calls
Quad Tap: Previous Song
Quad Tap: Next Song
Specifications
Wireless Version
Earbuds Battery Capacity
Charging Case
Battery Capacity
Earbuds Playtime on
a Single Charge
Playtime with Charging Case
Transmission Distance
Supported Codecs
Frequency Response
Power Input
5.2
35mAh*2
5V/300mA
300mAh
Approximately 7 Hours
28 Hours
Up to 50ft(15m)
aptX, SBC, AAC
20Hz-20KHz
5
EN

1. The earbuds power on when the charging case
is opened.
2. The earbuds power off when they are put into
the charging case and the case is closed, or when
they are outside of the charging case but have not
connected to a device for five minutes.
6
Power Information
1. When the charging case is opened, both earbuds
will power on and automatically pair with each
other. The indicator lights on each earbud will flash
red and blue alternatingly to indicate they are
connecting. After successfully pairing, the earbuds
will enter device pairing mode to connect with an
external device and the earbud indicators will
rapidly flash blue indicating they are looking for a
device to pair with.
2. On your Bluetooth device ensure Bluetooth is
active so that it can detect the earbuds.
3. On your device find the pairing request named
"NexiGo Air T2"and select "Pair" to connect.
The earbuds will respond with a voice prompt
Wireless Connection
EN

saying that the device is connected to indicate
that the pairing was successful. You can now use
the earbuds with the paired device.
Note: The earbuds will automatically connect to
the previously paired device when the charging
case is opened. If you want to change the paired
device you will need to disable the pairing with
the previously paired device before repeating the
above procedure for the new device.
1. The earbud indicators show the charging
status of the earbuds when they're charged in
the case. You will see a red light while the
earbuds are charging, and a blue light when the
earbuds are fully charged.
2. Exterior case charging indicators show the
battery status of the case. While charging the
case indicator lights will flash to indicate that the
case is charging. When the case is fully charged
all three indicator lights will turn on for eight
seconds and then off to indicate that charging is
complete.
Check the Charge Status
7
EN EN

Note: The third indicator light on the charging
case will provide a low battery alert by quickly
flashing when the battery is low.
1. For a stronger signal between your earbuds
and your device pull the handle away from your
head as much as possible so that they do not
touch your skin but are still comfortable to wear.
2. To ensure optimal charging please place the
earbuds into the charging case as shown in the
image below.
Usage Tips
8
EN

FAQ
Q1: Why am I not able to connect my device to the
Air T2?
Q2: Why can’t I reconnect to my phone after the
earbuds are disconnected?
A: 1. Before first time use, please make sure to peel
off the battery protection plastic tabs on the inner
bottom side of the earbuds. This will allow the
earbuds to pair and charge. After peeling off the
insulating plastic, place the earbuds back into the
charging case and close the cover until the red
indicator on the earbuds turns on. Open the
charging case again and the earbuds will enter
pairing mode. You can tell this as both earbud
indicators will flash blue. You can connect the
earbuds now.
2. Please ensure that both the earbuds and the
charging case have enough power. If the charge is
insufficient, please charge them before attempting
to pair again.
A: Place the earbuds into the charging case and
close the cover. You will see the red indicator light
appear on the earbuds. Open the charging case
again and the earbuds will enter pairing mode, both
9
ENEN

Q3: What should I do if only one of the earbuds is
working?
A: Follow the steps as listed in Question 2 for
earbuds disconnecting. If this does not resolve the
issue, attempt a factory reset.
1. Turn off Bluetooth on any devices the earbuds
have been paired with.
2. Place the earbuds in the charging case and close
the cover until the blue indicator light changes into
a red one.
3. Take only the L earbud out of the case and close
the case cover.
4. Tap the L earbud five times quickly on the tap pad
after the R earbud turns to a red light, the flashing
blue indicator on the earbud will change to flash red
three times to show that this step was successful
and then will go back to flashing blue.
5. Open the case, place the L earbud back into the
case and then close the case. Wait until the lights on
To restore the earbuds to factory default settings: (All
steps must be followed exactly or the instructions
will not work properly)
earbud indicators will flash blue rapidly indicating
they are in pairing mode. You can connect the
earbuds now.
10
EN

Q4: Why do my earbuds get stuck or disconnected
while talking or listening to music?
A: There are multiple reasons this may happen,
please try adjusting the below steps in order.
Solution 1 - The earbuds have a low battery and
must be charged.
Solution 2 - The distance between the device and
the earbuds is more than 50ft (15m)
Solution 3 - There is an object or barrier between
the earbuds go back to red, usually about a second.
6. Quickly open the case and remove the L earbud
again and then close the case again.
7. Quickly tap on the earbud five times again after
the R earbud turns to a red light. This time instead of
flashing red three times, it will turn solid red for about
2-3 seconds indicating that the factory reset was
successful.
8. Open the case and put the L earbud back into the
case. Wait for the indicator lights to turn red again,
and then open the case again. If the factory reset
was successful the lights on the earbuds will flash
from blue to red quickly indicating the reset was
successful.
9. Repeat if needed with the R earbud, all steps are
the same.
11
EN EN

the device and the earbuds, such as a wall, that is
interfering with the signal.
Solution 4 - The pairing of the left and right earbuds
is not synchronized. Reset the earbuds to sync them
again as outlined in Q2.
Shown below are the steps needed to set the
earbuds to always be the default audio on your
iPhone:
Go to: Settings > Accessibility > Touch >
Call Audio Routing and choose Bluetooth Headset
to force the phone to send calls to the earbuds if the
earbuds are active.
Q5: How can I set the earbuds as the default audio
device for phone calls?
A: Android:
The earbuds will automatically be set as the default
audio output device after they have been connected
to your phone.
iPhone:
The iPhone audio default is dependent upon how
you answer the call. If you use your iPhone to
answer the call, the default audio will go through the
iPhone. If you use the earbuds to answer the call,
the default audio will go through the earbuds.
12
EN

1. Listen with the volume setting as low as is
comfortable. Listening at a high volume for an
extended period may result in permanent damage
to your hearing.
2. Keep your earbuds and accessories out of
reach of children. Children should use the earbuds
only under adult supervision. These do present a
risk of a choking hazard if appropriate supervision
is not applied.
3. Do not expose the earbuds to water for a
prolonged period. Do not use while swimming,
diving, or in the shower.
4. Using your earbuds in a damp or dusty
environment, or near a strong magnetic field, may
result in internal circuit failure causing damage to
the device.
5. Do not store your earbuds in an environment
where the temperature is below ‒15°C or above
+50°C.
6. Do not charge the earbuds and/or the charging
case in an environment where the temperature is
below 0°C.
7. Do not expose your earbuds or charging case
to direct sunlight (such as on a window sill or on a
car dashboard ) for an extended period of time.
Notes
13
EN

Changes or modifications not expressly approved
by the party responsible for compliance could void
the user’s authority to operate the equipment.
This device complies with Part 15 of the FCC Rules.
Operation is subject to the following twoconditions:
(1) this device may not cause harmful interference,
and
(2) this device must accept any interference
received, including interference that may cause
undesired operation.
Note: This equipment has been tested and found
to comply with the limits for a Class B digital device,
pursuant to Part 15 of the FCC Rules. These limits
are designed to provide reasonable protection
against harmful interference in a residential
FCC Requirement:
This may damage or destroy the earbuds.
8. To avoid damage to your earbuds, do not
disassemble or tamper with them and do not
insert any foreign matter into the earbuds or the
case.
9. The shell of the charging case is made of a thin
metal. Do not handle it roughly or you may deform
the charging case.
14
EN
Table of contents

