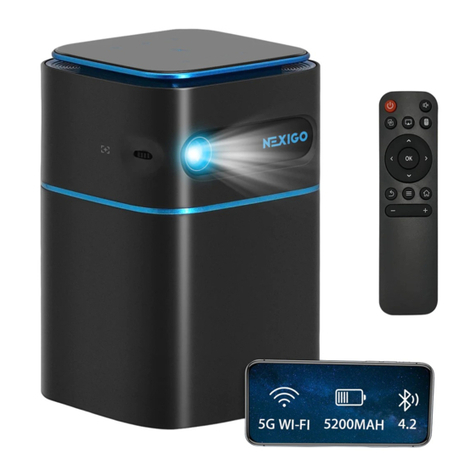
Nexigo PJ40 User manual

1080p LCD Projector
PJ40
User Manual
Scan the QR code or visit our link to
download the latest manual or watch
the installation video.
nexigo.com/manuals

TRANSLATIONS
English 01
29
Deutsch
33
Français
37
Español
41
Italiano
CONTENT

WELCOME TO THE NEXIGO FAMILY!
Thank you for choosing the NexiGo 1080p LCD projector! You are now
part of an exclusive club — the NexiGo family! It's our job to make sure
you enjoy your membership. If you have any problems, please contact
us any time at cs@nexigo.com for further assistance.
This product is automatically covered by our industry-leading one-year
manufacturer's warranty. Make sure to register your purchase at
nexigo.com/warranty within 14 days of the delivery date, and we will
extend your warranty coverage another year, for a total of two years!
From all of us here at NexiGo, we want to thank you for your trust in us.
We look forward to serving you again in the near future.
Sincerely,
The NexiGo Team
CONTACT INFORMATION
Website: www.nexigo.com Manufacturer: Nexight INC
Address: 11075 SW 11th St, Beaverton, OR, 97005, US
EN 01

PROJECTOR DIAGRAM
1. Lens
2. Focus Adjustment Wheel
3. Air Filter
4. Power Switch
5. Home Button
6. Return Button
7. OK Button
8. Left / Right / Up / Down Buttons
9. Power Input Port
12
3
15
FRONT VIEW SIDE VIEW
REAR VIEW BOTTOM VIEW
457
6
8
10. RJ45 Port
11. USB Input Ports
12. HDMI Input Ports
13. 3.5mm Audio Jack
14. AV Input Port
15. IR Receiver
16. Manual Lift Stand
17. Feet / Mounting Slots
17
16
17
9
10 11 12
13 15
14
EN 02

1 x Projector
1 x Cleaning Kit
1 x Remote (Requires two AAA
batteries, not included)
WHAT'S IN THE BOX?
1 x Power Cable
1 x AV Cable
1 x User Manual
1. USB Inputs: For a Hard Drive, USB Drive, iOS cable mirroring, or
charging USB devices.
2. HDMI Inputs: For a TV box, TV stick, or computer.
3. 3.5mm output for audio devices such as headphones or speakers.
4. AV input for a DVD or VCD player.
CONNECTION INTRODUCTION
1 2 3 4
EN 03

Power Switch: Toggles power on and off.
Mute: Toggles audio on and off.
Left / Right / Up / Down: Navigates through the on-screen display.
OK: Selects the current option.
Menu (Short Press): Displays the menu.
Input Source (Long Press): Displays the source selection bar.
Return: Returns to the previous screen.
Home: Returns to the home page.
Vol +: Increases the volume level.
Vol -: Decreases the volume level.
REMOTE CONTROL DIAGRAM AND FUNCTIONS
Mute
Power Switch
OK
Left
Menu (Short Press)
Input Source
(Long Press)
Vol -
Up
Right
Return
Home
Vol +
Down
EN 04

SPECIFICATIONS
Imaging Technology
Light Source
Native Resolution
Max Supported Resolution
Focusing Mode
Keystone Correction
Projection Distance
Projection Size
Aspect Ratio
Projection Ratio
Power Input
Integrated Watt Use
Input Ports
Output Port
Speakers
LCD
LED
1920 x 1080
4096 x 2176 (Local video playback)
Manual operation
Automatic
4.72 - 30.18ft
50 - 300 in
16:9 / 4:3
1.47:1
AC 90-260V
160W
HDMI x 2, USB x 2, AV x 1
3.5mm audio jack x 1
LAN Port RJ45 x 1
10W x 2
EN 05

QUICK START
CHOOSING A LOCATION
A room's size and layout will be the most important factors when
choosing where to place the projector. Consider the following when
selecting a location:
●The size, shape, and position of your screen.
●Where a suitable power outlet is located.
●Ensure the projector has sucient room for adequate airflow.
The projector is designed to be installed in one of four layouts. You
can either hang the projector from the ceiling via mounting bracket
(not included) or simply place it on a flat, stable surface. You may
need to change the projection mode so the images display correctly.
Select Projection Mode under Settings > Projection > Projector Mode,
then choose your preferred projection mode (see below).
EN 06

POWER ON / OFF
1. Plug the power cord into a
power outlet.
Note: 1. A specific rear projection screen is
required to use the rear projection function.
2. Please remove the 4 feet at corners on the
bottom of the projector for mounting on the
ceiling.
EN 07

2. Press and hold the Power Switch to turn on the projector. Press the
Power Switch to turn off the projector. Alternatively, press the Power
Switch on the remote to turn the projector on or off.
Note: Due to manufacturing tolerances, there may be variances of up to
3% from unit to unit. The above data is for reference only. Please use
actual measurements when installing your device.
PROJECTOR DISTANCE & SIZE
FOCUS ADJUSTMENT
Please use the Focus Adjustment Wheel to adjust the focus, rotating
it left or right until the image becomes clear. If the image appears
blurry, rotate the knob in the opposite direction until the image
clears up.
300
4.72 6.505.54 7.68 10.50 12.40 15.52 30.18(ft)
EN 08

KEYSTONE ADJUSTMENT
Please turn on Auto Keystone under Settings > Projection. The
projector will automatically correct the vertical keystone.
This section will show you how to connect the projector to other
equipment.
MULTI-MEDIA CONNECTIONS
USB CONNECTIONS
Insert your USB drive into the USB port shown in the diagram below.
In the on-screen menu, choose the type of content you want to open:
Oce (PPT, Word, Excel), Movie, Music, Photo, or Text.
EN 09

JPEG, BMP, PNG
MP4, MPEG, MOV, 3GPP, 3GP, DAT,
VOB, MPG, MPEG, AVI, MKV, FLV,
RM, RMVB, ASF, WMV
Video
Supported
Formats
Audio
Picture
Text
MP3, AAC, WAV, MKA, 3GP, M4A,
OGG, FLAC, PCM
TXT, SRT, SUB, SMI
Oce ppt, xlsx, doc, pdf
EN 10

HDMI CONNECTIONS
Plug an HDMI cable into the device you wish to connect to the
projector, and then insert the other end of the HDMI cable into one
of the HDMI ports as shown in the diagram below. Open the
on-screen menu and select the HDMI source in the Source tab. This
will allow you to display the screen of whatever device has been
plugged in.
EN 11

AV CONNECTIONS
To use a device with a standard RCA connection, you will need to
obtain an RCA to 3.5mm adapter. Connect the adapter to the
projector as shown below, and then connect the RCA plugs from the
device to the RCA jacks on the adapter. You can also just use a
singular AV cable if this is an option for your device. Once connected,
go into the on-screen menu and select AV under Input Source as
shown below.
EN 12

3.5MM AUDIO CONNECTION
To play sound from the source, plug either headphones or speakers
into the 3.5mm audio port as shown below.
EN 13

MULTISCREEN CONNECTIONS
You can wirelessly connect your iPhone, iPad, MacBook, and a wide
range of other devices to the projector; or, you can use a wired
connection with your iPhone or iPad to share your screen.
For wireless connections, please ensure that the projector and the
device you wish to connect to the projector are connected to the
same network. Instructions on how to connect the projector to a
wireless network are available in the Settings section on page 19.
MIRACAST - Share the screen from any device that uses Miracast
technology wirelessly.
Note: Android devices may have mixed functionality with Miracast. Most
devices will support it in some way: OnePlus / Google Pixel - Search Cast;
Samsung - Search Smart View; Sony - Search Screen Mirroring.
Additionally, there may be third-party apps you can download to your
Android device to provide Miracast functionality. We cannot guarantee
that this device will work as intended with all Android devices. If you're
having issues using Miracast, check with your device's manufacturer for
more information.
Devices with Miracast functionality can connect to the projector
wirelessly. Before starting the connection, ensure that both devices
are connected to the same network. To start the connection, open the
on-screen menu and select the Miracast option from the Home page.
Enter the System Settings on the Android device and then search for
the casting software for your device (OnePlus / Google Pixel - Search
Cast; Samsung - Search Smart View; Sony - Search Screen Mirroring).
Once you have opened the casting software for your device, look at
the list of available mirroring devices and select the "NexiGo-PJ40"
from the list. The connection is now complete.
EN 14

EN 15

To connect, make sure both devices are connected to the same
network. On the projector, select iOS Cast and then Airplay Mirror from
the options. Go into the control center on the iOS device and click
"Screen Mirroring". In the list of available mirroring devices, select the
device "NexiGo-PJ40" from the list. The connection is now complete.
IOS CAST - Share the screen of your iPhone, iPad, or MacBook
wirelessly using AirPlay.
EN 16

DLNA - Share the display of your device that supports DLNA
connections.
To connect using DLNA, as with the other steps, first ensure that both
devices are connected to the same network. Once that has been
completed, go back to the Home page and select More, and then
DLNA from the list of options. Then, on the device you want to cast
from, open an app that supports casting (ex: YouTube), and then tap
the button on the app that allows you to cast. Select "NexiGo-PJ40"
from the list of options. Press the play button on the video, and it will
now display the video via the projector.
EN 17

IOS CABLE CAST - Share the screen of your iPhone or iPad using a
USB wired connection.
Plug your iPhone or iPad into one of the USB ports on the projector.
Select Apple Cast from the Home page and then iOS Cable Cast.
After a moment, the phone / tablet will show a message asking "Trust
this device?" — tap "Trust" to finish the connection.
EN 18
Table of contents
Other Nexigo Projector manuals

