Nextchip SDVR2204PN Troubleshooting guide

NVS2200F : 1-Channel H.264 Codec SoC Processor (ARM9)
NVP1004MX : 4-Channel Video Processor
& 4-Channel Video Decoder / Encoder
S
SS
SDVR
DVRDVR
DVR2204PN
2204PN2204PN
2204PN
4-Channel Standalone H.264 DVR
Installation Guide & User’s Manual
Model Name
SDVR2204PN
Date
2007.12.28
Version 1.1

NDVR2200F
Installation Guide & User’s
1/8/2008
2
/
66
Revision history
Version Date Description
V1.0 2007.11.01 First release
V1.1 2007.12.28

NDVR2200F
Installation Guide & User’s
1/8/2008
3
/
66
Contents
1. Introduction
1. Introduction1. Introduction
1. Introduction................................
................................................................
................................................................
................................................................
................................................................
................................................................
.....................................
..........
..... 6
66
6
1.1.
Board Spec............................................................................................................ 6
1.2.
System Spec ......................................................................................................... 7
1.3. Board.................................................................................................................................. 8
2.
2. 2.
2. Product Design
Product DesignProduct Design
Product Design................................
................................................................
................................................................
................................................................
................................................................
................................................................
................................ 9
99
9
2.1. Power ................................................................................................................................. 9
2.2. Memory .............................................................................................................................. 9
2.3. 4channel Video Process (NVP1004MX) .......................................................................... 9
2.4. H.264 Decoding/Encoding (NVS2200F H.264 codec) .................................................... 9
2.5. 4channel Audio Record (NAP9004)................................................................................. 9
2.6. USB Backup Function .................................................................................................... 10
2.7. IR Remote-control Function .......................................................................................... 10
2.8. Mouse (PS/2) Function ................................................................................................... 10
2.9. Firmware Upgrade through USB/Network.................................................................... 10
2.10. Network Client Viewer with various Function............................................................ 10
3. Terminal Setting and DVR Board Booting
3. Terminal Setting and DVR Board Booting3. Terminal Setting and DVR Board Booting
3. Terminal Setting and DVR Board Booting................................
................................................................
......................................................
............................................
...................... 1
11
11
11
1
3.1. Connecting Serial Terminal ........................................................................................... 11
4. Terminal Setting in Linu Environment
4. Terminal Setting in Linu Environment4. Terminal Setting in Linu Environment
4. Terminal Setting in Linu Environment................................
................................................................
..........................................................
....................................................
.......................... 12
1212
12
5. Building Development Environment
5. Building Development Environment5. Building Development Environment
5. Building Development Environment................................
................................................................
...............................................................
..............................................................
............................... 16
1616
16
5.1. Host Development Environment ................................................................................... 16
5.2. Building the Cross Compiler ......................................................................................... 19
5.3. Building BOOTP Environment....................................................................................... 20
5.3.1. The necessary of setting BOOTP
................................
................................................................
................................................................
................................................................
....................................
........
.... 20
2020
20
5.3.2. BOOTP
................................
................................................................
................................................................
................................................................
................................................................
................................................................
............................................
........................
............ 20
2020
20
5.3.3. Configuring the Host BOOTP Environment
................................
................................................................
.....................................................
..........................................
..................... 20
2020
20
5.4. Building TFTP Environment .......................................................................................... 21
5.4.1. The necessary of TFTP building
................................
................................................................
................................................................
................................................................
......................................
............
...... 21
2121
21
5.4.2. TFTP
................................
................................................................
................................................................
................................................................
................................................................
................................................................
................................................
................................
................ 21
2121
21
5.4.3. Setting Host TFTP Environment
................................
................................................................
................................................................
................................................................
......................................
............
...... 21
2121
21
5.5. Building NFS File System Environment ....................................................................... 23
5.5.1. The necessary of NFS building
................................
................................................................
................................................................
................................................................
.......................................
..............
....... 23
2323
23
5.5.2. NFS
................................
................................................................
................................................................
................................................................
................................................................
................................................................
..................................................
....................................
.................. 23
2323
23
5.5.3. Setting Host NFS Environment
................................
................................................................
................................................................
................................................................
........................................
................
........ 23
2323
23
5.5.4. Logging the NFS server from board
................................
................................................................
................................................................
................................................................
................................ 28
2828
28

NDVR2200F
Installation Guide & User’s
1/8/2008
4
/
66
5.6. Installing Samba ............................................................................................................. 29
5.6.1. Server Installation
................................
................................................................
................................................................
................................................................
...........................................................
......................................................
........................... 29
2929
29
5.6.2. Samba Setting
................................
................................................................
................................................................
................................................................
................................................................
................................................................
.................................
..
. 30
3030
30
5.6.3. Checking Samba
................................
................................................................
................................................................
................................................................
.............................................................
..........................................................
............................. 31
3131
31
6. Building Kernel and Boot loader
6. Building Kernel and Boot loader6. Building Kernel and Boot loader
6. Building Kernel and Boot loader................................
................................................................
................................................................
................................................................
....................................
........
.... 32
3232
32
6.1. Building Kernel ............................................................................................................... 32
6.2. Kernel Build Option ........................................................................................................ 32
6.3. Building Boot loader ARMBoot 1.1.0 ............................................................................ 33
7. Operating Linu on NVS2200F Board
7. Operating Linu on NVS2200F Board7. Operating Linu on NVS2200F Board
7. Operating Linu on NVS2200F Board................................
................................................................
............................................................
........................................................
............................ 34
3434
34
7.1. Using OPENice-A1000 to Download Boot loader........................................................ 34
7.1.1. Environment
................................
................................................................
................................................................
................................................................
................................................................
................................................................
....................................
........
.... 34
3434
34
7.1.2. Flash Programming
................................
................................................................
................................................................
................................................................
.........................................................
..................................................
......................... 35
3535
35
7.2. Setting the Boot loader Environment ........................................................................... 42
7.3. Downloading Kernel , Ramdisk and Software ............................................................. 43
8. B
8. B8. B
8. Board Manual
oard Manualoard Manual
oard Manual ................................
................................................................
................................................................
................................................................
................................................................
................................................................
................................ 44
4444
44
8.1 Key Define Description ................................................................................................... 44
8.2 Display Modes.................................................................................................................. 45
8.3. Rear Board Description.................................................................................................. 46
8.4. Main Menu ....................................................................................................................... 46
8.5. Camera Menu .................................................................................................................. 47
8.6. Record Menu ................................................................................................................... 48
8.7. Motion Menu.................................................................................................................... 49
8.8. Sensor Menu ................................................................................................................... 50
8.9. Schedule Menu ............................................................................................................... 51
8.10. Network Menu ............................................................................................................... 52
8.11. Backup Menu................................................................................................................. 53
8.11.1. USB Backup
................................
................................................................
................................................................
................................................................
................................................................
................................................................
...................................
......
... 53
5353
53
8.11.2. CD/DVR-RW Backup
................................
................................................................
................................................................
................................................................
......................................................
............................................
...................... 53
5353
53
8.12. System Menu................................................................................................................. 54
8.12.1. TIME SETUP
................................
................................................................
................................................................
................................................................
................................................................
................................................................
..................................
....
.. 54
5454
54
8.12.2. SYSTEM PASSWORD
................................
................................................................
................................................................
................................................................
....................................................
........................................
.................... 54
5454
54
8.12.3. SYSTEM INFO
................................
................................................................
................................................................
................................................................
................................................................
................................................................
................................ 54
5454
54
8.12.4. VIDEO FORMAT
................................
................................................................
................................................................
................................................................
.............................................................
..........................................................
............................. 54
5454
54
8.12.5. LOG VIEW
................................
................................................................
................................................................
................................................................
................................................................
................................................................
......................................
............
...... 55
5555
55
8.12.6. LOG SET
................................
................................................................
................................................................
................................................................
................................................................
................................................................
........................................
................
........ 55
5555
55
8.12.7. HDD FORMAT
................................
................................................................
................................................................
................................................................
................................................................
................................................................
................................ 55
5555
55

NDVR2200F
Installation Guide & User’s
1/8/2008
5
/
66
8.12.8. FIRMWARE UPGRADE
................................
................................................................
................................................................
................................................................
...................................................
......................................
................... 55
5555
55
8.12.9. FACTORY RESET
................................
................................................................
................................................................
................................................................
...........................................................
......................................................
........................... 55
5555
55
8.12.10. LANGUAGE
................................
................................................................
................................................................
................................................................
................................................................
................................................................
.................................
..
. 55
5555
55
8.13 Booting (Start Status) .................................................................................................... 56
8.14 Record............................................................................................................................. 57
8.14.1. Always Record
................................
................................................................
................................................................
................................................................
...............................................................
..............................................................
............................... 57
5757
57
8.14.2. Event Record
................................
................................................................
................................................................
................................................................
................................................................
................................................................
.................................
..
. 57
5757
57
8.14.3. SCHEDULE
................................
................................................................
................................................................
................................................................
................................................................
................................................................
....................................
........
.... 57
5757
57
8.15 Search ............................................................................................................................. 58
8.15.1. Time Search
................................
................................................................
................................................................
................................................................
................................................................
................................................................
...................................
......
... 58
5858
58
8.15.2. Event Search
................................
................................................................
................................................................
................................................................
................................................................
................................................................
.................................
..
. 59
5959
59
8.15.3. Manual Search
................................
................................................................
................................................................
................................................................
...............................................................
..............................................................
............................... 59
5959
59
8.16. Zoom .............................................................................................................................. 60
8.17. Connect with Network Viewer ..................................................................................... 60
9. Network Viewer
9. Network Viewer9. Network Viewer
9. Network Viewer................................
................................................................
................................................................
................................................................
............................................................
........................................................
............................ 61
6161
61
9.1. Setting.............................................................................................................................. 61
9.2. Viewer Connection ......................................................................................................... 62
9.3. Play / Stop........................................................................................................................ 62
9.4. Select Live / Playback / FilePlay.................................................................................... 63
9.5. Live play........................................................................................................................... 63
9.6. Playback .......................................................................................................................... 64
9.7. FilePlay ............................................................................................................................ 65
9.8. Save as AVI ...................................................................................................................... 65
10. References
10. References10. References
10. References................................
................................................................
................................................................
................................................................
................................................................
................................................................
..................................
....
.. 66
6666
66

NDVR2200F
Installation Guide & User’s
1/8/2008
6
/
66
1. Introduction
SDVR2204PN board is 4ch DVR board embedded NVS2200F, and it offers convenience for
customer in improving access to develop their DVR system.
Accepted 4ch Analog Video Signals are managed to various display through the ‘NVP1004MX’
which is Multiplexer embedded 4ch Video Decoder, and accepted 4ch Analog Audio Signals are
encoded to the PCM/ADPCM data through the ‘NAP9004’. And also, ‘NVS2200F’, SoC(System
on Chip) embedded a H.264 Encoder/Decoder for Image compression and an ARM9 compatible
core.
Moreover, 4ch DVR system supports ‘Network Client Program’ for observation and control of
remote place over the network. It makes client can control general function of its DVR system.
1.1. Board Spec
CPU ARM 9 compatible - 331Mhz
SDRAM 128M byte
NOR Flash 8M byte
OS Linux (Kernel 2.6.14)
Boot Loader ARM Boot 0.21
gcc version 3.4.4 (Linux Cross Compiler)
etc MTD, S/W Upgrade by USB

NDVR2200F
Installation Guide & User’s
1/8/2008
7
/
66
1.2. System Spec
Supported Storage
Size
Connectable up to 2 HDD at once
and support maximum 500G in each HDD
Image Compression
H.264 and MJPEG
Image Input 4 (NTSC/PAL) channel
Record Resolution 720x480(576) Quad real
Record Speed Max 60(50)Field/sec, 720 x 240(288)
Record Mode
Manual record
Event record
- Alarm, Motion, Schedule
Centralized record
- an Event channel to D1
Playback Mode PLAY, STEP, BACK STEP, FF, REW
Monitoring 60-fps @720x240, 50-fps @720x288
Display
1ch(Full), 4ch, PIP and various combination
Anti Rolling
Zoom, Freeze
Event search, Record search, Time search Play
Full Duplex Enable to Record during Live / PB working
Sensor Input 4EA
Motion Detect Control Threshold by 8level, 30 x 24 Motion Area
PTZ control Connect with RS-485, Pan / Tilt / Zoom Function(Option)
BACKUP
USB Storage Backup
Save as FAT16file system(recognize from WINDOW)
Network Backup (Save form Network Viewer)
Enable to save as H.264
Network Viewer
TCP/IP Protocol
Support Remote REC ON/OFF control
Support Live/PB
Remote Control Support NEC Standard
Audio 4-PORT Audio input
1-PORT Audio output Audio(1channel)

NDVR2200F
Installation Guide & User’s
1/8/2008
8
/
66
1.3. Board
IDE PRIMARY CON
FRONT
-
KEY CON
VGA
RJ
-
45/
USB2.0
RS
-
485
-
RS
232
PS/2 MOUSE
JTAG(ARM
AUDIO OUT(1CH
AUDIO IN(4CH ,
VIDEO OUT(2CH ,
VIDEO IN(4CH ,
HDD Power
Power Switch
NVS2200F
NVP1004MX
NAP9004

NDVR2200F
Installation Guide & User’s
1/8/2008
9
/
66
2. Product Design
2.1. Power
SDVR2204PN board works with power source.
Following table shows power source.
Power Source Consumption Current Note
+12V 1.5A Hard Disk(Master/Slave)
+5V 1.5A
+3.3V 2.6A
+2.5 DDR RAM, PHY
+1.25 DDR RAM
+1.2 NVS2200F core(CPU)
+1.8V 0.3A NVP1004MX
2.2. Memory
SDVR2204PN board has three memory parts basically, such as System Memory, Program
Memory and etc Memory parts.
Use 128Mbyte DDR-DRAM as System Memory and NOR FLASH (8M byte) for low price as
Program Memory. As etc Memory, NVP1004MX which is Multiplexer embedded 4ch Video
Decoder requires SDRAM(64Mbit / 32data-bit) as well.
2.3. 4channel Video Process (NVP1004MX)
NVP1004MX quantizes 4ch analog video signal to digital data in real time. Moreover as a video
processor, NVP1004MX offers various display and Field/Frame/ CIF record as well.
2.4. H.264 Decoding/Encoding (NVS2200F H.264 codec)
NVS2200F H.264 codec receives Quad real data from NVP1004MX record port, and carries out
Encoding/Decoding image data through embedded H.264 engine. Then encoded data at
application can save in HDD. And also it supports converting Encoding data into its Decoding in
real time
2.5. 4channel Audio Record (NAP9004)
A NAP9004 supports audio record up to 4ch. The audio data will be recorded through
PCM/ADPCM codec, which facilitates inputted audio data and image data to make them
synchronize. And audio data is decoded through PCM/ADPCM codec as well.

NDVR2200F
Installation Guide & User’s
1/8/2008
10
/
66
2.6. USB Backup Function
There are two ways, H.264 image backup and AVI backup as the USB backup which enable to
storage its maximum memory size. Saved image can replay in PC with installing our Network
Client Viewer Software.
2.7. IR Remote-control Function
Support IR Remote-control for handling all function of SDVR2204PN board system.
2.8. Mouse (PS/2) Function
Support PS2 Mouse for handling all function of SDVR2204PN board system.
2.9. Firmware Upgrade through USB/Network
(A) USB Firmware Upgrade
1. Save the upgraded firmware into root directory of USB memory stick.
2. Connect it with the board.
3. It will upgrade after running the file.
In substance, the upgraded software will be applied in DVR system after restart the system.
(If there are several firmware programs in USB memory stick, erase other programs except for
being going to upgrade version. It is the safest way to install without confusing)
(B) Network Firmware Upgrade
In the case of upgrade through Network, use Firmware upgrade function in the NetViewer.
To apply upgraded firmware into DVR system, must do restart it after completing upgrade.
If do not restart, it might be running with old version of firmware.
2.10. Network Client Viewer with various Function
-Support various display modes(1/4channel)
-Enable to save the image that is displaying now in the viewer to PC storage.
-Stream data and live image data in PC storage can convert into Standard JPEG and AVI
file.
-Support Search function(Time search) for recorded data

NDVR2200F
Installation Guide & User’s
1/8/2008
11
/
66
3. Terminal Setting and DVR Board Booting
Use the communications emulator HyperTerminal in Microsoft Windows to check the booting of
NVS2200F DVR board. The HyperTerminal is a communications program installed in Microsoft
Windows and it is designed to be used when connecting with communications service in text
environment. The purpose of this HyperTerminal is to test and monitor the function of
NVS2200F DVR board through a serial cable.
3.1. Connecting Serial Terminal
Run the serial communications program like HyperTerminal and connect with a serial port of the
SDVR2204PN board. Configure the communications protocol as follows:
-Bit rate per second(B): 38400
-Data bit (D): 8
-Parity (P): None
-Stop bit (S): 1
-Flow control (F): No
Turn the power of SDVR2204PN board ON, if it is OFF.
If the power is ON, press the Reset button to see the following screen.
Video System : NTSC
Check Mux : Detect NVP1004MX
MDIN180 : OK
InputResol = IN_720x480i
NVS2200F ARMboot Version 0.21 for NVS2200F(Oct 23 2007-21:53:15)
ARMboot code: 00200000 -> 00223274
IRQ Stack: 00244270
FIQ Stack: 00245270
DRAM Configuration:
Bank #0: at address 0x0 (128 MB)
Check for MX29LV008B flash(8bit x4) DDI1=0x1, DDI2=0x227e (no)
Check for MX29LV640BB flash(16bit x1) DDI1=0x14, DDI2=0x0 (no)
Check for MX29LV640BT flash(16bit x1) DDI1=0x14, DDI2=0x0 (no)
Check for S29GL064AR3 flash(16bit x1) DDI1=0x1, DDI2=0x227e (yes)
Flash: (8 MB)
Hit any key to stop autoboot: 0
NVS2200F>

NDVR2200F
Installation Guide & User’s
1/8/2008
12
/
66
4. Terminal Setting in Linux Environment
In Linux, communications emulator ‘minicom’ is used to check the booting of SDVR2204PN
board board.
Minicom is a terminal emulator for Linux and it is used when exchanging data with and
monitoring the target board. For our system, minicom is used when testing the function of
SDVR2204PN board in Linux through a serial cable.
- Check the environment prior to using minicom
Set the serial port on Linux.
For serial communication with SDVR2204PN board, you need to modify minicom’s environment
set-up. The minicom parameters that are initially set are as follows:
For your information, the following description is given based on Red Hat 9.0.
-Baud rate : 9600
-Data Size : 8
-Parity : None
-Stop bits : 1
-Hardware flow control : No
-Software flow control : No
For setup, run the following as root authority.
Use the -S option to modify the minicom environment.
# minicom -S
# setserial –a /dev/ttyS0
/dev/ttyS0, Line 0, UART: 16550A, Port: 0x03f8, IRQ: 4
Baud_base : 38400, close_delay: 50, divisor: 0
closing_wait: 3000
Flags: spd_normal skip_test
#

NDVR2200F
Installation Guide & User’s
1/8/2008
13
/
66
Once it is done, the following screen will appear for environment setting.
Select the [Serial Port Setup] on the screen above in order to change the serial port.
Press an appropriate key on the keyboard to change the configuration.
- A : Change the serial device.
- E : Change parameters.
- F,G : Change flow control.
Modify the four items above for SDVR2204PN board.
Parameters to be set for NDVR3104PN board are as follow:
- Baud rate : 38400bps
- Data Size : 8
- Parity : None
- Stop bits : 1
- Hardware flow control : No
- Software flow control : No

NDVR2200F
Installation Guide & User’s
1/8/2008
14
/
66
You can set the parameters following the approach presented below.
Press an appropriate to set the parameters of SDVR2204PN board.
Press the <Enter> key to exit the [Comm Parameters].
After configuration is completed, be sure to select [Save setup as df1] in [configuration] to save
and then select [Exit] to exit.
38400

NDVR2200F
Installation Guide & User’s
1/8/2008
15
/
66
- Running minicom
Once run, the screen above will appear. This screen indicates that SDVR2204PN board is not
connected yet. Then, turn the power of SDVR2204PN board ON if it is OFF. Press the RESET
switch to start the system if it is ON. Press the spacebar key to see the prompt of the boot
loader of the SDVR2204PN board, [=>]. Press the enter key to see the shell prompt.
- Exit the minicom
The command to exit the minicom while it is under operation is as follows:
1. Press <Ctrl + a> and <q> in sequence.
2. Once the box ‘Leave without reset?’ pops up, select Yes and press Enter.
Welcome to minicom 2.00.0
OPTIONS: History Buffer, F-Key Macros, Search History Buffer, I18n
Compiled on Jan 25 2003, 00:15:18
Press CTRL-A Z for help on special keys

NDVR2200F
Installation Guide & User’s
1/8/2008
16
/
66
5. Building Development Environment
This part describes how to build an environment for the development of the Embedded Linux
System. Presented here are the examples and requirements for building the system.
5.1. Host Development Environment
As for a program which is run on PC, it can be developed and compiled by a compiler that can
also be operated on PC. This compiler is called a native compiler. However, this cannot be done
for an embedded device. A solution to this is building a development host, compiling and
creating a program on a development host, downloading it to a device, and building and running
it on the device. This compiler is called a cross compiler. This allows the development of
environment for an embedded Linux device.
In general, for the development of an embedded Linux, Linux is used as the OS for the
development host. The details to build are briefly summarized as follows:
1. Prepare the Linux Host PC (Fedora core 6)
2. Build the Cross Compiler Development Environment
- binutils
- gcc
- glibc or newlibc
3. Install the server and set the environment setting
- BOOTP (not always required)
- TFTP Server
- NFS Server
4. Boot loader (ARM Boot) Source
5. Kernel source
6. Binary image (Kernel & Ramdisk)
7. Samba server setting (for Windows environment)
Development environment that developers use may vary somewhat from one developer to
another. Let’s explain the development environment for this Company only. This Company used
the approach of building Linux development host, Windows environment, and Ethernet LAN
Network.

NDVR2200F
Installation Guide & User’s
1/8/2008
17
/
66
Development Host Linux PC
PC Window PC
Flash Writing JTAG
Terminal Serial
Download Network
Install Linux OS on development host and build cross compiler development environment. Do
the main job on Windows PC. Use JTAG for building boot image. As processing speed of JTAG
is very slow, download executable images through Ethernet network once boot loader is under
operation on the development board. BOOTP and TFTP are used in this process. BOOTP is
used in order to get an IP on the development host and TFTP is program used in order to
download real image from it. Using terminal emulator (HyperTerminal, etc), these programs
provide the environment to see message from boot loader on device or execute command. And
they provide console windows after Linux system starts. NFS allows embedded device, which
does not have large-capacity memory, to share files on the host after Linux kernel starts on the
device. Samba allows Windows client to share files on Linux machine that is the development
host.

NDVR2200F
Installation Guide & User’s
1/8/2008
18
/
66
Most works are performed on Windows, and compilation and image transfer for a development
device are performed on Linux. On Windows, TELNET or X Client Programs (zTerm, Xmanager,
Exceed, etc) are used to carry out control commands of Linux. This allows developers to use
the editor that they are used to and a web browser with which they find it easy to search the
information to develop an embedded Linux.
Flow Chart for Development
A development host is required for the development of an embedded Linux, and Linux is the
preferred OS for the development host. First install Linux on a host PC. For reference, all the
tests for this system are done on Fedora core 6.0.

NDVR2200F
Installation Guide & User’s
1/8/2008
19
/
66
When it comes to installation, it is recommended that you install all the packages by selecting
user installation rather than server or workstation installation option. Also, select No firewall on
the Firewall Configuration. This has something to do with the NFS and Samba configurations.
So make sure to select No firewall on the configuration.
5.2. Building the Cross Compiler
In general, a compiler generates a binary code suitable for its own system. For example, the
compiler gcc on x86 system generates the x86 binary code. A target board cannot directly
compile an application program or kernel, because it does not have enough space for storage.
To develop the kernel and application program for a target, the cross compilation environment
for the target should be built on a host system. It is the cross compiler that generates ARM
binary codes on x86 machines.
The cross compiler consists of the following:
Binutils: This is the abbreviation of binary utilities which are required to handle
binary files such as ar, nm, ld, ranlib, objdump, and others These can be
downloaded from GNU site
GCC: GCC is an abbreviation of GNU CC, which is compiler It includes compilers
for C, Fortran, C++, etc This can also be downloaded from the GNU site
GLIBC: GLIBC refers to the GNU C Library It has the library required to compile C
programs. GCC and GLIBC need an architecture-dependent kernel for compilation. It
can also be downloaded from the GNU site.
RPMs are supposed to be downloaded and compiled before use. In order to eliminate the
process of compiling them after downloading tool chain, they are created in the form of
compressed files. The tool chain should be installed in two versions. First, uncompress the arm-
linux-gcc-3.4.4-glib-2.3.5-static.tar.gz file at the root (/) directory in order to install the tool chain.
The other version of the tool chain can be installed by uncompressing the arm-linux-gcc-3.4.4-
glib-2.3.5-static.tar.gz file at the /opt/crosstool/arm-linux/gcc-3.4.4-glibc-2.3.5/ directory.
Uncompress at the directories above and make the PATH at the /root/.bashrc or .bash_profile
before use (For details, refer to the Readme.txt in the directory containing the compressed form
of the tool chain).

NDVR2200F
Installation Guide & User’s
1/8/2008
20
/
66
5.3. Building BOOTP Environment
5.3.1. The necessary of setting BOOTP
This is a protocol required in order to get an IP assigned for a system. IP is assigned to BOOTP
and DHCP. Among these, programs such as boot loader use BOOTP as it is a very simple
protocol to run.
5.3.2. BOOTP
BOOTP is an UDP-based protocol to get an IP using the MAC address of the Ethernet adapter.
The client sends a broadcast of its own Ethernet MAC address in order to receive an IP address.
The host that provide BOOTP services send an IP address corresponding to the Ethernet MAC
address after receiving the broadcast. The client receives and sets the IP. The information that
the host sends to the client through BOOTP includes the filename of a boot image as well as IP
address because a combination of BOOTP and TFTP is commonly used for network booting.
BOOTP provides the following benefits:
- Automatic assignment and allocation of IP addresses.
- Linked with TFTP, network booting requiring no memory allocation can be done
Things to keep in mind when using BOOTP
- Improper IP addresses can be set as the same MAC address is provided by multiple servers.
- It is not as convenient as using a fixed IP at time of development.
5.3.3. Configuring the Host BOOTP Environment
On Linux, a daemon called bootpd is run to support BOOTP. This daemon has the configuration
file named /etd/bootptab.
Edit the /etc/xinetd.d/bootp file as follows to use BOOTP:
service bootps
{
disable = no
socket_type = dgram
protocol = udp
wait = yes
user = root
server = /usr/sbin/bootpd
}
Table of contents
Popular DVR manuals by other brands
WatchNet
WatchNet PNT Hardware manual
Gatekeeper
Gatekeeper Y58 User manual & installation guide
Avicam
Avicam 5004A-B User's installation and operation manual
Swann
Swann 4 Camera DVR Pack specification
Woojin Digitech
Woojin Digitech TOPS-7016 Installation & operation manual
Lorex
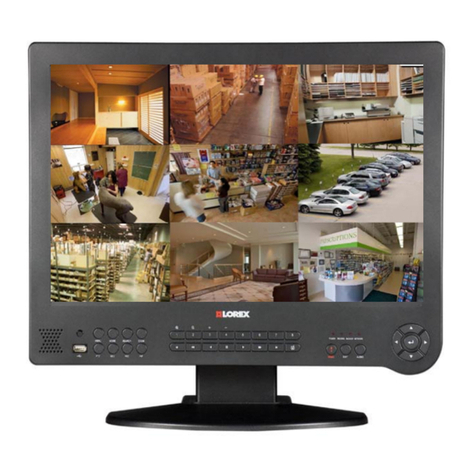
Lorex L19WD800 Series instruction manual

