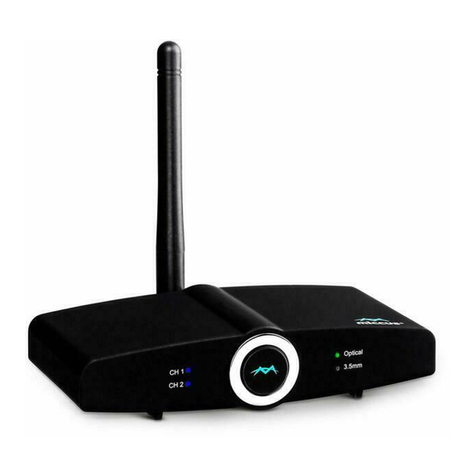
NexWave Uno2400 User manual

ImmersionRC Uno2400 v1
2.4GHz Audio/video receiver
Instruction manual - International edition
1

Overview
The Uno2400 follows in the footsteps of it’s Uno5800 ‘big brother’, an extremely
popular Audio/Video receiver designed for the FPV market.
With > -95dBm sensitivity the Uno2400 is sensitive, very sensitive. Paired with an
appropriate antenna, it will give you many miles/km of range. Add an antenna
tracker, and a higher gain antenna, and this range increases significantly.
This sensitivity does not come at the expense of increased interference from
nearby UHF transmitters. The Uno2400 is heavily filtered against UHF
interference, even when the interfering antenna is in very close proximity to the
receiver.
It is engineered from an FPV-er’s perspective and hence has features to match.
It’ll warn you when the receiver battery runs low, with an automatic, or
user-settable low voltage threshold.
It is designed for single-cable, plug and play, integration with the ImmersionRC
Ground Station, or Antenna Tracker v2.
Power, Audio, Video, and a bidirectional data link, are all passed through a single
Mini-Din connector, connected to the Ground Station.
Alternatively, traditional 3.5mm jacks, and DC power jacks, are provided for
compatibility with older systems.
The data link allows the Ground Station to know, at all times, the received signal
strength (RSSI), allowing it to warn the pilot of low-signal conditions. This signal
may also be used to help ‘hone’ a GPS-tracked antenna mount, to ensure that the
antenna is always optimally positioned pointing at the plane.
This same data link allows the Ground Station to control various aspects of the
receiver, including the channel selection. For receivers mounted directly on the
antenna’s RF output (where cable losses are eliminated), which are not easy to
access, this can be a real help
Package contents
1 pcs - Uno2400
1 pcs - 2.4GHz antenna
1 pcs - DC power cable to soldered ends
1 pcs - 3.5mm Male to 3x Phono cable
2

Operation
Operating the receiver is simple. Two push buttons are used to select the
frequency band, and the channel required. They are also used to set up user
configurable settings. After applying power, and provided the ‘auto’ setting for the
low voltage warning is selected, it’ll beep the number of LiPo cells it has detected.
So two beeps is a 2S LiPo and the low voltage warning is set to 6V, three beeps is
a 3S LiPo and the low voltage warning is set to 9V.
The Uno 2400 A/V receiver can tune to 13 unique frequencies in the 2.4GHz
Amateur radio, and ISM bands. All of the channels from the popular ‘Lawmate’
2.4GHz transmitters are supported, along with frequencies used in earlier
ImmersionRC 2.4GHz equipment (also known as the 2.4GHz ‘Airwave’ band).
When the low voltage battery alarm is triggered the receiver will start to beep
indicating you need to charge or change the battery. Furthermore it’ll also beep
when the input voltage is too low, less than 5V or too high, more than 13V. At
voltages less than 5V it will not work reliably, at voltages over 12V it will run hot
over a longer period of use, so this is not recommended. The power input is
reverse polarity protected; however it is good practice to always check polarity
prior to applying power. The Uno 2400 A/V receiver power connector is center pin
positive.
Programming
The Uno 2400 A/V receiver can be configured to store user selected configuration
settings. The selected band, and channel will always be stored so at power up it
defaults to the last selected frequency.
Other settings that can be configured are:
●Low voltage alarm threshold
Programming these settings is accomplished by using the CHAN push button,
with feedback from the internal beeper, in a manner similar to that used by most
ESCs (Electronic Speed Controllers).
To enter the programming menu, hold down the CHAN push button for 5 seconds
or longer. Once the programming menu has been activated, the receiver will start
cycling through the menu options, in the order listed.
To change one of the items, wait for it to be ‘played’, and immediately after, press
the button.
The receiver will then ‘play’ the current value, as a number of beeps, and will then
start from the first option, and play each option until the last. Selecting an option
is simply done by waiting for it to be played and pressing the button briefly.
See beep codes in the table below.
3

For example to change the Low Battery 100mV setting:
Button pressed for > 5 seconds
Dash Dot Dot - second menu item press button briefly to enter setting
Dot - current setting (auto)
Dot - first available option 0.0v press button briefly
Dot Dot - second available option 100mV press button briefly
At this point the Low Battery 100mV setting has been changed to ‘100mV’. The
module will now continue with the next item in the menu, and continue to the end
of the list. Once the end of the list is reached, the receiver will automatically exit
the programming mode signaled by two short beeps.
Beep Codes
Beep Code
Menu
Menu Choices
.
Low Batt Volts
1 – Auto (for 2S or 3S LiPo)*
2 – 6v
3 – 7v
4 – 8v
5 – 9v
6 –10v
7 – 11v
8 – 12v
Default: 6V for 2S, 9V for 3S
..
Low Batt
100mV
1 – 0.0v …. 10 – 0.9v
Default: 0.5v (for threshold of 9.5v)
(Ignored in Auto mode)
Note that * indicates the default value .
Low Battery Volts and Low Battery 100mV
These two options can be combined to set the threshold at which the low-voltage
alarm sounds.
In Auto mode (the default), the receiver will sense the attached battery voltage,
and will set the alarm voltage accordingly (6V for 2S and 9V for 3S LiPo). This
mode is designed only for use with LiPo batteries. For use with NiCD, NiMh, or
other batteries, set the alarm voltage manually, for example:
9.2v set LowBattVolts to 5 (9v), and LowBatt100mV to 3 (0.2v)
10.0v set LowBattVolts to 6 (10v), and LowBatt100mV to 1 (0.0v)
When powering the receiver from LiPo batteries, it is important to note that the
discharge curve is fairly flat, and drops off quickly near the end. Setting a
threshold of around 3.0/cell is relatively safe. It is however highly recommended
4

to perform a ‘dry-run’ after setting the voltage warning threshold to make sure the
low battery warning is set up correctly.
If upon connection of a battery pack the receiver beeps continuously then the low
battery warning is set higher than the voltage from the battery pack, so reset
accordingly or charge the battery pack.
Note that regardless of the low battery alarm settings, a fixed alarm will occur
when an input voltage smaller than 5V or larger than 13V is detected. This
safeguards the receiver from being used with input voltages with which the
correct operation cannot be guaranteed.
Safety Note: Even though this alarm will provide some protection against loss of video
signal during an FPV flight, it is highly recommended to fully charge all battery packs
used before each and every flight.
Optimal Antenna Connection
The Uno2400 was designed to be connected directly to the antenna’s RF
connector with as short a cable as possible, or ideally no cable at all.
Years of experience has shown that with this configuration, the best reception will
be obtained.
Special ‘Long Range’ Edition
The Uno2400 is available in a special ‘Long Range’ edition, with approx. 4dB more
sensitivity. This sensitivity comes at the expense of immunity to nearby RF
sources, such as UHF Long Range uplinks.
For applications where sensitivity is critical, and the UHF control link can be kept
clear of the 2.4GHz receiver antenna, these receivers will deliver exceptional
performance.
Sensitivity-wise, the standard Uno2400 is already on par with most of it’s
competitors, so for most users the standard product is the most suitable choice.
5

Connections
Groundstation Link Connection
The Ground Station link is a standard 6-pin mini-din, as used for many years by
PS/2 mice and keyboards.
This connector may be used to power the receiver, and also interface to the Video,
and Audio output lines.
6

Frequencies
The Uno2400 supports 13 unique frequencies, spread over 4 bands. These bands
correspond to various standards commonly used in the 2.4GHz FPV world, and
have some history behind them.
CH1
CH2
CH3
CH4
CH5
CH6
CH7
CH8
Band 1
Lawmate
2410
2430
2450
2470
2370
2390
2490
2510
Band 2
Airwave
2414
2432
2450
2468
-
-
-
-
Band 3
EU Band
2370
2396
2410
2430
-
-
-
-
Band 4
NexWaveRF
USA (US)
2396
2396
2410
2430
-
-
-
-
NotethattheImmersionRC700mW2.4GHztransmittersareavailable(currently)in
twoversions,aninternationalversion,whichusesthecommonLawmate
frequencies(Band1),andaUSA(Band4,US)version,whichusesthree
frequencieslegalforuseintheUSA(andlegalforUSretailerstoshiptodomestic
customers)
Band3fallswithintheUK/EUAmateurradioband,andisavailablebyspecialorder
(contactyourlocalretailerifyouareinterestedinthisproduct)
7

Support
First line of support is handled by the reseller. If you encounter any problems with
your ImmersionRC product contact them first.
For support on issues involving equipment from other brands and also general
support for ImmersionRC products, the best place to go is the ImmersionRC
section of FPVlab.com.
We actively monitor this forum and provide support here.
Regulatory notice
The use of this product may be prohibited in your country/region/state, please
verify that the RF output power and frequencies used by this transmitter comply
with local rules and regulations, this product may require a license to operate.
Directions on safety
ImmersionRC advocates the safe use of their products, always make sure you
equipment is in proper working order, is checked prior to every flight and that your
are familiar with and respect the equipment's capabilities and limitations. Do NOT
fly recklessly, do NOT fly near airports, freeways, towns, people, etc, basically
anywhere where a equipment failure or pilot error can result in injury or damage to
people and/or property.
Warranty
For warranty claims or repair requests please consult the retailer that you
purchased this product from, they will be able to help you with your warranty
claim or repair request.
8

LikeUs
We would like thank you for purchasing this ImmersionRC product.
Like ImmersionRC’s Facebook page and be kept up-to-date with news, product
releases, firmware updates, tips and tricks, and other information relevant to the
FPV hobbyist.
http://www.facebook.com/ImmersionRC
You can also follow us on Google Plus
google.com/+immersionrc
We have even been known to Tweet on occasion
https://twitter.com/@immersionrc
Manual rev1.0, ImmersionRC Limited
9
Table of contents
