Nexxt Solutions NHP-T720 User manual

WARRANTY
nexxtsolutions.com/warranty
YEAR
2
SmartWi-Fi surge protector
with four outlets and USB charging ports

1
2
3
4
User guide
Thank you for purchasing the Smart Wi-Fi surge protector
plug from Nexxt Solutions. We are excited to be part of
making your life easier, safer and for bringing peace of
mind into your home.
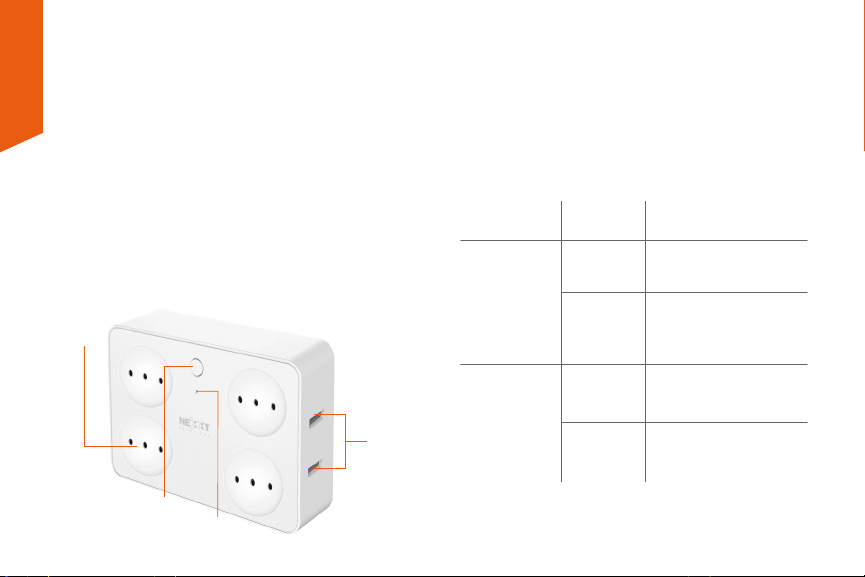
Product overview
1. Power/Reset button
2. Four outlets
3. LED status light
4. Four USB charging ports
English
Package content
• Smart surge protector plug
• Quick start guide
Status indicator
Red
Blue
Solid
Blinking
Solid
O
The smart surge protector
plug is connected to the
network
The smart surge protector
plug is in pairing mode
The smart surge protector
plug is on
The smart surge protector
plug is o
LED
indicator Status Description
* The color might look magenta as the red LED on the
background stays on.
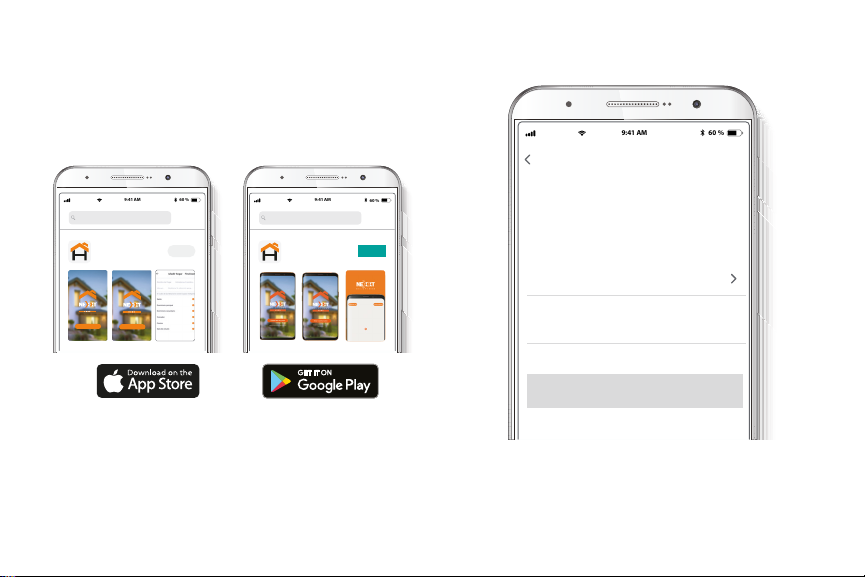
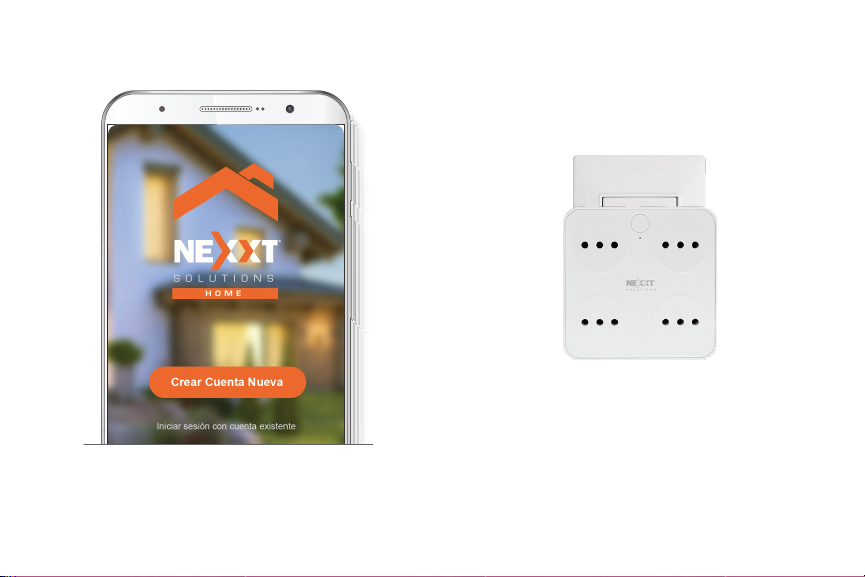
Installing the Nexxt Solutions
Home App
Download the Nexxt Home app on Google Play or Apple
App Store.
60 %
9:41 AM
Nexxt Home
Nexxt Solutions Home App
Cancel
GET
Accvent LLC
Login with existing account
Create New Account
SOLUTIONS
Iniciarsesión con cuenta existente
Crear Cuenta Nueva
SOLUTIONS
60 %
9:41 AM
Nexxt Home
Nexxt Solutions Home App
Cancel
INSTALL
Accvent LLC
Step 1
Register by email. Fill in the required elds.
60 %
9:41 AM
Register by email
United States of America
Email
Get authentication code

Step 3
Create a new password and then select Completed.
Step 2
Enter the verication code you received.
60 %
9:41 AM
Enter verication code
Verication code has been sent to your
60 %
9:41 AM
Set Password
Completed
6-20 characters, including letters and numbers

Step 4
The Nexxt Solutions Home App has been successfully
set up.
Plug in
Plug in the Nexxt Smart surge protector plug. Make sure
the red LED on the device is blinking, indicating that it has
entered into the pairing process. Otherwise, press and hold
the power/reset button until the red LED light starts
ashing.
60 %
9:41 AM
60 %
9:41 AM
60 %
9:41 AM
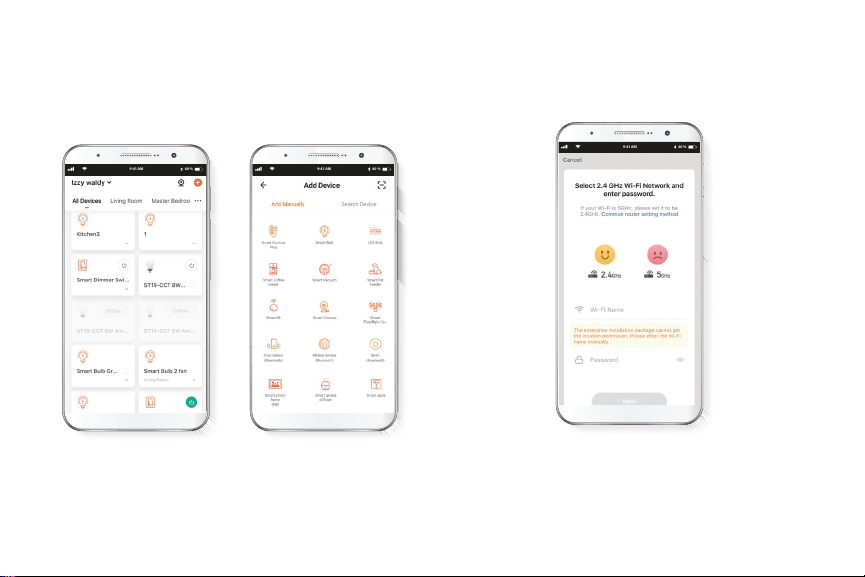
Step 2
You must connect to a 2.4GHz WiFi network. Enter your
network password. Make sure you enter the correct
password, otherwise the device will not connect.
Add device
Step 1
Select Add device, followed by the smart surge protector
plug.
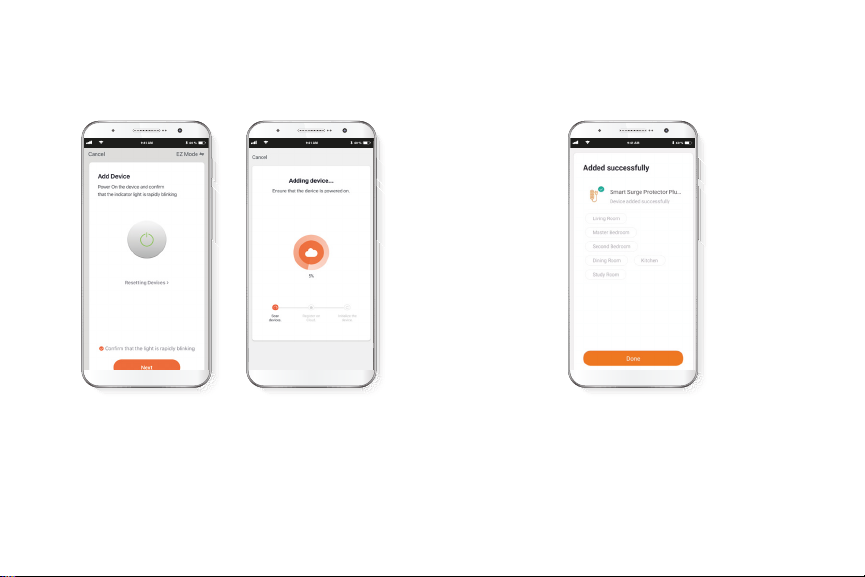
Step 4
When Device added successfully is displayed, assign a
location and click on Done.
60 %
9:41 AM
60 %
9:41 AM
Step 3
Make sure the indicator light on the app is blinking. Tap on
Conrm the indicator light blinks rapidly to continue.
60 %
9:41 AM
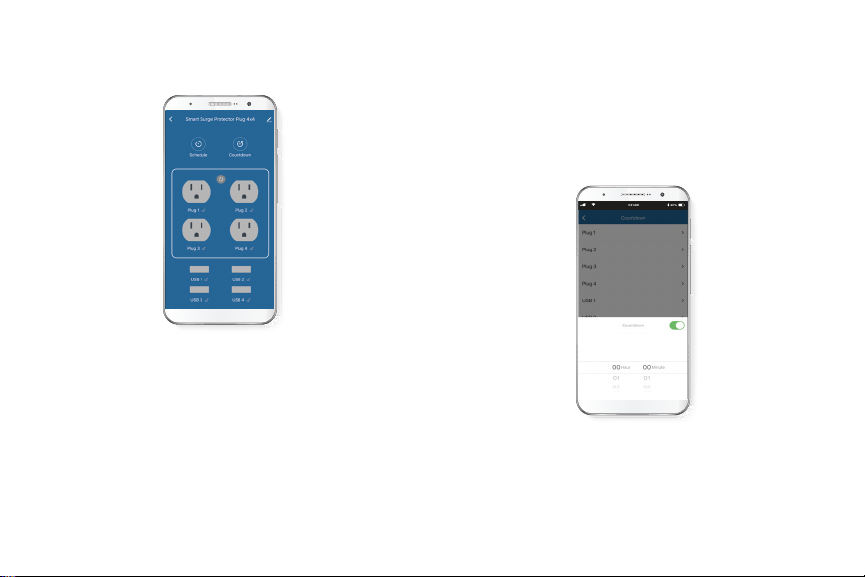
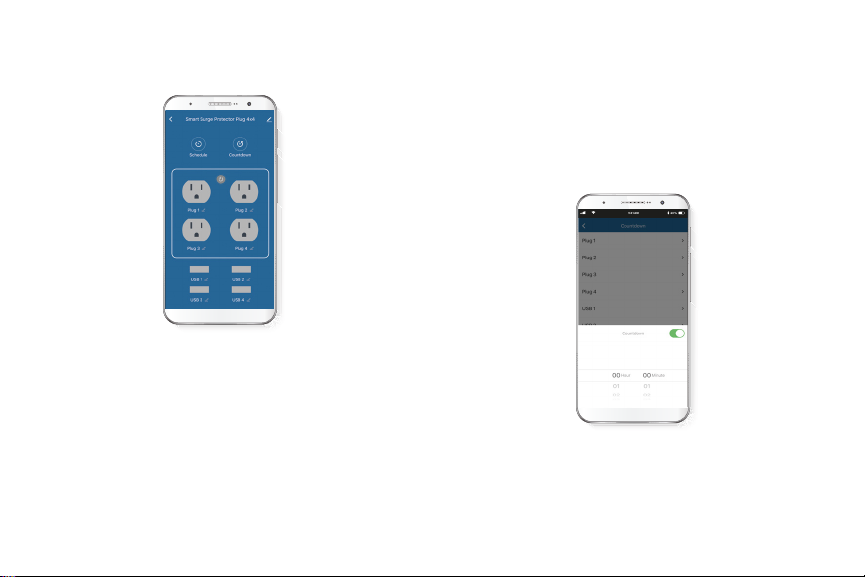
Configuration tools
Countdown
Enables the countdown timer to turn the device on and o.
Countdown setup
Click on the plug icon to turn the device on or o. To
schedule the timer, click on the countdown icon to set the
time as needed to turn the device on or o.
Main device
Main switch
Click on the power button image on the app to turn the
plug on and o.
Plug 1, 2, 3 and 4
Plug 1 and plug 2
Check the status of each receptacle and individually turn
each of them on or o.
USB 1, 2, 3, and 4
Check the status of each port and individually turn
each of them on or o.
60 %
9:41 AM

Schedule
To create a schedule, click on the corresponding icon to set
the time as needed to turn on or o each plug and USB
port.
Schedule setup
Step 1
Click on the schedule icon, select which plug or USB port
you want to congure, then tap on Add schedule.

Step 2
Set the time you wish to schedule. Select Repeat to set
weekly settings. Select ON/OFF to schedule on/o status.
Click on Save on the upper right-hand corner to store a
schedule.
60 %
9:41 AM
60 %
9:41 AM
Delete setup
To remove a schedule on iOS, slide item to the left , and for
Android, press and hold Schedule, followed by Delete.
Press and hold the Schedule
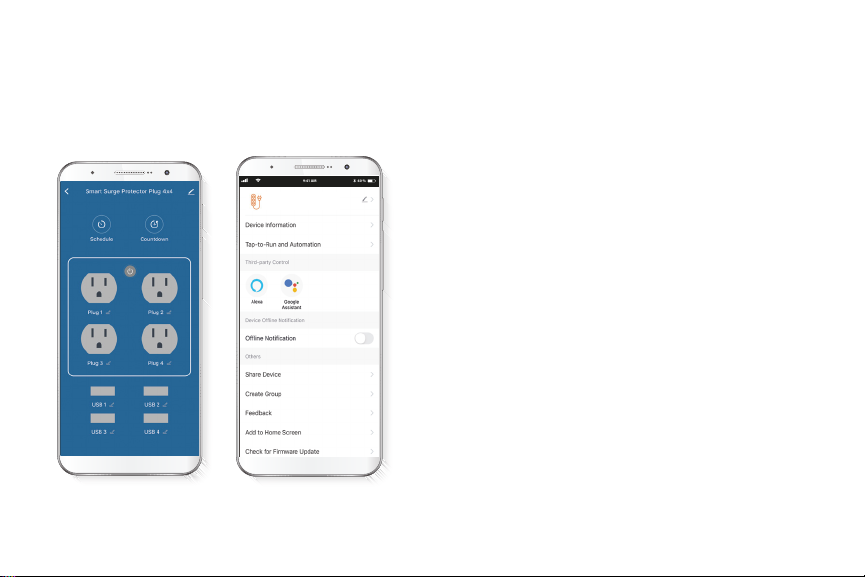
Settings
Click on pencil icon on the upper right-hand corner.
Device name: changes the icon and the name of the
device, and it also allows the user to assign a dierent
location.
Note: click on the pencil icon to access the device name
menu.
Device information: displays detailed information related
to the smart surge protector plug.
Tap-To-Run and Automation: links the Wi-Fi smart surge
protector plug with other smart products to automatically
control them through a customized command.
Third-party control: enables the voice recognition feature
through Alexa and Google Assistant.
Oine notication: provides a selection button to enable/
disable this feature.
Share device: allows sharing the Wi-Fi surge protector plug
with family and friends.
Create group: makes management of devices easier by
selecting and arranging multiple components under a
single group.
Smart Surge Protector Plug
60 %
9:41 AM

Rename device
To rename device, click on the pencil icon on the upper
right hand corner, tap on Device name to change and click
Save.
Smart Plug
Smart Plug
Feedback: let us know if you have any issues setting up
the product.
Add home screen: adds a shortcut of the device to the
main screen on your phone.
Check for rmware update: we will sometimes add
new features or provide updates with a new rmware
upgrade.
Remove device: allows you to unbind the device from the
Nexxt Home Account.
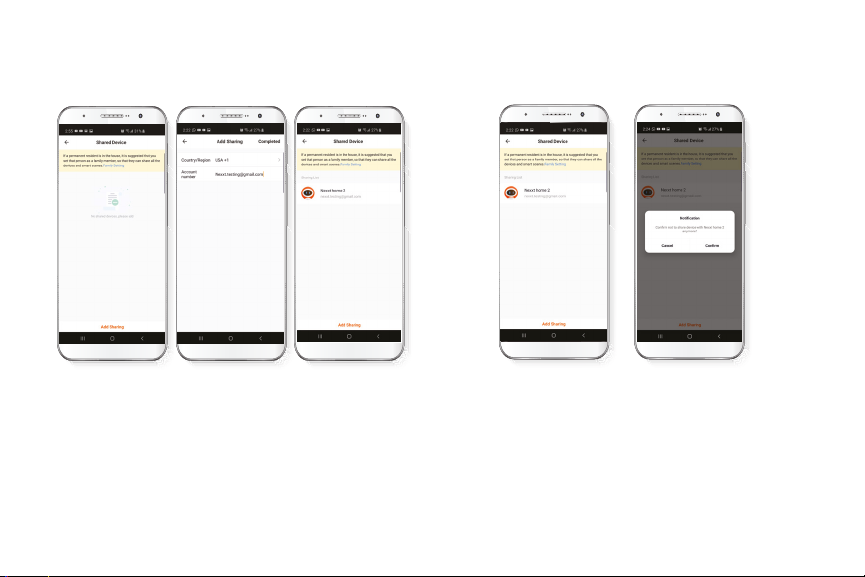
Share device
Click on Share devices then tap on Add sharing. Enter the
e-mail address of family and friends you wish to share the
device with. Tap Completed/Save. The newly congured
user will now have access to your smart plug.
Note: family or friends will need their own Nexxt Solutions
Home Account to access the device.
Delete user
To remove a user, slide to the left or press and hold the
name you want to eliminate. Click on Delete. A notication
conrming that you no longer want to share the device
with this user will be displayed. Click on Conrm.
Nexxt Solutions® is a registered trademark. All rights reserved. Amazon, Alexa and
all related logos are trademarks of Amazon.com, Inc. or its aliates. Google,
Android and Google Play are trademarks of Google Inc. All other brand names and
trademarks are the property of their respective owners. Made in China.
FCC ID: X4YHASPT610
1
2
3
4
Guía del usuario
Gracias por adquirir el Enchufe protector de sobretensión
inteligente con conexión Wi-Fi de Nexxt Solutions. Nos
complace ser parte de la solución destinada a no sólo
simplicar su vida, sino además poder brindar mayor
seguridad y tranquilidad al interior de su hogar.
Descripción del producto
1. Botón de encendido/ Reposición
2. Cuatro tomacorrientes
3. Luz LED indicadora de estado
4. Cuatro puertos USB para carga
Español
Contenido del empaque
• Enchufe protector de sobretensión inteligente
• Guía de conguración rápida
Indicador de estado
Rojo
Azul
Iluminado
Intermitente
Iluminado
Apagado
El enchufe protector de
sobretensión inteligente
está conectado a la red
El enchufe protector de
sobretensión inteligente
está en proceso de
emparejamiento
El enchufe protector de
sobretensión inteligente
está encendido
El enchufe protector de
sobretensión inteligente
está desconectado
Indicador
LED Estado Descripción
* Es posible que la luz parezca fucsia debido a que el
LED rojo permanece encendido.

Instalación de la aplicación
Nexxt Solutions Home
Descargue la aplicación Nexxt Solutions Home de Google
Play o Apple App Store.
60 %
9:41 AM
Nexxt Home
Nexxt Solutions Home App
Cancel
GET
Accvent LLC
Login with existing account
Create New Account
SOLUTIONS
Iniciarsesión con cuenta existente
Crear Cuenta Nueva
SOLUTIONS
60 %
9:41 AM
Nexxt Home
Nexxt Solutions Home App
Cancel
INSTALL
Accvent LLC
Paso 1
Registro por email. Complete los campos requeridos.
60 %
9:41 AM
Register by email
United States of America
Email
Get authentication code

Paso 3
Cree una contraseña nueva y seleccione Completo a
continuación.
Paso 2
Ingrese el código de vericación que recibió.
60 %
9:41 AM
Enter verication code
Verication code has been sent to your
60 %
9:41 AM
Set Password
Completed
6-20 characters, including letters and numbers
Paso 4
La aplicación Nexxt Solutions Home ha sido instalada
satisfactoriamente.
Conexión
Conecte el enchufe protector de sobretensión inteligente
Nexxt en un tomacorriente. Aségurese de que el LED de
color rojo del dispositivo parpadea rápidamente, para
indicar que ha iniciado el proceso de emparejamiento. De
lo contrario, mantenga presionado el botón de encendi-
do/reposición hasta que comience a parpadear el LED de
color rojo.

60 %
9:41 AM
60 %
9:41 AM
60 %
9:41 AM
Paso 2
Debe conectarse a la red Wi-Fi de 2.4GHz. Ingrese la
contraseña de la red. Asegúrese de utilizar la contraseña
correcta, de lo contrario, no se conectará el dispositivo.
Agregar dispositivo
Paso 1
Seleccione Agregar dispositivo, y a continuación el
enchufe inteligente.

Paso 3
Asegúrese de que el indicador luminoso en la aplicación
aparezca intermitente. Pulse Conrmar que la luz
indicadora parpadea rápidamente para continuar.
Paso 4
Cuando la noticación Dispositivo incorporado
exitosamente aparezca en la pantalla, asigne la ubicación
y seleccione Terminar al nal.
60 %
9:41 AM
60 %
9:41 AM
60 %
9:41 AM
Herramientas de configuración
Cuenta regresiva
Habilita el temporizador regresivo para encender y apagar
el dispositivo.
Configuración del temporizador regresivo
Haga clic en el ícono del enchufe para encender o apagar
el dispositivo. Con el n de congurar el temporizador,
pulse el ícono de cuenta regresiva para programar los
períodos de conexión o desconexión del enchufe.
Dispositivo principal
Interruptor principal
Haga clic en el botón de encendido en la aplicación para
activar y desactivar el dispositivo.
Enchufe 1, 2, 3 y 4
Permite vericar el estado de cada receptáculo, además de
poder encender o apagar cada uno en forma individual.
USB 1, 2, 3 y 4
Permite vericar el estado de cada puerto, además de
poder encender o apagar cada uno en forma individual.
60 %
9:41 AM
Table of contents
Languages:
Other Nexxt Solutions Surge Protector manuals


