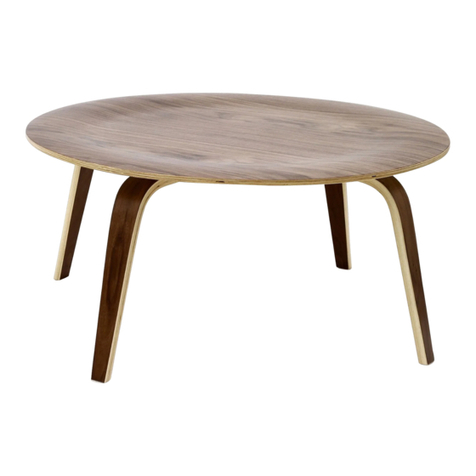
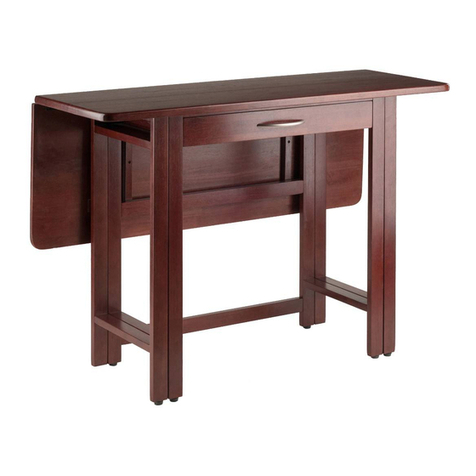
NIEHOFF Sitzmoebel 2203 User manual

P R O D U K T I N F O R M A T I O N U N D
M O N T A G E A N L E I T U N G
P R O D U C T I N F O R M A T I O N A N D
A S S E M B L Y I N S T R U C T I O N S
1x 4mm
Zum Aufbau benöti en sie:
For assembly you need:
Produktinformation:
Bitte achten sie bei der Tischmonta e auf eine weiche und saubere Unterla e, um Beschädi un en zu vermeiden.
Im Alltag sind Feuchtigkeit und Nässe die schlimmsten Feinde aller Holzmöbel. Versch ttete Fl ssigkeiten m ssen sofort entfernt werden, um
Schäden an der Oberfläche zu vermeiden. F r die Reinigung lackierter Oberflächen verwenden Sie bitte nur nebelfeuchte T cher. Niemals
d rfen Scheuer- oder Lösungsmittel verwendet werden.
Der Werkstoff Holz wird bei der Herstellung von Möbeln besonders gern eingesetzt. Jeder Baum ist ein St ck Natur und behält seine Struktur
und Schönheit, aber auch seine Empfindlichkeit bei. Gleiches gilt auch f r Furniere, da sie ohne Umwege aus einem Baumstamm hergestellt
werden.
Kleine Äste oder Unregelmäßigkeiten in der Maserung gehören zum besonderen Charakter von Holz und sind keineswegs Fehler und daher
auch kein Reklamationsgrund.
Bitte beachten Sie, dass sich die Farbe Ihres Möbels mit fortdauernder Lichteinwirkung verändern wird. Daher sollten sie direkte
Sonneneinstrahlung vermeiden. Vermeiden sie außerdem die direkte Einwirkung von Heizstrahlern, Heizkörpern und ähnlichen Geräten.
Durch variierende Luftfeuchtigkeit, auch in geschlossenen Räumen, kommt es zum Schwinden oder Quellen von Holzwerkstoffen. Massive
Tischplatten können daher leicht wellig bzw. uneben werden. Dieser Vorgang ist leider nicht zu verhindern.
Product information:
Please take notice of a clean and smooth underlay while assemblin the table in order to avoid dama e.
In everyday life humidity and moisture are the strongest enemies of all wooden furniture. Spilled fluids must be removed immediately to avoid
damage. For cleanig lacquered surfaces use only slightly wet towels (as if touched by fog). Never use solvents or abrasives!
Wood is being used very much for the production of furniture. Every tree is a piece of nature and keeps its structure and beauty, but also its
sensibility. That applies to veneer too, what is directly made of a tree trunk. Little sticks or anomalies in the figure of wood and veneer belong to
the character of wood and are no defects or reason for complaints.
The color of your furniture may change after a certain time due to the influence of light. Avoid direct solar irradiation. Also direct influences of
radiant heaters, heating elements or the like must be avoided.
Due to varying humidity, also inside rooms, wood can shrink and swell. Massive table tops can become slightly wavy. That can unfortunately not
be avoided.
Aufbauanleitungs-Nr: 613036_2203_Ansteckplattentisch.VSD Letzte Änderung: 04.05.2007
Modell 2203
http://www.niehoff-group.eu

DEinsetzen der Kloben in die Tischf ße
Inserting the blocks into the table-legs
B
C
Stecken Sie je einen Kloben B mit
den Madenschrauben C in die
diagonalen Bohrungen der
Tischf ße.
Die Löcher in den Kloben m ssen
vertikal von oben nach unten
ausgerichtet sein.
Put the block B with the grub screw
C into the diagonal hole on the
table-leg.
The holes in the blocks must be
aligned vertically.
C
4x
B
4x
E
Ansetzen der Tischf ße
Attaching the table-legs
Stecken Sie die Tischf ße
„kopf ber“ auf den
Verbindungsbolzen und die
Bohrungen in der Tischplatte.
Put the table-legs headfirst onto
the connecting pins B and the
holes in the table top.
F
Befestigen der Tischf ße
Fixing the table-legs
Befestigen Sie die
Tischf ße mit dem
mitgelieferten
Inbusschl ssel und drehen
die Madenschraube an.
Fix the table-legs with the
provided Allen key and
adjust the grub screw.
G
Anstecken der Ansteckplatten
Attaching the extensions
At first the metal bars underneith
the table top must be extended
completely. After that the
extension can be attached with a
45 degree angle and pushed
down slightly to adjust it.
Take much pleasure in your new
dining table by Niehoff Sitzmöbel.
Zunächst m ssen die
Metallschienen unter der
Tischplatte vollständig
ausgezogen werden (1).
Anschließend werden die
Ansteckplatten im Winkel
von ca. 45 Grad an die
Platte angesteckt und
leicht nach unten gedr ckt
(2).
Wir w nschen Ihnen viel
Freude mit Ihrem neuen
Esstisch von Niehoff
Sitzmöbel.
1
2
http://www.niehoff-group.eu
Servicecard
T eilenummer
part number
Anz ahl
quantity
Ab-Nummer:
Bitte tra en sie die benöti te Teilenummer, Anzahl
und AB-Nr. in die nebenstehende Tabelle ein und
kontaktieren Ihren Möbelhändler.
Please enter the desired part number, quantity and
order confirmation number into the table adjacend
and contact your furniture dealer.
D
8x
10x50 mm
Monta e
A
Verbindungsbolzen eindrehen
Weiche und saubere Unterlage verwenden!
Turning in the connecting pins
Use clean and smooth underlay!
C
4x
Drehen Sie den Verbindungsbolzen A in die Metallmuffen auf der
R ckseite der Tischplatte.
Dabei ist es wichtig, dass die größere Öffnung des
Verbindungsbolzens zur Tischmitte zeigt und die Oberkante der
Öffnung 47 mm ber der Plattenkante liegt!
Stecken Sie je zwei Holzd bel D in
die äußeren Bohrungen an der
Stirnseite jedes Tischfußes und
dr cken diese bis zum Anschlag
hinein.
Put two dowels D into the outer
holes at the head of the table leg.
B
4x
A
4x
A
4x
47 mm
Anschließend drehen Sie je eine Madenschraube C stirnseitig in
einen Kloben B und drehen die Schraube C zwei bis drei
Umdrehungen hinein.
After that screw grub screw C frontally into the block B and turn
the screw C approximately two to three turns.
B
D
8x
10x50 mm
BC
A
C
4x
B
4x
C
D bel einsetzen
Inserting dowels
1
2
22
2
3
3
47 mm A
Screw the connecting pin A into the sockets under the table top.
It ist very important that the larger opening of the connecting pin
shows to the table center and that the top edge of the larger opening is
47 mm over the table top surface.
Popular Indoor Furnishing manuals by other brands
Techni Sport
Techni Sport Echo TSF44 Assembly instructions
Hewi
Hewi M 40 Series Mounting instructions
Whittier Wood Furniture
Whittier Wood Furniture McKenzie 2078AFGACa Assembly instructions
Rauch
Rauch M2094 Assembly instructions
Symphony
Symphony SYK-1048 Setup instructions
medalounger
medalounger Modulax user manual
