Nielsen-Kellerman StrokeCoach User manual
Operating Manual
NIELSEN KELLERMAN AUSTRALIA
'REMO' 206 Cowans Lane
Oxley Island NSW 2430
Ph 02 6553 2473 | Fax 02 6553 2544
[email protected] | www.nk.com.au
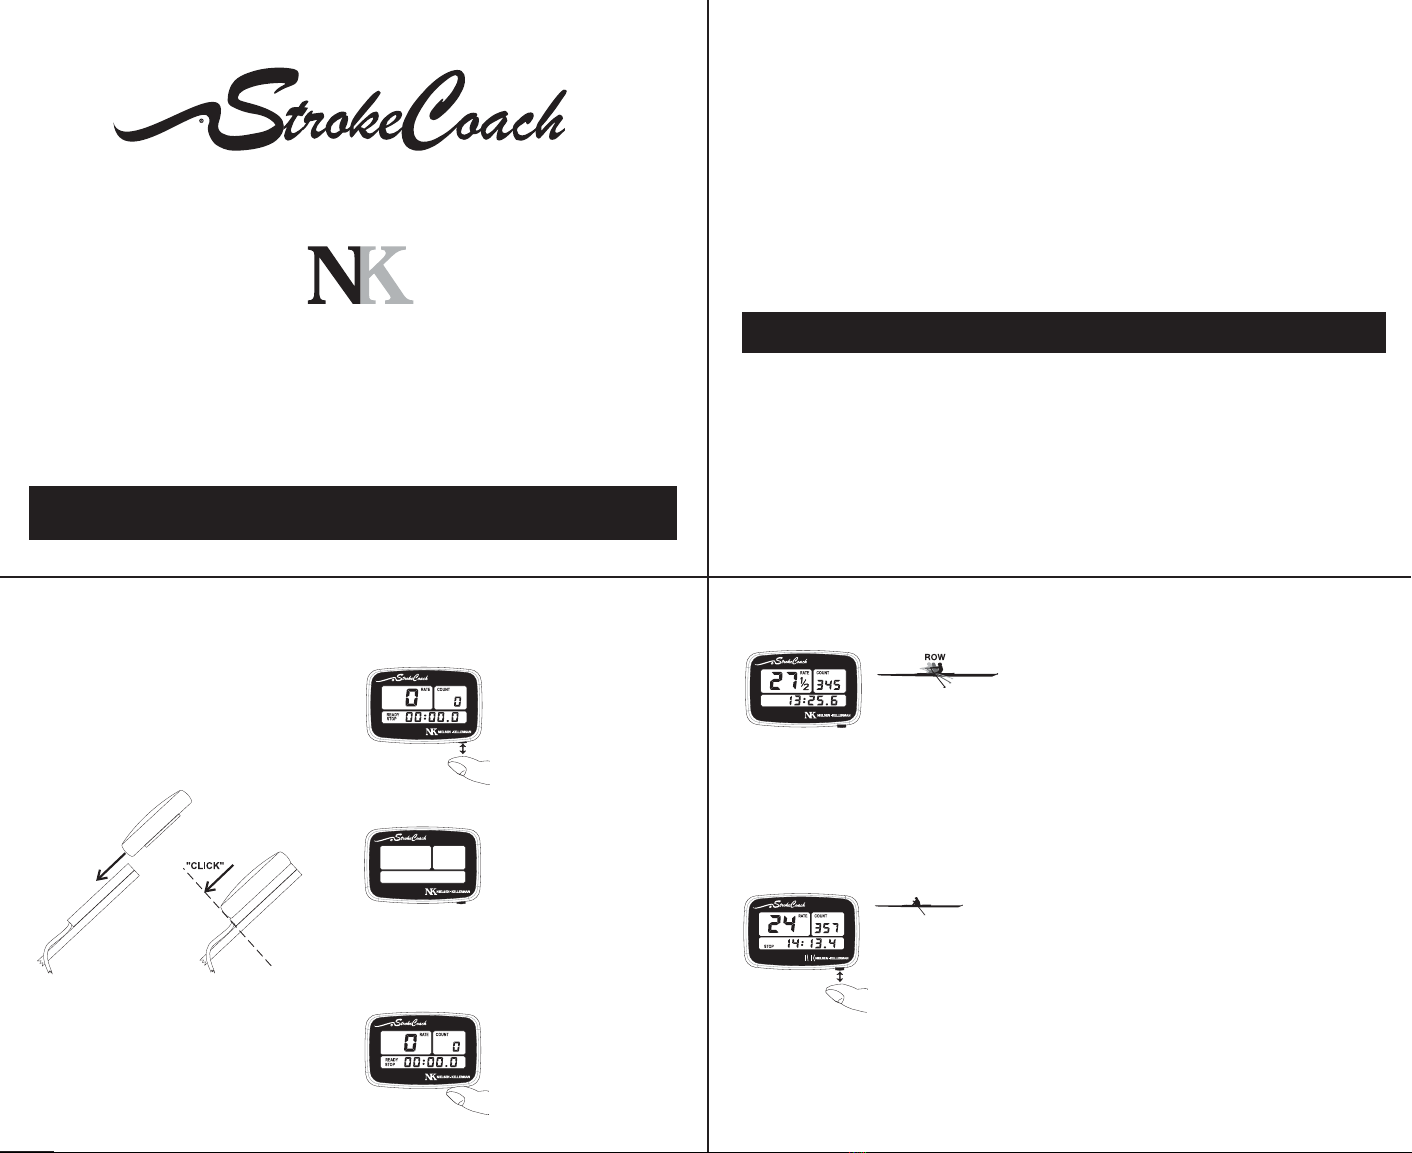
Mounting:
Slide the unit into the bracket from
the top. Press down until you feel the
unit “click” into place.
OPERATION
3
Memory:Start:
Start Rowing! The
timer, rate meter
and stroke counter all start
automatically. Make sure the display
shows both “READY” and “STOP”
before you start. If not, reset the
unit before rowing.
Stop:
Press the button
once to stop the
timer and stroke
counter when
you stop rowing. The rate meter
and stroke counter will continue to
work. NOTE: Once you have“stopped”
the clock,you cannot set it to“READY”or
restart until you have cleared/reset. 4
The StrokeCoach
automatically stores
your stroke rate in
memory every 10
seconds for the first
minute, then every 20
seconds up to 25
minutes and 49
seconds.
After stopping the
unit, press the bottom
button repeatedly to
step through the
memory. The timer
will show the elapsed
time for the displayed
stroke rate. The stroke
counter will continue
to show the total
strokes taken.
On:
Press and release the
button once to turn
the unit on.
Off:
The Control unit will
turn itself off after
17 minutes of no
button presses or
rowing. You cannot
turn it off manually.
Reset/Ready:
Hold the button for
two seconds to zero
the displays and set
the unit to “READY”.
Thank you for purchasing this StrokeCoach Rowing System. We have designed the
StrokeCoach to provide you with all the basic information you need to train effectively –
elapsed time, stroke rate and stroke count as well as 25 minutes of stroke rate memory so you
can review your rates after a race or piece.
NK Rowing Electronics Warranty & Service
NK does not believe in "disposable electronics." We know our products don't lead a pampered life,
and we design them for years of performance in tough conditions. We guarantee every NK product
to be free of defects in materials and workmanship for a period of TWO YEARS from your date of
purchase. We will repair or replace any defective product or part when notified within the warranty
period, and will return the product via domestic ground shipping at no charge. The following issues
do not result from a manufacturing defect and are not covered under this warranty: damage due to
improper use or neglect, including corrosion; impact damage; modifications or attempted repairs
by someone other than an authorized NK repair agent; normal wear and tear; failed batteries.
Need Help? Our Knowledge Center has answers to many common questions, along with tips and
tricks for using NK products. It’s available 24-7 at: www.nk.com.au
For email assistance with the installation or operation of your NK product, write:
Or call 02 6553 2473 Monday through Friday, 9 - 5 EST.
2 year warranty
Storage:
Always store your unit in the provided
pouch when not in use to prevent
scratches to the front window.
Cleaning:
Rinse the window thoroughly with
water to remove grit before wiping or
polishing.
MAINTENANCE
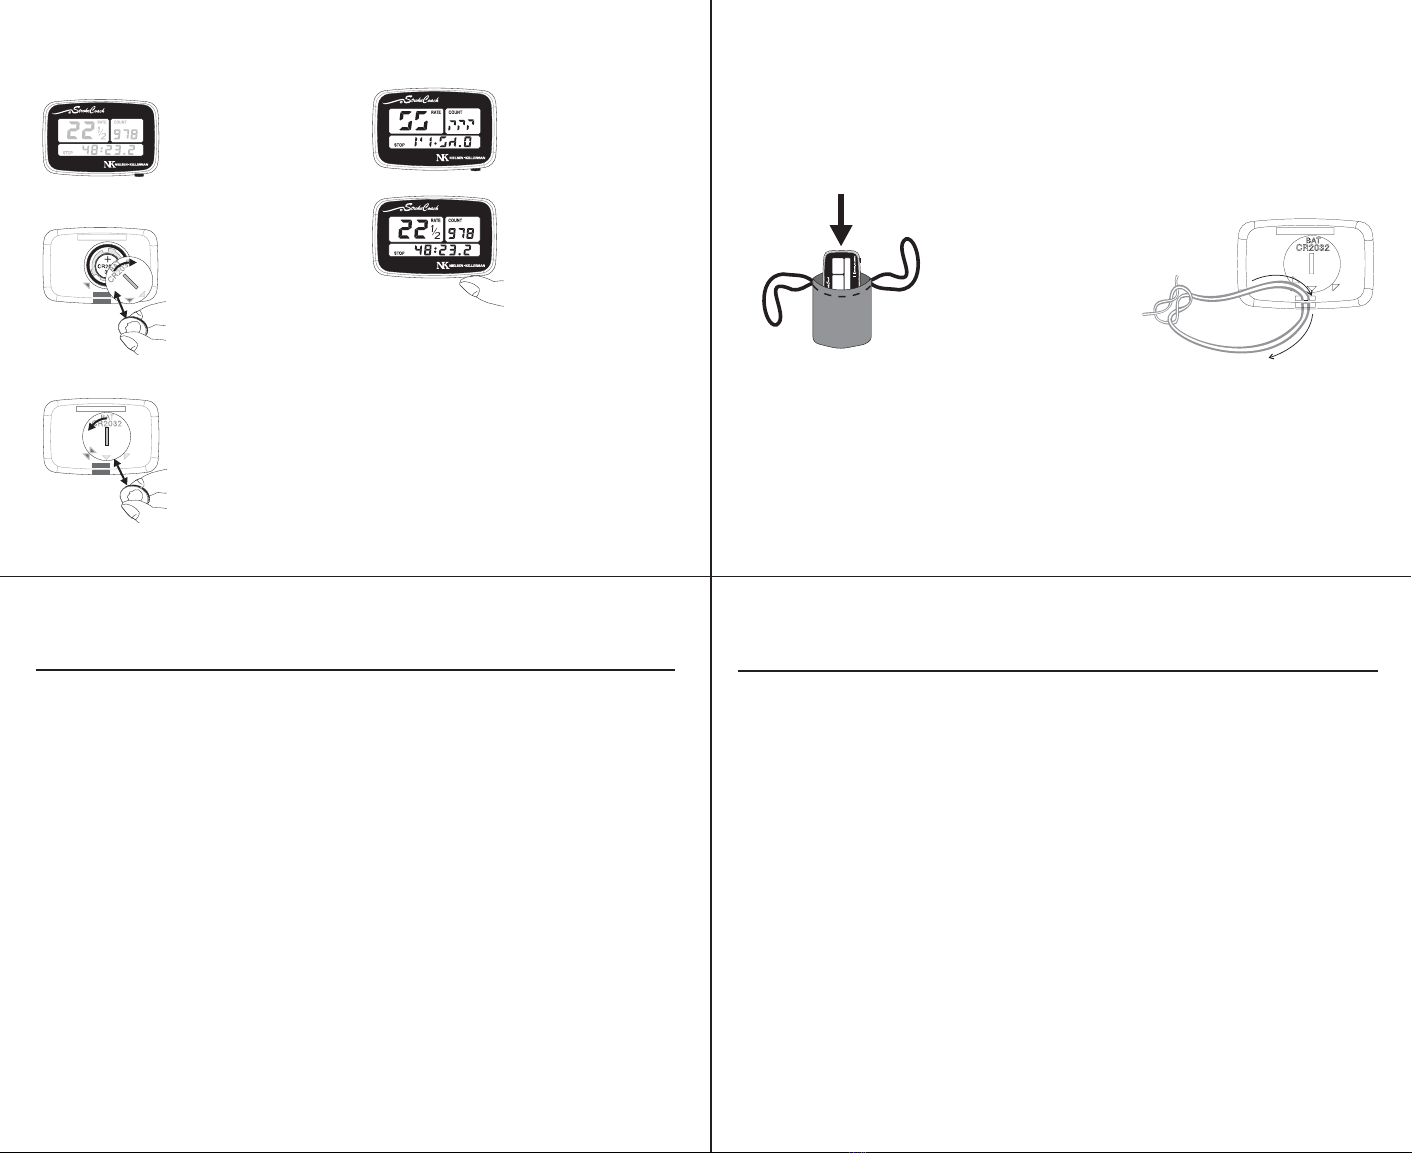
Carry Strap:
Install the carry strap provided by
threading it through the slot on
the bottom of the unit and tying.
6
Changing the Battery: Resetting after Changing the Battery:
5
If the display appears
faint, you need to
replace the battery.
Flip the unit over and
open the battery
compartment with a
nickel or similar coin.
Tap the unit on your
hand to remove the
battery. Insert a new
3-Volt CR2032 lithium
watch battery, “+” pole
up, and replace the
battery door.
Make sure the black
o-ring seal is in place
before replacing the
door.
The display will
occsionally appear
scrambled after a
battery change.
Reset the unit by
holding the button
for two seconds
and the display
should return to
normal.
8
TROUBLESHOOTING
PROBLEM: POSSIBLE SOLUTION:
NO STROKE RATE The display unit may not be in contact with the
mounting bracket. Push the display unit firmly onto
the mounting bracket until a loud ‘click’ is heard.
The seat magnet may not be passing close enough to
the stroke rate sensor. Make sure that the magnet is
passing directly over the black sensor and within 3/4".
The magnet and stroke rate sensor may not be
correctly aligned. Make sure that the magnet and
black sensor are both across (perpendicular to) the
long axis of the boat.
If possible, swap your control unit with a control unit
you know works. If the stroke rate begins working,
your problem lies with your control unit. If the stroke
rate still does not work, your problem lies with your
mounting bracket, stroke rate sensor or magnet.
TIMER WILL The unit is in STOP or MEMORY mode. Hold the
NOT START button for two seconds to reset the unit and clear “STOP”.
The unit may not be receiving a “start” signal from the
stroke rate sensor. Review “no stroke rate” solutions above.
7
TROUBLESHOOTING, CONT.
PROBLEM: POSSIBLE SOLUTION:
Replace your battery (CR2032 Lithium watch battery),
following the instructions on page 10. In rare cases,
an electrostatic discharge (static electricity “shock”)
may cause your display’s unit to go blank. In dry
weather, a charge can build up while the unit is being
carried in the storage pouch or a pocket and be
discharged when the unit is touched or placed on
the mounting bracket. If this happens, you can
perform a complete reset of your unit as follows:
Open the battery door and remove the battery. Leave
the battery out for at least 10 seconds while pressing
and holding the button. Release the button and reinstall
the battery. The unit should turn on and function
normally when you push the button.
If this procedure does not solve the problem, and
your unit is more than 2 years old, try replacing the battery.
DISPLAY APPEARS FAINT,
DISPLAY SUDDENLY
GOES BLANK,
AND/OR
UNIT WILL NOT TURN ON


