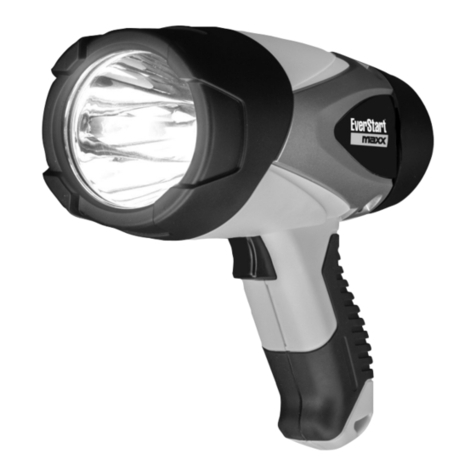
NightSearcher NSEX1400R User manual

NSEX1400R/-MAG USER MANUAL
Warranty Terms
If at any time, you need to dispose of this product or parts of this product: please note that waste electrical products, bulbs
and batteries should not be disposed of with ordinary household waste. Recycle where facilities exist. Check with your local authority for recy-
cling advice. Alternatively, NightSearcher is happy to take receipt of this product at end-of-life and will recycle it on your behalf.
Safe disposal of waste electrical products, batteries and bulbs
NightSearcher Limited - Unit 4 Applied House - Fitzherbert Spur - Farlington - PORTSMOUTH - Hampshire - PO6 1TT - UK
Specications
Light Output 1400 Lumens, 10W
Light Source LED
Beam Distance 10m beam
Run Times 12 hrs
Charging Times 4-5 hrs
Battery 6.6Ah Lithium-ion
Ambient Temperature -20°C to 55°C
Product size (mm) Magnetic Stand:
209x198x293mm
Stainless Steel Stand:
209x236x303mm
Product weight (g) 5.31kg /5.3kg
NS Part No. NSEX1400R/-MAG
1
Charging:
- Remove rubber plug from socket and insert charging cable into the charging socket of oodlight ‘2’.
- Connect the mains plug to a 100-277V AC mains socket.
Switch on mains power: A red light will illuminate while charging. A green light will illuminate once fully recharged.
- When fully charged turn off the AC mains power and disconnect charging lead from the oodlight.
- Replace rubber plug cover into socket to avoid dust entering.
Warning: Charging must be carried out in safe surroundings, the battery must be charged and discharged every 6 months.
Operation:
- Press Switch once ‘1’ once to turn light on, press ‘1’ again to turn lamp off.
- To check the battery status, press and hold the ‘1’ switch for more than 3 seconds, release the button and the lamp will ash:
Flash 5 times = The battery is at full capacity Flash 4 times = The battery has 80% capacity
Flash 3 times = The battery has 60% capacity Flash 2 times = The battery has 40% capacity
Flash 1 times = The battery has 20% capacity and needs to be charged fully.
Warning: Only operate the oodlight in ambient temperatures stated on the nameplate specication.
Carry
Handle 2
Standards:
IEC 60079-0: Electrical apparatus for explosive gas atmospheres, Part 1: General requirements
IEC 60079-1 : Explosive atmospheres, Part 2: Equipment protection by ameproof enclosures “d”
IEC 60079-31: Explosive atmospheres, Part 31: Equipment dust ignition protection by enclosure”t”
EN 60079-0: Electrical apparatus for explosive gas atmospheres, Part 1: General requirements
EN 60079-1: Explosive atmospheres, Part 2: Equipment protection by ameproof enclosures “d”
EN 60079-31: Explosive atmospheres, Part 31: Equipment dust ignition protection by enclosure”t”
EN 60598-1: Luminaire, Part 1: General requirements and tests.
EN 55015: Limits and methods of measurement of radio disturbance characteristics of electrical
lighting and similar equipment.
IEC 62321: Electrotechnical products - Determination of levels of six regulated substances
(lead, mercury, cadmium, hexavalent chromium, poly brominated biphenyls, poly brominated diphenyl ethers).
Bracket installation:
Fix the magnetic bracket to the lamp. Use M6 inner hexagon
screw the bracket to the lamp as shown in below diagram.
The bracket can be adjusted to these angles:
Magnetic
Base
充电:
-拔出橡胶塞,将充电线插入泛光灯“2”的充电口。
-将充电器连100-277VAC市电上。
充电时,红灯亮。充满电,绿灯亮。
-完全充满电后,请拔掉充电器及连接灯具的充电线。
-将橡胶塞插回充电口,以免灰尘等进入。
警告:充电必须在安全的环境中进行,如果灯具长时间不使用,电池必须每6个月进行充电和放电一次。
操作:
-按开关’1’一次,灯亮,再按一次,灯灭。
-检查电池电量,请按住开关“1”3秒以上,然后松开,灯将闪烁:
闪5次=电池电量满
闪4次=电池具有80%的容量
闪3次=电池有60%的容量
闪2次=电池具有40%的容量
闪1次=电池具有20%的容量,需充满电。
警告:灯具只能用于铭牌所述的适应环境温度中。
支架安装:
将磁力吸附支架固定到灯上。
使用M6内六角螺钉将支架固定到灯上,如下图所示。
支架可以调整到这些角度:
充電:
-ソケットからゴム製のプラグを取り外し、投光器を投光ランプ‘2’の充電ソケットに挿入します。
-電源プラグを100-277VのAC電源ソケットに接続します。
メイン電源を入れる:充電中に赤いランプが点灯します。一度充電すると緑色のライトが点灯します。
-完全に充電されたときは、AC主電源を切って、投光器からリード線を外します。
-ホコリが入るのを防ぐため、ソケットカバーをソケットに戻してください。
警告充電は安全な環境で行う必要があります。バッテリーは6ヶ月ごとに充放電する必要があります。
操作:
-‘1’を一回押すと点灯し、もう一度‘1’を押すと消灯します。
-電池の状態を確認するには、‘1’スイッチを3秒以上押し続け、ボタンを離すとランプが点滅します:
フラッシュ5回=バッテリの容量がフルになっています
フラッシュ4回=バッテリーの容量は80%です
フラッシュ3回=バッテリーの容量は60%です
フラッシュ2回=バッテリーの容量は40%です
フラッシュ1回=バッテリーの容量は20%であり、完全に充電する必要があります。
警告は、銘板仕様に記載されている周囲温度でのみ投光器を操作してください。
ブラケットの取り付け:
磁気ブラケットをランプに固定します。
下の図に示すように、ブラケットをM6の内側六角ねじでランプに接続します。
ブラケットは次の角度に調整できます。
Certications and Ratings:
ATEX ZONE 1, 21
ATEX ZONE 2 & 22
Rohs
IECEx
IK 08
ABS
IP66
CE
Ex db op is II C T* Gb
Ex tb op is IIIC T* Db
Product Certication
IECEX, ATEX, ABS, CE and RoHS.
Bracket installation:
Fix the bracket to the lamp. Use M6 inner hexagon screw the
bracket to the lamp as shown in below diagram.
支架安装:
将支架固定到灯泡上。使用M6内六角形将支架拧入灯具,如下图所示。
ブラケットの取り付け:
ブラケットをランプに固定します。M6の内側六角形を使用
下の図に示すように、ブラケットをランプにねじ込みます。
All NightSearcher products have a 3-year standard warranty on all manufacturing defects from the date of purchase.
Extended Warranty: From 1st September 2018, customers have the option to extend the warranty of the product to 5 years for manufacturing
defects. Registration of the product must be made within one month of purchase by sending us an email sales@nightsearcher.co.uk.
In the message please state in your own words that you would like to register your NightSearcher product for the extended warranty.
To view NightSearcher’s warranty policy, please visit: http://nightsearcher.com/en/warranty.html or scan the QR code.

Carga:
- Retire el tapón de goma del enchufe e inserte el cable de carga en el enchufe de carga del proyector ‘2’.
- Conecte el enchufe de red a una toma de corriente de CA de 100 - 277V.
Encender la red eléctrica: Una luz roja se iluminará durante la carga. Una luz verde se iluminará una vez totalmente recargada.
- Cuando esté totalmente cargada, apague la alimentación de CA y desconecte el cable del proyector.
- Reemplace la tapa del zócalo en el zócalo para evitar la entrada de polvo.
Advertencia de carga debe realizarse en un entorno seguro, la batería debe cargarse y descargarse cada 6 meses.
Operación:
- Presione el interruptor una vez “1” una vez para encender la luz, presione “1” de nuevo para apagar la lámpara.
- Para comprobar el estado de la batería, mantenga pulsado el interruptor ‘1’ durante más de 3 segundos, suelte el botón y la lámpara parpadeará:
Flash 5 veces = La batería está a plena capacidad
Flash 4 veces = La batería tiene 80% de capacidad
Flash 3 veces = La batería tiene 60% de capacidad
Flash 2 veces = La batería tiene 40% de capacidad
Flash 1 veces = La batería tiene 20% de capacidad y debe cargarse completamente.
Advertencia sólo opere el proyector en las temperaturas ambientales indicadas en la especicación de la placa de identicación.
Instalación del soporte:
Fije el soporte magnético a la lámpara. Utilice el tornillo hexago-
nal interior M6 para jar el soporte a la lámpara como se muestra
en el diagrama de abajo.
Auadung:
- Gummistopfen aus der Steckdose ziehen und Ladekabel in die Ladebuchse des Scheinwerfers ‘2’ stecken.
- Schließen Sie den Netzstecker an eine Netzsteckdose an. Netzspannung einschalten: Während des Ladevorgangs leuchtet ein rotes Licht
auf. Ein grünes Licht leuchtet einmal vollständig aufgeladen auf.
- Wenn Sie voll aufgeladen sind, schalten Sie das Netzkabel aus und trennen Sie das Kabel vom Scheinwerfer.
- Sockelabdeckung in Steckdose einbauen, um Staubeintritt zu vermeiden. Warnladung muss in sicherer Umgebung erfolgen, der Akku muss alle 6
Monate geladen und entladen werden.
Betrieb:
- Drücken Sie einmal die Taste 1, um die Lampe einzuschalten. Drücken Sie die Taste ‘1’ erneut, um die Lampe auszuschalten.
- Um den Batteriestatus zu überprüfen, halten Sie den Schalter ‘1’ länger als 3 Sekunden gedrückt, lassen Sie die Taste los, und die
Lampe blinkt:
Blitz 5 mal = Die Batterie ist voll ausgelastet
Flash 4 mal = Der Akku hat eine Kapazität von 80%
Blitz 3 mal = Die Batterie hat 60% Kapazität
Flash 2 mal = Die Batterie hat eine Kapazität von 40%
Blitz 1 mal = Der Akku hat eine Kapazität von 20% und muss
vollständig aufgeladen werden.
Warnung nur das Flutlicht bei auf dem Typenschild angegebenen
Umgebungstemperaturen betreiben.
Halterung:
Befestigen Sie die Magnethalterung an der Lampe.
Verwenden Sie M6 Innensechskant Schraube der
Halterung an der Lampe wie in der folgenden
Abbildung gezeigt.
Se charge:
- Retirez la che en caoutchouc de la prise et insérez le l de chargement dans la prise de charge du projecteur ‘2’.
- Brancher la che secteur à une prise secteur 100-277V.
Mise sous tension: Un voyant rouge s’allume pendant le chargement. Un voyant vert s’allume une fois complètement rechargé.
- Lorsque la batterie est complètement chargée, éteignez l’alimentation CA et débranchez le câble du projecteur.
- Remettre le couvercle de la prise dans la prise pour éviter l’entrée de poussière.
Attention la charge doit être effectuée dans un environnement sécurisé, la batterie doit être chargée et déchargée tous les 6 mois.
Opération:
- Appuyez une fois sur la touche ‘1’ pour allumer la lumière, puis sur ‘1’ pour éteindre la lampe.
- Pour vérier l’état de la batterie, maintenez enfoncée la touche ‘1’ pendant plus de 3 secondes, relâchez la touche et la lampe clignote:
Flash 5 fois = La batterie est à pleine capacité
Flash 4 fois = La batterie a une capacité de 80%
Flash 3 fois = La batterie a une capacité de 60%
Flash 2 fois = La batterie a une capacité de 40%
Flash 1 fois = La batterie a une capacité de 20% et doit être complètement chargée.
Attention n’utilisez le projecteur que dans les conditions ambiantes indiquées sur la plaque signalétique.
Installation du support:
Fixer le support magnétique à la lampe. Utilisez la vis hexagonale
intérieure M6 pour xer le support à la lampe comme indiqué dans
le schéma ci-dessous.
Le support peut être réglé sur ces angles:
Charging:
- Togliere il tappo di gomma dalla presa e inserire il cavo di carica nella presa di carica del proiettore ‘2’.
- Collegare la spina ad una presa di corrente alternata 100- 277V rete.
Accendere l’alimentazione: Una luce rossa si accende durante la carica. Una luce verde si accende una volta completamente ricaricata.
- Quando si volta completamente carica fuori dal CA alimentazione di rete e scollegare il cavo dal proiettore.
- Riposizionare il coperchio presa nella presa per evitare di entrare la polvere.
ricarica Attenzione deve essere effettuata in un ambiente sicuro, la batteria deve essere caricata e scaricata ogni 6 mesi.
Operazione:
- Premere l’interruttore una volta ‘1’, una volta per accendere la luce, premere ‘1’ di nuovo a girare lampada spenta.
- Per controllare lo stato della batteria, premere e tenere premuto il pulsante ‘1’ per più di 3 secondi, rilasciare il pulsante e la spia lampeggia:
Flash 5 volte = La batteria è a piena capacità
Flash 4 volte = La batteria ha una capacità di 80%
Flash 3 volte = La batteria ha una capacità di 60%
Flash 2 volte = La batteria ha una capacità di 40%
Flash 1 volte = La batteria ha una capacità del 20% e deve essere ricaricata completamente.
Attenzione operare solo il proiettore a temperature ambiente indicate sulla specica targhetta.
Installazione Staffa:
Fissare la staffa magnetica alla lampada. Utilizzare M6 esagono
interno avvitare la staffa alla lampada, come mostrato nella
gura qui sotto.
La staffa può essere regolata per questi ngoli:
Installation du support: Fixez le support à la lampe.
Utiliser l’hexagone interne M6 Visser le support sur la lampe
comme indiqué dans le diagramme ci-dessous.
Installazione Staffa:
Fissare la staffa alla lampada. Usare esagono interno M6 Avvitare
la staffa alla lampada come mostrato nel diagramma seguente.
Der Winkel kann auf diese Winkel eingestellt werden:
Halterung:
Befestigen Sie die Halterung an der Lampe. Verwenden Sie M6 Innensechskant
Schrauben Sie die Halterung an die Lampe, wie in der folgenden Abbildung gezeigt.
El soporte se puede ajustar a estos ángulos:
Instalación del soporte: Fije el soporte a la lámpara. Utilizar hexágono
interno M6 Atornille el soporte a la lámpara como se muestra en el
diagrama a continuación.
This manual suits for next models
1
Other NightSearcher Spotlight manuals
Popular Spotlight manuals by other brands

Foscam
Foscam S41/SPC user manual

EuroLite
EuroLite LED SLS-144 UV Floor Spot user manual

Guangzhou Yinhe Lighting&Sound Equipment Factory
Guangzhou Yinhe Lighting&Sound Equipment Factory NE-204 user manual

LIVARNO home
LIVARNO home 375304 2101 Installation, operating and safety information

Leviton
Leviton Ellipsoid 5/50 user guide

Vector
Vector SL3AKV instruction manual

Quantum
Quantum Q262 Product data sheet

EUROSPOT
EUROSPOT C51 instruction manual

DTS
DTS MINI BRICK ARC user manual

Federal Signal Corporation
Federal Signal Corporation VISIBEAM II Installation, operation and maintenance instructions

ACME
ACME LED-MS350B user manual

EuroLite
EuroLite Akku flat light 1 user manual


