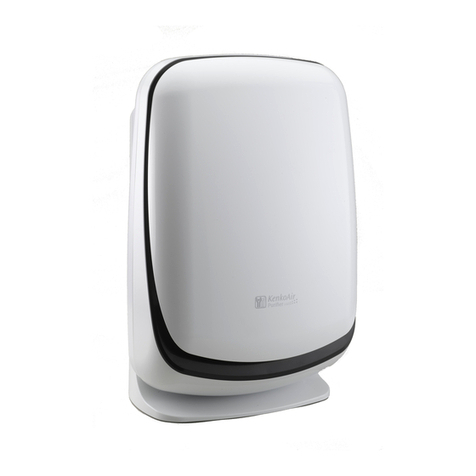
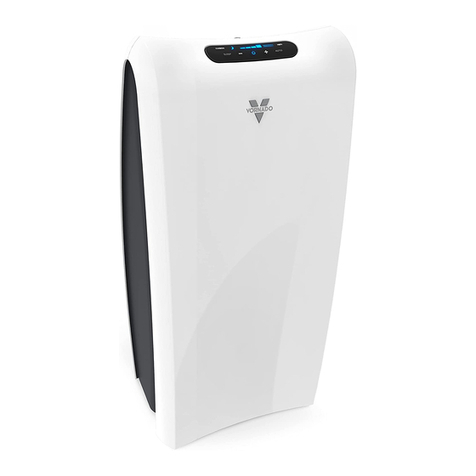
Nikken Air Wellness Power5 Pro User manual

OWNER MANUAL
A
A
MODE SPEED ION
AirWellness
™

-2-
CONTENTS page
Glossary . . . . . . . . . . . . . . . . . . . . . . . . . . . . . . . . . . . . . . . . . . . . . . . . . . . . . . . . . . . . . . . . 3
Product introduction. . . . . . . . . . . . . . . . . . . . . . . . . . . . . . . . . . . . . . . . . . . . . . . . . . . . . . 4
Safety information . . . . . . . . . . . . . . . . . . . . . . . . . . . . . . . . . . . . . . . . . . . . . . . . . . . . . . . 5
Quick start guide . . . . . . . . . . . . . . . . . . . . . . . . . . . . . . . . . . . . . . . . . . . . . . . . . . . . . . . . 6
Components and controls . . . . . . . . . . . . . . . . . . . . . . . . . . . . . . . . . . . . . . . . . . . . . . . . . 7
Preparation for use. . . . . . . . . . . . . . . . . . . . . . . . . . . . . . . . . . . . . . . . . . . . . . . . . . . . . . . 9
Installing remote control battery . . . . . . . . . . . . . . . . . . . . . . . . . . . . . . . . . . . . . . . . . . 9
Unit installation . . . . . . . . . . . . . . . . . . . . . . . . . . . . . . . . . . . . . . . . . . . . . . . . . . . . . . . . 9
Operation . . . . . . . . . . . . . . . . . . . . . . . . . . . . . . . . . . . . . . . . . . . . . . . . . . . . . . . . . . . . . . 10
Selecting mode and speed settings. . . . . . . . . . . . . . . . . . . . . . . . . . . . . . . . . . . . . . . 10
Selecting negative-ion generation . . . . . . . . . . . . . . . . . . . . . . . . . . . . . . . . . . . . . . . . 10
Adjusting the particle sensor . . . . . . . . . . . . . . . . . . . . . . . . . . . . . . . . . . . . . . . . . . . . 11
Reading the air-quality display. . . . . . . . . . . . . . . . . . . . . . . . . . . . . . . . . . . . . . . . . . . 12
Maintenance . . . . . . . . . . . . . . . . . . . . . . . . . . . . . . . . . . . . . . . . . . . . . . . . . . . . . . . . . . . 13
Cleaning exterior and interior components . . . . . . . . . . . . . . . . . . . . . . . . . . . . . . . . 13
Replacing filters . . . . . . . . . . . . . . . . . . . . . . . . . . . . . . . . . . . . . . . . . . . . . . . . . . . . . . 14
Maintenance check . . . . . . . . . . . . . . . . . . . . . . . . . . . . . . . . . . . . . . . . . . . . . . . . . . . . 15
Troubleshooting . . . . . . . . . . . . . . . . . . . . . . . . . . . . . . . . . . . . . . . . . . . . . . . . . . . . . . . . 15
Specifications . . . . . . . . . . . . . . . . . . . . . . . . . . . . . . . . . . . . . . . . . . . . . . . . . . . . . . . . . . 16

GLOSSARY
Terms used in this manual:
HEPA filter — High Efficiency Particulate Air filter, a type of extremely efficient filtration
that removes or reduces a wide range of airborne contaminants. HEPA filters are widely
used in a clinical or laboratory environment.
Multistage — Composed of multiple, sequential stages.
Negative ions — Molecules that possess a negative electrical charge and are found in
the atmosphere under certain conditions, particularly in forests and near waterfalls.
Ozone — A form of oxygen that is produced by sunlight in combination with some
pollutants, or by electrical equipment. Ozone is classified by the United States
Environmental Protection Agency as a toxic gas.
Particles or particulates — Minute solids suspended in a liquid or gas (as in air).
-3-

PRODUCT INTRODUCTION
Congratulations on your purchase of a Nikken Air Wellness™ Power5 Pro™ indoor
air system. The Nikken Power5 Pro combines a multistage air filter with negative-ion
generation and effectively ozone-free operation.
The Power5 Pro features advanced air-filtration technology that reduces contaminants
in particle sizes ranging from visible to microscopic. The Power5 Pro is certified by
independent testing laboratories to reduce:
• solid particulate matter, including dust
• pollen, pet dander, mold spores and other allergens
• organic and inorganic chemical vapors
Its filtration technology — including a HEPA filter stage — is equal to the systems
used in hospital operating rooms,
microassembly clean rooms and
nuclear laboratories. The Power5 Pro
also incorporates a revolutionary filter
element that physically breaks down a
molecular compound without the use
of a light source. This multiple
filtration is an extremely effective
means of cleaning indoor air.
The Power5 Pro includes clean ion
generation, another proprietary
technology. Only Nikken has clean ion
generation, which produces negative
ions without creating harmful ozone.
Patent-pending advanced technology
— multistage filtration — HEPA air
purity — negative-ion generation —
ozone-free operation — and more. The
Nikken Power5 Pro offers all these
features in one product. Now you can
start enjoying the air in your home with
every breath, every day.
A
A
MODE SPEED ION
-4-

-5-
SAFETY INFORMATION
IMPORTANT: Make sure you read all safety information before using this product.
Follow all directions for safety.
READ AND SAVE THESE SAFETY INSTRUCTIONS BEFORE USING THIS PRODUCT.
When using electronic appliances, basic precautions should always be followed to
reduce the risk of fire, electric shock and injury to persons, including the following:
1. Read all instructions before operating the Air Wellness™ Power5 Pro™.
2. Inspect filters before first use. If they are enclosed within a wrapper, remove
this covering and replace filters in the correct sequence. See page 14.
3. Locate the unit in a place where it will not be knocked over or struck by
persons, pets, furniture or doors.
4. The unit must be placed in an upright position.
5. Never place the unit in direct sunlight or near powerful lighting equipment.
6. Always turn the unit off and unplug it from the wall when not in use for a long
period of time.
7. To unplug the Power5 Pro, first turn the power off. Grasp the plug and pull it
from the wall outlet. Never unplug the unit by pulling on the cord.
8. Do not operate the unit if it has a damaged cord or plug. Do not operate if the
unit malfunctions, is dropped or damaged in any manner.
9. Keep the cord away from heat or hot surfaces.
10. Do not use this product outdoors.
11. Never operate this unit unless it is fully assembled. Do not operate without
filters in place.
12. Do not attempt to wash and reuse the disposable filter elements.
13. If prefilter is washed, allow to dry completely before reassembling the unit.
14. Do not disassemble internal components. No user-serviceable parts are inside
the unit (filter replacement excepted). Disassembly, repair or replacement of
internal components may be performed only by qualified technicians.
15. Do not place the power cord under carpet, and do not cover it with throw rugs.
Arrange the cord so that it will not be tripped over. Do not place anything on the cord.
16. Disconnect the power supply before servicing and/or cleaning.
17. Place the air purifier near the electric power outlet and avoid using an
extension cord.
18. This appliance has a polarized plug (one blade is wider than the other). To reduce
risk of shock, this plug is intended to fit only one way in a polarized outlet. If the
plug does not fit fully in the outlet, reverse the plug. If it still does not fit, contact
a qualified electrician. DO NOT attempt to defeat this safety feature.

QUICK START GUIDE
1. Make sure that filters are installed before
using the Power5 Pro. If they are
enclosed within a wrapper, remove this
covering and replace filters in the correct
sequence. See page 14.
2. Connect the unit to a
power source and press
power switch.
3. For automatic or manual operation,
select the desired mode or fan
speed. See page 10.
4. Clean the unit and replace filters at
recommended intervals. See page 14.
-6-
19. A loose fit between the AC outlet (receptacle) and plug may cause overheating
and a distortion of the plug. Contact a qualified electrician to replace a loose or
worn outlet.
20. Do not use the Power5 Pro where combustible gases or vapors are present.
21. Do not operate near a kitchen vent.
22. Do not expose the Power5 Pro to rain, or use near water, in a bathroom, laundry
area or other damp location.
23. Do not allow foreign objects to enter the ventilation or exhaust opening, as this
may cause electric shock or damage to the product. Do not block air outlets or
intakes. Keep these openings clean as specified in the instructions.
24. Do not sit, stand or place heavy objects on the Power5 Pro.
25. Do not attempt to recharge or disassemble the battery that is supplied with the
remote control. Do not discard a used battery by placing it in fire.
A
MODESPEED ION

-7-
COMPONENTS AND CONTROLS
Power5 Pro unit
1. Lift handle
2. Remote control bay
3. Air outlet
4. Particle sensor
5. Front section magnet clips
6. Air inlet
7. Control/display panel
8. Prefilter/mesh filter
9. Neutralizing filter
10. Activated carbon filter
11. HEPA filter
A
MODE SPEED ION
2
3
4
5
6
7
8
1
9
10
11

-8-
Control/display panel
1. REMOTE CONTROL SENSOR — receives signals from the handheld remote.
2. MODE DISPLAY — indicates the mode in which the unit is operating.
3. SPEED DISPLAY — indicates the speed at which the unit is operating.
4. NEGATIVE-ION DISPLAY — indicates when the negative-ion generator is active.
5. AIR-QUALITY DISPLAY — indicates the level of airborne contaminants.
6. POWER CONTROL — switches the unit on and off.
7. MODE CONTROL — allows the unit to be set on automatic or selected manually
for specific modes such as dust reduction, silent and turbo speed.
8. SPEED CONTROL — allows the fan speed to be selected manually.
9. NEGATIVE-ION CONTROL — switches the negative-ion generator on and off.
Remote control
1. POWER CONTROL — switches the unit on and off.
2. MODE CONTROL — allows the unit to be set on
automatic or selected manually for specific modes.
3. SPEED CONTROL — allows the fan speed to be
selected manually.
4. NEGATIVE-ION CONTROL — switches the negative-
ion generator on and off.
2 3 4
6 8
1
9
5
7
2
34
1

-9-
PREPARATION FOR USE
Installing remote control battery
A battery (Type CR2025) is supplied with the remote control. This battery must be
installed before the remote control can be used.
1. Open the battery access tray in the remote control by
pushing the end latch inward (the direction indicated)
and sliding the tray out of the remote.
2. Insert the battery in the remote control, making sure
that the battery is correctly positioned with the positive
terminal touching the positive connector.
3. Replace the battery tray.
Follow the same procedure whenever the battery needs to be
replaced. Normal battery life is approximately one year.
Replacement batteries may be purchased at most electronics
stores.
See caution statements at the front of this manual regarding handling and disposal of
the battery.
When using the remote control, operate with front end (signal sender) directed at the
Power5 Pro™ unit. The signal from the remote may be blocked if there is an object
between the remote and the unit.
Unit installation
When the Power5 Pro is first unpacked, some of the materials in the unit may
produce a slight odor. This is normal and occurs during the manufacturing process.
The odor should dissipate after the product has been in use for a few days or weeks,
depending on the amount of use.
If the odor persists, clear debris or dust from the filter components and the air outlet
vent, using a vacuum cleaner. If odor remains after cleaning, replace the filters.
Before use, remove the protective plastic strip from the front panel display and discard.
If filters are sealed in packaging, follow the procedure described in the maintenance
section (page 14) to install them before attempting to operate the unit.

-10-
Do not use the Power5 Pro in a room where there is high humidity (over 80%) or
extreme temperature change. It is recommended that the Power5 Pro not be used in
a room where the temperature is lower than 32°F (0°C) or exceeds 90°F (32°C).
See the safety information for other restrictions regarding use of the Power5 Pro.
OPERATION
Selecting mode and speed settings
The MODE button selects the operating mode.
In AUTO the mode will automatically adjust the fan speed up
or down based on the condition of the room air as measured
by the particle sensor.
Sleep feature: In the auto mode, the unit will automatically set to a
quiet running speed after the room goes dark and remains darkened for three
minutes. When the room lightens, the Power5 Pro will reset to full auto mode after
four minutes.
The DUST setting operates the unit at alternating speeds from level 1 (for
approximately 30 minutes) to level 3 (approximately 10 minutes) and is suitable
for exceptionally dusty conditions.
The SILENT setting maintains a lower fan speed, when quiet operation is
desired.
The TURBO setting is the most powerful. It is useful for cleaning the room air
as quickly as possible.
The SPEED button adjusts the fan speed manually. Pressing this
button will override the mode setting.
To return the unit to operation in one of the selected modes, press
the MODE button for the desired result.
Selecting negative-ion generation
The –ION button activates or turns off the negative-ion generator. The unit can be
operated with the ion generator on or off. The ion generator is automatically activated
if no selection is made.

-11-
Adjusting the particle sensor
The particle sensor is set at a moderate level of sensitivity. The degree of sensitivity
controls the point at which the Power5 Pro (in auto mode) increases or decreases its
fan speed in response to room conditions.
The particle sensor should be readjusted after the Power5 Pro:
• Has been operated continuously for more than two hours in a room with a high
level of dust or contamination, or
• Has been operated at its lowest setting for more than one hour, in these conditions.
Adjust the particle sensor as follows:
1. Press the POWER button to activate the Power5 Pro.
2. Press both the MODE and SPEED buttons and hold,
until the air-quality display begins to flash.
3. Use the SPEED button to reset the sensor to the
desired level. This is indicated by the numbers in
the speed display. The number 1 calibrates the
sensor to make it highly sensitive to airborne
contaminants. Number 2 is a medium setting, and
number 3 is less sensitive.
4. When you have selected the desired number, press
both the MODE and SPEED buttons again and hold for
three seconds. The sensor is now reset.

-12-
Reading the air-quality display
Your Power5 Pro is equipped with an accurate indicator that reveals the level of
airborne contamination in its surroundings, when the unit is in operation. The air-
quality display uses color to provide this information.
When the indicator light is a solid, clear blue, the air is relatively free of particulates.
A light violet color indicates a low to moderate level of airborne contamination.
A darker violet color is indicative of moderate to high levels of particulates.
A red color means relatively high levels of dust, allergens or other airborne particles.
A
MODE SPEED ION
A
MODE SPEED ION
CLEAN LOW MED HIGH
POLLUTION LEVELS

-13-
MAINTENANCE
CAUTION: When performing any maintenance operation, make sure the Power5 Pro
is unplugged.
Never clean the unit by washing. Use a dry or damp cloth to wipe the exterior only. Do
not allow water to enter the unit.
Follow the recommended intervals shown below for cleaning and filter inspection and
replacement. These may need to be performed less or more frequently, depending on
operating conditions.
Cleaning the exterior
Use a soft, dry or damp cloth to wipe the unit. Do not use solvents, chemical cleaners
or a stiff brush.
Cleaning the air inlet and outlet
Clean the air inlet and outlet with a soft brush.
Cleaning the particle sensor
1. Locate the particle sensor on side of unit. Clean
the inlet and outlet vents with a soft brush or low-
pressure vacuum.
2. Press latch to open and remove the particle
sensor cover. Use a cotton swab dampened with
alcohol to gently wipe the exposed sensor.
3. Use a dry swab to remove remaining alcohol
from the sensor. Replace cover.
Cleaning the prefilter/mesh filter
1. Remove the front panel of the Power5 Pro as described below in the Replacing
Filters section. Detach the prefilter/mesh filter as described.
FILTER MAINTENANCE CYCLE CLEAN/REPLACE
Exterior 2-4 weeks clean
Air inlet and outlet 2 months clean
Particle sensor 2 months clean
Prefilter/mesh filter 2 months clean
Filter elements 6 months replace if necessary

2. Clean the filter by gently vacuuming or by immersion in warm water.
3. If washed, allow the filter to air dry completely before replacing it in the unit.
Reinsert the filter and reattach the front panel.
Replacing filters
All the filters should be replaced at the same time. Inspect at least once every 6 months,
or more often if used in an area with higher than average levels of air pollution.
Do not operate the unit without filters in place.
1. Remove the front panel of the unit by placing fingers inside the side air inlets
and pulling the panel slightly outward at the
bottom. Then lift the panel upward to remove
and set aside.
2. The prefilter/mesh filter includes two projecting
tabs in the center of the frame. Gently pull
these tabs to remove filter. Set the filter aside
and retain it for further use.
3. The front of the neutralizing filter includes a
small pull tab at top or bottom edge. Gently pull
this tab to remove the filter.
4. Follow this same procedure to remove the
activated carbon and HEPA filter elements. Discard the used neutralizing,
activated carbon and HEPA filters.
5. Remove the new filter elements from packaging. CAUTION: When inserting the
replacement elements, make sure to install in the proper order. If filters are not
placed in the correct sequence, operation may cause damage to the unit. First
insert the HEPA filter into the back of the filter space. Push the filter all the way
into the space, at all corners. Make sure that the front of the HEPA filter (labeled
FRONT) is facing toward the front of the unit, and the pull tab is exposed.
6. Follow this same procedure in inserting the activated carbon filter. Next insert
the neutralizing filter. Make sure that both are placed with the labeled front
surface of the filter toward the front, and the pull tab is exposed.
-14-

-15-
• Unit will not operate.
• Unit is set in automatic
mode but runs at a
constant speed.
• Unit operates at
highest (turbo) speed
continuously.
• Fan speed is very slow.
• The air-quality
indicator remains the
same color at all times.
• Unit may be unplugged.
• Remote control battery
may need replacing.
• Front panel is not
completely closed.
• Significant pollution in air.
•Room is dark and auto
mode is operating in sleep
setting.
•Manual setting is selected
for turbo speed.
• Particle sensor is clogged.
•Clogged filters.
•The air quality level has
been excessively high or low.
• The particle sensor is dirty.
• Check to make sure the unit is plugged in.
•Replace battery in remote control.
• Make sure the front panel is securely in
place.
• Allow the unit to reduce pollution level,
after which it will reset speed.
• Switch on room illumination.
• Select a different speed setting.
• Clean particle sensor.
• Replace filters and clean prefilter.
•Reset the particle sensor adjustment.
• Clean the particle sensor.
PROBLEM POSSIBLE CAUSES SOLUTIONS
TROUBLESHOOTING
7. Replace the prefilter/mesh filter, with the front side toward the front of the unit.
First insert the frame edge tabs along one side. Then flex the frame slightly so
that the other side is pointed toward the unit, and insert the edge tabs on that
side. Finally, insert the top and bottom tabs. Make sure that all tabs are in place.
8. Replace the front panel by sliding it into place at the top and lowering the
bottom magnetic clips against the unit.
All replacement filters are provided as one item: Air Wellness Power5 Pro
Replacement Filter Pack, Item# 1439.
Maintenance check
Check the unit periodically (at least every six months) to make sure the following
conditions do not occur:
Power cord or electric outlet is hot.
Power cord is damaged.
If these problems are present, discontinue use of the Power5 Pro and consult your
service representative.

SPECIFICATIONS
Model: Nikken®Air Wellness™ Power5 Pro™
Electric power: 110-120 volts AC, 60 hertz, 43 watts
Coverage, area*: Maximum 387 sq ft/36 m2
Air flow*: Maximum 180 cu ft/5.1 m3per minute
Ozone (ppm)**: Less than 0.001 parts per million
Noise level (turbo): 47 dB
Weight: 15 lb/6.8 kg
Dimensions:
Width 13.4 inches/34 cm
Height 23.2 inches/59 cm
Depth 9 inches/23 cm
Accessories: Full-function remote control
Features
•Multistage filtration
•Negative-ion generation
•Ozone-free operation
•Low noise level
•Anti-charging material
•Automatic fan control
All specifications and features are subject to change without notice.
* This value refers to minimum area as measured by KACA (Korean standard). Differing test
criteria, test chamber dimensions and interpretation of data all may influence coverage
specifications as stated by various agencies.
** Tested and certified by Korean Air Cleaning Association. These test results establish that the
Power5 Pro meets the criteria that allow it to be designated as ozone-free.
Warranty
Standard three-year limited warranty on fan motor. General parts and labor
warranted for one year.
Under warranty, Nikken will repair any defects in materials or workmanship. Nikken
retains the option to either repair or replace this product with a new or fully
warranted, reconditioned unit, or refund part or all of the purchase price of the
product, on a prorated basis.
©2008 Nikken Inc.
•Low maintenance
•Lightweight design
•Auto particle sensor
•HEPA filter
•Easy filter replacement
-16-

GUIDE DE L’UTILISATEUR
A
A
MODE SPEED ION
AirWellness
MC

-2-
TABLE DES MATIÈRES : page
Glossaire . . . . . . . . . . . . . . . . . . . . . . . . . . . . . . . . . . . . . . . . . . . . . . . . . . . . . . . . . . . . . . . 3
Présentation du produit . . . . . . . . . . . . . . . . . . . . . . . . . . . . . . . . . . . . . . . . . . . . . . . . . . . 4
Consignes de sécurité . . . . . . . . . . . . . . . . . . . . . . . . . . . . . . . . . . . . . . . . . . . . . . . . . . . . 5
Guide de démarrage rapide . . . . . . . . . . . . . . . . . . . . . . . . . . . . . . . . . . . . . . . . . . . . . . . 6
Composants et commandes. . . . . . . . . . . . . . . . . . . . . . . . . . . . . . . . . . . . . . . . . . . . . . . . 7
Préparation en vue de l’utilisation . . . . . . . . . . . . . . . . . . . . . . . . . . . . . . . . . . . . . . . . . . 9
Installation de la pile de télécommande . . . . . . . . . . . . . . . . . . . . . . . . . . . . . . . . . . . . 9
Installation de l’appareil . . . . . . . . . . . . . . . . . . . . . . . . . . . . . . . . . . . . . . . . . . . . . . . . . 9
Fonctionnement de l’appareil . . . . . . . . . . . . . . . . . . . . . . . . . . . . . . . . . . . . . . . . . . . . . 10
Sélection du mode et réglage des vitesses. . . . . . . . . . . . . . . . . . . . . . . . . . . . . . . . . 10
Sélection de la fonction de production d’ions négatifs . . . . . . . . . . . . . . . . . . . . . . . 10
Réglage du capteur de particules . . . . . . . . . . . . . . . . . . . . . . . . . . . . . . . . . . . . . . . . 11
Lecture de l’affichage de la qualité de l’air. . . . . . . . . . . . . . . . . . . . . . . . . . . . . . . . . 12
Entretien . . . . . . . . . . . . . . . . . . . . . . . . . . . . . . . . . . . . . . . . . . . . . . . . . . . . . . . . . . . . . . 13
Nettoyage des composants internes et externes . . . . . . . . . . . . . . . . . . . . . . . . . . . . 13
Remplacement des filtres . . . . . . . . . . . . . . . . . . . . . . . . . . . . . . . . . . . . . . . . . . . . . . 14
Vérification de maintenance. . . . . . . . . . . . . . . . . . . . . . . . . . . . . . . . . . . . . . . . . . . . . 15
Dépannage . . . . . . . . . . . . . . . . . . . . . . . . . . . . . . . . . . . . . . . . . . . . . . . . . . . . . . . . . . . . 15
Fiche technique. . . . . . . . . . . . . . . . . . . . . . . . . . . . . . . . . . . . . . . . . . . . . . . . . . . . . . . . . 16

-3-
GLOSSAIRE
Termes employés dans le présent manuel :
Filtre HEPA — Filtre à particules à haute efficacité, un type de filtration extrêmement
efficace qui retire ou réduit un grand nombre de contaminants de l’air. Les filtres HEPA
sont couramment utilisés en clinique ou en laboratoire.
À plusieurs étapes — Composé d’étapes multiples et séquentielles.
Ions négatifs — Molécules possédant une charge électrique négative que l’on trouve
dans l’air sous certaines conditions, notamment dans les forêts et à proximité des
chutes.
Ozone — Forme d’oxygène produite par de l’équipement électrique ou par la lumière du
soleil combinée à certains polluants. L’Environmental Protection Agency (États-Unis) a
classé l’ozone parmi les gaz toxiques.
Particules ou matières particulaires — Solides microscopiques en suspension dans un
liquide ou dans un gaz (comme l’air).

-4-
PRÉSENTATION DU PRODUIT
Nous vous félicitons d’avoir acheté le système de filtration d’air intérieur Air
WellnessMC Power5 ProMC de Nikken. Le système Power5 Pro de Nikken combine une
filtration à plusieurs étapes, la production d’ions négatifs et un fonctionnement sans
émission d’ozone.
Le système Power5 Pro possède une technologie de filtration avancée qui réduit les
contaminants de l’air, depuis les particules visibles jusqu’aux particules microscopiques.
Le système Power5 Pro garantit une réduction de la teneur dans l’air des contaminants
suivants :
• les particules solides, y compris la poussière;
• le pollen, les particules animales, les spores de moisissures et autres
allergènes;
• les vapeurs chimiques organiques et inorganiques.
Sa technologie de filtration – y compris un filtre HEPA – est identique à celle des
systèmes utilisés dans les salles d’opération, les salles blanches d’assemblage de
microcircuits et les laboratoires nucléaires. Le système Power5 Pro comprend
également un élément filtrant révolutionnaire qui décompose physiquement les
composés moléculaires sans l’aide d’une source lumineuse. Cette filtration multiple
constitue un moyen extrêmement efficace de
purifier l’air intérieur.
Le système Power5 Pro produit des ions,
une autre technologie exclusive. Seul le
système Nikken est capable de générer des
ions propres et de produire des ions négatifs
sans émettre d’ozone nocif.
Une technologie en instance de brevet — un
procédé de filtration à plusieurs étapes — la
purification d’air d’un filtre HEPA — la
production d’ions négatifs — un
fonctionnement sans émission d’ozone — et
bien d’autres avantages : voilà ce que vous
offre le système Power5 Pro de Nikken et tout
cela dans un même produit. Vous pouvez
maintenant commencer à respirer un air
intérieur toujours pur, tous les jours.
A
A
MODE SPEED ION
Other manuals for Air Wellness Power5 Pro
1
Table of contents
Languages:
Other Nikken Air Cleaner manuals
