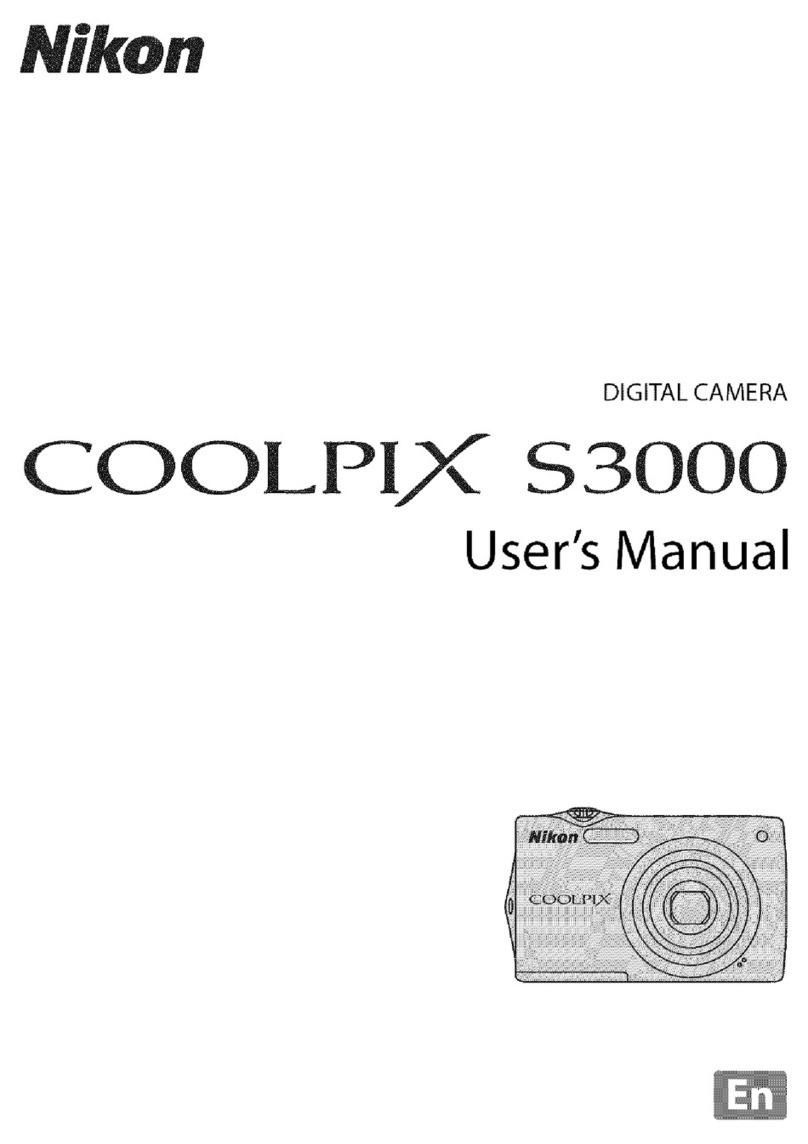
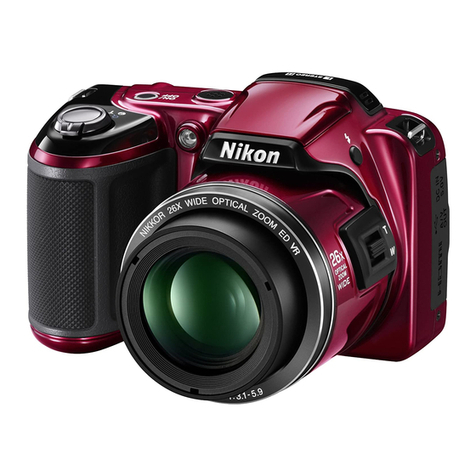
Nikon Coolpix S3600 User manual

Nikon
Quick
Start
Guide
Confirming
the
Package Contents 3
First Steps 5
Shooting
and Playback 14
Using ViewNX 2 20
Other
Functions 26
For Your Safety
32
Nikon
COOLPIX
'
COOLPIX
53600

I
Thank you for purchasing a Nikon COO
LPIX
S3600 digital
ca
mera. This
guid
e
introdu
ces
the
procedu
res
necessary for first time
use
of
thi
scamera.
To ensure
proper
use,
plea
se
read and
thorough
ly
und
er
sta
nd
the
inf
o
rmat
ion in "For Your Safety" (pages
32
-
35)
before using
th
e camera.
For
more
deta
il
ed informati
on
, please refer
to
the
digital
Reference
Manual,
which is located
on
the
Nikon
we
b
si
t
e.
Fo
r
inf
ormation
on
view
ing
th
e camer
a's
di
gita
l
Reference
Manual,
see
"Dow
nlo
ading
th
e "Reference Manual
""
descr
ib
ed bel
ow
Should you need technical
su
pp
ort,
we
offer a
number
of
opt
ions.
Internet
Ple
ase
visit the Nikon
support
hom
e page,
where
you can:
• Search Nikon's
continuou
sly
updated
Knowledge
Da
tabase
for
the
latest technical s
upport
information.
•
Use
"Ask
Nikon a Question"
to
receive a
prompt
r
ep
ly
from
a Nikon professional
adv
isor
to
your e-mail.
•
Dow
nload the latest versions of
Ni
kon
so
ft
wa
re
or
fi
rmware
updates for your
product,
or register to receive e-mail
not
ification for
so
f
tw
are or firmware
upda
tes.
For cus
tom
ers in
the
United Stat
es:
www.nikontechusa.com
For customers in Canada: help.nikon.ca (Eng
li
sh
),
nikoncanada-fr.custhelp.com
(Fran<;:a
i
s)
For cus
tom
ers
in Mexico nikon.com.mx!soporte
For customers
in
B
raz
il http://nikon.com.br
Telephone
Plea
se
ca
ll
for techrli
cal
sup
port
and
othe
r
pro
duct
assis
tance.Our professional advisersare s
tanding
by
to
help wi
th
your
digital
ca
mera
reed
s.
For customers in the United States: 1-800-NIKON-UX(1-800-645-6689)
For customers in Canada 1-877-534-9910
For
custome
rs in Mexico: 001-888-565-5452
For customers in
Brazi
l:0800-886-4566 (0800-88 NIKON)
I[JJJ
Downloading the
"Reference
Manual"
Refer to
th
e Reference Manu
al
(PDF
format)
for
more
detailed information. The Reference Manual can be
downl
oaded from
the Nrkon website.
http://nikonimglib.com/manual!
The Reference Manual can be vi
ewed
using
Adobe
Reader,available for free
downlo
ad from
the
Adobe
website.
An
Important
Notice
about
Accessories
Nikon COOLP
IX
digital camera is
designed
to
the
highest standards and includ
es
co
mplex
electronic circuitry. Only
Nikon accessories, such
as
batt
e
ry
chargers, batteri
es,
Charging
AC
Adapters, and
AC
adapters are certified
by
Nikon
specifi
ca
ll
y for y
our
Nikon COOLPIX
came
ra
and are engineered and tested
to
operate
within
the
requir
ements
of
the
electronic ci
rc
uitry
of
our
camer
as.
THE
USE
OF
NON-NIKON
ACCESSOR
I
ES
MAY DAMAGE
YOUR
CAMERA AND WI
LL
VOID
YOUR
NI
KON
WARR
A
NTY.
Ge
nuine Nikon accessori
es
are
ava
ilable
throug
h
you
r Nikon-authorized dealer.
;-:
·:<
~
..
··rfiling t"e:;l'acka!}f
tOiifei;ts
J
In
the
event
that
any items are missing, please
contact
the
store
where
you
purchased
the
camera.
COOLPIX
S3600
Digital Camera
Charging
AC
Adapter
EH-70P*
Camera
Strap
USB
Cable
UC-E6
•
Quick
Start
Guide
(this guide) • Warranty
Rechargeable Li-ion Battery
EN-EL
19
ViewNX 2
CD
*A
plug adapter
is
included
if
the
camera was purchased in a
country
or region
that
requires a
plug
adapter. The shape
of
the
plug adapter varies
with
the
country
or
region
of
purchase
([I]S).
The included charging
AC
adapter
is
EH-70P
in countries
other
than
Brazil,
and EH-69C in
Brazil.
NOTE: A Secure Digital
(SO)
memory
card, hereafter referred
to
as
a
"memory
card,"
is
not
provided.
CD:
This
icon indicates that more information
is
available elsewhere
in
this guide.
Confirming
the
Package
Contents
I

Parts
of
the
Camera
13
l
I
' i
II
Power switch/power-on lamp
II
Zoom control
II
Shutter-release
button
II
Charge lamp/flash lamp
IJ•
(~If
movie-record)
button
IJ
0
(shooting mode)
button
I
II
[E
(playback)
button
~
Confirming
the
Package
Contents
5
6
7
8
9
10
11
12
aMulti selector
IJ
®(apply
selection)
button
IJ
1ffi
(delete)
button
Ill
MENU
button
~~
Battery-chamber/memory card slot cover
IEJ
Monitor

First
Steps
Step 1
Attach the Camera Strap
step
2 Insert the Battery
and
Memory
Card
Ifa
memory
card
is
inserted in
the
camera,
image
'sdata
is
saved
on
the
memory
card.
If
no
memory
card
is
inserted in
the
camera,
the
data
is
saved
to
the
camera'sinternal
memory.
2.1
Open
the
battery-chamber/memory
card slot cover.
First
Steps
1
·.·
.
·.
·.·.
·
h

I
2.2
Insert
the
battery.
•
Push
the orange battery latch
in
the direction indicated
by the arrow (
(D)
,and fully insert the
battery(
@).
• The battery locks into place
when
inserted correctly.
~
Be
Careful
to
Insert
the
Battery
in
Correct
Direction
Inserting the
battery
upsidedown orbackwards could
damage
the camera.
2.3
Insert
the
memory
card.
• Slide the
memory
card
in
until it clicks into place.
~
Be
Careful
to
Insert
the
Memory
Card
in
Correct
Direction
Inserting the
memory
cardupsidedown orbackwards
could
damage
the camera
and
memory
card.
First
Steps
Battery latch
Memory
card slot

2.4
Close the battery-chamber/memory card slot cover.
Removing the Battery and
Memory
Card
Turn the camera
off
and make sure
that
the
power-on
lamp and
monitor
have turned off, and
then open the
battery-chamber/memory
card slot cover.
• The camera, battery, and
memory
card may be
hot
immediately after using
the
camera.
Removing the Battery
Move
the
battery latch in
the
direction indicated by
the
arrow
(G))
to
eject
the
battery(@).
Removing the
Memory
Card
Gently push
the
memory
card
into
the camera
((}))to
partially
eject the card
((1)).
First
Steps
I

I
Step3
Charge the
Battery
Use
the
included
Charging
AC
Adapter
and
USB
cable
to
charge
the
battery
while
it
is
in
the
camera.
3.1
Prepare
the
included
Charging
AC
Adapter.
Ifa plug adapter*
is
included
with
your camera, attach
the
plug
adapter
to
the
plug
on
the
Charging
AC
Adapter.
Push
the
plug
adapter firmly
until it
is
securely held in place. Once
the
two
are
connected,
attempting
to
forcibly remove
the
plug
adapter could damage
the
product.
*The
shape
of
the
plug
adapter varies according
to
the
country
or
region in
which
the
camera was purchased. This step can be
omitted
if
the
plug
adapter comes
permanently
bonded
to
the
Charging
AC
Adapter.
First
Steps

3.2
Make sure
the
battery
is
installed in
the
camera, and
then
connect
the
camera
to
the
Charging
AC
Adapter in order
of
CD
to@.
• Keep
the
camera
turned
off.
• Make sure
that
the
plugs are properly oriented. Do
not
insert or remove
the
plugs at
an
angle
when
connecting
or
disconnecting
them.
USB
cable
(included)
I
• The charge
lamp
slowly flashes green
to
indicate
that
the
battery
is
charging.
• Shooting
is
not
possible
while
the
camera
is
connected
to
the
Charging
AC
Adapter.
•
About
2
hour
sand 50
minutes
are required
to
charge a fully exhausted battery.
3.3
Disconnect
the
Charging
AC
Adapter from
the
electrical
outlet
and
then
disconnect
the
USB
cable.
First
Steps
I

I
Step4
Turn On the Camera
Press
the
power
switch.
• The
monitor
turns on.
R The Auto
Off
Function
• The
time
that
elapses before
the
camera enters standby
mode
is
about
one minute. The
time
can be changed using the Auto
off
setting in the setup menu
(0]
29
).
• While the camera
is
in
standby mode,
the
monitor
turnsback on ifyou perform any
of
the
following operations:
-
Press
the
power
switch, shutter-release button, 0 (s
hooting
mode
)
button,~
(playback) button,
ore
(
...
If
movie-record) button.
First
Steps

StepS
Selecta Language
and
Setthe Camera Clock
When
the
camera
is
turned on for
the
first time,
the
language-selection screen and
the date and
time
setting screen for
the
camera clock are displayed.
Use
the
multi
selector
to
make
the
settings.
• Ifyou exit
without
setting
the
date and
time,~
will flash
when
the
shooting
screen
is
displayed.
5.1
5.3
Use
the
multi
selector
A~
to
select
the
desired language and press
the(@
button.
Select
your
home
time
zone and press
the(@
button.
5.2
Select
Yes
and press
the(@
button.
Daylight Saving Time
Ifdaylight saving
time
isin effect, press A
to
enable the daylightsaving time function.
• When
the
daylight
saving t
ir11e
function
is
enabled,
'i~·
isdisplayed
above
the
map.
•
Press
~to
disable
the
daylight
saving
time
function.
First
Steps

I
5.4
5.6
Select the date format and press the
®button.
Select
Yes
and press
the®
button.
• When settings
are
finished, the lens
extends and the camera switches
to
shooting mode.
First
Steps
5.s
Edit the date and time.
• Select afield:
Press
~
....
(changes
between
M,
0,
Y,
hour, and minute).
• Edit the date and time:
Press
.A.
T.
• Confirm the settings: Select the
minute
field and
press
the®
button.

R Imprinting
the
Date and Time on Images While Taking Images
After setting the date and time, enable
the
Print date
option
in
theY
(setup)
menu
([l]29).
Display
theY
(setup)
menu
using
the
following procedure and change
the
settings.
Press
the
MENU
button
-
--.
press the multi
se
lector_,... -
..
use
.A.
T
to
select
theY
(setup) menu
icon and press
the®
button
-----.
us
e
.A.
T
to
select
an
item and press
the®
button.
R Changing the Current Date, Time, or Language
Just
as
described under "
Imprinting
the
Date and Time on Images While Taking Images"
above, display
theY
(setup)
menu
(11]29) and set Language
or
Time zone and date.
The
ne
xt step explains
ba
sic
shooting operations using
~(scene
auto selector) mode.
First
Steps

I
Shooting andPlayback
Step 1 Check the
Battery
Level
and
the
Number
of
Exposures Remaining
Battery Level Indicator
Display
Description
(CJI
The
batt
ery
le
vel is high.
(.:JI
The b
att
ery level is
low
.
CD
Th
e c
am
era cann
ot
ca
pture
Battery exhaus
ted
.
im
age
s.
Rechar
ge
th
e
batter
y.
Number
of
Exposures Remaining
Number
of
exposures
remaining
l!l9.ifu~
~C
QJ
~~
......:..L.....
-l.........LUL...&..--1.:::;::::;;::;::
Battery level indicator
[ll]
is
displayed
when
no
memor
y card isinserted in
the
camera, and
im
ag
es
are
sav
ed in
the internal memory.
Shooting and
Playback

Step 2 Hold the Camera andFrame a Picture
2.1
Hold
the
camera steady in
both
hands.
• Keep fingers and other objects away from the le
ns
,
fl
as
h,
etc.
2.2
Frame
the
picture.
• When the camera automatically determines the scene
mode, the shooting
mode
icon changes.
Using
the
Zoom
Move the zoom control.
•
To
zoom in closer
to
the subject, move the zoom control
toward T (telephoto).
•
To
zoom
out
and view a larger
area,
move the zoom
control toward W (wide-angle). When the camera
is
turned on,
the
zoom moves
to
the maximum wide-angle
position.
Shooting mode icon
Shooting and
Playback
I

I
Step3
Focus
and
Shoot
3.1
Press
the
shutter-release
button
halfway,
i.e.,
press
the
button
lightly
until
you
feel aslight
resistance.
• When
the
subject
is
in focus,
the
focus
area
glows green (multiple focus
areas
can
glow
green).
• When you
are
using digital zoom, the camera focuses
in
the
center
of
the
frame and
the
focus
area
is
not
displayed. When
the
camera
has
focused, the focus
indicator glows green.
• Ifthe focus
area
or focus indicator flashes,
the
camera
is
unable
to
focus.
Modify
the
composition
and
try
pressing
the
shutter-release
button
halfway again.
•
Shooting
and
Playback

Flash
lamp
The flash lamp indicates flash status
when
the
shutter-release
button
is
pressed halfway.
•
~
#
On The flash fires
when
an
image
is
taken.
.:o#-
. Flashing The flash
is
charging.*
#
•
I
#
•
Off
The flash does
not
fire
when
an
image
is
taken.
I
* If
the
battery level
is
low,
the
monitor
turns
off
while
the
flash
is
charging.
3.2
Without
lifting yourfinger,
press
the
shutter-release
button
the rest
of
I
the way
down
to
take the picture. •
• The shutter
is
released and
the
image
is
saved.
• Ifyou press
the
shutter-release
button
with
too
much
force,
the
camera
may shake, causing images
to
be blurred.
Press
the
button
gently.
Shooting and
Playback
I

I
Step 4 PlayBackImages
Press
the
[E
(playback) button. The camera
enters playback mode.
• The last image captured
is
displayed in full-
frame playback mode.
•
Use
the multi selector
.6.
~~_...to
display
previous or next images.
• To return
to
shooting mode, press the 0
(shooting mode)
button
or shutter-release
button.
.)
Shooting
and
Playback
0 button
Display
the
previous image
~
'eJ
Display
the
next image

Deleting Unwanted Images
To
delete the image currently displayed
in
the monitor,
press
the
1ID
(delete) button.
When the deletion screen
is
displayed,
use
the multi
selector
.A.~
to
select Current
image
and
press
the®
button.
When the confirmation dialog
is
displayed, select
Yes
and
press
the®
button
to
delete the image that
is
displayed.
• After pressing the
1ID
button,
use
.A.~
to
select Erase
selected images and select multiple images
to
be
deleted.Select All images
to
delete
all
images.
• Deletedimagescannot
be
recovered.
To
cancel
without
®
deleting, select No
in
the confirmation dialog and
press
the®
button.
Shooting and
Playback
I

I
Usin
,
gjlti'i!wNX2
ViewNX 2
is
an
ail-in-one software package
which
enables you
to
transfer, view,
edit
and share images. Install ViewNX 2 using
the
included ViewNX 2 CD-ROM.
Step
1 Installing ViewNX2
• An Internet
connection
is
required.
Compatible Operating
Sys~ems
Windows
Windows
8.1,
Windows
7,
Windows
Vista,
Windows
XP
Mac
OS
X 1
0.9,
1
0.8,
10.7
(~
Using
ViewNX
2
Other manuals for Coolpix S3600
2
Table of contents
Other Nikon Digital Camera manuals

Nikon
Nikon Coolpix S500 User manual

Nikon
Nikon D3100 User manual

Nikon
Nikon D2X User manual

Nikon
Nikon COOLPIX P510 User manual

Nikon
Nikon D3200 User manual

Nikon
Nikon COOLPIX L22 User manual

Nikon
Nikon Coolpix L30 User manual

Nikon
Nikon Coolpix Use and care manual

Nikon
Nikon D3300 User manual

Nikon
Nikon CoolPix P6000 User manual

Nikon
Nikon Coolpix L120 User manual

Nikon
Nikon COOLPIX S4000 User manual

Nikon
Nikon D5000 User manual

Nikon
Nikon D7000 Operating instructions

Nikon
Nikon CoolPix S9100 User manual

Nikon
Nikon D4 Service manual

Nikon
Nikon F3AF User manual

Nikon
Nikon D50 Operating instructions

Nikon
Nikon 350-20054 User manual

Nikon
Nikon 26196 User manual