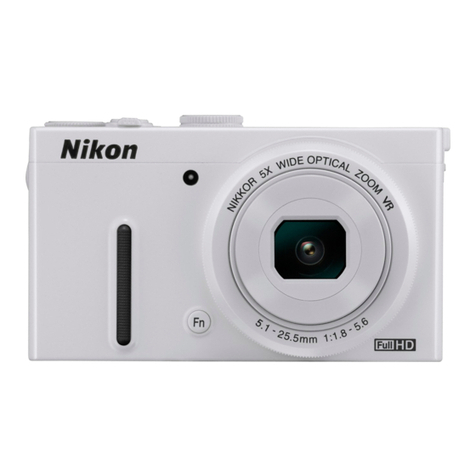
Nikon CoolPix S9100 User manual

Nikon
COOLP DIGITAL CAMERA
User's Manual

When one of the following scenes is selected using the mode dial or the scene
menu, images are captured using settings that are optimized for the selected
scene,
(_ 62)
Bysimply framing a picture,
the camera automatically
selects tile optimum scene .___f_:
mode for simpler shooting. J
]__[] Night Landscape
(_ 64)
[] Night Portrait (_ 65)
[] Backlighting (_ 66)
Rotate the mode dial to [],
[], or [] and take pictures.
SCENE
Pressthe MENUbutton to display the scene menu and choose one of the following
shooting scenes.
Portrait (default setting) (_ 67) [] Landscape ([_ 67)
_" Sports (_ 68) _ Party/indoor ([_] 68)
Beach (_ 69) [] Snow (_ 69)
Sunset ([_ 69) ill Dusk/dawn ([_ 70)
_ Close-up(_ 70) _1 Food (_ 71)
Museum (_ 72) "i!i._ Fireworks show ([_ 72)
[] Blackand white copy ([_] 73) _ Panorama (_ 73)
wE Pet portrait (_ 74)
Choose a scene type from the scene menu and rotate the zoom control ([_ 4) to
T (_) to view a description (help) of that scene. To return to the original screen,
rotate the zoom control to T (qi_)again.
o_
o
oo
[] Image Mode
The Image mode setting (_ 47) car/be changed by pressing the MENUbutton in scene mode.
Changes made to the image mode setting apply to all shooting modes, 61

o_
o
oo
Shooting in the Scene Mode Selected by the Camera
(Scene Auto Selector)
By simply framing a picture, the camera automatically selects one of the following
scene modes for simpler shooting.
• _: Auto (general shooting) • Ill,J: Portrait
• IF_: Landscape • I1"_: Night portrait
• l_: Night landscape • B:CIose-up
• _: Backlighting
1 Rotate the mode dial to _. _-_\_, i,,........................./}
..\.-rqi_..... -_
The camera enters scene auto sdector, iti)_' /
If the flash is dosed, The flash is Iowe,ed. isdisplayed. __(_
Slide the _ ¢ (flash pop-up) control to make the flash iiiiiiiiiiiiiiiiiiiiiii_1[_ .R_J._"S
pop up. _ ":"__, I
2Frame the subject and take a picture.
The shooting mode icon changes.
Pressthe shutter-release button haEfwayto set focus and
exposure. When the subject is in focus, the active focus
area glows green.
Pressthe shutter-release button the rest of the way down
to take the picture.
62

_1_ Notes on Scene Auto Selector
• Digital zoom is not available.
• Depending upon shooting conditions, the camera may not select the desired scene mode. Should
this occur, switch to I_1 (auto) mode (_ 24) or select the desired scene manually (_ 64).
[] Focusing Using Scene Auto Selector
• When the camera detects a human face in scene auto selector, it focuses on that face. See "Face
Detection" (_ 56) for more information.
• When the shooting mode indicator n or _ (close up) is displayed, the camera automatically
selects the focus area (up to nine areas) containing the subject closest to the camera as same as
when Auto is selected for AF area mode (_ 53),
[] Shooting with Night Landscape and Night Portrait When Using Scene Auto
Selector
• If the camera switches to _ (night bndscape) when using scene auto selector, the camera
captures a series of images which will be combined into a single image and saved.
• If the camera switches to _ (night portrait) when using scene auto selector, flash mode is fixed
at red eye reduction for shooting human subjects (the camera does not shoot continuously).
• In dark surroundings, the use of a tripod is recommended. Set Vibration reduction (_ 178) to
Off when using a tripod to stabilize the camera.
[] Flash
• _AUVO(auto; default setting) and _ (off) flash mode settings car/be applied (_ 32).
When _AIJTI)(auto) is selected, the camera automatically selects the optimum flash mode
setting for the scene mode it has selected.
When (_) (off) is selected, the flash does not fire even if the flash is popped up.
• To make sure the flash does not fire, take pictures with the flash lowered.
[] Functions Available in Scene Auto Selector
• The selfltimer (_ 35) and exposure compensation (_ 40) settings can be adjusted.
• Smile timer (_ 37) cannot be used.
• The macro mode button on the rotary multi selector (_ 39) is disabled.
o_
o
oo
63

o
Choosing a Scene and Shooting (Scene Mode Types and
Characteristics)
Tile mode dial can be used to select scenes when shooting (_ 61 ).
See"Shootinginthe SceneIVlodeSelectedbythe Camera(SceneAuto Selector)"
(_ 62) for more information on scene auto selector.
is used in tile following scene descriptions to indicate tile flash mode (_ 32)
setting when tile flash is raised. _t_ indicates tile self-timer (_ 35), _1_indicates
macro mode (_ 39), and [] indicates exposure compensation (_ 40) settings.
_ Night landscape
Captures the atmosphere of night landscapes.
Press the MENUbutton to set Night landscape to Hand-held
or Tripod.
•Hand-held (default setting): Select this option to produce
shots with reduced blurring and noise even when the
camera is hand-held.
- The _ icon is displayed in the shooting screen.
- When the [] icon at the top left of the monitor lights in green, press the shutter-
release button all the way to capture a series of images which will be combined into a
single image and saved.
- Once the shutter-release button is pressed aNthe way, hold the camera steady without
moving it until a still image is displayed. After taking a picture, do not turn the camera
off before the monitor switches to the shooting screen.
- The angle of view (i.e.,the area visible in the frame) seen in the saved image will be
narrower than that seen in the monitor at the time of shooting.
• Tripod: Select this option when using a tripod or other means to stabilize the camera
during shooting.
- The _ icon is displayed in the shooting screen.
-Vibration reduction (_) 178) is automatically set to Off regardless of the setting in
the setup menu (_ 169).
- One image is captured at a slow shutter speed when the shutter-release button is
pressed all the way.
• Digital zoom is not available.
•Camera focuses at infinity. The focus area always glows green when the shutter-release
button is pressed halfway. Note, however, that objects in the foreground may not always
be in focus.
• AF-assist illuminator (_ 181) does not light.
Off1
1 The self4imer can be used.
2 Other settings can be selected.
64

[] Night portrait
Use this mode for portraits of a human subject shot in front of
background lighting at night. Flash is used to illuminate the
subject while maintaining the mood of the background.
Press the MENUbutton to set Night portrait to Hand-held or
Tripod.
•Hand-held: Select this option to produce shots with
reduced blurring and noise even when the camera is hand-held.
- The _ icon is displayed in the shooting screen.
- When the [] icon at the top left of the monitor lights in green, press the shutter-
release button all the way to capture a series of images which will be combined into a
single image and saved.
- Once the shutter-release button is pressed all the way, hold the camera steady without
moving it until a still image is displayed. After taking a picture, do not turn the camera
off before the monitor switches to the shooting screen.
- The angle of view (i.e.,the area visible in the frame) seen in the saved image will be
narrower than that seen in the monitor at the time of shooting.
- If the subject moves while the camera is shooting continuously, the image may be
distorted, overlapped, or blurred.
•Tripod (default setting): Select this option when using a tripod or other means to
stabilize the camera during shooting.
- The @ icon is displayed in the shooting screen.
-Vibration reduction (I_) 178) is automatically set to Off regardless of the setting in
the setup menu (_ 169).
- One image is captured at a slow shutter speed when the shutter-release button is
pressed all the way.
• Raise the flash before taking pictures.
• Digital zoom is not available.
• When the camera detects a human face, it focuses on that face (see "Face Detection"
([]_ 56) for more information).
- If more than one face is detected, focus will be on the face closest to the camera.
- The camera softens skin tones (in up to three faces) by applying the skin softening
function before saving images (_ 67).
- If no faces are detected, the camera focuses on the subject at the center of the frame.
_1 O1_2
1 The flash fires using red-eye reduction.
2 Other settings can be selected.
o_
o
oo
65
o
o
oo
_11Backlighting
Use when light is coming from behind the subject, throwing features or details into
shadow.
Press the MENUbutton to set HDR to On or Off according to the shooting conditions and
subject.
When HDR is set to Off (default setting): The flash fires to
prevent the subject from being hidden in shadow.
•Raise the flash before taking pictures.
• The camera focuses on the subject at the center of the
frame. One image is captured when the shutter-release
button is pressed all the way.
When HDR is set to On: Use when taking pictures with very
bright and dark areas in the same frame.
• The _)_ icon isdisplayed in the shooting screen. If there
are very bright areas and very dark areas in the frame, the
[] icon lights in green.
• The camera focuses on the subject at the center of the
frame. Digital zoom is not available.
• When the shutter-release button is pressed all the way,
the camera shoots images continuously at high speed,
and saves the following two images.
- An image processed by DAighting ([_) 133) at the time of shooting
- A composite image with high dynamic range (HDR) in which the loss of details in
highlights or shadows is minimized
• The second image saved is an HDR composite image. If there is only enough memory to
save one image, an image processed by D-Lighting isthe only image saved.
• Once the shutter-release button is pressed all the way, hold the camera steadily without
moving it until a still image is displayed. After taking a picture, do not turn the camera off
before the monitor switches to the shooting screen.
• The angle of view (i.e.,the area visible in the frame) seen in the saved image will be
narrower than that seen in the monitor at the time of shooting.
1 Flash is fixed at _ (fill flash) when HDR is set to Off, and is fixed at (_) (off) when HDR is set
to On,
2 The self4imer carl be used.
3 Other settings can be selected.
66

SCENE_ _ Portrait
Use this mode for portraits.
• The camera detects and focuses on a human face. See "Face
Detection" (_ 56) for more information.
• If more than one face is detected, focus will be on the face
closest to the camera.
• The camera softens skin tones (in up to three faces) by
applying the skin softening function before saving images.
• If no faces are detected, the camera focuses on the subject at the center of the frame.
• Digital zoom is not available.
off* oft ....................................0T:........................................
* Other settingscan besdected.
SCENE -) i Landscape
Use this mode for vivid landscapes and cityscapes.
• Camera focuses at infinity. The focus area or focus indicator
([_) 7) always glows green when the shutter-release button
is pressed halfway. Note, however, that objects in the
foreground may not always be in focus.
• AF-assist illuminator (_ 181) does not light.
]@off*
* Other settings can be selected.
o
o
o
[] Notes about Skin Softening
When using the [] (night portrait) or Portrait scene modes, the camera detects up to three human
_ces when the shutter is released, and processes the image to soften facial skin tones he.re saving
the image.
• More time than usual is required to save images.
• The level of effect applied cannot be adjusted. Confirm the result by playing back the image.
• Skin softening can also be applied on saved images (_ 134),
• in some shooting conditions, facial skin tones may not be smoothed or parts other than face may
be modified though the camera detects a face. 67

o
oo
2.
_ Sports
Use this mode for dynamic action shots that freeze the action
in a single shot and record motion in a series of pictures. With
continuous shooting, instantaneous movements in moving
subjects can be captured clearly.
• The camera focuses on the subject in the center of the
frame. The camera focuses continuously until the shutter-
release button is pressed halfway to lock the focus.
• While the shutter-release button is held all the way down, up to 24 images are captured
continuously at a rate of up to about 1.8 fps (when image mode is set to [] 4000x3000).
Shooting ends when the shutter-release button is released.
• Focus, exposure compensation, and white balance are fixed at the values determined
with the first shot in each series.
• The speed of continuous shooting may decrease depending on the image mode, the
type of memory card used, and shooting conditions.
• AF-assist illuminator (_ 181) does not light.
off off 0.0"
* Other settings can be selected.
SCENE_ _Party/indo0r
Suitable for taking pictures in parties. Captures the effects of
candlelight and other indoor background lighting.
• The camera focuses on tile subject atthe center of the frame.
• As images are easily affected by camera shake, hold the
camera steadily. In dark surroundings, tile use of a tripod is
recommended. Set Vibration reduction (_ 178) to Off
when using a tripod to stabilize the camera.
_" 3 _1 Off 0.0 2
1 The flash mode setting may automatically switch to slow sync with red-eye reduction.
Other settings can be seEected.
2 Other settings can be selected.
68

SCENE->-_ BeaCh
Captures the brightness of such subjects as beaches or sunlit
expanses of water.
• The camera focuses on the subject at the center of the
frame.
off* off
* Other settingscan beselected.
SCENE -> [] snow
Capturesthe brightnessof sunlit snow.
• Thecamerafocusesonthe subjectat thecenter of the
frame.
Off* Off
* Other settingscan beselected.
SCENE -> _ Sunset [_
Preservesthedeep huesseenin sunsetsand sunrises.
• Thecamerafocusesonthe subjectat thecenter of the
frame.
o
0.0"
] @* off*
* Other settings can be selected.
(_}: Use of a tripod is recommended in scenes with which _] is indicated, Set Vibration reduction
(_ 178) to Off when using a tripod to stabilize the camera. 69

o
rD
o
SCENE->i Duslddawn
Preserves the colors seen in the weak natural light before
sunrise or after sunset.
• Camera focuses at infinity. The focus area or focus indicator
(I:2_)7) always glows green when the shutter-release button
is pressed haffway. Note, however, that objects in the
foreground may not always be in focus.
• AF-assist illuminator (_ 181) does not lighc
_ @ off* off
r settingscan beselected.
SCENE-) _ Closetup ...........
0.0 _
Use this mode to photograph flowers, insects, and other small
objects at close range.
• Macro mode (_) 39) is enabled and the camera
automatically zooms to the closest position at which it can
fOCUS.
• The closest distance at which the camera carl focus varies
depending on the zoom position.
When the zoom is at a position where @ and the zoom indicator glow green (to the left
of/'%), the camera can focus on subjects as dose as 11cm (4.4 in.) from the lens.At the
maximum wide-angle position, the camera can focus on subjects as close as4 cm (1.6 in.)
from the lens.
• AF area mode is set to Manual and the focus area in which the camera focuses can be
sdected (I:Z_)53). Press the _) button and then move the focus area by rotating the
rotary multi sdector or by pressing A V, _1,or I_.
To change settings for any of the following functions, first press the _) button to cancel
focus-area selection, then change the settings as desired.
- Flash mode
- Self-timer
- Exposure compensation
• The camera focuses continuously until the shutter-release button is pressed halfway to
lock the focus.
• As images are easily affected by camera shake, be sure that Vibralion re¢ludior_
(I:2_)178) is enabled and hold the camera steadily.
] ®* 0.0-
* Other settings can be selected. Note that the flash may be unable to light entire subject at
distances of less than 50 cm (1 ft. 8 in.).
(_]: Use of a tripod isrecommended in sceneswith which Z] isindicated, SetVibration reduction
70 (_ 178)to off when using a tripod to stabilize the camera.

SCENE-__1FoOd
Use this mode when taking pictures of food.
• Macro mode (iZ_] 39) is enabled and the camera
automatically zooms to the closest position at which it can
fOCUS.
• The closest distance at which the camera carl focus varies
depending on the zoom position.
When the zoom is at a position where _ and the zoom indicator glow green (to the left of
f%), the camera can focus on subjects as close as ] ] cm (4.4 in.) from the lens. At the
maximum wide-angle position, the camera can focus on subjects as close as4 cm (1.6 in.)
from the lens.
Hue can be adjusted in the range of the slider displayed on
oI
the left in the monitor. Pressthe rotary mufti selector • to _
b,u,sh. hehueett,ng,saved,nthecamera'memor even
after the camera isturned off. g_]
AF area mode is set to Manual and the focus area in
which the camera focuses can be selected (_]] 53). Press L_:>2s_
the _) button and then move the focus area by rotating
the rotary mufti selector or by pressing •, V, ,, or i_.
To change settings for any of the following functions, first press the _) button to cancel
focus-area selection, then change the settings as desired.
- Hue
- Self-timer
- Exposure compensation
• The camera focuses continuously until the shutter-release button is pressed halfway to
loci< the focus.
• As images are easily affected by camera shake, be sure that Vibration reduction
(1_] ] 78) is enabled and hold the camera steadily.
(_) Off* 0.0_
Other settings can be selected.
71

o
oo
SCENE-) _ Museum
Useindoorswhereflashphotography isprohibited (for
example,in museumsand art galleries)or in other settingsin
which you do not wantto usethe flash.
• Camerafocusesonthe subjectat the centerof theframe.
• BSS(bestshot selector)can beenabled(_ 82).
• Asimagesareeasilyaffectedby camerashake,besurethat
Vibration reduction (_ 178)isenabledandhold thecamerasteadily.
• AF-assistilluminator (_ 181)doesnot light.
...._ .... Off* Off*
* Other settingscan besdected.
SCENE -) I]:ii._FireworksSh0W [_
Slowshutter speedsareusedto capturethe expanding burst
of lightfrom a firework.
• Camerafocusesatinfinity.Thefocusindicator (_ 6)always
glowsgreen whenthe shutter-releasebutton ispressed
halfway.Note,however,that objectsin the foreground may
not alwaysbein focus.
• AF-assistilluminator (_ 181)doesnot light.
• Only thefiveoptical zoom positions shown onthe right
can beapplied.When thezoom control isrotated,zoom
will not stop atany position otherthanthe five indicated
(digitalzoom isavailable).
0.0
(_J:Use of a tripod isrecommended in sceneswith which _] isindicated, SetVibration reduction
72 (_ ] 78)to Off when using a tripod to stabilize the camera.

SCENE_ II Black and Whitecopy
Provides dear images of text or drawings on a white board or
in print.
• Camera focuses on the subject at the center of the frame.
• Use macro mode (_ 39) to focus at short ranges.
• Colored text and drawings may not show up well.
off* off* 0.0"
* Other settingscan beselected.
SCENE _ ]_:lPan0rama
Use this mode to take panorama pictures.
From the screen displayed after the _ Panorama scene mode is selected, select Easy
panorama or Panorama assist.
•Easy panorama (default setting): By simply moving the camera in the desired direction,
panoramas that can be played back using the camera can be taken.
--> "Shooting with EasyPanorama" (_ 75)
--> "Playing Images Captured with EasyPanorama" (_ 77)
•Panorama assist: Use this setting to take a series of pictures while confirming how each
image will connect to the next. After transferring the images to a computer, the images
can be joined by using the supplied Panorama Maker 5 software ([_ 161).
--> "Shooting with Panorama Assist" ([_ 78)
Off2 Off1 0.03
1 Can be changed when using Panorama assist.
2 Self-timer can be used when using Panorama assist.
3 Other settings car] be selected.
o_
S
o
oo
[] Note on Printing Panoramas
When printing panoramas, the entire image may not be able to be printed depending on the
printer's settings, Additionally, printing may not be possible depending on the printer,
See the documentation provided with the printer or consult the digital photo lab for details, 73

o
oo
74
SCENE-) _ Pet portrait
Use this mode when taking pictures of dogs or cats. When the
camera detects the face of a dog or cat, the camera focuses on
that face. Once the camera has focused, by default it
automatically releases the shutter (pet portrait auto release).
• From the screen displayed after the "_ Pet portrait scene
mode is selected, select Single or Continuous,
- Single: Images are captured one at a time.
- Continuous: Three images are captured continuously when a face isfocused on (at a
rate of about 1.8fps when image mode is [] 4000x3000). While Continuous is
selected, the I_) is displayed in the shooting screen.
• When the camera detects aface, a double border (focus
area) isdisplayed around the face, and the double border
glows green when the camera has focused.
The faces of up to five pets can be detected at the same
time. When the camera detects more than one face, the face
displayed largest in the monitor is framed by a double
border and the others by single borders.
• If no pet faces are detected, the shutter can be released by pressing the shutter-rdease button.
- If no pet faces are detected, the camera focuses on the subject at the center of the frame.
- When Continuous isselected, up to 24 images are captured continuously at a rate of
about 1.8fps (when image mode is setto [] 4000x3000) while the shutter-release button
is held all the way down. Shooting ends when the shutter-release button is released.
• Press the rotary multi selector • (_)) to change auto release settings.
-Pet portrait auto release (default setting): The camera automatically releases the
shutter when it focuses on the detected face. While Pet portrait auto release is
selected, the _ icon is displayed in the shooting screen.
-Off: The shutter is released only when the shutter-release button is pressed.
• Digital zoom is not available.
• AF-assist illuminator (_ 181) does not light. Button sounds and the shutter sound
(_) 183) are disabled.
• Depending on the distance of the pet from the camera, the speed of the pet's movement,
the direction the pet isfacing, the ambient brightness of the pet's face, etc., dog and cat
faces may not be detected and faces of other animals may be detected.
•Pet portrait auto release is automatically set to Off in the following situations.
- When five series of images are captured using auto release
- When the camera is turned back on after entering standby mode (_ 1g)
- When there is no remaining space in the internal memory or on the memory card
To continue using Pet portrait auto release to take more pictures, press the rotary multi
selector • (_£__))and change the setting again.
1 Can be set to Off. Self-timer (lOs, 2s) is not available.
2 Other settings can be selected.
0.0 2

Shooting with Easy Panorama
1Rotatethemodedia,to :--_-_'_'_T_. "/ 1
SCENE, press the MENU J,_i_] L
buttonand choose
I_ Panorama ([Z]]61), __IiI _)
2Choose EASYEasypanorama and press the
button.
3Choose_TDNormal (180°)or _ Wide (360°)
as the shooting range and press the _) button.
When tile camera is readied in the horizontal position,
the image size (width > height) is asfollows.
_ _..._TDNormal (180°): 3200 x 560 when moved
horizontally, 1024 x 3200 when moved vertically
- _ Wide (360°): 6400 x 560 when moved
horizontally, 1024 x 6400 when moved vertically
- When the camera is readied in the vertical position, the direction and the width and
height are switched.
4Frame the first edge of the panorama scene,
and then press the shutter-release button to
focus.
The zoom position is fixed at the widest position.
A grid is displayed in the monitor.
The camera focuses on the subject at the center of the
frame.
Exposure compensation (_ 40) can be set.
If the focus and exposure are not correct, try using focus lock (i_) 55).
75

o
oo
5Press the shutter-release button all the way,
and then remove your finger from the
shutter-release button.
D is displayed to indicate the direction the camera
movement.
6Move the camera slowly and straight in one of
the four directions, and begin shooting.
When the camera detects which direction it is moving in,
shooting begins.
A guide indicating the current shooting position is
displayed. ___
When the shooting position guide reaches the edge, Exposure compensation
shooting ends. guide
Example of camera movement
76
The operator, without shifting position, moves the camera horizontally or vertically
in an arc:.
Move the camera from one edge of the panorama range to the other, in about 1S
seconds for 180 ° shooting angles, and about 30 seconds for 360 ° shooting angles.
_1_ Notes on Easy Panorama Shooting
• The range of the image seen in the saved image will be narrower than that seen in the monitor at
the time of shooting.
• if the camera is moved too quickly or if the camera is shaken too much, an error will occur.
• if shooting is stopped before the camera reaches the haft way point in the panorama range, a
panorama image is not saved.
• if more than half of the panorama range is captured but shooting ends before reaching the edge
of the range, the range not captured is recorded and displayed in gray.

Playing Images Captured with Easy Panorama
Switch to playback mode (_ 30, 89), display an image
captured using easy panorama in full-frame playback
mode, and then press the _) button to display tile
short edge of the image using the entire monitor and
automatically move (scroll) the displayed area.
The image scrolls in the direction that was used when
shooting.
Rotate tile rotary multi selector to advance or rewind.
Playback controls are displayed at tile top of the
monitor during playback. Press tile rotary multi selector
or i_ to choose a control, and then press tile _)
button to use tile following operations.
_-- Tunc_iT'n'--"_ [Tc_T '_ ...................................
i
Rewind
Advance i
Pause
End i I!1 Switch to full-frarne playback mode.
Scrolling can also be performed by rotating the rotary multi selector.
o_
o
oo
_1_ Note on Easy Panorama Scroll Playback
The COOLPIX $91 O0 may not be able to scroll the playback of, or zoom in on, easy panorama images
captured with another make or model of digital camera. 77

F
o
oo
Shooting with Panorama Assist
The camera focuses on tile subject at the center of the frame. Use atripod for the
best results. Set Vibration reduction ([_ 178) to Off in setup menu (_ 169)
when using a tripod to stabilize the camera.
1Rotatethe mode dial to ........
button and choose __'F_'_/v: 1II
_Panorama(_[_]61). _ _.,_.:_ iE_
2Choose ASSISTPanorama assist and press
the _) button.
Panorama direction icons are displayed to show the
direction in which images will be joined.
3Use the rotary multi selector to choose the
direction and press the _) button.
SeEectthe direction in which images wiE] bejoined in the
completed panorama; right (D), left ((]), up (/'_), or down
The yellow panorama direction icon (D D) isdisplayed for
the current direction and the direction is fixed when the
_) button is pressed. The icon changes to the white fixed direction D icon.
If necessary, apply flash mode (_] 32), self-timer (_ 35), macro mode (_] 3g), and
exposure compensation (_] 40) settings with this step.
Pressthe _) button again to choose a different direction.
4Frame the first portion of the
panorama scene and take the first
picture.
One third of the image will be displayed as
translucent.
78

5Take the next picture.
Frame the next image so that one third of the
frame overlaps the first image, and press the
shutter-release button.
Repeat this process until the necessary
number of images has been taken to
complete the scene.
6Press the _) button when shooting is
complete.
The camera returns to step 2.
wNotes on Panorama Assist
• Set flash mode, selhtimer, macro mode and exposure compensation before taking the first
picture.They cannot be changed after the first picture is taken, images cannot be deleted, nor can
zoom or Image mode setting (_ 47) be adjusted after the first picture is taken.
• Shooting ends if the auto off function (_ 184) is activated, If the camera enters standby mode
during shooting, set Auto off to a longer setting,
[] _r_l_Ii==L Indicator
In panorama assist mode, exposu re, white balance, and focus for all
images in a panorama are fixed at the values for the first image in
each series.
When the first picture is taken, _1_=_ is displayed to indicate
that exposure, white balance, and focus are locked.
oo
[] Combining Images to Make a Panorama
Transfer images to a computer (_ 157) and use Panorama Maker 5 (_ 161) to join them in a
single panorama.
Install Panorama Maker 5 from the supplied ViewNX 2 CD.
[] More Information
See "File and Folder Names" (_ 199) for more h_formation. 79
Other manuals for CoolPix S9100
4
Table of contents
Other Nikon Digital Camera manuals

Nikon
Nikon Z 9 User manual

Nikon
Nikon Photomic FTN Finder User manual

Nikon
Nikon Coolpix L830 User manual

Nikon
Nikon Z 7 Quick start guide

Nikon
Nikon D3200 User manual

Nikon
Nikon VBA23001 Operating instructions

Nikon
Nikon COOLPIX S02 User manual

Nikon
Nikon COOLPIX L620 User manual

Nikon
Nikon Coolpix S6600 User manual

Nikon
Nikon D70s User manual