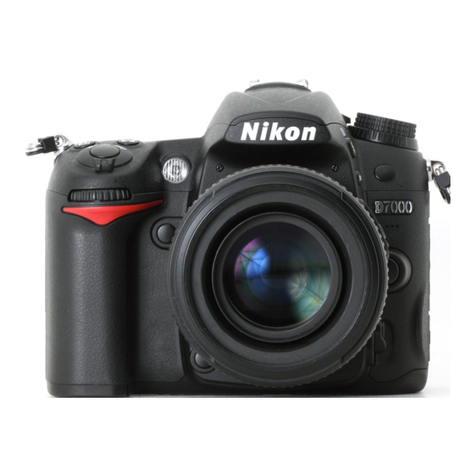
Nikon D7000 User manual

Page 1of 30
Nikon D7000 Camera Kit
-Checklist and Operations Manual-
July 31, 2013
SRQ Composite Squadron, FLWG, Civil Air Patrol

Page 2of 30
1.0 Equipment Pre-Mission Check
1.1 Open the camera case and verify the following items are enclosed
Nikon D7000 camera, MB-D11 Battery Grip, 18-105mm Nikkor lens, 50mm
Nikkor lens, UV filters and lens caps.
2 rechargeable camera batteries (one stored in the battery grip)
Nikon GP-1 GPS attachment with attached cable
Charger for camera batteries
Instruction manuals for D7000, GP-1

Page 3of 30
D7000 Camera
Battery Grip
Lens Cover & Lens Shield
(lens Shield not used)
SD Memory Card
Battery Charger and Battery
Battery

Page 4of 30
Adapter for 4 AA Batteries
(use when rechargeable
batteries are discharged)
GP1 GPS Adapter
USB Cable
50mm F1.8 Lens
1.2 Charge Camera Batteries
To remove the battery pack from the camera body, open the door on the bottom of the
camera by moving the release lever. When the battery access door opens, move the
yellow release lever until the battery pack pops free. There is one battery pack in the
battery grip. To remove the battery pack from the battery grip, pull the release ring out
and turn counter-clockwise to open the battery grip. Slide the insert out and remove
the battery by pressing the button marked “push” and slide the battery free. Charge
each battery pack, one at a time, and bring the batteries to full charge. The indicator
light will flash during charging. When fully charged, the light will illuminate
continuously.

Page 5of 30
Battery Compartment Release
Battery release lever
Battery Grip Release Tab
Battery Pack Tab Marked “push”

Page 6of 30
1.3 Nikon D7000 Camera Pre-mission Initiation
Verify the Camera is turned off
Mode Selector On/Off Switch
Install memory cards
(cards may already be in the camera) by moving the door located on the right side of the camera and
pushing it slightly toward the rear of the camera to open the memory card access cover. The cards are
installed by gently pushing the card in until it clicks in place. A light located on the back-right of the
camera will briefly illuminate to confirm the card is seated. The card can be removed by pushing the
card in and it will pop out. Two 32 GB cards are furnished with the system.
SD Memory Cards Memory Card Access Cover

Page 7of 30
Set the lens autofocus switch to AF Set the camera autofocus switch to AF
Just to the left of the camera AF switch is the lens optical
stabilizer switch (OS). Place this switch to ON.
Rotate mode switch to "S".
The Mode switch is located on the top-left side of the camera.

Page 8of 30
Install the Nikon GP1 GPS
If the cable is not attached to the GP-1, insert the smaller connector into
the GP-1 while lining up the arrows on the GP-1 and cable. Push it in
until it snaps in place hiding the arrows.
The other end of the cable goes into the GPS port on the camera. The
arrow on the connector should face the back of the camera. Slide the
connector all the way in. It does not snap in place.

Page 9of 30
Insert camera batteries
The D7000 body holds one battery. The MB-D11 holds one battery. The
D7000 will operate properly without the MB-D11. The MB-D11 extends
operation time. If the MB-D11 Battery grip is attached, it must be
removed before replacing the battery in the camera body. At the back of
the MB-D11 is a wheel labeled “lock”.
To remove the MB-D11 turn the wheel to the left and the battery grip
will separate from the camera body.
With the MB-D11 removed, the battery compartment on the D7000 is
located on the bottom of the camera. Move the battery compartment
release toward the middle of the camera and the battery door will open.
With the door open, move the yellow release until the battery pops up.
To install a battery, with the battery door open push the battery in until it
snaps in place. Close the battery door, and attach the MB-D11.
The MB-D11 holds one battery. To access the battery compartment, pull
the release tab located on the side of the MB-D11. With the tab straight
out turn the tab in direction of the green arrow. The battery compartment
will slide out and expose the battery. To release the battery, push on the
tab labeled “push” and the battery will slide free. To install a battery,
slide the battery with the contacts down until it snaps into place. Then
slide the compartment into the MB-D11 and turn the release tab to lock
in place.
The MS-D11 also has an accessory that replaces the rechargeable battery
compartment with one that holds 4 AA batteries. Observe proper polarity
when installing batteries. The compartment slides in place in the same
manner as the standard rechargeable one. Photos on page 5
Page 10 of 30
Remove Lens Cap
Turn on the camera
Check Batteries
Note: the battery symbol above shows the status of the battery in use. When two batteries
are installed it is better to follow the procedure below to check battery status.
Press the "Info" button to turn on the Monitor.
The following will show on the Monitor. Both batteries are shown;
the active battery (chosen by the camera) and the standby battery.

Page 11 of 30
Reset the camera
Press the “=/-” button (green dot)
and the “QUAL” button (green dot).
Hold both until the top display blinks
Set Shutter Speed
Turn the rear adjustment wheel until the shutter speed reads 1000

Page 12 of 30
Set Auto ISO
Press the left arrow on the Multi Selector to return to the main menu, then press
the down arrow key to find the “shooting” menu. Press the right arrow and then
move down to “ISO sensitivity settings”. Press the right arrow twice and set
ISO sensitivity to 200 by moving up or down to 200 and press OK. . Press the
left arrow and move down to “Auto ISO sensitivity control”. Press the right
arrow then up so that “on” is highlighted. Press OK. Press down twice to
highlight Minimum shutter speed. Press the right arrow key once. Move up or
down until 1/1000s shutter speed is highlighted, the press OK.
Press the left arrow on the Multi Selector
to navigate the various Menu screens. Press the
up and down keys to find the "Play Back"
menu. Press the right key and then the up and/or
down keys, to select the Delete Menu. Press the
right key to select the Delete Page and then
move the up and/or down keys to select All All.
Push the right key and then the up and/or down
key to select "Yes" on the Delete All screen and
then push the OK button. All images on the
memory card will be erased.

Page 13 of 30
Set Photo Quality
Press the left arrow to return to the shooting menu, then press the down arrow
to choose “Image quality”. Press the right arrow key then the up arrow to
highlight “JPEG fine”. Press OK.
Check Camera Settings
Press the Info button to bring up the Monitor Screen. The screen should look
similar the one shown here.
Shutter Speed Priority GPS Locked Number of Exposures (x1000) Battery Indicator
Note: The GPS may not lock inside of a building. Outside, it may take up to five minutes to
get the GPS locked indication! See section 1.5 for more detail.

Page 14 of 30
1.3 Photo Check
The following is best done outside. Make sure the GPS indicator shows “locked”.
Then, take a photograph of anything; scenery, airplane,
automobile, people, hanger. .. etc. Hold the shutter button down half way for a second
to allow the lens to auto-focus. Press the shutter button all the way down to take the
photo
Check the results.
Press the Playback button.
The picture will appear on the
Monitor.
The photo should be sharp and
properly exposed.
Push the Multi Selector "up" button to
see the shooting data display. The
display shows the f-stop, shutter
speed, ISO value, lens focal length
and an icon confirming the camera is
set to the shutter speed priority mode.
Press the Multi Selector "up" button
one more time to view the latitude,
longitude, altitude, and time and date.
Presence of this data shows that the
GP-I GPS is working correctly. Note
that altitude is in meters.

Page 15 of 30
Delete the photo
Press the delete button twice to delete
the photo just taken
1.4 Lenses
Changing Lenses
The 18-105 mm lens is used for most situations, but for route photography and Mapping
the 50mm fixed focal lens is included. To change lenses hold the lens release button while
turning the lens clockwise. After removing the lens replace the lens caps.
Lens release Button
To attach a lens line up the white dots and slide the lens into the body then turn counter
clockwise until it clicks.

Page 16 of 30
50mm Lens
When using the 50mm the f stop ring must be locked in the f22 position. Make sure the f
stop ring is in the f22 position, and that the locking tap moved toward the camera body.
When the tab is correct, the two yellow dots line up as shown.
1.5 Using the GP1 GPS
Turn on the camera at least 15 minutes before taking photos to allow the GP1 to initialize.
The light on the rear of the GP1 will change from flashing red to solid green to indicate that
it operational. Do not turn the camera off until you are finished taking photos for the sortie
since once turned off the unit will take several minutes to initialize.

Page 17 of 30
Interval Timer Operation
For missions requiring photos taken at timed intervals, the D7000 has a
built-in timer. To access the timer controls, press the menu button, and
use the arrow keys to move up or down to the shooting menu. Press the
right arrow key, then press the up or down arrow keys to reach the
interval timer shooting menu.
1. To start shooting immediately, highlight now and press the right
arrow key. Shooting begins about 3 seconds after settings are complete.
Skip down to step 3.
2. To choose a starting time, highlight Start Time and press the right
arrow key to display the start time options. Press the right and left
arrow keys to highlight hours or minutes and use the up and down arrow
keys to change.

Page 18 of 30
3. Choose the interval. Press the left and right arrow keys to highlight
minutes or hours and press the up and down arrow keys to choose an
interval longer than the slowest anticipated shutter speed. Press the
right arrow key to continue.
4. Choose the number of intervals and number of intervals and
number of shots per interval. Press the right and left arrow keys to
highlight the number of intervals or number of shots, then press the up
or down keys to change. Press the right arrow key to continue.
5. Start shooting. Highlight On and press OK (to return to the
shooting menu without starting the interval timer highlight Off and
press OK). The first series of shots will be taken at the specified
starting time, or after about 3 seconds if Now was selected for Choose
start time in Step 2. Shooting will continue at the selected interval
until all shots have been taken. Note that because shutter speed and the
time needed to record the image to the memory card may vary from shot
to shot, the interval between a shot being recorded and the start of the
next shot may vary. If shooting cannot proceed at current settings, a
warning will be displayed in the monitor.

Page 19 of 30
2.0 Pre-Mission Planning
2.1 Identify Customer Requirements
The flight crew needs the following information to assure successful acquisition of the aerial
photographs required by the customer:
Type of mission. The major types are:
Spot Photography
Route Photography
Photographic Mapping
Location
Target location(s) for spot photography and type of pattern to be flown
Beginning and end of a route (highway, shoreline, river)
oPercent of successive photo overlap
Corner point coordinates defining area for photographic mapping
oAmounts of successive photo overlap and parallel photo overlap
Ground level coverage of each photograph (how many feet wide and how many feet deep)
Camera pointing angle (how many degrees down from the horizontal)
Resolution at ground level at the center of the photograph
2.2 Translate customer requirements into specific photographic shooting parameters to
include:
Altitude above ground (AGL)
Aircraft speed
Camera pointing angle
Lens focal length
Time between photographs (required for route photography and photographic
mapping)
Altitude above ground level (AGL)
1200 feet AGL is an ideal altitude for aerial photography; the closer to the ground, the less
build-up of haze and thus a clearer photograph. Higher altitudes allow for more ground
coverage per picture but at lower ground resolution.

Page 20 of 30
Aircraft Speed
At 90 Knots, the aircraft moves 150 feet per second. This is a good speed for aerial
photography.
Camera Pointing Angle
Camera pointing angle is the angle below the horizon.
In a Cessna 182 or Cessna 172 with a photo window it is not possible to get a pointing angle
much greater than 45 degrees. Smaller angles result in the photos being greater in extent
perpendicular to the direction of flight and thus lower resolution at ground-level. Haze also
becomes more significant at smaller pointing angles. 45 degrees is an excellent choice
although 30 degrees is a reasonable compromise.
Setting Camera Pointing Angle
Taking photos with a consistent pointing angle requires the use of a monopod. The
following pictures show how one squadron sets the pointing angle using a locally fabricated
guide. The guide shown is for 45 degrees.
Camera mounted to monopod. Mono pod rests on seat. Lens set to 45 degrees
Ponting angle set using guide. Photographer holds monopod so camera does not rest against
the photo window
Other manuals for D7000
12
Table of contents
Other Nikon Digital Camera manuals

Nikon
Nikon D7000 User manual

Nikon
Nikon COOLPIX S1000pj User manual

Nikon
Nikon COOLPIX AW120 User manual

Nikon
Nikon Coolpix B500 User manual

Nikon
Nikon Coolpix P600 User manual

Nikon
Nikon Coolpix P530 User manual

Nikon
Nikon D200 User manual

Nikon
Nikon Coolpix S3100 User manual

Nikon
Nikon CoolPix P500 User manual

Nikon
Nikon D5200 User manual

Nikon
Nikon Coolpix 880 User manual

Nikon
Nikon 25432 User manual

Nikon
Nikon Coolpix L20 User manual

Nikon
Nikon D3400 User manual

Nikon
Nikon Coolpix L30 User manual

Nikon
Nikon TIRF User manual

Nikon
Nikon COOLPIX 5200 User manual

Nikon
Nikon D3000 User manual

Nikon
Nikon D90 - Digital Camera SLR User manual

Nikon
Nikon D5300 User manual