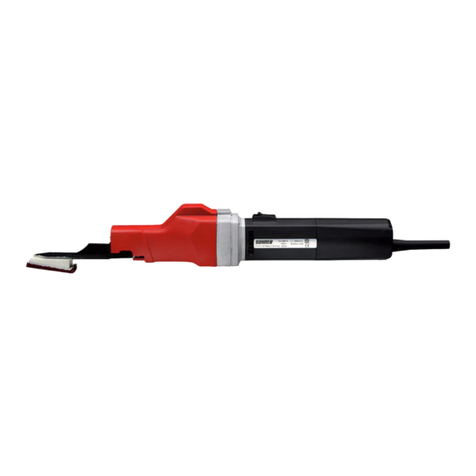
NIPPY NP-S7B Ski-mini User manual

NP-S7B Ski-mini
INSTRUCTION MANUAL
(AC100V-240V)

◆◆◆ table of contents ◆◆◆
1.Before using ・・・1
2.Name of parts ・・・3
3.Operating Instruction(How to adjust each part)
(1)How to skive ・・・4
(2)Thickness adjustment・Presser foot handle set ・・・4
(3)Adjustment of presser foot angle(Diagonal skiving method)・・5
(4)How to replace presser foot ・・・5
(5)Blade replacement ・・・6
(6)Feed roll adjustment ・・・6
(7)Position adjustment of spring tension adjustment lever ・・・7
(8)Removing the feed holder frame ・・・7
(9)Fuse replacement ・・・8
(10)Switching between operation switch and foot pedal ・・・8
(11)How to operate the foot pedal ・・・9
4.Abnormality of machine and its cause and adjusting method
・・・10
5.Specifications ・・・12
6.PRODUCTWARRANTY ・・・12

1
1.Before using
■Safety Precautions■
◆Readthis"SafetyPrecautions"carefullybeforeuse.
◆Afterreading,keepwhereyoucanseeatany time.
WARNING
Riskofdeathorseriousinjuryform improperuse.
⚫UseonlyAC100V-240V.
⚫In thefollowingcases,turnoffthe powerswitch andunplug.
☑Whenleavingthemachine.
☑After usingthemachine.
☑Whena powerfailure occursduringuse.
☑Whenabnormality,afailureoccurs.
⚫Forthe preventionof electricshock,shortcircuit andfireaccident,do not applyexcessive
force to thecable duringuse.
⚫Fortheprevention ofelectricshock,shortcircuitandfireaccident, Donotconnect overloading
anelectrical circuit.
⚫Openingthecovermaycause anelectricshock, Donotopen the cover.
⚫Do notuseorkeepmachineout ofwater,extreme humidity(70%ormore)oroutdoors.
⚫Do notusenearvolatilecombustibles.
⚫When unplugging the powerplug,holdand unplug thepowerplug,notthecord.
⚫Do notblockthevent.Heatmaybuildupinsideandcausefire.
CAUTION
Riskofinjuryordamagetopropertyfrom improperuse.
⚫Usethe machine ona stable platformorafterinstalling ona table.
⚫Ensure enoughbrightness.
⚫Do notusein directsunlight
⚫Forthe preventionof personalinjury,donotputyourfingeronthecuttingedge.
⚫If takingthetrash,besuretoturnoffthe mainpowerbeforetaking it.
⚫Keepawaythismachine form children.
⚫Neverdoremodelingofthemachine,separating.
⚫Do not regrindthebroken bladeand useitagain.
⚫Forthe preventionof personalinjury,donotusetheLeatherskivingmachinefor anything
otherthanitsintendeduse.
⚫Whenreplacingblade,besuretoturn offthemain power.
⚫Useatroom temperatureof5 ℃to35 ℃.
⚫Storeat roomtemperatureof-10°C to 45° C.

2
■Handling Instructions■
⚫Do notburdenthemachine.(extremely thickorhard)
⚫Do notusewhereitgetswet.Avoid using wethands.
⚫Becarefulnotto touchthe cuttingedge whenreplacing blade.
⚫Keepyourfingers awayfrom the blade whileoperating.
⚫Notto giveexcessiveshocksuch asfalls.
⚫Do notoperate with the presserfootincontact withtherollerorcutter.
⚫Do not operate the roller in contact with the blade.(It may cause the blade to chip or the
sharpness todeterioratequickly.)
⚫Do not stop the processed product and keep moving the skiving Machine.(It will cause the
sharpness todeterioratequickly)
⚫Neverruncontinuously formore than15minutes.(interval45 minutes)
⚫Besure tokeep the cardboard boxesthatthemachine wasin.
➢(Itis usedwhenshipping toourcompanyif thereisaproblem.)
■Safety device■
⚫Spindlemotor・Feedmotor
✓There is a safety device that automatically shuts off the machine when a certain load is
applied.
✓Once the safety device has been activated, turn off the main power and remove the one
withtools that caused the overload.
✓Atthis time,becarefulnottotouchthebladewithyour hands.
✓If itcan beconfirmedthatithasbeenremoved,turnonthemainpoweragainandcheckthat
theindicatorlamp is lightingreenbefore restartingoperation.
⚫Maincircuit
✓If thecircuitisshorted,the fusebuiltintothe mainunit willblow.
✓If thefuse isbroken, replaceitwithanewone. Referto8page“ Fuse Replacement”.
■Makesure tocheckthe followingitemsbeforework■
⚫Checkifeach part hasnoloosescrews.
⚫Checkthat thebladeandpresserfootare firmlyfixed.
⚫Check if the presser foot is not in contact with the bladeor roller and the roller is not in contact
with the blade.
⚫Adjustmentthethicknessintrialandthenworkonit.

3
2.Name of parts
power jack
fuse holder
foot pedal
lock
Green light : Operationcondition
Lamp display
status
foot clamp screw
main power
dust box
flat spring
angle adjustment screw
guide
Presser foot
power switch
table
guard
spring tension adjustment lever
feed roller
blade
thickness adjustment screw
arm
presser handle
feeding holder frame
adjustment screw
indicator lamp

4
3.Operating Instruction(How to adjust each part)
(1)How to skive
①Turnonthe mainpoweronthe backofthemachine.(Whenthe powerison,theindicatorlamp
lightsupingreen.)
②Adjust the guide tothedesiredwidth.
③Adjustthepresserfoottothedesiredthickness(Refertothe followingfortheoperationmethod)
④Turnonthepowerswitch.
⑤Feedthematerial between thefeed rollerandthepresserfootwhile keepingitalong the guide.
(2 )Thickness adjustment・Presser foot handle set
Turnthethicknessadjustmentscrewtotheright,thepresserfootapproachestheblade.
Turn to the left, wider distance from the blade. (The presser foot moves up and down by 1
mminonerotation.)
By raising and lowering the presser handle, it is possible to raise and lower the presser foot
with one touchwithoutchangingthethicknessadjustment.
When skiving from the middle of workpiece or workpiece gets between feed roller and the
blade,itisusefulfor removalwork.
①Whenskivingthinly
Thethicknessadjustingscrew isturned ontherightdirection.
②Whenskivingthickly
Thestepsof①aboveshouldbe performed inreverse order(left direction).
Thin
Thick
the thickness adjusting screw
feedingdirection
presser foot
material
feed roller
table
skiving debris
finished material
blade
guide
feedingdirection
material

5
( 3 )Adjustment of presser foot angle(Diagonal skiving method)
①Replacewith the 20mmwidth plasticpresser footincluded intheaccessories.
※The20mmwide presserfootisalready 15° angled comparedtothe40mmone.
②Whenturningtheangleadjustmentscrewleft orright,changesthedistancebetween the
presserfootandthe bladeandadjusttoanyangle, fix firmlywith lock nut.
(WhenTurned totheleftwith anangle.When turnedtothe right,itapproachesparallel.)
③Afterchangingtoanyangle,adjustthepresserfootupanddownwiththe thicknessadjustment
screw.
Atthis time,the presserfootisloweredtoomuch,becarefulnottotouchthe feed roller.
④If theangleandupperandlowerposition isdecided,passthroughthematerialasusual.
(Precaution)
Too muchangle,note thatthe feedforceofthe materialwillbeweak.
( 4 ) Howto replace presser foot
①Raise thethicknessadjustingscrew upward, remove the presserfoot fromtheblade,shiftthe
flatspring.
②Loosen theknurled screw ofthepresser foot andremovethe lockand removedtogetherwith
thepinfor presser foot.
③Remove thetwo setscrewsontherightside ofthepresserfoot, replacetipattachment.
④Attach thereplacementpresserfootbya reverseprocess.
(Precaution)
Thereplacedpresserfootmust besecurelyfixed.Thethicknessadjustingscrewis fastenedtoo
tightlyandit mayimpairthefeedrolland the presser foot.
The thickness adjusting screw must be loosened in advance and replace. Then tighten the
thickness adjustingscrewandadjustthe presserfootheight.
loosen
angled
lock nut
angle adjustment screw
presser pin
flat spring
shifttothe side
remove
lock
Plastic presser foot
(base material)
Presser foot accessory parts

6
( 5 ) Blade replacement
①Turnoffthemainpower.
②Loosen thescrewoftheguardwith the accessorydriver, remove the guard.
③Loosenthebladefixingscrewwiththeaccessorydriver, remove thebladeholder.
④Replacethebladeandassembleinthereverseprocess.
(Precaution)
・Workcarefullynot totouch the cutting edge.
※Ifyoutouchedge ofblade,pleasewear protective glovesetc.
・Workcarefullynottodropthe removedscrewinside themachine.
・Tighten the blade fixing screw little by little alternately to the left and right, tighten firmly at the
end.
(6 )Feed roll adjustment
Thefeedrollandblade’s spaceis properlyadjusteddependon
thethickness ofaworkpiece.
Turningtheadjustment screw to the rightincreases thedistancebetween the rollerand theblade,
turntotheleft tonarrow.
Oncetheposition isdetermined,turnthe lock nutand fixtheadjustmentscrew.
(Precaution)
Notto contact between the roller and the blade,the stop position atthe stopper is the upper limit
position.
go down
guard
push forward and pull
up
guard
blade holder
blade
blade fixing screw
stopper
blade holder
lock in
lock nut
adjustment screw
roller
blade
go down
presser foot

7
(7 )Position adjustment of spring tension adjustment lever
①Whenahard workpieceisskived
Pull the spring tension adjustment lever forward and hang in the back groove, strengthen the
force of the spring.
②Whenasoft workpieceisskived
Hanginthefrontgrooveofthespringtensionadjustmentlever,weakentheforceofthe spring.
( 8 ) Removing the feed holder frame
①Pulloutthedust box.
②Hookthespringtensionadjustmentleveronthesideofthe stopper.
③Loosen thescrews ofinnercover withtheaccessorydriverandremovethe cover.
④Loosen the center set screw with the accessory hex wrench and pull the center pin
sideways while supporting the feed support frame with your hand, the feed support frame
willberemoved.
⑤After pulling out the feed support frame, disconnect the feed motor harness from the
connector.
⑥Assembleinthereverseprocess.
strength
weak
spring strength by groove position
stopper
dust
box
center pin
inner cover
spring tension adjustment
lever
center set screw
feed support frame
connector
pullout

8
( 9 ) Fuse replacement
①Turnoffthemainpowerandunplugthepowercord.
②Pulloutthefuseholderofthepowerjack.
③Replacea newfuse,assemble in thereverse process.
Useacommercially available 5A, 250Vminiatureglasstubefuse.(φ5.2×20mm)
➢Thefuseholderisattached ina spare fuse.
(10 )Operation switching between run switch and foot pedal
There isoperation switchingbetweenrunswitch andfoot pedalonthebackofthe main unit.
Theupperside isthe foot pedal,and thelowerside istherun switch.
(Precaution)
Note that when switching to the foot pedal, if you hold down the pedal, it will start moving
immediately.
Note that if the power switch is operation mode, it will start moving immediately when you
switched it.
【Stop the back switch ⇒Operation】
power jack
fuse holder
fuse
main power
fuse holder

9
Switchingoperation
Operation
Behavior
Set the backswitchtothe
runswitch
Presstherunswitch
Startoperation
Pressthefootpedal
No reaction
Set the backswitchtothe
footpedalside
Presstherunswitch
No reaction
Pressthefootpedal
Startoperation
(11 )How to operate the foot pedal
Takeoutthefootpedalfromtherightsideand installthepedal inanypositiontouseit.
Avoidtheplace wheresteppingerrorsare likelytooccurorplacesthatare pronetocollapse.
Makesure thebackoperateswitching isonthe footpedalside.
It onlymoveswhile with themain poweronandpressingthefoot pedal.
Byturningthe footpedalon/off,youcan controlthefeedspeed.It isuseful when youwantto
workonacurveorslowly.
(Precaution)
Do notbendthecableforcibly.
Theplugisn’t removable.
foot pedal
cable
plug

10
4.Abnormality of machine and its cause and adjusting method
Abnormality
Cause
Adjusting method
Work piece does not enter
themachine smoothly
The up and down space between presser
footandthebladeiswide
Thintheskiving thickness,because it istoothick
The space between the feed roll and the
blade iswide
Bring the feed roller as close to the blade as
possible
The space between the feed roll and the
blade isnarrow
When a work piece is thick, lower the feed roll little
bylittle
Thebladedoesn’t cut well
Replacewithanewone
Spring tension adjustmentlevertoo strong
Weaken spring tension adjustment lever as much
aspossible
Thesurfaceofthepresserfootiswornout
Replacewitha newone
Slippageof presserfootis bad
ApplyTeflontapetothepresser footslidingsurface
Leather does not enter
between presser foot and
flatblade
The up and down space between the
presserfootandthebladeis narrow
Increasethespace betweenpresserfootandblade
The space between the feed roll and the
blade isnarrow
Increasethespace betweenfeedroll andblade
Leather isn’t skiving
(orcleanly)
Thebladedoesn’t cut well
Replacewitha newone
The up and down space between the
presserfootandthebladeis wide
Thintheskiving thickness,because itis toothick
Wavy stripes are present
ontheskivedsurface
The edge of the blade is partly broken or
thebladedoesn’t cut well
Replacewitha newone
Thebladeisnotcompletelyfixed
Tightenthe bladeholderscrew
Anskivedportions
areleft
Thepresserfootisnotcompletelyfixed
Thesetting screw forthepresserfootis loose,fix the
presserfootnottomove
Thepresserfootcontactswiththefeedroll
Loosen the thickness adjusting screw, and raise the
presserfoot
Uneven portions existon the feedroll
Thefeedrollisdefective,replace theroll
Not pushing the center pin of the feed
supportframecompletely
Push the center pin completely and tighten center
setscrew

11
Abnormality
Cause
Adjusting method
Work piece goes under the
blade
The space between presser foot and the
blade isnarrow
Thicktheskivingthickness,becauseitistoothin
Thepresserfootisbelowthe bladeedge
Raisethepresserfoot
The space between the feed roll and the
blade istoowide
Bringthefeed rollclosertotheblade
Thesharpness ofthe bladeisbad
Replacewithanewone
The spring tension adjuster is too device is
tooweak
Strongthe springtension adjuster
The skived scrap is rolled
upward
Thedustis fullofdustbox
Throwaway thedust
There are irregularities on the surface of
thefeedroll
Replacewithanewone
Thesharpness of the blade
gets worsesoon
stopping and running the processed
skivingpiece inthemiddleof work
Finish theprocessedproducttotheend
Skiving for something thick, hard or hard to
cut
When skiving something that is likely to damagethe
blade,replace withanewonefrequently
Bladedoesn’t move
Foreign matter is caught at both ends of
theblade
Because the safety device is working, Eliminate the
causeof overload(suchasthedust)
Mainpowerorpowerswitchisoff
Turnon main powerorpowerswitch
Spindlemotorfailure
Replacewitha newone
Power supplycircuitfailure
Requestrepair fromourcompany
The feed roll doesn’t move
Foreignmattersuchas shavingsiscaught
Because the safety device is working, Eliminate the
causeofoverload (suchasthedust)
Feedmotor failure
Replacewitha newone
Power supplycircuitfailure
Requestrepair fromourcompany
Cannotturnon
Powercordisnotstuck
Plugin thepowercode
Thefuseis blown
Replacefusewithanewone
Power supplycircuit failure
Requestrepair fromourcompany

12
MODEL
NP-S7B
Product
Number
Date of purchase
Warranty
period
1 Year
Customer
Address
Name
Tel
Store
5.Specifications
M O D E L
NP-S7B
Power source
AC100V –240V
R a t e d f r e q u e n c y
50/60Hz
P o w e r c o n s u m p t i o n
80W
Rate d t i m e
15min
U s e d f u s e
5A250Vminiatureglasstube fuse(φ5.2×20mm)
D i m e n s i o n s
H390×W330×D240mm
Standard skiving thickness
2.5mm(dependsonthetypeofleather)
W e i g h t
10.5kg
Ac ces so rie s
・Feedfootpedal
・Presserfoothandleset
・2kindsofPlasticpresserfoot(40mm、20mm)
・Powercode(Plug:AtypeorCtype)
・Blade5pcsset(forreplacement)
・Screwdriver, 2kindsof Hexwrench
・INSTRUCTIONMANUAL(thisdocument)
6.PRODUCT WARRANTY
●Spareparts(blade,feed roll,presserfoot)areoutofcompensation
●Malfunction occurred in wronguseorcarelessnesssuchasfalls
●Repair orremodelingexcepttheregularstore
●The damageby anatural disaster suchasfire,earthquake,storm,flood damage,thunderbolt and
abnormalvoltage
We will repair the product without charge for any failure that should occur in normal use for 1 year after
purchaseshowingthiswarranty.Inthe case of follows,itis chargedwhether they occur during the warranty
periodornot.
WARRANTY

MEMO

Aug. 2022
■MANUFACTURE AND SALES■
NIPPY KIKAI CO., LTD.
767-1 Shimomiyaki-cho, Kasai, Hyogo 675-2105 Japan
TEL: +81-790-49-1414 FAX: +81-790-49-2266
E-mail: info@nippy.jp URL: http://www.nippy.jp/
Table of contents
