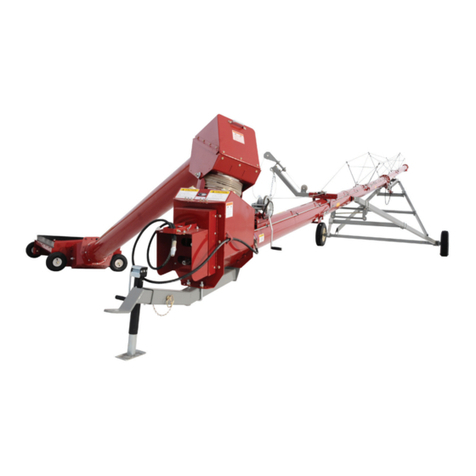
Meridian HARVEST T852 User manual

Read this manual before using product. Failure to follow
instructions and safety precautions can result in serious
injury, death, or property damage. Keep manual for future
reference.
T852

T-Series Augers:
Important Notes
At 15-20 miles, tire lug nut tightness
and wheel hub temperature need to be
checked.
At 50-60 miles, check these a second
time.
For all models, the maximum transport
speed is 45 mph.
2

Harvest by Meridian thanks you for your purchase of the best quality auger on
the market. We are proud to have you on our team. Our equipment is
manufactured in the United States of America and is made to improve your
farming operation. Before you operate this auger, we advise that you read this
manual and familiarize yourself with each of the features. Please take all the
precautions necessary for an e!cient and safe operation. Harvest by Meridian
recommends that anyone using this auger read the operational manual and
sign on the sheet provided below. This is to be kept for your record keeping.
Date
Employee Name
Employee
Signature
3

TABLE OF CONTENTS
1.Introduction______________________________________________________________5
2. Safety First______________________________________________________________6
3. Transportation & Placement_____________________________________________7
3.1 Before Transporting Your Auger___________________________________7
3.2 Transport Procedure_______________________________________________8
3.3 Placement of Auger________________________________________________8
3.4 Final Placement__________________________________________________10
3.5 Lowering the Auger______________________________________________10
4. Operation______________________________________________________________12
4.1 Pre-Operation Checklist__________________________________________12
4.2 Auger Drive & Lockout___________________________________________13
4.3 Start Up & Break In_______________________________________________13
4.4 Everyday Operation______________________________________________14
4.5 Shutting Down the Auger_________________________________________15
4.6 Completion & Cleanup___________________________________________15
4.7 Lowering the Auger______________________________________________16
5. Hydraulics_____________________________________________________________17
5.1 General Information______________________________________________17
5.2 Cylinder Hydraulics______________________________________________18
6. Storage & Maintenance_________________________________________________19
6.1 General Maintenance_____________________________________________19
6.2 Storage of Auger_________________________________________________20
7. Appendix & Forms_____________________________________________________21
T0852 Lubrication Requirements_____________________________________21
T0852 Parts Book____________________________________________________25
Warranty Policy & Forms______________________________________________34
4

1. Introduction
Congratulations on your choice of a Harvest by Meridian auger! This
equipment has been designed and manufactured to meet the needs of
the discerning buyer.
Safe and e!cient operation of your auger requires that you, and anyone
else who will be operating or maintaining the auger, read and understand
the safety, operation, maintenance, and troubleshooting information in
this manual.
Keep this manual handy for frequent reference and to pass on to new
operators or owners. Call your Harvest by Meridian distributor or dealer if
you need assistance, information, or additional copies of the manual.
Always give your dealer the serial number of your Harvest by Meridian
Grain Auger when ordering parts or requesting service or information.
The serial number on your auger is located where indicated by the arrow
in the picture above. Please mark the number in the space provided
below for easy reference.
Model Number:_____________________________________
Serial Number:______________________________________
Production Year:_____________________________________

2. Safety First
Safety is a priority in your everyday work habit, especially if you work with
machinery. Whether you are an owner, an operator, or an employee, it is
your responsibility to know the operational requirements and safety
precautions of the machinery.
Why is safety important to you?
1. Accidents disable and kill.
2. Accidents cost.
3. Accidents can be avoided.
SIGNAL WORDS:
Note the use of the signal words DANGER, WARNING, CAUTION, and
NOTICE with the safety messages. The safety alert symbol identifies
imminent and potential hazards to personal health and safety. The
appropriate signal word for each message has been selected using the
definitions below as a guideline:
DANGER: indicates an imminently hazardous situation that, if
not avoided, will result in serious injury or death.
WARNING: Indicates a hazardous situation that, if not
avoided, could result in serious injury or death.
CAUTION: Indicates a hazardous situation that, if not
avoided, may result in minor or moderate injury.
NOTICE: Indicates a potentially hazardous situation that, if
not avoided, may result in property damage.
6

3. Transportation and Placement
3.1 Before Transporting your Auger .
Remove wheel chocks, so wheels are free to move.
DANGER:
If auger wheels are stuck in grain, mud, dirt, or snow. remove the
restraining substance from around the wheels before transport.
Failure to do this could cause damage to the auger, and serious
injury or death.
All T-series augers have minimum clearance positions
between 8’ 10” and 9’ 2” when in transport mode. Place auger in full
down position.
DANGER:
Electrocution Hazard! Make sure that all unauthorized personnel
are clear from the transport zone. This auger is not insulated. Be
alert to overhead obstructions and electrical wires. Electrocution
can occur without direct contact. Do not raise or lower auger until
hazardous area is cleared. Failure to maintain proper clearance can
result in serious injury or death.
Put hitch pin in place, and ensure that the safety chain is properly
attached. Use a type of hitch pin that will not allow the auger to detach
itself from the tractor. If you have questions about appropriate hitch pins,
contact your tractor manufacturer.
Put PTO driveline and swing hopper into transport position and lock into
place. If swing hopper is not in transport position, the hopper will be
damaged during transport.
Put jack in raised position and lock into place. Use caution when working
with hitch jack.
If you have a light package for your auger, make sure the connections are
fastened securely and not dragging on the ground.
7

3.2 Transportation Procedure _
Move auger with a tractor only. Never attempt to move by hand.
Under no condition should you allow riders on the auger or tractor.
Transport the auger no faster than 15 mph. When roads are rough or
surfaces are uneven, slow down to ensure safe travel.
DANGER:
Do not transport the auger on slopes greater than 20 degrees. This
could cause the auger to tip, resulting in damage to the auger, and
personal injury or death.
When visibility is reduced, please use caution and add extra lights to the
auger. Consider using a pilot vehicle for safer travel.
Use extreme caution when turning or cornering with the auger in tow.
Check regulations with local authorities regarding auger transportation.
Follow all over-width regulations. Equip auger with all necessary lighting,
and use hazard warning flashers on your tractor, when required by law.
When the T-series auger is released from the towing vehicle, test the
intake end for downward weight. Do not raise the intake end above the
drawbar height. This could shift the balance of the auger, causing it to
upend.
3.3 Placement of Auger _
Before raising or lowering your auger, check that the area is clear of
obstructions, children and unauthorized personnel.
DANGER:
Electrocution Hazard! Make sure that all unauthorized personnel are
clear from the transport zone. This auger is not insulated. Be alert
to overhead obstructions and electrical wires. Electrocution can
occur without direct contact. Do not raise or lower auger until
hazardous area is cleared. Failure to maintain proper clearance can
result in serious injury or death.
Ensure that your auger is on level ground that is free of debris.
8

DANGER:
If ground is very uneven, auger can tip and cause damage to the
equipment and personal injury or death.
WARNING:
Never position raisers of any kind under the wheels of the auger to
increase height. This includes pieces of wood, cement blocks,
bricks, etc. Attempting this could result in damage to the
equipment and personal injury or death.
Make sure that the hitch is secured to the tractor, and that all hydraulic
connections are tight and in good working condition. If there are any
leaks or damaged hoses, you must replace these before using your auger.
Replacement hoses and hose ends must have a minimum strength of
1900psi working pressure.
Make sure that the wheels of your auger are free to move before you raise
or lower your auger.
CAUTION:
If the auger wheels are buried in any type of material, do not
attempt to raise or lower the auger. Remove dirt, snow, grain, or
whatever other material is obstructing the auger before use.
Check that the valve on the hose to the lift cylinder is open. Double check
that the area above and around the auger is clear of obstructions. Raise
auger to desired height, and
close hose valve after auger is positioned.
WARNING:
If hose valve remains open, a loss of hydraulic pressure within the
tractor system will allow the auger to lower by itself; this could
cause damage to the auger and personal injury or death.
NOTICE:
Do not use the auger as a hoist or crane, no matter the size or
weight of the object being lifted. This will create an unsafe
condition and void your warranty.
9

3.4 Final Placement of Auger _
When you are ready to use your auger, place the auger in its lowered
position, and slowly back it up to your bin or storage facility, keeping an
eye out for any people or obstructions in the hazard zone.
DANGER:
Avoid any electrical wires and overhead obstructions. Electrocution
can occur without direct contact. Failure to listen to this warning
can result in personal injury or death.
Use tractor hydraulics to raise the auger into position. Slowly back the
auger into position until the spout is over the opening of the bin or
storage facility and use tractor hydraulics to slowly lower the spout into
the opening.
On T-Series augers, the winch should make a clicking sound when raising
the auger. If you do not hear the clicking sound, retain hold on the winch
handles, lower the auger, and repair the winch.
As soon as the auger is in position, the wheels of the auger must be
chocked on both sides. To prevent tipping, anchor or support the auger
during operation.
On T-series augers, the PTO driveline is a non-separable type. Remove
the PTO from the tractor and secure it in the transport mode before
moving tractor away from auger.
3.5 Lowering the Auger _
Attach auger to tractor, making sure that your hydraulics are also
attached to the tractor. Raise the auger, to ensure that the outlet end is
above the bin or storage facility. Remove wheel chocks and ensure area is
clear of personnel and obstructions.
Drive forward, pulling auger slowly away from the bin or storage facility.
Be sure that the wheels are free to move, and lower the auger. Make sure
auger is in full down position before proceeding.
10
Table of contents
Other Meridian Tools manuals

Meridian
Meridian HARVEST T Series User manual

Meridian
Meridian HARVEST T862 User manual

Meridian
Meridian HARVEST H1392 User manual

Meridian
Meridian SLMD Series User manual

Meridian
Meridian HVST H10 Reference manual

Meridian
Meridian HARVEST T832 User manual

Meridian
Meridian HARVEST T1342 User manual

Meridian
Meridian HARVEST H13112 User manual

Meridian
Meridian SLMD10 Guide

Meridian
Meridian HARVEST H10 Series User manual