Nivel 5070 User manual

FNR Switch Assembly
Part # 5070
TOOLS NEEDED
We recommend professional installation. If you choose to not have
this product installed by a professional, we highly recommend that
you exercise caution, care, and patience when installing this product.
For E-Z-GO TXT Electric 94-Up
Always wear appropriate eye protection
Your Complete Source
• 1/2” Socket
• 3/8” Socket
• 3/8” Wrench
• 9/16” Socket
• 9/16” Wrench
TOOLS NEEDED
STEP 1 To begin, be sure to engage the parking brake and switch your cart to “o”.
STEP 2 Remove seat bottom and disconnect the black negative cable from battery terminal.
INSTALLATION INSTRUCTIONS
INSTALLATION COMPLETE
STEP 3
STEP 4
STEP 6
STEP 8
STEP 9
STEP 10
STEP 5
STEP 7
Using a 3/8” socket, remove and retain FNR switch cover.
Using 1/2” socket and wrench remove mounting hardware.
Locate the four black cables on the back of the FNR switch. Remove hardware holding
cables with a 1/2” ratchet.
NOTE: It is important that the cables connect to the exact same location on your new
FNR Switch. You may want to take a picture or label where each cable was connected.
Locate the shift lever connected to the FNR Switch and disconnect it with a
9/16” wrench.
Locate the reverse buzzer and unplug the black wire.
Turn the FNR Switch over and disconnect the last set of wires from the switches.
Remove bolts, washer and lock nut to remove FNR switch assembly from cart.
To install follow the instructions in reverse order of removal. When your new FNR
switch is secure, reconnect the battery wire and install seat bottom back on the cart.
NOTE: When reconnecting the shift lever to FNR switch, be sure to tighten the
9/16” nut till it is firm and secure.
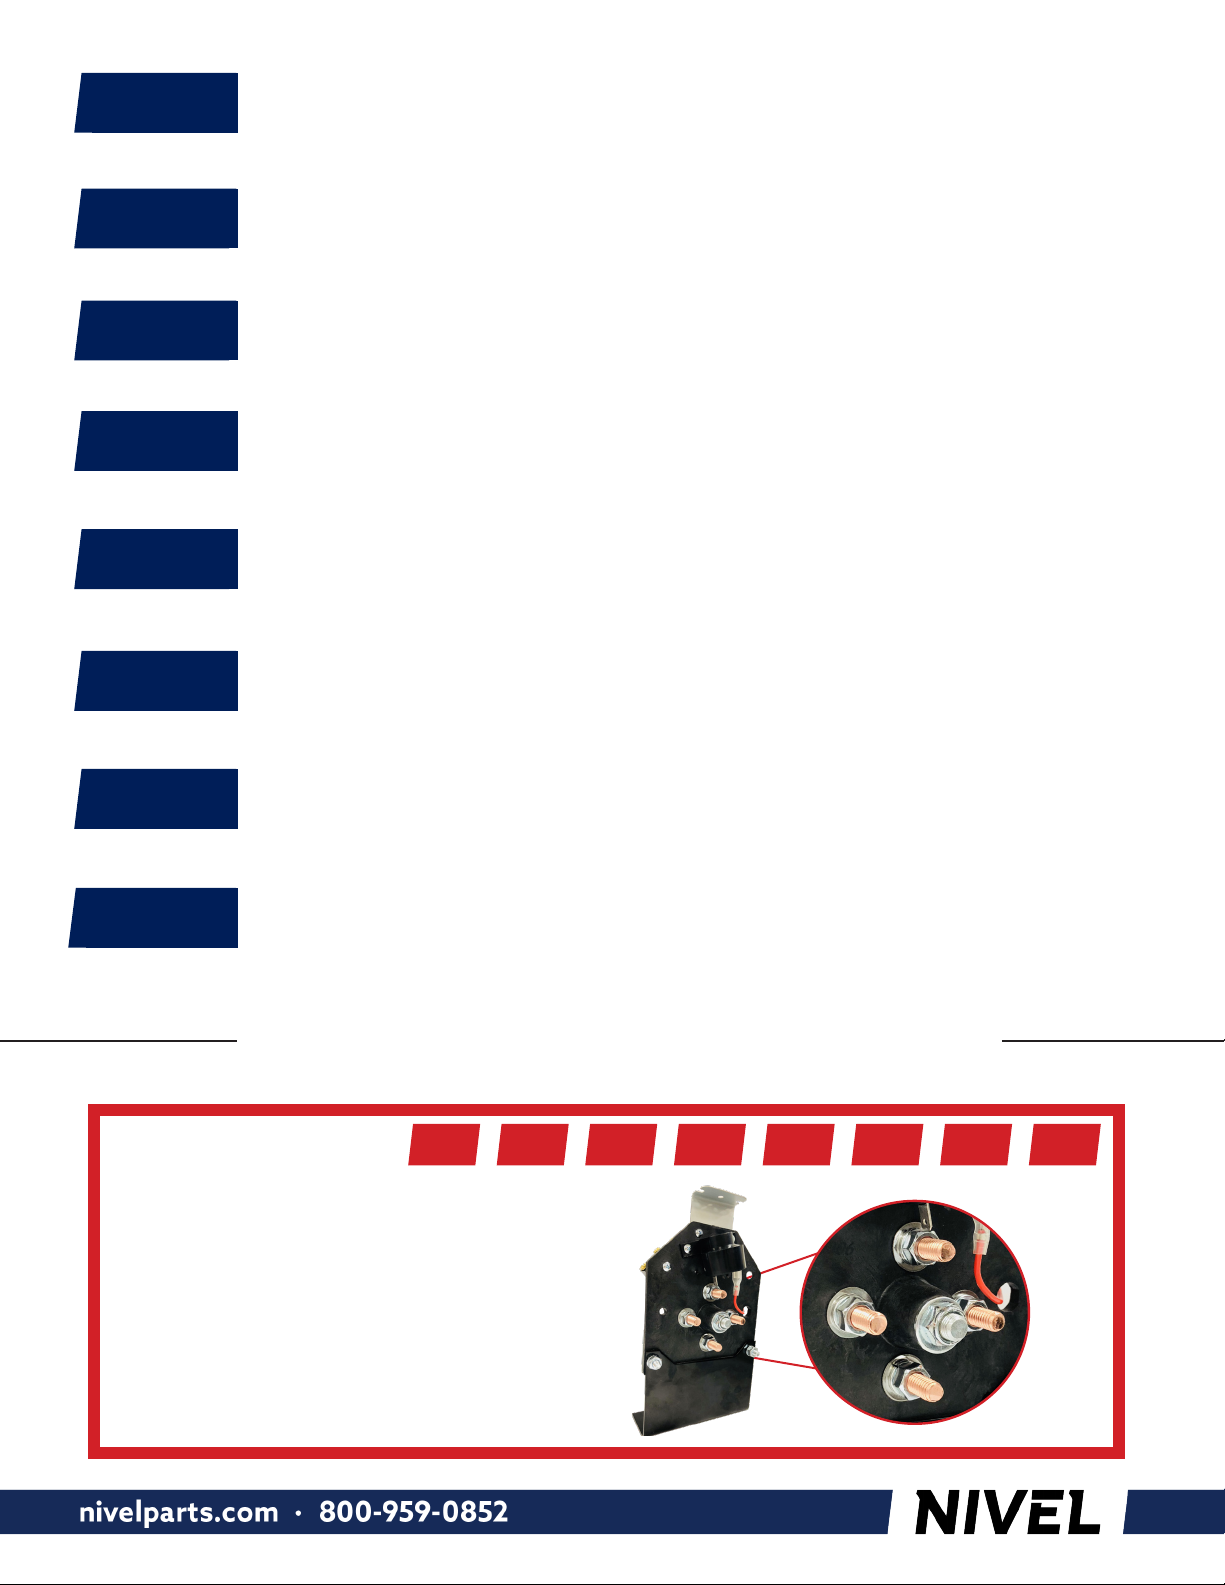
IMPORTANT
To prevent overheating from extra
accessory installation, we have provided
hardware that can be utilized on top of
existing hardware.
Table of contents
Popular Switch manuals by other brands


Asante
Asante IntraCore 35160 Series user manual

Alpermann+Velte
Alpermann+Velte TC 30 AS-GPS Installation & operation manual

McDATA
McDATA Sphereon 4300 Installation and service manual

GarrettCom
GarrettCom Magnum 3000 Installation and user guide

Shure
Shure AXT600 manual

Motorline professional
Motorline professional MCONNECT DUAL SWITCH User's and installer's manual