Noaton DF 4214 HEPA User manual
INSTRUCTIONS FOR USE
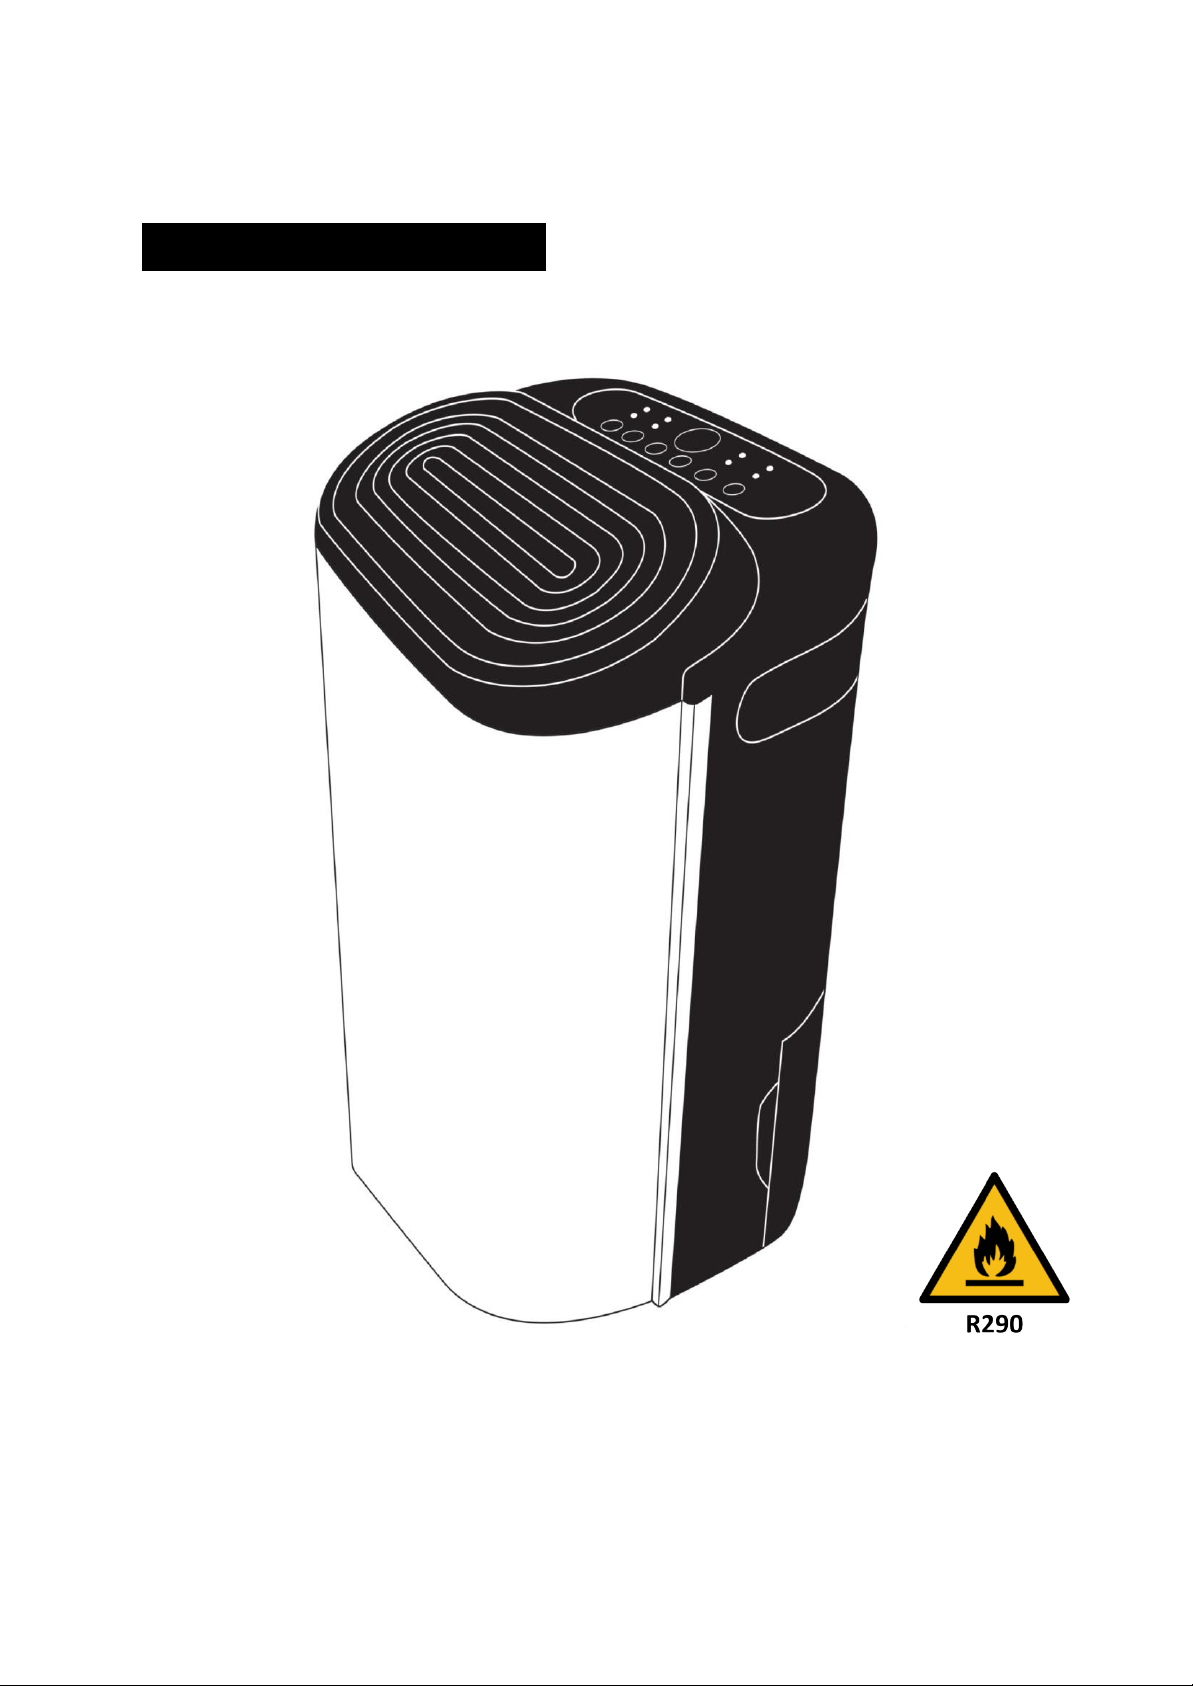
Noaton DF 4214 HEPA
Dehumidifier and air purifier

Read the instructions for use. Before any use, read
the corresponding section in this User Guide.
A service manual is available on request for certified workshops.
This product must not be disposed of with other household waste at
the end of its useful life, but must be taken to a collection point
designated for the recycling of electrical equipment.
NOTE: After shipping, allow the unit to stand upright for at least 6
hours before starting. This procedure will protect the compressor
and extend the life of this unit. Failure to follow this procedure
may result in reduced performance, damage to the refrigeration
circuit and void the warranty!
The product complies with applicable European and other directives.
The product uses flammable refrigerant for its function. If the
refrigerant escapes from the unit and comes into contact with an
open flame or other strong heat source, there is a risk of fire.

3
CONTENTS
1. Safety instructions ............................................................................................................................4
2. Warning in relation to R290 refrigerant .................................................................................5
3. Instrument features...........................................................................................................................6
4. Parameters............................................................................................................................7
5. Instrument description......................................................................................................................9
6. Before starting.....................................................................................................................11
6.1. Filter installation............................................................................................................11
6.2. Correct placement...................................................................................................................11
7. Continuous condensate drain .......................................................................................................12
8. Controls and functions ...................................................................................................................13
8.1. Switching the device on and off ............................................................................................13
8.2. Timer settings ..........................................................................................................................13
8.3. Fan speed setting....................................................................................................................14
8.4. Choice of modes .....................................................................................................................14
8.4.1. Laundry drying..................................................................................................................14
8.4.2. Air purification mode........................................................................................................15
8.4.3. Manual mode....................................................................................................................15
8.4.4. Night mode .......................................................................................................................16
8.5. Safety child lock ......................................................................................................................16
8.6. Low temperature defrost mode .............................................................................................17
8.7. Automatic shutdown when the tank is full............................................................................17
8.8. Memory functions....................................................................................................................18
9. Maintenance....................................................................................................................................18
9.1. Cleaning the water tank .........................................................................................................18
9.2. Cleaning the instrument and pre-filter ..................................................................................18
9.3. HEPA filter cleaning................................................................................................................19
10. Storage ..........................................................................................................................................19
11. Overview of error messages.......................................................................................................19
12. Troubleshooting ............................................................................................................................20
13. Disposal ............................................................................................................................21

4
1. Safety instructions
Before using the dehumidifier, read the instructions for use carefully,
especially the following safety instructions and warnings in relation to R290
refrigerant.
1. Install the unit on a level and solid floor to reduce vibration or noise.
NOTE: After shipping, allow the unit to stand upright for at least 6 hours before starting. This
procedure will protect the compressor and extend the life of this unit. Failure to follow this
procedure may result in reduced performance, damage to the refrigeration circuit and void the
warranty!
2. Never immerse the device in water or other liquids.
3 Never use the device if the cable or other connector is damaged or something unusual
occurs. In this case, please contact customer service.
4 Disconnect the unit from power when not in use, being moved or being cleaned.
5 Use the device according to the specified voltage.
6 The device is intended for indoor use only. Do not use it for other purposes.
7 Do not place heavy objects on the device.
8 Do not tilt the unit to either side, water may spill out of the unit and damage it.
9 Never insert any objects into the interior of the unit to prevent damage to the unit.
10 Do not place the device near heat-generating equipment or near flammable or hazardous
materials.
11 This appliance is not intended for use by persons (children) with reduced physical or sensory
abilities or lack of experience, unless they have been given safety instructions on how to
operate the appliance or are working under the supervision of a person responsible for their
safety. Children must be supervised by an adult and should not handle the apparatus.
12 If the power cord is damaged, it must be replaced by the manufacturer, its service
representative, or a similarly qualified person to avoid risk of shock.
13 The appliance must be positioned so that the plug is accessible.
14 The appliance must be installed in accordance with national wiring regulations.
15 The ambient temperature range for the device is 5 °C - 35 °C.
Do not attempt to repair, disassemble or make adjustments to the appliance, damage
or malfunction may occur. Even the actual replacement of the power cord should only

5
be carried out by a specially qualified person.

6
2. Warning in relation to R290 refrigerant
This equipment is designed to use only R290 (propane) refrigerant, which is hermetically
sealed under pressure in the refrigeration circuit. Repairs to this equipment may only be
carried out by a specially trained service technician in accordance with national
legislation relating to flammable substances! The service manual is available on request.
Do not interfere with, pierce or expose the cooling circuit to higher temperatures.
Do not release refrigerant into the atmosphere.
Do not try to speed up the defrosting process in any way (e.g. by heating).
The device must be placed in a room with a minimum surface area of 4 m2.
R290 is a flammable gas (propane) and is heavier than air. For this reason, its concentration
rises most near the ground during a leak, but it can be agitated (e.g. by drafts, fans, etc.) to
higher layers. The propane used in this equipment is an odourless gas.
Do not use the unit in a room with an open flame or other strong heat source (e.g.
cigarettes, candles, etc.) or electrical discharges. Place the appliance in a room that can be
ventilated if necessary and where gas accumulation is not possible.
If propane is detected or even suspected in the room, do not allow unauthorized persons
to search for the location of the leak. In this case, evacuate all persons from the room,
open the windows, exit the room, and notify the local fire station of the propane leak. Do
not allow any person to return to the room until the fire department commanding officer
or certified service technician has determined that the hazard has passed.
FAILURE TO FOLLOW THE ABOVE INSTRUCTIONS MAY RESULT IN FIRE, EXPLOSION,
PROPERTY DAMAGE, INJURY OR DEATH.

7
3. Instrument features
Powerful dehumidification
Using compressor technology, this dehumidifier removes excessive humidity in the room.
Compact and portable design
The simple design of the dehumidifier and its low weight guarantee very easy and effortless handling.
Two dehumidification modes
Two types of dehumidification mode are available for the user: manual, where the user can
choose the target humidity, and continuous dehumidification (drying of laundry).
Low noise and energy saving
This device uses special energy-saving technology, plus its low noise level provides users with a
comfortable home experience.
Air purification
This unit uses a HEPA filter or HEPA + carbon filter to clean the air in the room.
In terms of cleaning functions, it uses a double-start method that can dehumidify and clean at the
same time.

8
PARAMETER VALUE
4. Parameters
Power supply220 V - 240 V / 50 Hz
Energy
consumption
210 W (35℃,80 %RV)
155 W (27℃, 60 %RV)
Rated current 0.9 A (30℃, 80 %RV)
Dehumidification
capacity
14 l/day (35℃, 90%RV)
12 l /day (30℃,80 %RV)
7 l/day (27℃,60 %RV)
Noise
Max. ≤42 dB (A)
Min. ≤36 dB (A)
Air flow max. 95 m3/ hour
Tank capacity2 .3 l
Refrigerant type / quantityR290 / 0,045 kg
GWP coefficient 3
CO equivalent20,000135 t
Operating temperature5℃-35℃
Recommended room size 15 ~ 25 m² (height = 2.6 m)
Control typeTouch panel
Automatic defrost Yes

9
PARAMETER
VALUE
Automatic shutdown when the tank
is full
Yes
Automatic humidity maintenance
Yes
Memory during power failure
Yes
Timer
(delayed start, delayed shutdown)
0 - 24 hours
Instrument size
309 x 229 x 478 mm
Package size
350 x 270 x 505 mm
Instrument weight
11 kg
Weight including packaging
12,2 kg
Drain with hose (not included)
Yes (inner Ø 14 mm)
Minimum room size
4 m2
10
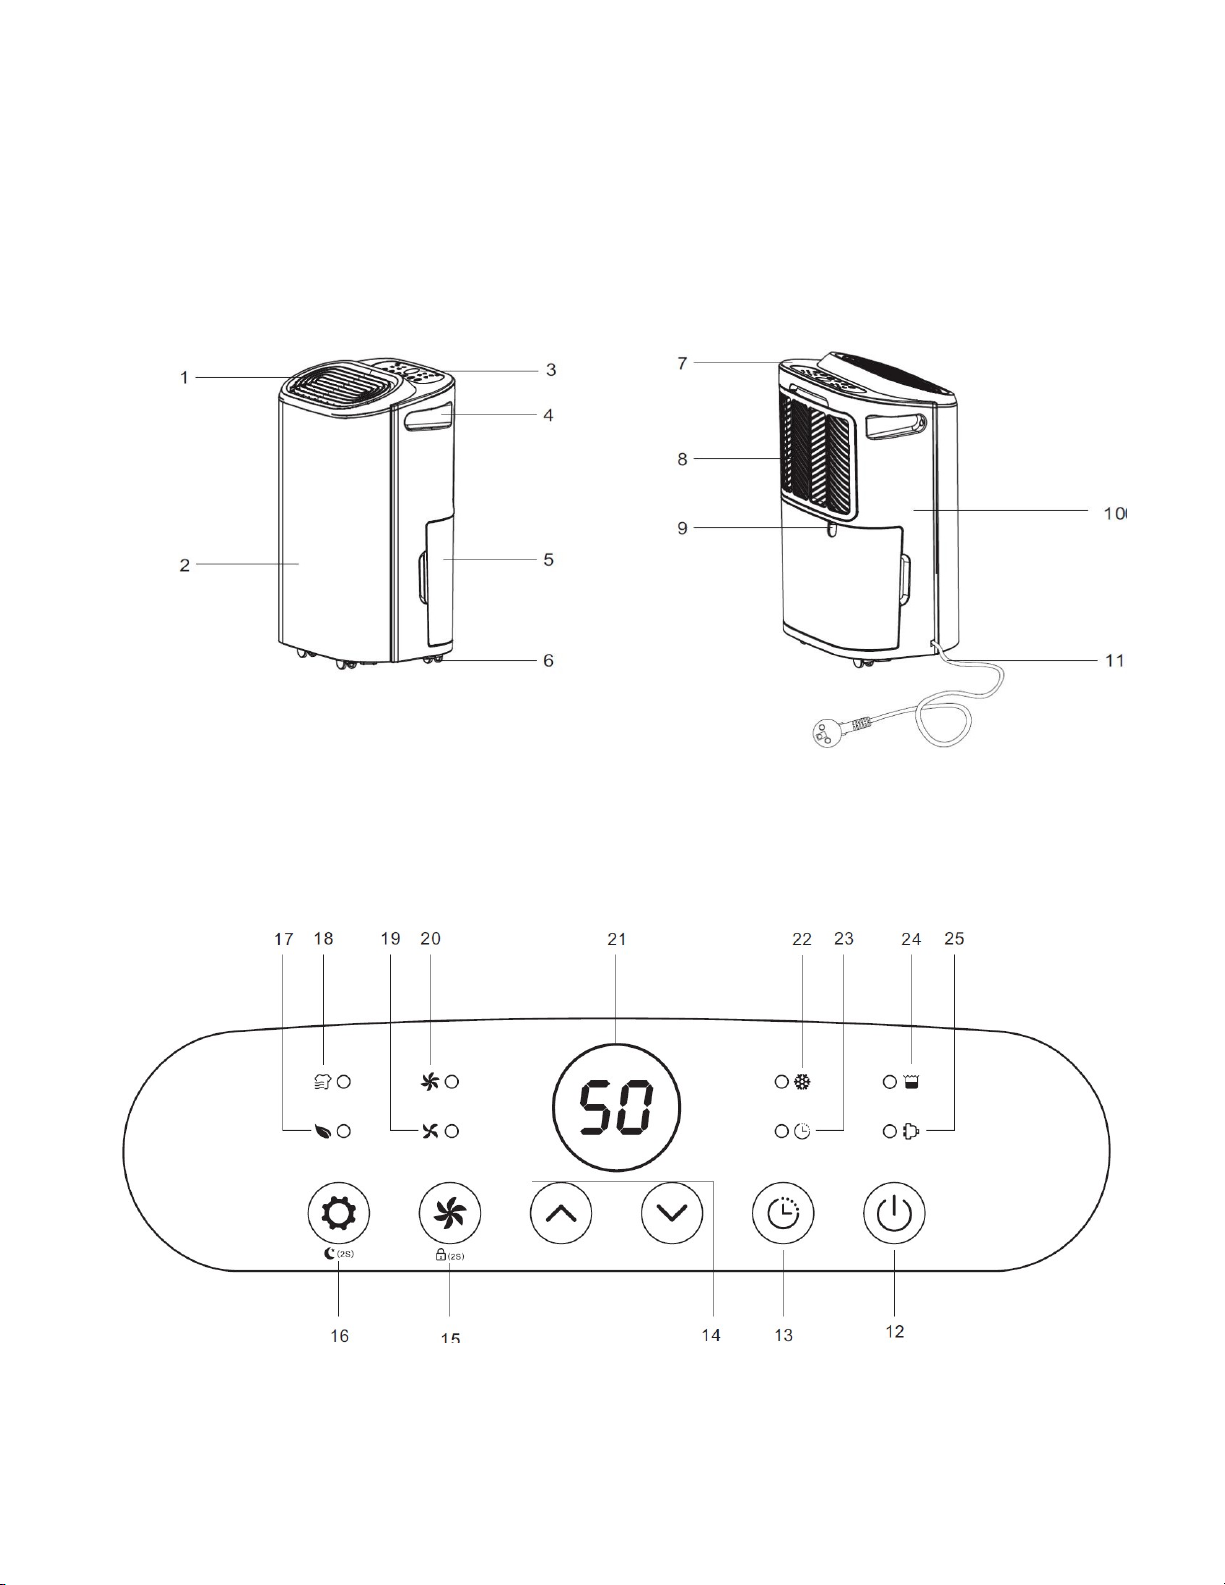
5. Instrument description
Components
Control panel

11
Components
č. description
1. Air outlet
2. Front cover
3. Control panel
4. Handle
5. Water tank
6. Wheels
7. Top cap
8. Air intake grille with pre-filter
9. Outlet for hose outlet
10. Back cover
11. Power cable
Control panel
no.
Descrip
tion
12. On/Off button
13. Timer
14. Up and down button
15. Fan speeds / Child lock
16. Mode selector button / Night mode
17. Air cleaning indicator light
18. Laundry drying mode indicator light
19. Low fan speed light
20. High fan speed light
21. Display
22. Defrost indicator light
23. Timer light
24. Full tank indicator light
25. On/Off indicator light

12
After shipping, allow the unit to stand upright for at least 6 hours before starting. This
procedure will protect the compressor and extend the life of the unit.
Failure to follow this procedure may result in reduced performance, damage to the
cooling circuit and void the warranty!
6. Before starting
6.1. Filter installation
1. Remove the air intake grille with pre-filter (8).
2. Remove the HEPA filter from the plastic bag
3. Insert the unpacked filter back into the device.
4. Now return the air intake grille with pre-filter (8).
5. The average lifespan (depending on air pollution) of the filters in normal use
(about 8 hours per day) is approximately 6 - 12 months.
Filter type
Code
HEPA
DF 4214H
Combined (HEPA + carbon)
DF 4214HC
6.2. Correct placement
When the dehumidifier is in operation, make sure that the rear of the dehumidifier has a
minimum distance of 20 cm from walls or furniture as shown in the following figure.

13
•
Place the dehumidifier upright on a stable and level floor.
•
Make sure the unit is positioned in the room so that the minimum distances as
shown in the figure above are maintained.
•
The input voltage parameters must correspond to the technical label on the
device, the electrical socket must be earthed.
•
Make sure the reservoir is correctly inserted into the device. If the reservoir is
full or not inserted correctly into the machine, the appropriate indicator light
will come on and the machine will stop.
•
Start the dehumidifier and follow the operating instructions later in this manual.
7. Continuous condensate drain
In the basic setting, the condensed water is collected in a reservoir. If you want to use the hose for
continuous drainage, do the following:
a) Remove the reservoir from the device
b) Insert the drain hose with an inner diameter of 14 mm into the condensate outlet.
c) Put the reservoir back in place in the machine.
Always make sure that the hose is directed downwards into the collection container or into the
waste, so that the water can run off by itself. The hose must not be bent or kinked.
č.
Description
26
Drain outlet
27
Drain hose (not included)

14
8. Controls and functions
8.1. Switching the device on and off
Plug the power cord into the mains and press the power button (12). An audible signal will
sound and the unit will start in default mode, i.e. manual mode is selected and set to continuous
dehumidification with the fan on the highest speed, the on/off indicator light (25) will be lit.
Note: If you press the power button (12), the unit will stop working, but the fan will continue to
spin for a few seconds to expel the warm air from the inside of the unit.
8.2. Timer settings
While the instrument is running, press the timer button (13) to set the number of hours until
the instrument shuts off in the range 00-24-00.
While the unit is in standby mode (the unit is turned off but still plugged into the wall outlet),
press the timer button (13) to set the number of hours until the unit starts from 00-24-00.
Each press of the timer button increases the number of hours by 1 full hour. For faster setting,
this timer button can be held long until the required value is reached.

15
Notes:
a. The automatic switch-off setting will be cancelled if the timer button (13) is pressed
twice within 3 seconds.
b. The automatic shutdown setting will be cancelled if the device is switched off and
restarted.
c. The auto-start setting will be cancelled if the device is started manually.
8.3. Fan speed setting
Press the fan speed change button (15) to select low or high speed as required.
Note: This button is not functional in defrost and dry mode, see below.
8.4. Choice of modes
8.4.1. Laundry drying
Press the mode selector button (16) until the Laundry drying mode light (18) comes on. The
appliance sets continuous dehumidification with a high fan speed that cannot be changed. After
6 hours the appliance will automatically switch off. The timer cannot be set in this mode.

16
8.4.2. Air cleaning mode
Press the mode selector button (16) until the air cleaning light (17) comes on. The compressor
will turn off, the unit will stop dehumidifying and the fan will switch to a high speed that can be
changed.
8.4.3. Manual mode
Press the mode selector button (16) so many times that neither the laundry drying mode light
(18) nor the air cleaning mode light (17) lights up. At this point the unit is in manual mode and
the desired target humidity can be set manually.
Press the arrow buttons (14) to select the desired target humidity from CO to 85% in 5%
increments. The CO value means that the unit dehumidifies continuously regardless of the
ambient humidity. The selected value flashes twice, then the display shows the current ambient
humidity value.

17
8.4.4. Night mode
Press and hold the mode selector button (16) for 2 seconds and the unit will switch to night
mode. All lights and display will go out and the fan speed will switch to low.
Note: If the reservoir fills in this mode, the full reservoir light (24) will illuminate, but the unit
will not beep.
8.5. Safety child lock
Press and hold the fan speed change button (15) for 2 seconds. A beep sounds and LC appears
on the display. All buttons are inactive at this time. To cancel this lock, hold the fan speed
change button again for 2 seconds.
Note: The safety lock can also be activated in standby mode, but it cannot be activated if the
tank is full and therefore the corresponding indicator light (24) is on.

18
8.6. Low temperature defrost mode
If the ambient temperature is low (generally between approximately 5 and 16 °C), the appliance
automatically switches to defrost mode as required and the corresponding indicator light (22)
illuminates. In this mode, the appliance does not dehumidify.
8.7. Automatic shutdown when the tank is full
When the condensate tank is full or if it is not properly inserted, the unit will beep several times
and switch to standby mode. The corresponding indicator light (24) will illuminate.
After the reservoir is emptied and reinserted into place, the unit will start up again in its original
mode.
Note: All other buttons are inactive except for the power button (12).

19
8.8. Memory functions
a. When the power cord is disconnected from the mains or when the power fails and the
power is reconnected, the dehumidifier will operate in pre-shutdown mode. The timer
setting will be maintained.
b. Press the on/off button (12) to switch off the dehumidifier and then switch it on again by
pressing the same button. The dehumidifier will operate in pre-shutdown mode. The timer
setting will be cancelled.
c. Switch off the device and disconnect the power cord, reconnect the power and switch on
the dehumidifier. The unit will return to the original factory settings.
9. Maintenance
9.1. Cleaning the water tank
a. Do not remove the float. If the float is removed from the tank, the unit will not turn on.
b. If the tank is dirty, wash it with warm water. Do not use detergents or scouring pads,
chemically treated anti-dust cloths, petrol, benzene, thinners or other solvents as they can
damage the water tank and cause leaks!
c. When inserting the water tank, push it into the machine with both hands and insert it into
the correct position. If the tank is not in the correct position, the appliance will not switch
on.
9.2. Cleaning the instrument and pre-filter
a. Before cleaning, switch off the appliance, then pull the plug from the socket.
b. Clean the cover with a soft dry cloth. If the device is very dirty, use mild detergents.
Wipe the dehumidifier with a damp cloth. Water must not get inside the device.
c. Remove the pre-filter from the rear of the unit, clean it with a vacuum cleaner or
soapy water no warmer than 40 °C.
d. Dry the pre-filter thoroughly before returning it to the machine.

20
9.3. HEPA filter cleaning
You can partially extend the life of the HEPA filter by vacuuming its surface, but the particles
deposited inside the filter can no longer be removed.
Do not use water, compressed air from a compressor or any method other than a normal
vacuum cleaner to clean this filter. Otherwise, there is a risk of damage and loss of filtering
capacity.
10. Storage
If the dehumidifier will not be used for a long period of time, please follow these instructions:
a. Switch off the appliance and remove the plug from the socket. Empty the tank and
completely drain it and the dehumidifier. Place the unit in a dry place for 2-3 days to
completely dry the inside of the unit.
b. Clean the filters.
c. Check that the dehumidifier is in good condition to ensure it is safe to use after extended
storage.
d. Wrap the equipment in suitable packaging, preferably covered with plastic wrap.
e. Store the dehumidifier in a dust-free and dry environment, out of direct sunlight.
11. Overview of error messages
If any of the following error messages appear on the instrument display, contact your
distributor.
SHOWN CODE
CONCLUSION
DISPLAY
WHAT'S HAPPENING
E1
Temperature sensor
error
Flashes
every 30
seconds
The device works normally
E2
Humidity sensor error
Flashes
every 30
seconds
The device works normally, but
the desired humidity cannot be
set
L3
Inlet air is too warm
(>42 °C)
L3 flashing
slowly
The compressor is stopped, the
fan is running at low speed. If
after 10 minutes the
temperature drops below
40 °C, the device will run normally
Table of contents
Other Noaton Dehumidifier manuals


Popular Dehumidifier manuals by other brands


Stanley
Stanley ST-16L-DH-ME instruction manual

Royal Sovereign International
Royal Sovereign International RDH-200 Series owner's manual

cecotec
cecotec BigDry 2500 Essential 360 instruction manual

Sovelor
Sovelor DR 100E User and Maintenance Book

stadler
stadler Albert little operating instructions

Woods
Woods MRD14 operating instructions


