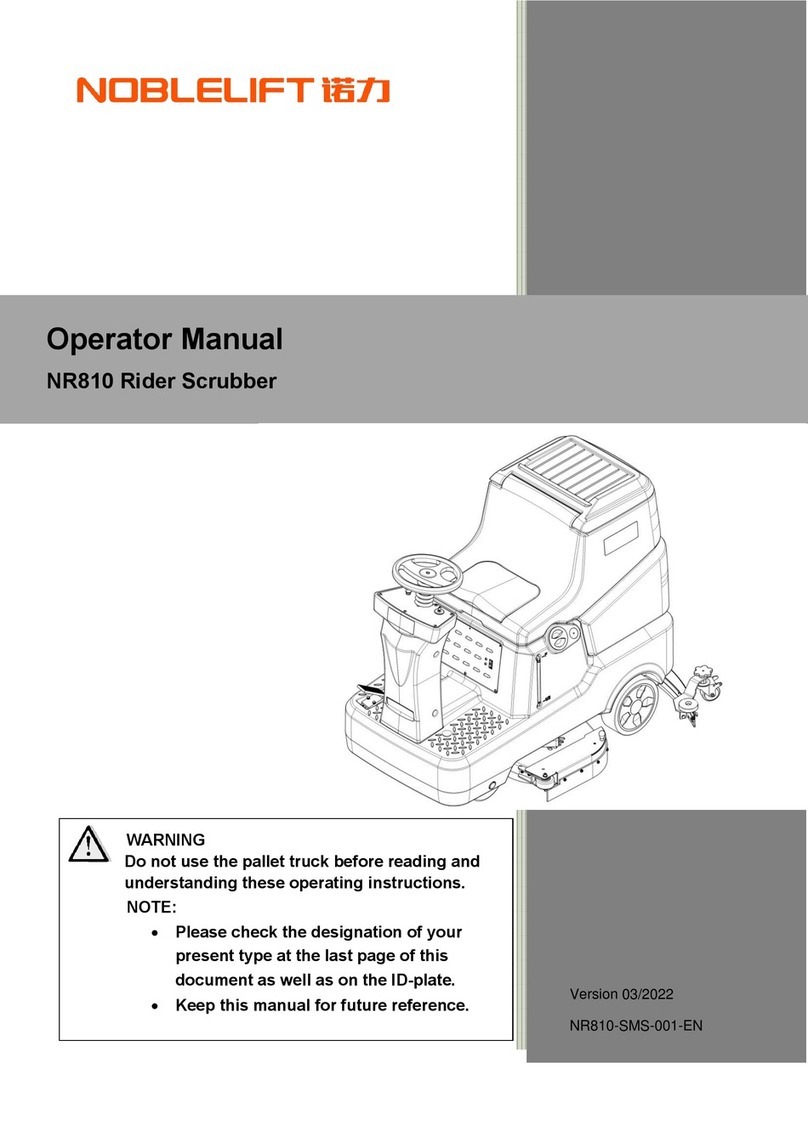
Noblelift NR530 User manual

Version 05/2021
NR530-SMS-001-EN
Operator Manual
NR530 Rider Scrubber
WARNING
Do not operate the rider scrubber before
reading and understanding the operator
manual.
NOTE:
•Please check product type and
parameters of your scrubber in
this manual as well as on the ID-plate.
•Keep this operator manual for future reference.

CONTENTS
INTRODUCTION......................................................................................................................................... 1
MANUAL PURPOSE AND CONTENT.................................................................................................. 1
HOW TO KEEP THE MANUAL ............................................................................................................. 1
DECLARATION OF CONFORMITY...................................................................................................... 1
ACCESSORIES AND MAINTENANCE ................................................................................................ 1
CHANGE AND IMPROVEMENT........................................................................................................... 2
INTENDED USE...................................................................................................................................... 2
MACHINE IDENTIFICATION................................................................................................................. 2
TRANSPORTING AND UNCRATING................................................................................................... 2
SAFETY....................................................................................................................................................... 2
SAFETY SYMBOLS................................................................................................................................ 2
GENERAL SAFETY INSTRUCTIONS.................................................................................................. 3
MACHINE SETUP...................................................................................................................................... 5
MAIN COMPONENTS............................................................................................................................ 5
CONTROL PANEL.................................................................................................................................. 6
TECHNICAL DATA................................................................................................................................. 7
ELECTRICAL WIRING DIAGRAM........................................................................................................ 8
OPERATION INSTRUCTIONS.................................................................................................................. 9
INSTALLING BATTERIES..................................................................................................................... 9
EMERGENCY STOP.............................................................................................................................. 9
INSTALLING AND REMOVING DISK BRUSHES/PADS.................................................................. 10
ATTACHING SQUEEGEE ASSEMBLY.............................................................................................. 10
SOLUTION TANK FILLING.................................................................................................................. 11
START AND STOP OF MACHINE...................................................................................................... 11
DRAINING TANKS................................................................................................................................... 12
DRAINING SOLUTION TANK ............................................................................................................. 12
AFTER USE........................................................................................................................................... 12
AFTER LONG-TERM INACTIVITY ..................................................................................................... 12
INITIAL USE.......................................................................................................................................... 13
MAINTENANCE.................................................................................................................................... 14
REGULAR MAINTENANCE CHECKLIST.......................................................................................... 14
CHARGING BATTERY......................................................................................................................... 14
CLEANING DISK BRUSH/ PAD.......................................................................................................... 15
CLEANING SOLUTION FILTER.......................................................................................................... 15
SQUEEGEE CLEANING AND STORAGE......................................................................................... 15
SQUEEGEE BLADE CHECK AND REPLACEMENT........................................................................ 16
RECOVERY TANK CLEANING AND CHECK................................................................................... 16
READ RUNNING DATA....................................................................................................................... 17
TROUBLE SHOOTING............................................................................................................................ 18
LCD DISPLAY FAULT CODE.............................................................................................................. 19
SCRAPING AND DISPOSE..................................................................................................................... 21
HAZARDOUS SUBSTANCE AND CONTENT................................................................................... 21

1
INTRODUCTION
NOTE
The code of related components in ( ) can be found in the chapter of
machine description.
MANUAL PURPOSE AND CONTENT
⚫This manual is to provide the operator with the necessary information for the correct and safe use of
the machine, which includes the technical data, safety, operation, storage, maintenance, accessories
and dispose of the machine.
⚫Before performing any operation or maintenance on this machine, the operator and the qualified
technicians must read this manual carefully.
⚫If you have any questions about the explanation of this manual or want more related information,
please contact our after-sales or agency.
⚫The operator is not allowed to perform the steps that must be completed by the technicians. All
instructions in this manual should be seriously followed, otherwise our company shall not be liable for
any losses arising therefrom.
HOW TO KEEP THE MANUAL
⚫The Manual must be kept near the machine, inside an adequate case or bag, away from liquids and
other substances that can cause any damage to it.
DECLARATION OF CONFORMITY
⚫The declaration of conformity is provided with the machine to prove that the machine complies with
relevant criteria and regulations.
NOTE
The copy of the original declaration of conformity is provided together with
the machine documentation.
ACCESSORIES AND MAINTENANCE
⚫All necessary operation, maintenance and repair procedures must be performed by qualified
personnel or the maintenance center designated by our company. Only original spare parts and
accessories are allowed to be used on the machine.
⚫If you need service or want to order spare parts or accessories, please contact our company's
after-sales service department or the agent, and provide the model and serial number of the
machine.

2
CHANGE AND IMPROVEMENT
⚫Our company is committed to the continuous improvement of the products and reserves the right to
notify the improvements and changes of the products that have been sold.
INTENDED USE
⚫This floor scrubber can be used in commercial and industrial environments, and it is suitable for
cleaning smooth and hard floors (washing and sewage collecting). It must be used in a safe
environment by a qualified operator. This scrubber is not suitable for cleaning outdoors floors,
carpets or rough floors.
MACHINE IDENTIFICATION
⚫The model and serial number of this machine are marked on the identification label. The information
on this label is very important, which is required to be provided when you order the accessories for
the machine.
TRANSPORTING AND UNCRATING
⚫Carefully check machine for signs of damage. Report damages at once to carrier. Record the
damages on paper to reserve the right for compensation.
After uncrating, check if the machine is equipped with the following items:
1. Technical documents, including operation manual;
2. Battery connecting cable.
SAFETY
⚫The following symbols indicate potential dangers. In any case, please read this information carefully
and take necessary precautions to avoid possible injury and property loss.
SAFETY SYMBOLS
WARNING!
Read all the instructions carefully before performing any operation
on the machine.
DANGER!
It indicates the danger that may cause death of the operator.
WARNING!
It indicates a potential hazard that may cause people injury and objects
damage.
CAUTION!
It indicates a caution related to important or useful functions.
Pay attention to the paragraphs marked by this symbol.

3
NOTE
It indicates notes on important matters and useful functions.
CONSULTATION
It indicates the necessity to refer to the instructions of this manual before
performing any procedures.
GENERAL SAFETY INSTRUCTIONS
Specific warnings and cautions for potential damages to personnel and machine are
notified as follows:
DANGER!
⚫This machine must be operated by trained and authorized personnel according to the instructions of
this manual.
⚫Before performing any procedures of cleaning, maintenance, repair or replacement, read all the
instructions carefully, and ensure to turn off the machine and disconnect the battery connector.
⚫Do not operate the machine near toxic, dangerous, flammable and/or explosive powders, liquids or
vapors. This machine is not suitable for collecting dangerous powders.
⚫Do not wear jewels when working near electrical components.
⚫Do not work under the lifted machine without safety support.
⚫Lead-acid battery may emit inflammable gas under normal use, must keep the battery away from
sparks, flames, smokes and radiating, illuminating and burning objects.
⚫During charging, lead-acid battery may emit hydrogen gas which may cause explosion. Must keep
the charging environment well-ventilated and away from naked flames.
WARNING!
⚫Check the machine carefully before each use to ensure that all parts of the machine are installed
correctly, otherwise it may cause harm to people or property.
⚫Please check if the values of voltage and frequency indicated on the serial number label match with
the main power before using the charger.
⚫Do not move the machine by pulling the charger cable, do not let the cable pass through a closed
door, or wind with sharp edges or angles, and do not let the machine run over the cord. Keep the
battery charger cable away from heated surfaces.
⚫In order to avoid fire, electric shock or personnel injury, make sure that the machine is off before
leaving.
⚫This machine is not intended for outdoor use, it is only suitable for indoor use, please store the
machine in a dry indoor environment when not in use.
⚫The storage temperature and working ambient temperature of the machine must be between 0-40°C
(32°F~104°F). The humidity must be between 30%-95%.
⚫Do not use the machine on a ramp that exceeds the specified slope.

4
⚫When using and handling floor cleaning detergents, follow the instructions on the labels of the
detergent container and wear suitable gloves for protection.
⚫Please use the brush disk and pad driver provided with the machine and the parts specified in the
user manual. Other brush disk and pad driver use may reduce safety.
⚫In case of machine malfunctions, ensure that these are not due to lack of maintenance. If necessary,
request assistance from the authorized personnel or from an authorized service center.
⚫Take all necessary precautions to avoid the dangers of hair, jewelry and loose clothes that may be
caught by the moving parts of the machine.
⚫Do not use the machine in particularly dusty areas.
⚫Do not rinse the machine directly with water, pressured water jets or corrosive substances.
⚫Avoid collision with surrounding objects when using the machine, especially when the collision may
cause the danger of falling objects.
⚫For stationary machine, stop the working brush/ pad driver to avoid damage to the ground.
⚫In case of fire, use a dry powder fire extinguisher. Do not use liquid fire extinguishers.
⚫Do not remove or modify the stickers on the machine.
⚫Do not tamper with the safety protection of the machine or disobey the maintenance instructions.
⚫Pay attention to the transportation when temperature is below 0°C (32°F). The water in the recovery
tank and hoses may freeze and cause serious damage to the machine.
⚫If spare parts need be replaced, order ORIGINAL spare parts from an Authorized Dealer or Agency.
⚫Send the machine to the service center if it cannot work normally due to damage, being placed
outdoors or being dropped into the water.
⚫To ensure proper and safe operation of the machine, the regular maintenance shown in the relevant
chapter of this manual must be performed by the authorized personnel or an authorized service
center.
⚫This machine must be properly disposed because of the toxic and hazardous materials (batteries,
etc.) that must be disposed by a specific center in accordance with relevant regulations (see the
chapter for disposal and scrapping).
⚫This machine can only be used as a cleaning tool, any other purpose use is not allowed.
⚫Keep the working area unobstructed and do not use the machine in blocked aisle. Remove dust, hair
and any objects that may obstruct the air circulation from the aisles.
⚫Use the machine in a well-lit area.
⚫This machine can only be used by properly trained or authorized personnel. Children or unsuitable
people cannot use this machine.
Close attention is necessary when operate the machine nearby children. Ensure that children do not
play with the machine to avoid injury.
⚫When using the machine, please be careful not to injure people or objects around.
⚫Avoid damage to people or objects when using the machine.

5
MACHINE SETUP
MAIN COMPONENTS
1. Recovery tank lid
2. Seat
3. Steering wheel
4. Fill-port lid
5. Front lamp
6. Charging socket
7. Filter
8. Liquid level hose
9. Rear wheel
10. Solution tank level hose
11. Drain hose
12. Recovery tank
13. Control panel
14. Accelerator pedal
15. Drive unit
16. Solution tank drain valve
17. Brush deck
18. Brush disk/ Pad driver
19. Vacuum hose
20. Squeegee assembly
21. Warning lamp

6
CONTROL PANEL
NO.
Description
Function
1
LCD display
Display the functional status of the machine.
2
Brush motor
button
Short press the button, the brush disk push rod drops and the brush motor works.
Long press the button, perform automatic brush loading.
3
Vacuum motor
button
Short press the button, lower the squeegee assembly, and vacuum motor works.
Long press the button to enter ECO energy-saving mode.
4
Key switch
Control the main power supply of the machine. Turn the key to "OFF" when
charging.
5
Solution flow
button
Short press the button to adjust the amount of liquid, the flow increases step by
step.
Long press the button, perform automatic brush unloading.
6
Horn button
Press the horn button and a beep will be issued.
7
Emergency button
Press the emergency button, the machine stops working.
8
Backward button
Press the backward button, step the accelerator pedal, the machine will move
backward.
9
Acceleration
button
Press the button with rabbit symbol to increase the speed, 3 indicator lights on
indicate the fastest speed.
10
Forward Button
Press the forward button, step the accelerator pedal, the machine will move
forward.
11
Deceleration
button
Short press the button with turtle symbol to reduce the speed, 1 indicator light on
indicate the slowest speed.
12
Front lamp button
Short press the button to turn the front lamp on/off.
Long press the button to enter the LCD display interface and the working state of
the machine can be read.
1
2
3
4
5
6
7
8
9
10
11
12

7
TECHNICAL DATA
Model
NR530
Rated power
W
1500
Brush motor rated power
W
550
Drive motor rated power
W
550
Vacuum motor rated power
W
400
Vacuum
kPa
>12
Voltage (DC)
V
24
Sound pressure level at 1.5 m (ISO 3744)
dB (A)
68±3
Max. speed
km/h
6
Product dimensions (L*W*H)
mm
1260*600*1010
Brush speed
rpm
180-200
Solution/ Recovery tank capacity
L
70/70
Brush pressure
kg
35
Cleaning path
mm
530
Turning radius
mm
1300
Gradeability
%
10
Clean productivity (theoretical/ actual)
m²/h
3180/ 2120
Insulation class
III
Brush/ Pad diameter
mm
500/ 500
IP protection class
IP24
Net weight (without batteries)
kg
150
Water flow
L/ min
1.2
Continuous working time (12V120AH*2)
H
3-4h
Battery compartment size (L*W*H)
mm
590*390*350
Gross weight (with batteries)
kg
220
Brush disk quantity
1 Disc

8
ELECTRICAL WIRING DIAGRAM
M1: Drive motor
M2: Vacuum motor
M3: Brush motor
M4: Motor for squeegee system
M5: Motor for brush system

9
OPERATION INSTRUCTIONS
WARNING!
If the battery is installed or wired incorrectly, the electrical components of
the machine may be seriously damaged. The battery must be installed by
qualified personnel. Equip the machine with correct charger according to
the battery. Please check if the battery is damaged before assembling.
Disconnect the battery connector and charger plug. Handle the batteries
with great care.
NOTE
This machine requires two 12V batteries or one 24V lithium battery, please
follow the drawing for wiring.
INSTALLING BATTERIES
CAUTION!
Ensure to hold the grip under the seat when close the recovery tank in
case of hand-pinching.
EMERGENCY STOP
If there is any emergency during machine operating, press the emergency button on the
control panel, then all functions of machine will stop, nothing will be displayed on the control
panel. Push emergency button to restore the power supply.
1. Open the recovery tank lid to check whether the recovery
tank is empty, if not, drain it through the drain hose.
2. Hold the grip under the seat to open the the recovery tank till
the tank rope is in tension.
3. Carefully and correctly place the battery into the battery
compartment.
4. Complete the wiring as shown in the picture. Tighten the
lock screw on the battery.
5. Connect the battery with machine though the connector.
6. Hold the grip under the seat to close the recovery tank
carefully.

10
INSTALLING AND REMOVING DISK BRUSHES/PADS
NOTE
According to the conditions of the floor to choose the appropriate brush
disc or pad driver for cleaning.
CAUTION!
Before manually installing or uninstalling the brush disc or pad driver,
ensure that all switches of the machine are off. Protective gloves must be
worn during operation to avoid injury by debris.
NOTE
The machine has the function of automatic loading and unloading of
brush disc/ pad driver. It is not recommended to manually install/ remove
the brush disc or pad driver. Specific steps are as follows:
1. Turn the key switch to "ON" position (the brush disk and squeegee assembly will automatically return
to the original position).
2. Put the brush disk/ pad driver under the brush deck and place it in the center.
3. Long press the "brush motor button", the brush motor indicator flashes, the brush deck is lowering and
the brush motor rotates until the brush/pad is locked by the buckle. Release the "brush motor button", the
brush loading is completed, the brush motor stops, and the front push rod is lifted.
4. Long press the "solution flow button" to enter the automatic brush unloading mode. When three
indicator lights flash, you can release the button, and the controller will automatically complete the brush
unloading process and the solution flow indicator lights stop flashing.
5. Manually loading/unloading the brush/pad. Align the brush/pad driver with the central axis, manually
rotate the brush/pad counterclockwise for installing. Removing the brush/pad by rotating contrariwise.
WARNING!
Do not operate the machine until the brush/pad is well-installed.
ATTACHING SQUEEGEE ASSEMBLY
1. Turn the key switch to "ON" position.
2. Press the "Vacuum motor button", the squeegee assembly will be automatically lowered to the
ground.
3. Unscrew the two knobs on the squeegee assembly and lock it into the groove on the squeegee holder.
4. Tighten the knobs on the squeegee assembly and connect the vacuum hose to the squeegee.

11
SOLUTION TANK FILLING
1. Open the fill-port lid in the front of the machine.
2. Fill the cleaning water or suitable detergent with hose. The solution tank water level can be checked
by the indicator hose on the side. When the float ball reaches "F" position, the solution water tank is full.
The temperature of the filling water or detergent shall not exceed +104F (+40°C).
NOTE
When the float ball exceeds "F" position, excess water will be spilled from
the top of the water level indicator hose. Avoid the float ball exceeding
the "F" position when filling water.
WARNING!
Use only low-foam and non-flammable detergent, which should be
suitable for the scrubber.
START AND STOP OF MACHINE
1. Prepare the machine as shown in previous paragraph. Operator sits on the seat and turn the key
switch to "ON" position. If the BDI display 100% of battery charge, it means the battery is fully
charged and available for use. If the BDI displays 10%, the battery needs to be charged. Turn the key
switch to "OFF" and charge the battery fully. (See Maintenance Chapter)
2. Press the "brush motor button" and "vacuum motor button", the indicator light will be on, the
squeegee and the brush will be automatically lowered to the ground. Brush motor and vacuum motor
start running.
3. According to the cleaning demand, the solution liquid flow can be adjusted through the "solution flow
button" on the control panel, three different flows are available. Three indicator lights on indicates the
maximum flow. Visually check the water level indicator hose on the side of the solution tank. When
the float ball reaches the bottom, the water of the solution tank is going to be empty, fill the water
accordingly.
4. The speed of the machine can be adjusted through the "tortoise/rabbit button" on the panel. Press
the "tortoise button" to decelerate, and press the "rabbit button" to accelerate. Three levels of speed
are available. Speed can be adjusted by operating the accelerator pedal, the more force on the pedal,
the faster machine travels. Reduce the force on the accelerator pedal slowly, move the steering
wheel and start scrubbing.
5. Press the "R" button to move the machine backwards. When the machine backward, the squeegee
assembly and brush disc will be automatically lifted and the machine stops cleaning automatically.
6. In case of sudden crowd or crowded situation, operator can press the "horn button" for warning, the
machine will issue a "beep" sound.
7. If work in the dark area, press "front lamp button" to turn on the front LED lamp.
8. Press “emergency button" to stop the machine immediately in case of emergency.
9. Release the accelerator pedal to stop the machine.

12
10. Press the "brush motor button" and "vacuum motor button" again, the indicator light will be off and the
squeegee and the brush will be automatically lifted. The brush motor shuts down and the vacuum
motor shuts down after a few seconds.
11. Make sure to park the machine and turn the key switch to "OFF" position.
CAUTION!
To avoid any damage to the floor surface, turn off the brush/pad driver
when the machine stops in an area.
CAUTION!
Do not use the machine when the battery charge is low, to avoid damaging
the batteries and reducing the battery life.
DRAINING TANKS
1. The float shut-off screen will block the inspiratory path of vacuum motor when the recovery tank is full,
and the vacuum motor can not suck the floor dry. Please stop working immediately.
2. Turn off the brush motor and vacuum motor to lift the brush disk and squeegee assembly.
3. Move the machine to the designated drainage area.
4. Drain the recovery tank through the drain hose, then rinse the recovery tank with clean water.
WARNING!
When the recovery tank is full, please stop working immediately to avoid
sewage entering the vacuum motor.
DRAINING SOLUTION TANK
Unscrew the solution tank tap cover under the accelerator pedal to drain the solution liquid.
AFTER USE
After working, complete the following steps before leaving the machine:
1. Remove the brush disk/pad driver according to the procedures shown in previous chapter.
2. Drain the solution tank and recovery tank according to the procedures described above.
3. Perform the daily maintenance procedures (see the maintenance chapter).
4. Store the machine in a clean and dry place, with the brush disk/ pad driver and the squeegee lifted
or removed.
AFTER LONG-TERM INACTIVITY
If the machine isnot going to be used for more than 30 days,proceed as follows:
1.Perform the procedures shown in chapter of After Use.
2.Disconnect the batteryand the machine.

13
INITIAL USE
After the first 8 hours of use, check if the fastening and connecting parts of the machine are loose, and
check for visible damage and leakage.

14
MAINTENANCE
WARNING!
The procedures must be carried out with the machine off and the battery
disconnected. Moreover, read carefully the instructions in the Safety
chapter before performing any maintenance procedures.
REGULAR MAINTENANCE CHECKLIST
CAUTION!
The procedure marked with (1) must be performed when the machine is
used after 8 hours for the first time. The procedure marked with (2) must
be performed by an authorized service center.
Check Item
Daily
(after use)
Weekly
Semi-
-annually
Yearly
Charge battery
Clean squeegee
Clean brush/pad
Clean solution tank and recovery tank
Check seal of tanks
Check squeegee, replace it if necessary
Clean solution tank filter
Clean vacuum motor filter
Check if all screws and nuts are tightened
1
Check brush/ pad driver, replace it if necessary
2
Check carbon brush of vacuum motor, replace it if necessary
2
Check carbon brush of drive motor, replace it if necessary
2
CHARGING BATTERY
NOTE Charge the battery when BDI on the LCD display shows less than or equal
to two notches, or charge the battery after every use.

15
CAUTION!
Keep the battery fully charged to extend the service life of the battery.
CAUTION!
Charge the battery as soon as possible when the battery is low, otherwise
the service life of the battery will be shortened. Check the battery at least
once a week.
1. Move the machine to designated charging area.
2. According to the type of the battery, choose the appropriate charger for charging.
3. Connect the charger connector to the socket under the seat of the machine, and then connect the
charger plug to the power supply.
4. After charging the battery, disconnect the charger plug from the power supply, and then disconnect
the connector from the machine.
CLEANING DISK BRUSH/ PAD
CAUTION!
Wear protective gloves when cleaning the brush/pad in case of the injury
by the sharp debris.
1. Remove the brush disk/ pad driver from the machine, as shown in the previous chapter.
2. Clean the brush disk (pad driver) and brush (pad) with cleaning solution and water.
3. Check the condition of the brush/pad for wear, and replace it if necessary.
CLEANING SOLUTION FILTER
1. Turn off the water tap of the solution tank.
2. Remove the filter cover and clean the filter, then fit it back in place.
3. Turn on the water tap of the solution tank and check if the filter is properly installed without leakage.
SQUEEGEE CLEANING AND STORAGE
NOTE
The squeegee must be clean and its blades must be in good conditions in
order to achieve better scrubbing.
CAUTION!

16
It is advisable to wear protective gloves when cleaning the squeegee in case of the
injury by the sharp debris.
1. Loosen the knobs on the squeegee assembly and remove the vacuum hose from the squeegee.
2. Clean the aluminum bracket squeegee and the vacuum hose. Check the front blade and the rear
blade for integrity, cuts and tears; replace them if necessary.
3. Assemble the squeegee in the reverse order of disassembly.
SQUEEGEE BLADE CHECK AND REPLACEMENT
1. Check the edges of front blade and rear blade for integrity, cuts and tears; if the bottom edge of the
blade is worn, turn it upside down (the top edge is intact). If the top edge is worn, replace the blade
according to the following procedures:
2. Loosen the buckle, release pressure strip from the retainers and remove the retaining strip. Replace
the worn blade and assemble the new rear blade in the reverse order of removal.
3. Unscrew the knob and remove the retaining strip, then replace the front blade. Assemble the front
blade in the reverse order of removal.
RECOVERY TANK CLEANING AND CHECK
1. Drain the recovery tank by drain hose.
2. Open the recovery tank and remove the recovery tank lid, then rinse the recovery tank lid and
recovery tank with clean water.
3. Check whether the bearing surface of the sealing of the recovery tank is intact and sealed, remove
the sealing from the tank and replace it if necessary.
4. Fit the recovery tank lid in place.

17
READ RUNNING DATA
Long press the "front lamp button" to enter the LCD interface, working data of the machine can be read.
There are four interfaces in total.
LCD Display Description
ECO
Energy saving mode: 0 for off, 1 for on
F
Brush deck push rod motor state, 1-3 is down, 4-6 is up.
B
Squeegee system push rod motor state, 1-3 is down, 4-6 is up.
Pwr
The battery voltage value, above is the 10 stages of power display.
Vac
Total working time of vacuum motor.
Bru
Total working time of brush motor.
Ivca
Real-time working current of vacuum motor
Ibru
Real-time working current of brush motor
Thrt1
Accelerator input value
Temp
Controller temperature
B0/B1
The electromagnetic brake of drive motor is disconnected/connected
S0/S1
Seat switch close/open

18
TROUBLE SHOOTING
Trouble
Possible Cause
Remedy
The machine doesn't
work and the LCD
displaydoesn't lightup
The batteryconnector isdisconnected
Connect the battery connector
The batteries are completely discharged
Charge the batteries
10% The machine don’t
work, and the battery is
displayed at10%
Lowbattery
Charge the batteries
The machine do not
go-forward/backward
Control circuitboard failure
Replace the control circuit board
Operator is not on the seat or seat switch
failure
Siton the seatorreplace seatswitch
Accelerator pedal is unconnected or
damaged
Check the cable or replace the
accelerator pedal
The brush motor does
notwork
Control circuitboard failure
Replace the control circuit board
Brush motor overload
Use soft bristle brush that is suitable
for cleaning, and reset the brush
motor overload protector
Brush motor carbon brush wearing
Contactafter-sales service
Obstacles prevent the brush rotating
Clean the brush
The vacuum motor
doesnotwork
Vacuum motor damage
Check and replace vacuum motor
Control circuitboard failure
Replace the control circuit board
Insufficient suction, the
floor cannotbe dried
Recovery tank is full
Empty the recovery tank
Drain hose and squeegee poor connection
Connect the drain hose and
squeegee correctly
Squeegee is dirty or wearing
Check and clean the squeegee
Recovery tank cover is not closed properly,
or the seal is damaged, or the hose is
clogged
Close the cover correctly, or replace
the gasketorclean the Bend tube.
Recovery tank is dirty
Clean the recoverytank
Insufficient solution
supply to brush plate
Solution filter is dirty
Clean the filter
Dirtysolution tankora clogged pipeline
Clean the solution tank and piping
Squeegee leaves
scratch on the floor
There are debris under the squeegee blade
Remove the debris
Squeegee blade wear,crack, aged
Replace the squeegee blades
Other manuals for NR530
1
Table of contents
Other Noblelift Scrubber manuals