nodon CFS-2-1-05 User manual

INTERRUPTEUR DE SOL
FLOOR SWITCH
CFS-2-1-05 NodOn SAS - 121 rue des Hêtres
45590 St CYR EN VAL (FRANCE)
Assembled
in China
INSTALLATION
FR
EN
DÉCLARATION DE CONFORMITÉ
Par la présente, NodOn SAS déclare que cet équipement
radio est conforme à la directive RED 2014/53/UE. Le texte intégral de
la déclaration de conformité de l’UE est disponible à l’adresse Internet
suivante: www.nodon.fr/support/doc
DÉCLARATION DE GARANTIE
NodOn SAS, 121 rue des Hêtres, 45590 ST CYR EN VAL France
(«NodOn®») garantit le produit de marque NodOn®et les accessoires
contenus dans l’emballage d’origine contre les défauts de matériaux et
de fabrication, lorsqu’ils sont utilisés normalement en conformité avec
les directives publiées par NodOn®pour une période de deux (2) ans
à compter de la date d’achat originale par l’utilisateur nal ( « période
de garantie »). La preuve d’achat doit être accompagnée du reçu de
vente d’origine. Les directives publiées par NodOn®comprennent, mais
ne se limitent pas aux informations contenues dans les spécications
techniques et les consignes de sécurité. NodOn®ne garantit pas une
utilisation du produit ininterrompue ou exempte d’erreur. NodOn®
n’est pas responsable des dommages causés par le non-respect des
instructions relatives à l’utilisation du produit. De cette garantie sont
exclus : L’usure normale, les modications, les révisions, les dommages
dus à la négligence, l’inuence étrangère, les domaines d’application
pour lesquels le produit n’a pas été conçu, les produits partiellement ou
complètement démontés.
WEEE
Au sein de l’UE, le symbole de la poubelle barrée indique que ce
produit ne peut pas être mis au rebut avec les déchets ménagers. Les
anciens appareils peuvent contenir certains matériaux recyclables
qui doivent être recyclés, an de ne pas nuire à l’environnement ou à la
santé en raison de mauvaises conditions de stockage des déchets. De ce
fait, merci de jeter vos vieux appareils en utilisant les systèmes de collecte
appropriés, ou en renvoyant l’appareil à l’endroit où vous l’avez acheté, an
d’organiser son recyclage.
DECLARATION OF CONFORMITY
Hereby, NodOn SAS declares that this radio equipment is in
compliance with the RED Directive 2014/53/EU. The full text of the
EU declaration of conformity is available at the following internet
address: www.nodon.fr/support/doc
WARRANTY STATEMENT
NodOn SAS, 121 Rue des Hêtres, 45590 ST CYR EN VAL France
(“NodOn®”) warrants the NodOn®-branded hardware product and
accessories contained in the original packaging against defects
in materials and workmanship when used normally in accordance
with NodOn®’s published guidelines for a period of TWO (2) YEARS
from the date of original retail purchase by the end-user (“Warranty
period”). Proof of purchase must be accompanied by the original
sales receipt. NodOn®’s published guidelines include but are not
limited to information contained in technical specifications and
safety instructions. NodOn®does not warrant that the operation
of the product will be uninterrupted or error-free. NodOn®is not
responsible for damages arising from failure to follow instructions
relating to the product’s use. Excluded from this warranty are: normal
wear and tear, alterations, revisions, damages due to negligence,
foreign inuence, areas of application for which the product is not
designed, or completely or partially dismantled products.
WEEE
Within the EU the crossed-out wheeled bin symbol indicates
that this product must not be disposed of via household waste.
Waste equipment contains valuable recyclable materials which
should be recycled and not harm the environment or human health
by uncontrolled waste disposal. Therefore, please dispose of your
old equipment using suitable collection systems or send the device
to the place where you purchased it. This will then feed the device to
material recycling.
ou
or
1
2a 2b
Installation simple et rapide
par adhésif double face
(inclus) ou vis (non incluses),
au sol ou sur une plinthe
ON
Simple and fast installation
with an adhesive bounding
(included) or screws (not
included), on the floor
or on a baseboard
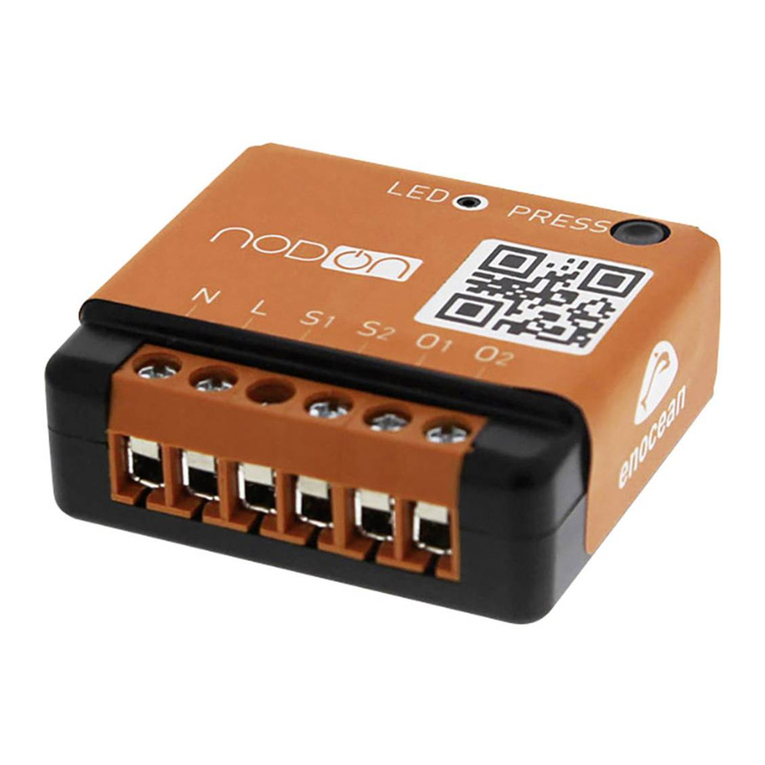
A. Module Éclairage ON/OFF - ON/OFF Lighting Relay Switch
B. Connecteur rapide (inclus) - Fast connector (included)
C. Couvercle pour boite de dérivation (inclus) - Junction box cover (included)

INTERRUPTEUR DE SOL FLOOR SWITCH
Référence : CFS-2-1-05
Alimentation : Magnéto-résistive (sans pile ni batterie) • 1 bouton - 1 canal
Installation au sol : par adhésif double face (inclus) ou vis (non incluses)
Bande de fréquences radio utilisée : 868,0 à 868,6 Mhz • Puissance radio maximale : +5dBm
Portée : jusqu’à 30m en intérieur • Température de fonctionnement : -10°C à 40°C
EEP (Prol EnOcean) : F6-02-01
Dimensions : Ø 90 x 21,4 mm • Poids : 67 g • Garantie : 2 ans
Reference: CFS-2-1-05
Power source: Magneto-resistive (no battery) • 1 button - 1 channel
Floor mounting: using adhesive bounding (included) or screws (not included)
Radio frequency range: 868.0 to 868.6 MHz • RF power max: +5dBm
Radio range: up to 30m indoor • Operational temperature: -10°C à 40°C
EEP (EnOcean Prole) : F6-02-01
Dimensions: Ø 90 x 21,4 mm • Weight: 67 g • Warranty: 2 years
*SIN-2-2-xx - Version rmware V3.5.0 (et ultérieure). Une fois votre module installé (voir la notice du
module), réalisez l’appairage comme suit :
Avant l’installation de l’Interrupteur de Sol il est nécessaire d’installer le Module Éclairage ON/OFF
compatible. Voir schéma d’installation au dos.
*SIN-2-2-xx - Firmware version V3.5.0 (and later version). Once your relay switch is installed (see the
Relay Switch’s user guide), perform the pairing as follows:
Before installing the Floor Switch it is necessary to install the compatible ON/OFF Lighting Relay Switch.
See wiring diagram on the back.
Une fois le Module installé (voir schéma de câblage
au dos), il est nécessaire de shunter l’interrupteur
et de le démonter. Pour ce faire, démontez votre
interrupteur. Installez le connecteur rapide et
remplacez l’interrupteur par l’obturateur de boite
de dérivation. Vous pouvez ajouter un sticker sur
l’obturateur, pour indiquer que le nouvel interrupteur
se trouve au sol.
Once the Relay Switch is installed (see wiring
diagram on the back), it is necessary to shunt the
switch and remove it. To do this, disassemble your
switch. Install the fast connector and replace the
switch with the junction box cover. You can add a
sticker on the cover to indicate that the new switch
is on the ground.
• Tenir le produit éloigné de tous liquides
• Le produit est conçu pour une utilisation à l’intérieur uniquement
• Keep the product far away from liquids.
• The product is designed for indoor use only.
PRÉCAUTIONS D’USAGES USE CAUTIONS
SAV AFTER SALES
MODE D’EMPLOI USER GUIDEFR EN
APPAIRAGE AVEC UN MODULE ÉCLAIRAGE ON/OFF COMPATIBLE*
INSTALLATION DU MODULE
PAIRING WITH A COMPATIBLE ON/OFF LIGHTING REALY SWITCH*
RELAY SWITCH INSTALLATION
DÉSAPPAIRAGE DU MODULE ÉCLAIRAGE ON/OFF ON/OFF RELAY SWITCH UNPAIRING PROCEDURE
Accédez directement à la notice détaillée
sur la rubrique support sur
www.nodon.fr/support/module-eclairage-on-off
NOTICE DU MODULE RELAY SWITCH USER GUIDE
Foruserguides in other languages, pleasevisit www.nodon.
fr/notices
Foruserguides in other languages, pleasevisit www.nodon.
fr/notices
Ce produit est conforme au protocole radio EnOcean. This product is conform to EnOcean radio protocol.
Ce produit est prévu pour être utilisé en intérieur uniquement. This product must be used indoor only.
Par la présente, NodOn SAS déclare que cet équipement radio est conforme à la directive RED 2014/53/UE.
Le texte intégral de la déclaration de conformité de l’UE est disponible à l’adresse Internet suivante :
www.nodon.fr section «Support»
Hereby, NodOn SAS declares that this radio equipment is conform to the RED directive 2014/53/
UE. The integral text of the EU declaration of conformity is available at the following online address:
www.nodon.fr ”support” section.
APPROBATIONS ET CERTIFICATIONS APPROVALS AND CERTIFICATIONS
NodOn SAS
121 rue des Hêtres
45590 St CYR EN VAL (FRANCE)
NodOn SAS
121 rue des Hêtres
45590 St CYR EN VAL (FRANCE)
CONTACT CONTACT
Directly access the detailed user guide on the Support section on
www.nodon.fr/en/support/on-off-lighting-relay-switch
DANGER D’ÉLECTROCUTION DANGER OF ELECTROCUTION
AVANT TOUTE INSTALLATION ASSUREZ-VOUS D’AVOIR COUPÉ L’ALIMENTATION ÉLECTRIQUE SOUS
PEINE D’ÉLECTROCUTION.
Coupez directement l’alimentation depuis le coffret électrique, pour éviter
tout risque d’électrocution. Le module est conçu pour une utilisation sous tension, une mauvaise
installation peut entraîner un incendie ou un choc électrique. Si vous ne vous sentez pas à l’aise avec les installations
électriques, veuillez consulter un professionnel. Le module doit obligatoirement être installé ET connecté en suivant
scrupuleusement les instructions de cette notice. Nous ne pourrons être tenus pour responsables en cas d’accident
ou de dommages dus au non respect des instructions de montage.
Coupez l’alimentation avant toute intervention et n’effectuez aucune modication si la LED du module est allumée.
BEFORE ANY INSTALLATION MAKE SURE THE POWER SUPPLY IS DISCONNECTED TO AVOID ANY RISK
OF ELECTROCUTION.
Directly cut the power supply from the breaker box to avoid any risk of electrocution. This relay switch is
designed to be used power up, a wrong installation can create a re or an electric shock. If you are not condent about
electrical installation, please ask a professional.
The relay switch must be installed and connected carefully following the instructions of this user guide. We will not be
responsible for any loss or damage resulting from a non-respect of the instructions of this user guide. Cut the power
supply before any operation and don’t do any modication if the relay switch’s LED is still ON.
N L N L
N L
N L
N L N L
N L
N L
La LED du module scintille 2 fois en vert, conrmant
l’appairage des deux appareils. The LED of the relay switch will blink green twice,
conrming the pairing of the two devices.
L’éclairage s’arrête de clignoter, conrmant
l’appairage des deux appareils. The light stops to blink, conrming the pairing
of the two devices.
Effectuez la procédure identique à l’appairage (voir “appairage avec un Module Éclairage ON/OFF compatible”) en prenant
soin d’appuyer sur l’Interrupteur de Sol contrôlant votre éclairage. Do the same procedure as pairing (see “pairing procedure”) and take care of pressing the Floor Switch controlling
your light.
1Lancez l’appairage en effectuant 3 appuis consécutifs
sur le bouton du module. La LED scintille en rouge.
1Launch the pairing by doing 3 consecutive presses on
the relay switch button. The LED blinks red.
2 Vous disposez de 30 secondes pour appairer votre
Interrupteur de Sol en appuyant 3 secondes sur le bouton.
2 You have30 seconds to pair your Floor Switch
by pressing the button for 3 seconds.
CANAL 1 ( / ) CHANNEL 1 ( / )
Pour ajouter un Interrupteur de Sol vous devez entrer en mode appairage et votre éclairage doit être allumé.
Le module doit être raccordé et sous tension.
To add a Floor Switch you must enter the pairing mode, your light must be switched ON.
Relay switch must be power supplied.
Depuis le module connecté From the Relay Switch
Other nodon Switch manuals
