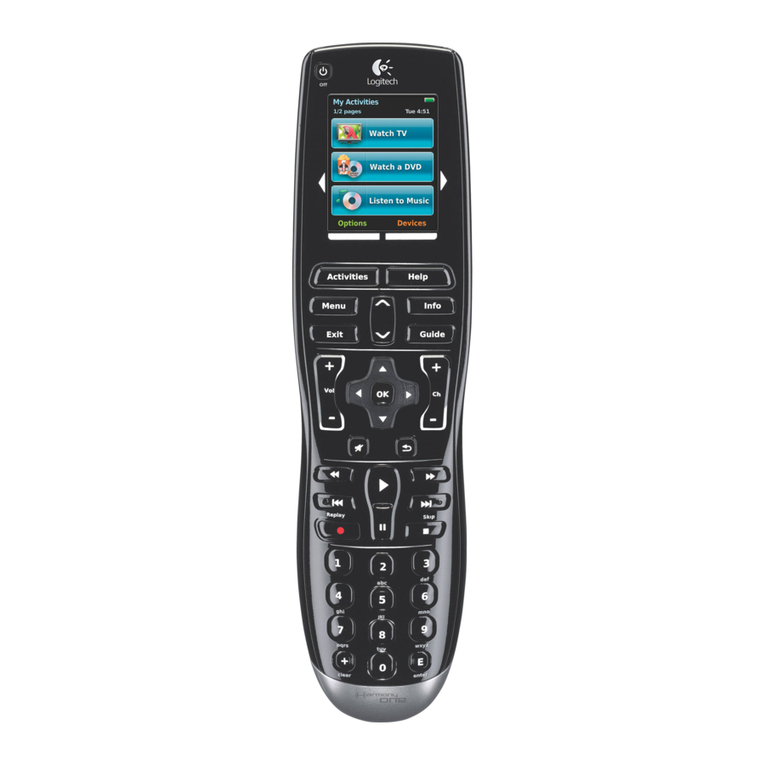
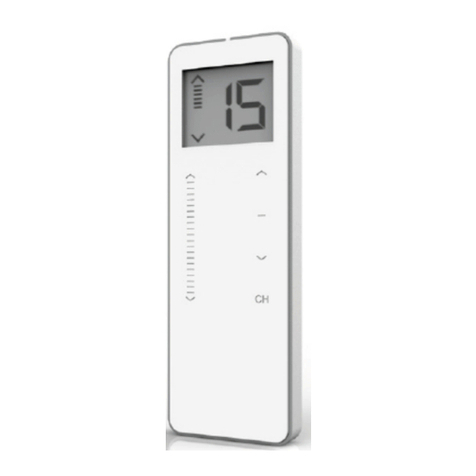
NORDGAS EASYREMOTE User manual

REMOTE CONTROL DEVICE
EASYREMOTE
INSTRUCTION
MANUAL

Technical features
Guide to LCD symbols
Guide to keys

Supply by communication bus
Number of temperature levels 2 (DAY / NIGHT)
Temperature setting range DAY 5 ÷ 30 °C
Temperature setting range NIGHT 5 ÷ 30 °C
Temperature setting range MANUAL 5 ÷ 30 °C
Differential operation temperature OFF 0.0 ÷ 1.0 °C
Differential operation temperature ON -1.0 ÷ -0.1 °C
Correct working range room temperature probe -40 ÷ 50 °C
Temperature resolution 0.1 °C
Room anti-frost start temperature range 0.1 ÷ 10.0 °C
Room anti-frost end temperature start value + 0.6 °C
Timer programmer resolution 30 minutes
Maximum number of startings and shutdowns per day 48
Number of standard heating programs 1
Number of standard storage tank programs 1
Internal clock time retention in case of power loss 1 hour
Operating temperature range 0 ÷ 50 °C
Stocking ambient temperature -10 ÷ 50 °C
Size (L×H×D) 118×85×30 mm
Maximum cable length for boiler connection 50 mt
Cable section for boiler connection 0,5 ÷ 1,5 mm2
Technical features

Dear customer,
Our compliments for buying the remote control device
EASYREMOTE, a product of latest technologies which will
give you superior comfort.
In order to get top performance and to learn how to best use
features and functions of this remote control device, care-
fully read this manual and keep it always readily accessible
in case you need to refer to it.
CAUTION
Before connecting refer to the Instruction booklet to make
sure that the boiler was designed to be used with the
remote control device EASYREMOTE

ABC D EF G
ASelect operation status
BSet time and
temperature
CWeekly program
D
Change displayed
value (turn)
Select automatic /
manual (press)
EAlarm reset
FSelect temperature level
(day/night)
GTemperature display
Keys

ICON STEADY BLINKING ICON STEADY BLINKING
Current temperature Fault code Set time and day of
the week
Time/temperature Set day temperature
Current day of the week Change day of the week Set night temperature
Domestic hot water
enabled
Domestic hot water
requested Heating temperature Set heating temperature
Heating enabled Heating requested Domestic hot water
temperature
Set domestic hot water
temperature
Manual mode kd value
Burner on Current temperature
level = day
Heating program Change heating program Current temperature
level = night
Storage tank program Change storage tank
program
Fault, no more attempts
left for restoring
Fault - restore attempts
available
Current room set point Temporary change room
set point
Fault requiring technical
service
Outside temperature Night level
System pressure Day level
LCD symbols

1
E A S Y R E M O T EN O R D G A S
Contents
1 - How to use this instruction booklet........................................................................3
2 - General instructions ..............................................................................................4
3 - Main features.........................................................................................................5
4 - Installation .............................................................................................................6
5 - Configurating operating parameters................................................................... 10
6 - Disabling thermo-regulation ............................................................................... 13
7 - Selecting operating mode................................................................................... 14
8 - Setting up clock and temperature....................................................................... 17
8.1 - Setting up clock........................................................................................ 18
8.2 - Setting up room DAY temperature ........................................................... 20
8.3 - Setting up room NIGHT temperature ....................................................... 21
8.4 - Setting up HEATING temperature............................................................ 22
8.5 - Setting up DOMESTIC HOT WATER temperature .................................. 23
8.6 - Setting up outside probe KD value .......................................................... 24
9 - Setting up clock and temperatures..................................................................... 25
9.1 - MANUAL operation .................................................................................. 26
9.2 - AUTOMATIC operation ............................................................................ 27
10 - Weekly heating program .................................................................................. 28
10.1 - Display heating program ........................................................................ 29
10.2 - Change heating program ....................................................................... 30

2E A S Y R E M O T EN O R D G A S
11 - Weekly storage tank program........................................................................... 31
11.1 - Display storage tank program ................................................................ 32
11.2 - Change storage tank program ............................................................... 33
12 - Temporary change room temperature set point ............................................... 34
13 - Fault signalling ................................................................................................. 35
13.1 - Restorable faults .................................................................................... 35
13.2 - Not restorable faults............................................................................... 36
14 - Display values .................................................................................................. 37
14.1 - Display set room temperature................................................................ 38
14.2 - Display temperature domestic hot water probe ..................................... 38
14.3 - Display temperature delivery probe ....................................................... 39
14.4 - Display temperature outside probe........................................................ 39
14.5 - Display system water pressure .............................................................. 40
15 - Reset of default values..................................................................................... 41
16 - Complete resetting ........................................................................................... 43
17 - Room anti-freeze function ................................................................................ 44

3
E A S Y R E M O T EN O R D G A S
This booklet is divided into two sec-
tions, each of which having its own
addressee:
Installer section
•
, this gives instruc-
tions regarding the accurate installation
and configuration of the remote control
device.
User section
•
, this gives detailed
instructions regarding the steps to
carry out in order to personalize the
functioning of the EASYREMOTE
remote control device.
Some hints
When a numeric value is blinking you
•
can change it by turning button .
The value as changed by turning button
•
will be automatically stored when
the blinking stops.
The use of the symbol shows the impossibility
to dispose this product as domestic waste.
The correct disposal of this product helps to
prevent potential negative consequences for
the environment and human health.
1 - How to use this instruction booklet

4E A S Y R E M O T EN O R D G A S
INSTALLER
Carefully read this manual because
•
it will give you important instructions
regarding the safety of use, installation
and maintenance.
The system must be implemented in
•
compliance with the safety regulations
in force.
After unpacking and before installing
•
check that the product is intact.
This device is to be used only for the
•
use it has been designed for: any dif-
ferent use is improper.
In case of repair contact only techni-
•
cal service centers authorized by the
manufacturer.
Non-compliance with the above may
•
endanger the safety of the device.
If the device is installed to control a low
•
temperature zone, this zone must be
equipped with a low temperature safety
thermostat surveying it.
The manufacturer cannot be held lia-
•
ble for any damages resulting from bad
operation, extraordinary events, config-
uration errors or improper, wrong and
unreasonable use of the device.
The manufacturer reserves the right to•
eventually make changes to the device
and whatever else appears necessary
for the continual improvement thereof.
2 - General instructions

5
E A S Y R E M O T EN O R D G A S
INSTALLER
The EASYREMOTE remote control
device has been designed to guaran-
tee ideal temperature conditions at any
moment of the day offering the possibil-
ity to set the boiler from remote.
The programming of the EASYREMOTE
remote control device is extremely easy -
a large LCD-display makes it possible to
check and change the set values at any
time.
The EASYREMOTE remote control
device is electrically connected to the
boiler by means of two nonpolarized con-
ductors. They give it the necessary supply
to operate and constitute also the com-
munication between the two devices.
After installing it is immediately ready to
run with its memorized standard program.
This program can be changed according
to the needs of the user.
3 - Main features

6E A S Y R E M O T EN O R D G A S
INSTALLER
The EASYREMOTE remote control
device must be installed only by expert
personnel.
To correctly install the device and in com-
pliance with the regulations in force about
electrical appliances, use a dedicated line
to connect it. In case this is impossible,
any interference due to electric wires may
cause poor working of the remote con-
trol device.
Install the EASYREMOTE remote con-
trol device at approx. 1.5 m over floor in
a place suitable for correct sensing of the
room temperature. Do not install behind
doors, curtains, near heat sources nor
expose to direct sunlight or water sprin-
kles.
4 - Installation
NONO
NO YES
1.5 mt

7
E A S Y R E M O T EN O R D G A S
INSTALLER
1. Cut off electricity from boiler
2. Use a screwdriver and gently press
on the two lower splines to take off
the device from the back of its fixing
template.
3. Insert both ends of the connecting
wire into their proper seat on the fix-
ing template.
Use the proper holes to install the
EASYREMOTE remote control
device directly onto the wall or onto a
housing. The necessary screws are
supplied together with the device.
Pay attention to the sign “ UP”.

8E A S Y R E M O T EN O R D G A S
INSTALLER
4. Connect electricity to the terminal
box.
N.B.: The connection is not polarized.
5. Fix your remote control device to its
template. First insert the upper part
and then press and turn until its com-
pletely closed.
6. Check in the boiler if there is a request
to eliminate the jumper on the room
thermostat terminals (if installed).

9
E A S Y R E M O T EN O R D G A S
INSTALLER
7. Supply power to the boiler.
Now the installation is completed. If it was
done correctly the remote control device
is now powered and the LCD display will
show the following message for a few
seconds:
As soon as the connection is established
the normal operating condition will be dis-
played:

10 E A S Y R E M O T EN O R D G A S
INSTALLER
This operation must be done by
technical service personnel only.
Errors in the configuation of your
EASYREMOTE remote control device
may lead to malfunctioning.
This operation configures the remote
control device to be compatible with the
boiler and the system to which it is con-
nected.
1. Move the remote control device to
OFF position.
2. Press the keys and and
keep them pressed until the display
will show PAr.
3. To confirm the function press button
.
Instead of the time the display will
show the parameter number, and
instead of the temperature the param-
eter value. The parameter number will
be blinking.
5 - Configurating operating parameters

11
E A S Y R E M O T EN O R D G A S
INSTALLER
4. Turn button to select the param-
eter number to be displayed. The
temperature display will show the
corresponding parameter value.
5. Press button : to change this value.
The corresponding parameter value
will start blinking.
6. Turn button to change the dis-
played value.
7. If within 30 sec. no key is pressed,
normal operation will be restored
and the last change made will not be
saved.
8. Press button to store the value.
9. To change the parameter repeat from
point 4.
10. To exit the configuration context press
key .
Hereafter you can find the definition of
parameters you can change:
P00 - Room temperature sensor
•
compensation
It is the value (-5.0°C ÷ +5.0°C) to
be added to/detracted from the dis-

12 E A S Y R E M O T EN O R D G A S
INSTALLER
played room temperature in order to
compensate any possible error.
P01 - Room anti-frost Start temper-
•
ature Range
It defines the start temperature for
the room anti frost function (0.1°C ÷
10°C).
N.B.: 0.0 = value 0.0 disables the room
anti frost function.
P02 - Differential operation temper-
•
ature OFF
It is the value to be added to the room
setpoint in order to define the end of the
Central Heating Demand.
Example:
Tset point = 20.0 °C
P02 = 0.5 °C
Tset point + P02 = 20.0 + 0.5 = 20.5 °C
The central heating demand ends
whenever the room temperature is
higher then 20.5°C.
P03 - Differential operation temper-
•
ature ON
It is the value to be subtracted from the
room setpoint in order to define the start
of the Central Heating Demand.
Example:
Tset point = 20.0 °C
P03 = 0.5 °C
Tset point - P03 = 20.0 - 0.5 = 19.5 °C
The central heating demand starts
whenever the room temperature is
lower then 19.5°C.
P04 - Thermo-regulation type•
0 = ON/OFF
1 = Modulating on Room Temperature
sensor
2 = Modulating on External Temper-
ature Sensor (Outside Temperature
Compensation)
3 = Modulating on Room and External
Temperature sensors
4 = Disabled

13
E A S Y R E M O T EN O R D G A S
INSTALLER
In case the remote controller is installed
inside a generic environment and you
do not need to control its temperature
(i.e.garage, boiler room…), you can dis-
able the Central Heating demand request
trough proper configuration of parameter
P04 = 4 (see chapter 5 - Configurating
operating parameters).
With this kind of configuration the word
diS is displayed on the remote controller
LCD screen in place of the room temper-
ature.
6 - Disabling thermo-regulation

14 E A S Y R E M O T EN O R D G A S
USER
Subject to the type of boiler con-
nected, some of the following modes
may not be available.
Select the operating mode of the boiler by
pressing key several times. The oper-
ating modes you can set are:
7 - Selecting operating mode
SELECTED
STATUS ID ICONS
OFF
SUMMER
WINTER
ONLY HEATING
1. OFF: all requests for boiler are disa-
bled.
Table of contents
