2
Wireless Remote Controller Kit Installation manual
CONTENTS
1. SAFETY CONSIDERATIONS..........................................2
2. BEFORE INSTALLATION................................................2
3. REMOTE CONTROLLER INSTALLATION......................3
4. RECEIVER INSTALLATION.............................................3
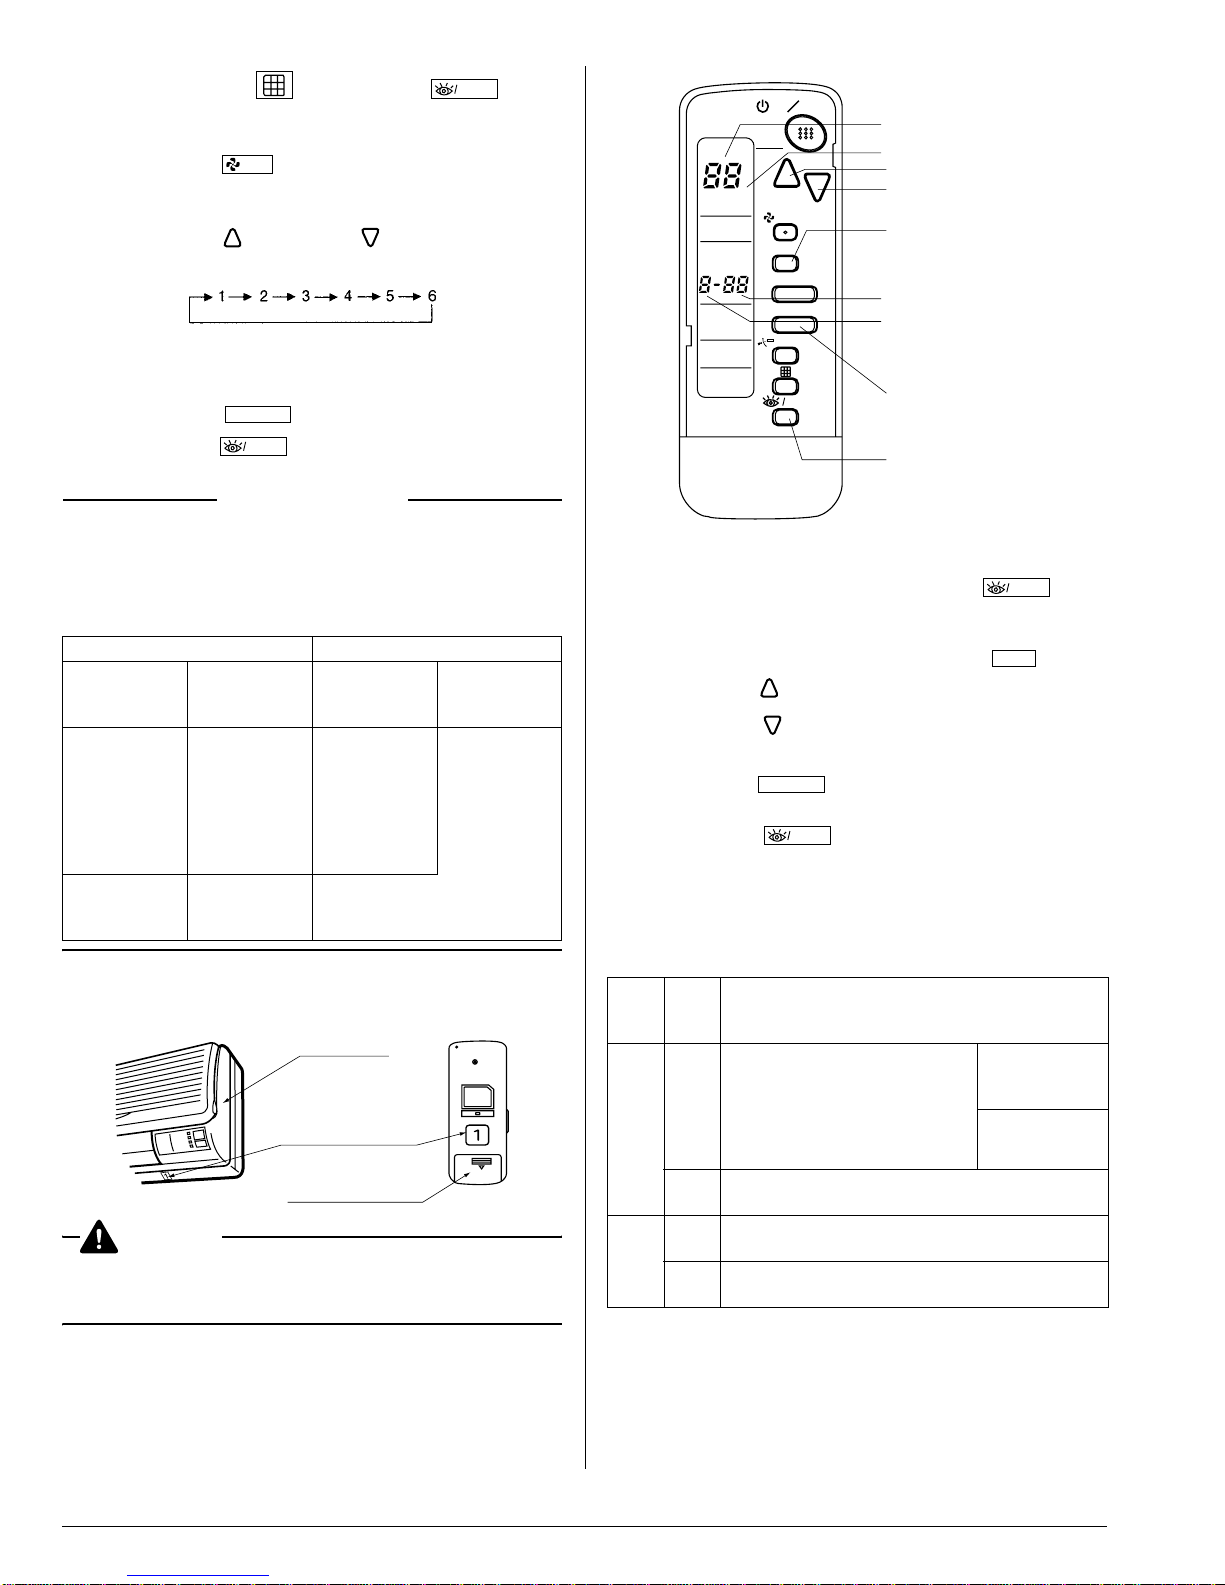
5. FIELD SETTING..............................................................5
6. TEST OPERATION..........................................................6
1. SAFETY CONSIDERATIONS
Please read these “SAFETY CONSIDERATIONS” carefully
before installing air conditioning equipment and be sure to
install it correctly. After completing the installation, make sure
that the unit operates properly during the start-up operation.
Please instruct the customer on how to operate the unit and
keep it maintained.
Also, inform customers that they should store this installation
manual along with the operation manual for future reference.
This air conditioner comes under the term “appliances not
accessible to the general public”.
Meaning of warning, caution and note symbols.
WARNING .............Indication a potentially hazardous sit-
uation which, if not avoided, could
result in death or serious injury.
CAUTION ..............Indication a potentially hazardous sit-
uation which, if not avoided, may
result in minor or moderate injury. It
may also be sued to alert against
unsafe practices.
NOTE ....................Indication situation that may result in
equipment or property-damage-only
accidents.
WARNING
• Perform installation work in accordance with this instal-
lation manual.
Improper installation may result in electric shocks or fire.
•Be sure to use only the specified accessories and parts
for installation work.
Failure to use the specified parts may result in, electric
shocks, fire or the unit falling.
•Before touching electrical parts, turn off the unit.
•Do not touch the switch with wet fingers.
Touching a switch with wet fingers can cause electric shock.
CAUTION
•Refer also to the installation manuals attached to the
indoor unit and the decoration panel.
•Confirm that the following conditions are satisfied prior
to installation.
Ensure that nothing interrupts the operation of the wireless
remote controller. (Ensure that there is neither a source of
light nor fluorescent lamp near the receiver.Also, ensure that
the receiver is not exposed of direct sun light.)
Ensure that the operation display lamp and other indicators
are easy to see.
•The installation position of this receiver is one corner of
thedecorationpanel. Therefore,confirm thatits position
is set so that the signal from the wireless remote control-
ler can be easily transmitted and itsdisplay can be easily
seen.
•If both this kit and fresh air intake kit are installed, only
one duct chamber shall be used. Refer to the installation
manual of the fresh air intake kit (optional hand book).
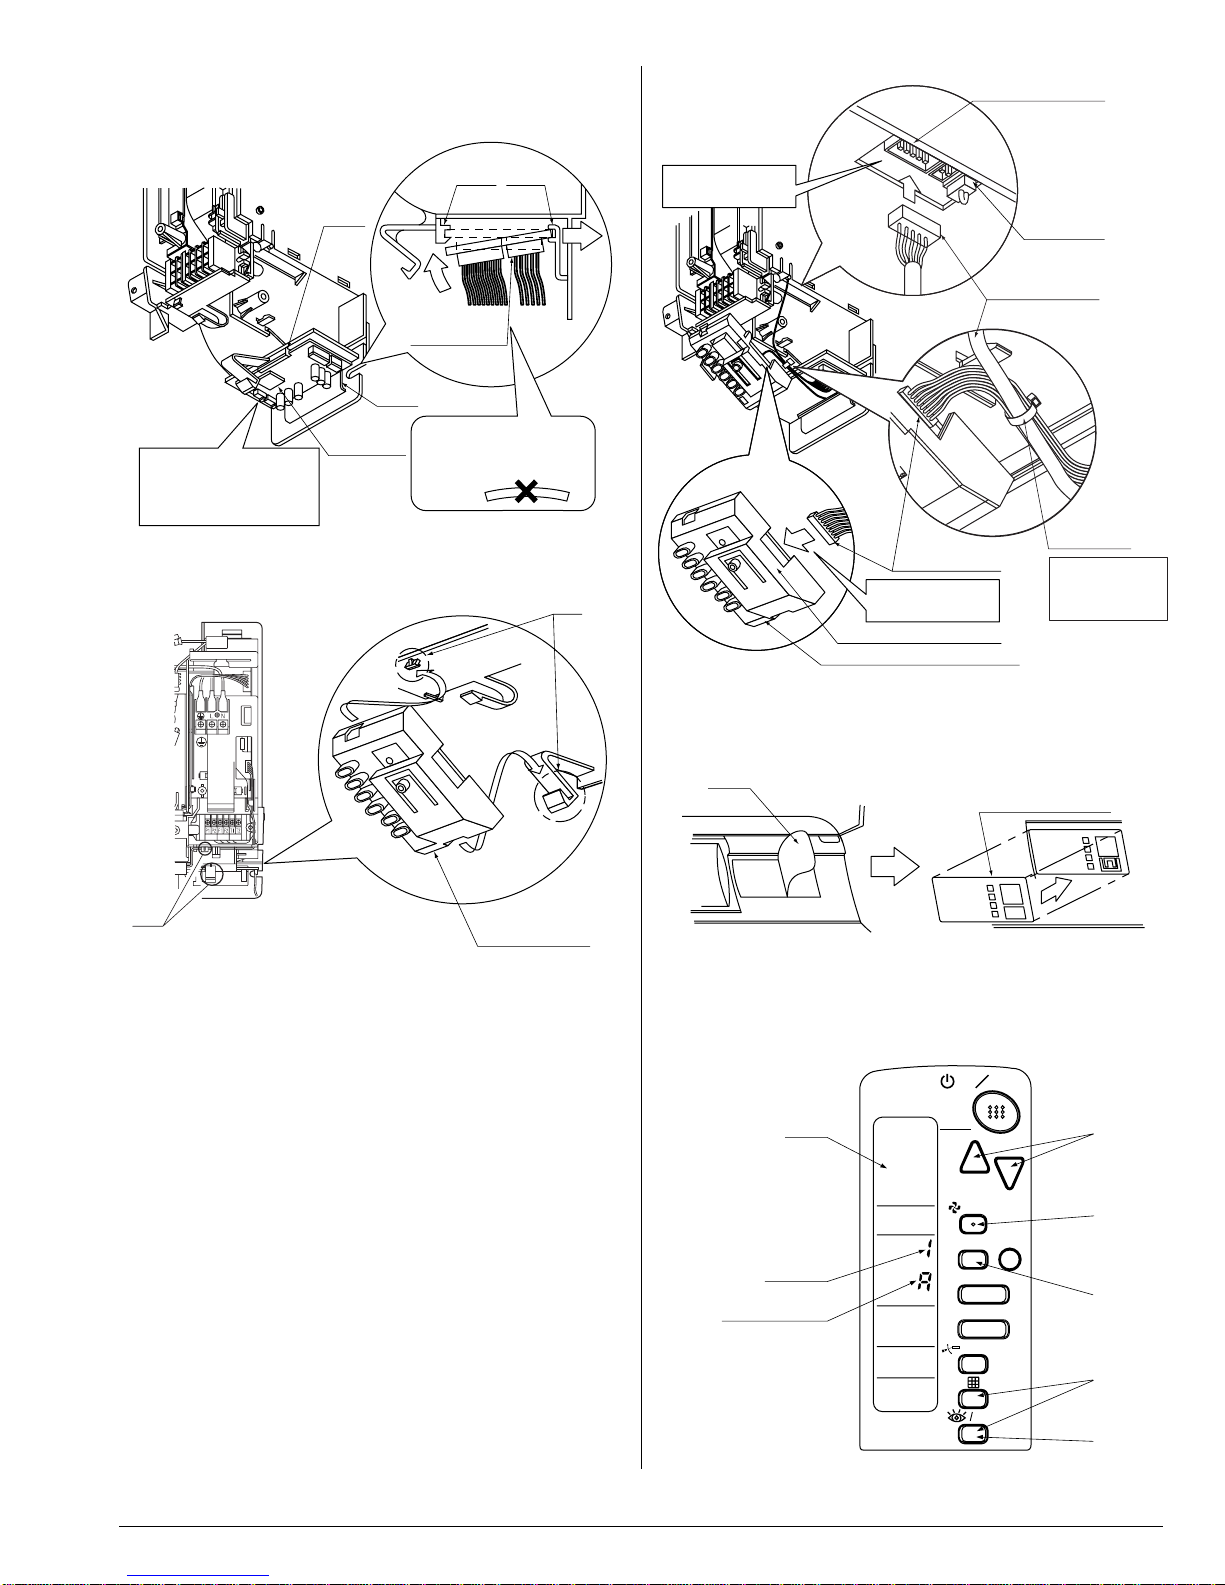
2. BEFORE INSTALLATION
2-1 ACCESSORIES
Check if the following accessories are included with the unit.
2-2 NOTE TO THE INSTALLER
Be sure to instruct the customer how to properly operate the
system showing him/her the attached operation manual.
Name Receiver (3) Relay harness
- long
(1) Light receiver
assembly
(2) Transmission
PC-board
Quantity 1 pc. 1 pc. 1 pc.
Shape
Name (4) Relay harness
- short (5)
Wireless remote
controller
(6)
Remote
controller holder
Quantity 1 pc. 1 pc. 1 pc.
Shape
Name (7)Drycell battery
LR03 (AM4) (8) Unit No. label (9) Receiver label
Quantity 2 pcs. 1 pc. 1 pc.
Shape
Name (10)
Screw for install-
ing remote con-
troller hol
der
(11) Operation
manual (12) Installation
manual
Quantity 2 pcs. 1 pc. 1 pc.
Shape
Name (13) Clamp
Quantity 1 pc.
Shape
1
1
1
2
2
2
3
3
3