North American Ramps CHECK OUT ProMaster Operator's manual

RAMP LIFTGATE
MANUAL & SAFETY
INSTRUCTIONS
NORTH AMERICAN RAMPS LLC • 226 Manley Street • Charlotte, NC 28216
checkoutourramps.com • (704) 844-0900
_________________________________________________________________________________
For ProMaster, Transit, and Sprinter Cargo Vans
Shown on RAM ProMaster
Shown on Ford Transit
Shown on Mercedes Benz Sprinter


Please thoroughly familiarize yourself with the operating manual
before using this ramp. This ramp is designed to give years of
service with minimal maintenance when operated according to this
manual. If you have any questions, please contact us at
Congratulations on your purchase of the
finest ramp system on the planet!
NORTH AMERICAN RAMPS LLC • 226 Manley Street • Charlotte, NC 28216
_________________________________________________________________________________
Record the serial number, model number and date of installation in
the box below. Retain this information for future reference.
Check Out Our Ramps Serial Number:
Make and Model of Van:
Vehicle Identification Number (VIN):
Installation Date:
Vehicle Mileage at Ramp Installation:
Be sure to register your ramp online at: checkoutourramps.com/warranty
checkoutourramps.com • (704) 844-0900

FOLLOW ALL WARNINGS AND SAFTEY INSTRUCTIONS BEFORE USING THIS RAMP
LIFTGATE. FAILURE TO FOLLOW WARNINGS OR USE OF RAMP OTHER THAN FOR ITS
INTENDED PURPOSE, CAN RESULT IN DEATH, PERSONAL INJURY AND/OR PROPERTY
DAMAGE.
BE SURE THAT THE VEHICLE IS PROPERLY AND SECURELY BRAKED BEFORE USING THE
RAMP, INCLUDING USE OF THE VEHICLE’S EMERGENCY BRAKE. VEHICLE SHOULD NEVER
BE MOVED WHEN THE RAMP IS NOT LATCHED AND SECURED.
DO NOT USE THE RAMP LIFTGATE UNTIL YOU HAVE READ AND BECOME FAMILIAR WITH
THE OPERATING INSTRUCTIONS. This is a manually operated ramp liftgate with a spring assist.
Use caution at all times when opening and closing the ramp door in order to avoid damage and or
injury to yourself or others.
THIS LIFTGATE IS INTENDED FOR LOADING AND UNLOADING CARGO ONLY! DO NOT USE
THIS RAMP LIFTGATE FOR ANYTHING OTHER THAN ITS INTENDED MANUFACTURED USE.
INSPECT RAMP BEFORE EACH USE. Always inspect the ramp before each use to ensure that the
ramp lift gate is safe and functioning Properly. Do not use the ramp liftgate if there are signs of poor
maintenance, abnormal wear or damage. Do not use the ramp liftgate if the ramp liftgate is wet or
slippery. Do not use the ramp liftgate in poor weather conditions such as rain and or snow. Do not
attempt to repair the ramp liftgate yourself unless you have been trained and or authorized to do so.
INSPECT RAMP LIFTGATE LOADING AREA. Make sure that the loading area where the ramp
liftgate is to be lowered and used, is clear from all obstacles, animals and people at all times. Make
sure the ramp liftgate is clearly visible from all approach angles and directions by using traffic safety
cones, triangle warning stands, flashing lights, and or platform flags. NEVER use the ramp in low light
conditions.
MAINTAIN VISUAL AWARENESS OF RAMP AREA AT ALL TIMES. Make sure that you can see
and keep visual control over the whole working area of the ramp liftgate, the platform and its load at all
times.
RAMP CAPACITY: 2,200 POUNDS MAX! DO NOT EXCEED RAMP CAPACITY OR OVERLOAD
RAMP LIFTGATE as this could cause the ramp to buckle and or collapse causing injury and or
damage. NEVER drive a forklift onto the ramp liftgate.
BEFORE LOWERING RAMP! Check the area beneath the ramp to ensure that there are no animals,
children, and or objects that could potentially be struck and or hurt as the ramp is lowered into place.
Do not allow any part of your body to be placed under, within, or around any portion of the moving
ramp liftgate or its mechanisms, or in a position that would trap them between the platform and the
ground when raising or lowering the ramp liftgate.
WARNING - RAMP LIFTGATE WARNING & SAFETY INSTRUCTIONS

For the orginal latching system, pull the latch down to unlatch the
ramp liftgate from the frame one side at a time.
LOWERING THE RAMP
NEVER hold the ramp at the end of the ramp liftgate to lower onto the ground as this can cause injury
to hands and fingers.
NEVER stand behind the ramp liftgate to lower and/or close.
RAMP MUST REST LEVEL ON SURFACE. Ensure that the ground surface where the ramp edge will
rest, is level and parallel to the ramp edge. Lowering the ramp on an uneven surface can cause
damage to the ramp and cause the ramp to be unstable while loading and unloading. If you cannot
load and or unload on a level surface, DO NOT ATTEMPT TO USE THIS RAMP.
UNLEVEL SURFACE (BAD) LEVEL SURFACE (GOOD)
When lowering the ramp, always use both hands to assist the
ramp to the ground. It is best to hold the ramp on the sides,
towards the end to maximize weight leverage. Keep your feet
away from the landing position of the ramp.

RAISING THE RAMP LIFTGATE. When raising the ramp, always use both hands to assist the ramp
to its closed position just like you did while lowering the ramp. Keep hands, fingers, and other items
away from the ramp edge (pinch points) and ramp frame to avoid injury and or damage.
UNSAFE SAFE
Once loading and unloading is complete,
ALWAYS SECURE LIFTGATE TO THE
CHASSIS BY LATCHING AND
LOCKING THE RAMP HANDLE OR
RAMP LATCHES TO THE FRAME!
NEVER MOVE THE VEHICLE UNTIL
THE RAMP IS SECURE!
WEAR APPROPRIATE WORK CLOTHES AND FOOTWEAR. We suggest wearing appropriate foot
wear that will keep your feet and toes protected while using the ramp. Wearing steel-toed shoes and
non-slip soles are recommended. Open-toed foot wear, like sandals are not recommended. Wearing
protective gloves whenever using the ramp liftgate for loading and unloading is also recommended.
NEVER USE A CELLPHONE WHILE OPERATING THIS RAMP LIFTGATE.
ABOVE ALL, USE GOOD "COMMON SENSE" WHEN OPERATING THIS RAMP LIFTGATE.
RAMP MAINTENANCE
There are two grease fittings
located on either side of the ramp.
To ensure consistent mechanical
operation of the ramp, these fittings
must be greased 1-2 times per
year to keep the interior spring
torsion bar and cams lubricated.
If you have any difficulty with, or questions regarding the use, maintenance or operation of the ramp, we want to help!
Please call (704) 844-0900.
Comply with all attached instruction and warning labels. Keep instruction and warning labels clean and legible. If labels have become
illegible or missing, have them replaced immediately. Get free replacement labels from North American Ramps LLC.
NO ALTERATIONS OF ANY KIND SHALL BE MADE TO THE RAMP, nor the use of the ramp liftgate for any other purpose outside the
intended specified manufacturers suggested use, as this will void the manufacturer’s warranty and release North American Ramps LLC
from all indemnification and liability for the misuse and neglect of using the ramp for anything other than the manufacturers intended use
for this ramp. Only manufacturer attachments or accessories should be used with the ramp, and no other such device should be
installed without contacting the manufacturer first. At all times, operation and maintenance of the ramp shall be done in accordance with
these warnings and the operation manual. It is recommended that qualified personnel do an annual inspection of the ramp, and that any
damaged parts or warning labels be replaced immediately.

INSTRUCTIONS FOR RAMP LIFTGATE OPTIONS & ACCESSORIES
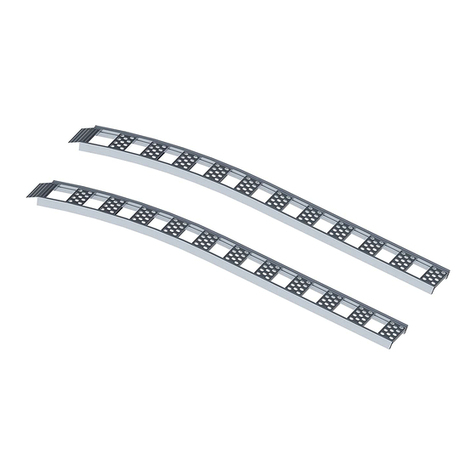
RAMP EXTENDERS - the ramp extenders are a great choice to help decrease pitch, and make
loading and unloading safer and easier.
Our ramp extenders have been designed to increase the efficiency and
pitch of the ramp. Some ramps have more of a pitch or angle than others.
As well, some inclines that you may encounter may also increase the pitch
or angle that you will be loading and unloading on. And finally, some
equipment may not cross over the threshold of the ramp without scraping
as it enters the cargo van floor. For this reason, the ramp extenders are a
great choice to help decrease pitch, and make loading and unloading safer
and easier.
Transit Ramp standard pitch on level
ground without ramp extenders is 23º.
Transit Ramp standard pitch on level
ground with ramp extenders is 15.5º.
ProMaster Ramp standard pitch on level
ground without ramp extenders is 19º.
ProMaster Ramp standard pitch on level
ground without ramp extenders is 14º.
Sprinter Ramp standard pitch on level
ground without ramp extenders is 24º.
Sprinter Ramp standard pitch on level
ground without ramp extenders is 17º.

RAMP EXTENDER POSITIONING
HOW TO POSITION RAMP EXTENDERS
CORRECTLY
Make sure you place the edge of the ramp into the
lip of the ramp extender.
Make sure that BOTH ramp extenders fit into the lip
as shown.
Also ensure that both extenders are placed either directly together and or spaced apart equally as
needed for each specific item to be loaded. See examples listed below.
VERY IMPORTANT
• Make sure that the emergency brake is set and/or engaged before using the ramp extenders.
• Shifting of the ramp may occur while loading and unloading using the ramp extenders as the
weight of the item you are moving may push the ramp and extenders ever so slightly. Always
ensure that the edge of the ramp is firmly set into the lip of the ramp extender, each and every
time you load and unload any item.
For example, you will
want to place and use
the extenders together
to load a motorcycle.
The ramp extenders can be used for various applications such as loading motorcycles, stand-on
mowers, flooring equipment, and golf carts. The extenders can be positioned in several different ways
in order to accommodate the item that is to be loaded.
For a lawn mower, you
may have to spread the
extenders apart to fit the
wheel base of the
mower to the ramp.

For a golf cart, you’ll want to spread and place the extenders equal to the width of the golf cart tires, in
order to make sure the ramp extenders, golf cart tires, and the ramp are all positioned exactly.
Always use caution when using the ramp extenders. Make sure that when placing extenders into
position, you place them equally from one side of the ramp to the other, as seen in the pictures above.
Placing them 10” in on one side, and 5” in from the opposite side can cause the ramp to become
unstable and dangerous to load and unload. We always suggest using both ramp extenders at the
same time for increased safety.
RAMP LEGS - Turn your ramp into a worktable in minutes.
Our Ramp Legs turn your ramp into a multi-use worktable in only minutes! The applications are
endless. Simply attach the two ramp legs to the ramp pegs located on the back of the ramp, and then
place your set pin in the legs and adjust the pivoting base.
ATTACHING THE LEGS TO THE RAMP

Take one ramp leg at a time and place over the ramp peg on the back of the ramp aligning both holes.
Take a ramp pin and pass it through the holes in the adjustable leg and ramp peg. Once the pin has
passed through the holes, secure the set pin by pulling the closed looped end over the set pin. Do this
for both sides and ensure that all the ramp pins have been secured. If additional length is needed,
simply remove the ramp pins and adjust the ramp leg to the desired length and reset each ramp pin.
LOWERING THE RAMP INTO POSITION
When lowering the ramp, always use both hands to assist the ramp to the ground. Do not use the
ramp leg to hold or lower the ramp to the ground. It is best to hold the ramp on the sides, towards the
end to maximize weight leverage. Keep your feet away from the landing position of the ramp.
Once the ramp has been lowered into position, it is imperative that each pivoting base, and threaded
shaft be adjusted, so that equal weight is placed on both pivoting bases. Both pivoting bases should
be touching the ground at the same time. If significant adjustment is needed to balance the adjustable
legs, then close the ramp, remove ramp pins and slide the adjustable legs to a different hole position
and reinsert the ramp pins.
For minor adjustment, simply turn the shaft nuts or the entire threaded shaft clockwise or counter
clockwise to adjust. ALWAYS make sure that the nut on the threaded shaft is tightened to avoid
damage to the adjustable threaded shaft.
NOT ADJUSTED ADJUSTED NOT Threaded Properly Threaded Properly
Also ensure that the shaft nuts have been hand-tightened so that they are threaded against either end
of the shaft. Failure to do this can strip the thread pattern on the threaded shaft.

Make sure that the emergency brake is set and/or engaged before using the ramp legs for
the worktable.
Ensure that the item you are placing on the ramp worktable does not exceed the
manufacturers 2,000 lb max weight capacity.
Make sure that the item you are placing on the ramp worktable is centered and the weight
of that item is evenly distributed across the worktable.
DO NOT place the bulk of the weight on the sides of the worktable or towards the end or
edge of the rear of the ramp worktable.
VERY IMPORTANT
If you have any difficulty with, or questions regarding the use, maintenance or operation of the ramp,
we want to help! Please call (704) 844-0900.
NORTH AMERICAN RAMPS LLC • 226 Manley Street • Charlotte, NC 28216
_________________________________________________________________________________
checkoutourramps.com • (704) 844-0900

WARNING LABELS
Each ramp system comes with seven (7) WARNING, CAUTION, and NOTICE Labels. These labels
have already been placed onto the ramp from the factory. These labels were installed in order to
remind, protect, and keep you safe! If any of these labels are missing, damaged, or removed for
any reason, call or email us at [email protected].
WARNING LABELS AND POSITIONING
Positioned on the back of the ramp to
the right of ramp latch.
Positioned directly above ramp latch.
Positioned on the left side of the ramp, below the ramp latch bar.
CAUTION LABELS AND POSITIONING
Placed onto the driver's side sun visor.
Placed on both sides of outer ramp
edge. Two (2) labels on each side.
Placed on the opened ramp edge.
Two (2) labels on each side.
NORTH AMERICAN RAMPS LLC • 226 Manley Street • Charlotte, NC 28216
_________________________________________________________________________________
NOTICE LABELS AND POSITIONING
Placed on both sides near the
grease fittings.
checkoutourramps.com • (704) 844-0900


This manual suits for next models
2
Table of contents
Popular Lifting System manuals by other brands

Golf-Lift
Golf-Lift GL-TL GOLF LIFT Installation and owner's manual

Hiniker
Hiniker VERSAPLOW 4208 Operator's manual
JLG
JLG 1200SJP Operation and safety manual
Dhollandia
Dhollandia DH-CH101 Operation manual

Conductix-Wampfler
Conductix-Wampfler BridgeGuard Plus ASSEMBLY, INSTALLATION, OPERATION & MAINTENANCE MANUAL

Telpro
Telpro Panel Lift 110 Assembly manual

AAQ
AAQ AutoLift PP609 Installation manual & operation instructions
WOOD'S POWR-GRIP
WOOD'S POWR-GRIP MRT49DC instructions
ReadyLift
ReadyLift Rubicon JL manual
Genie
Genie SUPER HOIST Operator's manual

ATLAS PLATINUM
ATLAS PLATINUM PVL14OF-EXT Installation & operation manual

Finkbeiner
Finkbeiner FHB 3500DC Assembly instruction
