NorthStar EXPLORER 443S User manual

www.northstarnav.com
Explorer 443s/443sp
Fishfinder
Installation and Operation Manual

FCC Statement
Note: This equipment has been tested and found to comply with the limits for a Class B digital device,
pursuant to Part 15 of the FCC Rules. These limits are designed to provide reasonable protection
against harmful interference in a normal installation. This equipment generates, uses and can radiate
radio frequency energy and, if not installed and used in accordance with the instructions, may cause
harmful interference to radio communications. However, there is no guarantee that interference
will not occur in a particular installation. If this equipment does cause harmful interference to radio
or television reception, which can be determined by turning the equipment off and on, the user is
encouraged to try to correct the interference by one or more of the following measures:
Reorient or relocate the receiving antenna.
Increase the separation between the equipment and receiver.
Connect the equipment into an output on a circuit different from that to which the receiver is
connected.
Consult the dealer or an experienced technician for help.
A shielded cable must be used when connecting a peripheral to the serial ports.
IMPORTANT SAFETY INFORMATION
Please read carefully before installation and use.
DANGER
This is the safety alert symbol. It is used to alert you to potential personal
injury hazards, Obey all safety messages that follow this symbol to avoid
possible injury or death.
!
WARNING
WARNING indicates a potentially hazardous situation which, if not avoided,
could result in death or serious injury
CAUTION
!
CAUTION indicates a potentially hazardous situation which, if not avoided,
could result in minor or moderate injury.
CAUTION
CAUTION used without the safety alert symbol indicates a potentially haz-
ardous situation which, if not avoided, may result in property damage.
DISCLAIMER: It is the owner’s sole
responsibility to install and use the instrument
and transducers in a manner that will not cause
accidents, personal injury or property damage.
The user of this product is solely responsible for
observing safe boating practices.
BRUNSWICK NEW TECHNOLOGIES INC. AND ITS
SUBSIDIARIES AND AFFILIATES DISCLAIM ALL
LIABILITY FOR ANY USE OF THIS PRODUCT IN A
WAY THAT MAY CAUSE ACCIDENTS, DAMAGE OR
THAT MAY VIOLATE THE LAW.
Governing Language: This statement,
any instruction manuals, user guides and
other information relating to the product
(Documentation) may be translated to, or
has been translated from, another language
(Translation). In the event of any conflict
between any Translation of the Documentation,
the English language version of the
Documentation will be the official version of the
Documentation.
This manual represents the Explorer 443s/443sp
as at the time of printing. Brunswick New
Technologies Inc. and its subsidiaries and
affiliates reserve the right to make changes to
specifications without notice.
Copyright © 2006 Brunswick New Technologies
Inc. Northstar™ is a registered trademark of
Brunswick New Technologies Inc

3
Northstar Explorer 443s/443sp Installation and Operation Manual
Contents
1 Introduction ..........................................................................................................................................5
2 Getting started ......................................................................................................................................6
2-1 Simulation Mode . . . . . . . . . . . . . . . . . . . . . . . . . . . . . . . . . . . . . . . . . . . . . . . . . . . . . . . . . . . . . . . . . 7
3 Operation ..............................................................................................................................................7
3-1 Alarms. . . . . . . . . . . . . . . . . . . . . . . . . . . . . . . . . . . . . . . . . . . . . . . . . . . . . . . . . . . . . . . . . . . . . . . . . . . . 8
3-2 HISTORY screen operation. . . . . . . . . . . . . . . . . . . . . . . . . . . . . . . . . . . . . . . . . . . . . . . . . . . . . . . . 9
3-3 HISTORY screen interpretation . . . . . . . . . . . . . . . . . . . . . . . . . . . . . . . . . . . . . . . . . . . . . . . . . . 10
3-4 ZOOM screen . . . . . . . . . . . . . . . . . . . . . . . . . . . . . . . . . . . . . . . . . . . . . . . . . . . . . . . . . . . . . . . . . . . 13
3-5 SONAR screen . . . . . . . . . . . . . . . . . . . . . . . . . . . . . . . . . . . . . . . . . . . . . . . . . . . . . . . . . . . . . . . . . . . 14
3-6 NAVIGATE screen. . . . . . . . . . . . . . . . . . . . . . . . . . . . . . . . . . . . . . . . . . . . . . . . . . . . . . . . . . . . . . . . 15
3-7 DATA screen . . . . . . . . . . . . . . . . . . . . . . . . . . . . . . . . . . . . . . . . . . . . . . . . . . . . . . . . . . . . . . . . . . . . . 16
3-8 RANGE menu. . . . . . . . . . . . . . . . . . . . . . . . . . . . . . . . . . . . . . . . . . . . . . . . . . . . . . . . . . . . . . . . . . . . 16
4 SETUP menu......................................................................................................................................... 17
4-1 ALARMS menu . . . . . . . . . . . . . . . . . . . . . . . . . . . . . . . . . . . . . . . . . . . . . . . . . . . . . . . . . . . . . . . . . . 18
4-2 UNITS menu. . . . . . . . . . . . . . . . . . . . . . . . . . . . . . . . . . . . . . . . . . . . . . . . . . . . . . . . . . . . . . . . . . . . . 19
4-3 FISH SYMBOL. . . . . . . . . . . . . . . . . . . . . . . . . . . . . . . . . . . . . . . . . . . . . . . . . . . . . . . . . . . . . . . . . . . .20
4-4 CONTRAST menu . . . . . . . . . . . . . . . . . . . . . . . . . . . . . . . . . . . . . . . . . . . . . . . . . . . . . . . . . . . . . . .20
4-5 ZOOM SPLIT . . . . . . . . . . . . . . . . . . . . . . . . . . . . . . . . . . . . . . . . . . . . . . . . . . . . . . . . . . . . . . . . . . . . . 20
4-6 LOG menu (Explorer 443sp ONLY) . . . . . . . . . . . . . . . . . . . . . . . . . . . . . . . . . . . . . . . . . . . . . . 21
4-7 INSTALL menu. . . . . . . . . . . . . . . . . . . . . . . . . . . . . . . . . . . . . . . . . . . . . . . . . . . . . . . . . . . . . . . . . . . 21
4-8 CALIBRATION menu . . . . . . . . . . . . . . . . . . . . . . . . . . . . . . . . . . . . . . . . . . . . . . . . . . . . . . . . . . . . .22
4-9 Resetting to Factory Defaults. . . . . . . . . . . . . . . . . . . . . . . . . . . . . . . . . . . . . . . . . . . . . . . . . . . .23
5 Installation.......................................................................................................................................... 23
5-1 What comes with the Explorer 443s/443sp?. . . . . . . . . . . . . . . . . . . . . . . . . . . . . . . . . . . . . .23
5-2 Options and Accessories. . . . . . . . . . . . . . . . . . . . . . . . . . . . . . . . . . . . . . . . . . . . . . . . . . . . . . . . .24
5-3 Mounting the Explorer 443s/443sp Display Unit . . . . . . . . . . . . . . . . . . . . . . . . . . . . . . . . . 24
5-4 Wiring Connection . . . . . . . . . . . . . . . . . . . . . . . . . . . . . . . . . . . . . . . . . . . . . . . . . . . . . . . . . . . . . .25
5-5 Connecting an Explorer 443s/443sp to other instruments . . . . . . . . . . . . . . . . . . . . . . .26
Appendix A - Specifications..................................................................................................................... 27
Appendix B - Troubleshooting................................................................................................................. 28

4 Northstar Explorer 443s/443sp Installation and Operation Manual
Northstar fishfinders are set up with default units of feet, °F (Fahrenheit) and knots.
Please refer to section 4-2 of this manual to change the units.
Important
It is your sole responsibility to install and use Northstar’s instrument & transducers in a manner that
will not cause accidents, personal injury or property damage. Always observe safe boating practices.
The choice, location, angle and installation of the instrument & transducers are critical to
performance of the system as intended. Follow instructions in this manual carefully. If in doubt,
consult your Northstar dealer.
Ensure that any holes cut are in a safe position and will not weaken the boat’s structure. If in
doubt, consult a qualified boat builder.
Do not install plastic through hull transducers in solid wooden hulls. Leaking through the hull
may result.
Do not install bonze transducers in metal hulls. This will cause electrolytic corrosion that may
result in damage to the hull or transducer.
Sonar Performance: The accuracy of the sonar depth display can be affected by many factors,
including the type and location of the transducer and water conditions. Ensure that the transducer
is located and used correctly.
Fuel Computer: Do not rely on the fuel computer as the sole source of information regarding
available fuel onboard. Fuel economy can change drastically depending on boat loading and sea
conditions. Fuel Computer information should be supplemented by visual or other checks of the
fuel load. This is necessary due to possible operator errors such as forgetting to reset the fuel used
when filling the tank, running the engine with the Fuel Computer not switched on, or on other
operator actions that may render the device inaccurate. Always carry adequate fuel onboard for the
intended trip, plus a reserve to allow for unforeseen circumstances.
Failure to adhere to these warnings may lead to death, serious injury or property damage.
Northstar disclaims all liability for installation or use of this product that causes or
contributes to death, injury or property damage or that violates any law.
As Northstar is continuously improving this product we retain the right to make changes to the
product at any time which may not be reflected in this version of manual. Please contact your
nearest Northstar office if you require any further assistance.

Congratulations on choosing a Northstar
fishfinder. For maximum benefit, please read this
manual carefully before installation and use.
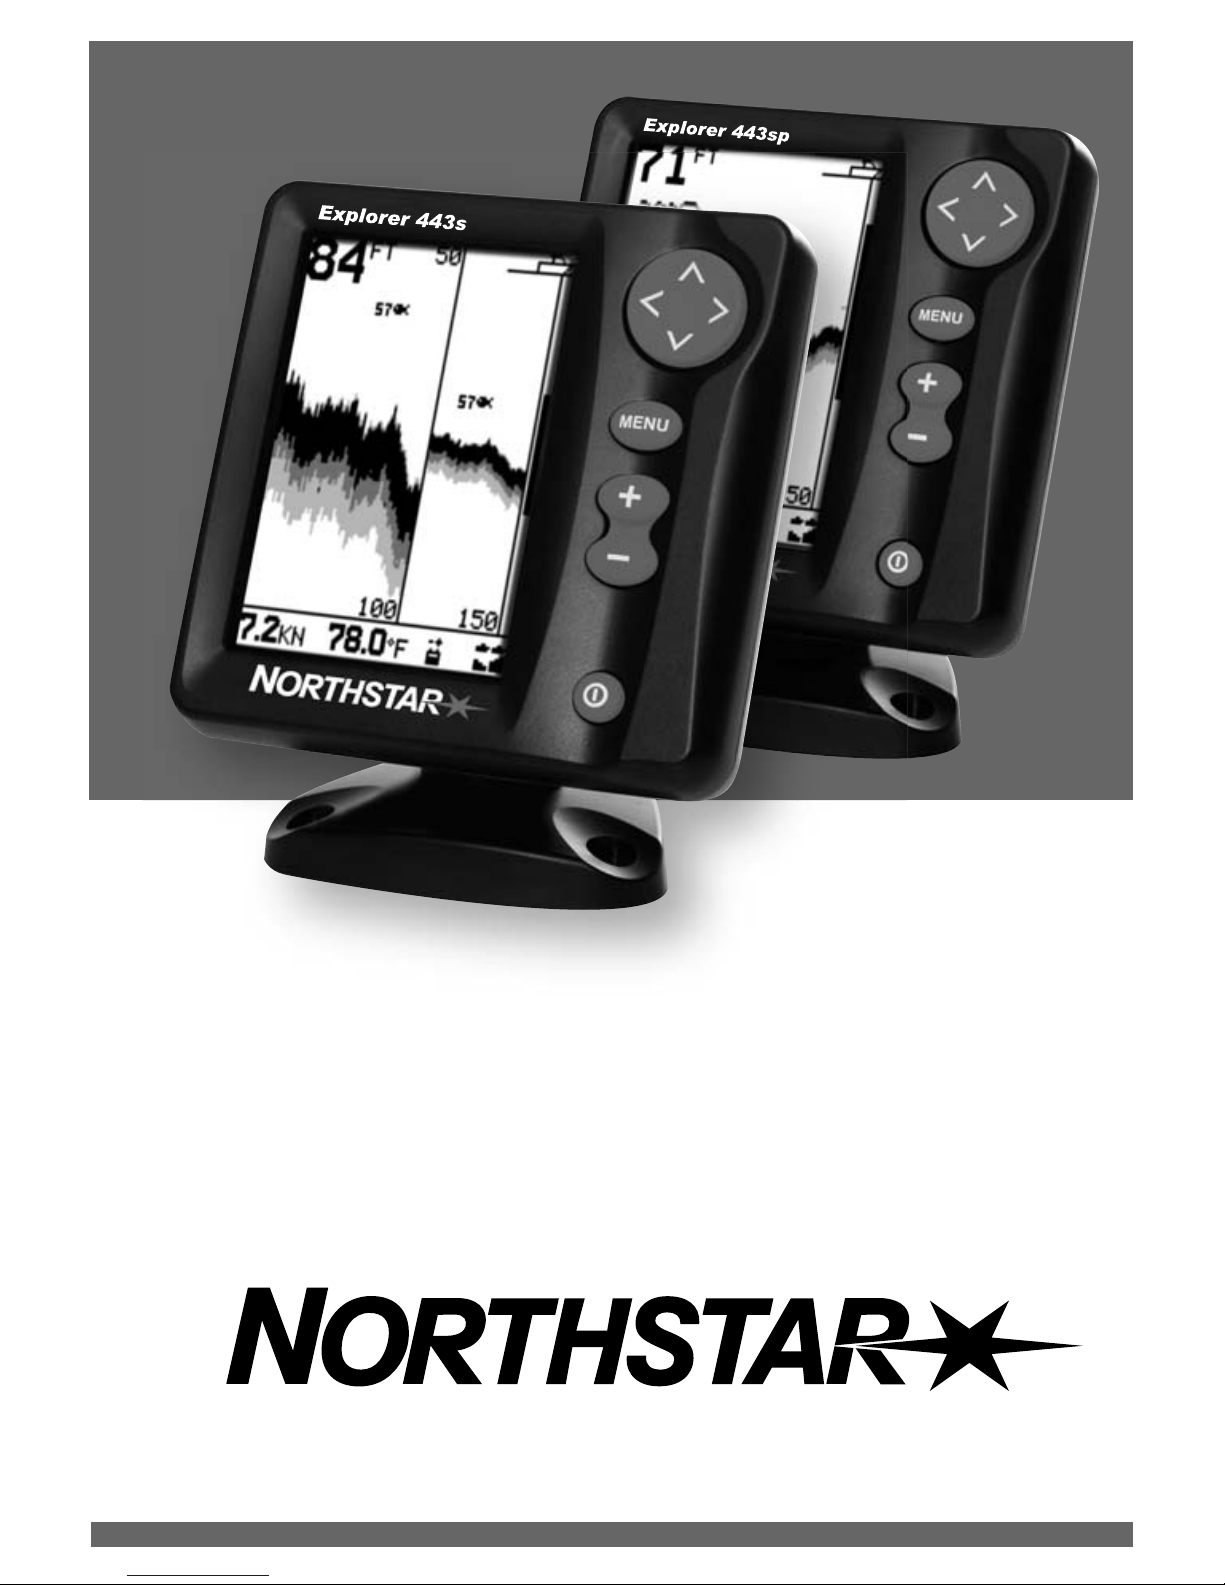
This manual describes the installation and operation
procedures for the Explorer 443s/443sp.
The Northstar Fishfinder
The Explorer 443s/443sp is an ultrasonic fishfinder
with four levels of greyscale. It provides powerful
software and a large, high-resolution screen with
a zoom facility and a choice of fish symbols. As
well as detecting fish, the Explorer 443s/443sp
measures the water depth, battery voltage,
engine hours and water temperature.
The Explorer 443sp also measures boat speed and
has two distance logs (Trip Log and Total Log).
An installed Explorer 443s/443sp has two parts:
- The transducer attached to the hull.
- The display unit.
The transducer generates an ultrasonic pulse
(sound that is above the hearing range of the
human ear), which travels down towards the
bottom, spreading out into a cone shape.
When the pulse meets an object, such as a fish
or the bottom, some of the pulse is reflected
back up towards the boat and is received by
the transducer. The depth of an object can be
calculated by measuring the time between
sending the pulse and receiving its echo. The
Northstar Explorer 443s/443sp will detect
the bottom down to 600 feet (180 metres),
depending on the clarity of the water and the
type of transducer used.
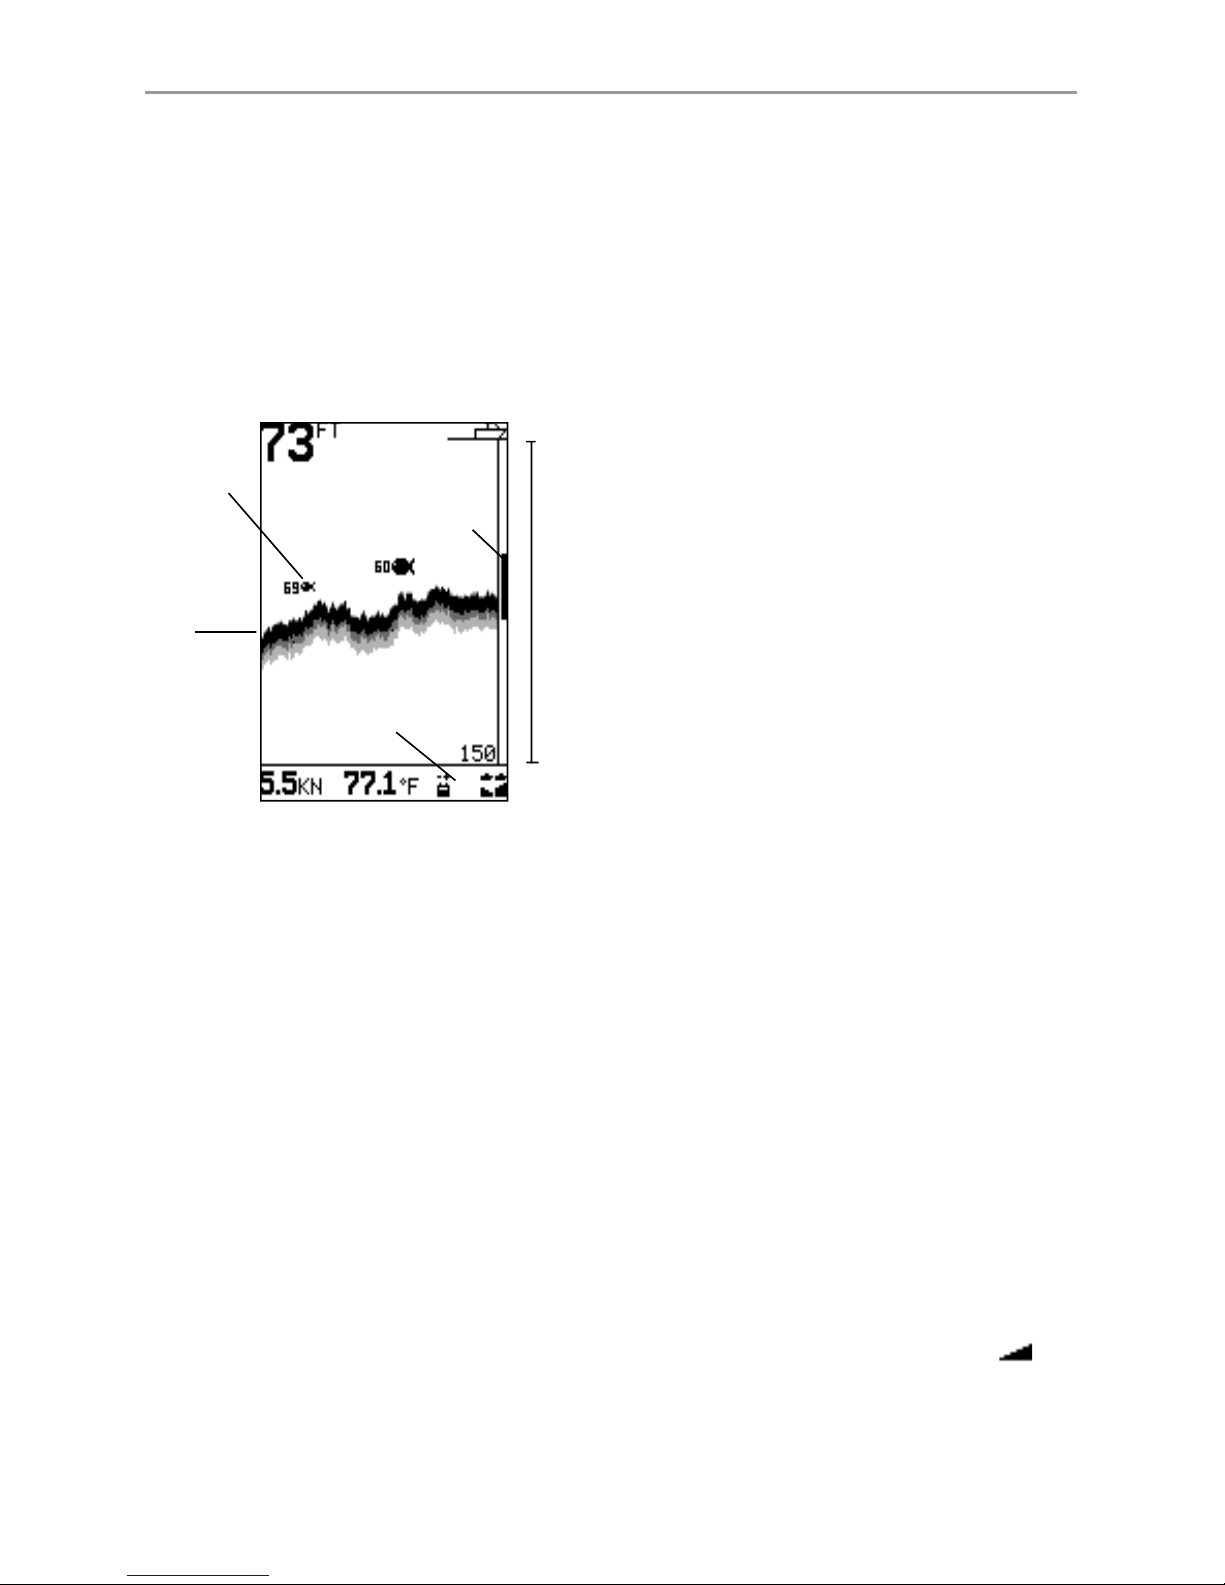
The strength of an echo can vary for a number
of reasons. Larger fish usually return stronger
echoes, and so do fish in the middle of the
cone, where the pulse is strongest. Reasons for
weak echoes include the fish or object being in
deep water, turbid water or in the edge of the
cone where the pulse is weakest. Turbid water
scatters the ultrasonic pulse and is difficult to
‘see’ through. Turbidity can be caused by air in
the water (e.g. from another boat’s wake) or by
mud in the water.
Important
It is vital to the performance of the fishfinder that
the transducer is installed in the best location.
Please follow the instructions in the Transducer
Installation manual very carefully.
All of the Northstar 400 Series fishfinders use
proprietary SBN Technology for sonar processing to
improve signal enhancement, bottom recognition
and noise rejection. SBN Technology uses the
latest in digital adaptive filter algorithms to
enhance all returned signals. At the same time,
SBN Technology uses active noise control to
reject interference, which can often be mistaken
by fishfinders for true returns. Using SBN
Technology, the Explorer 443s/443sp analyses the
reflections from each pulse, filters false returns,
and displays what is in the water under the boat.
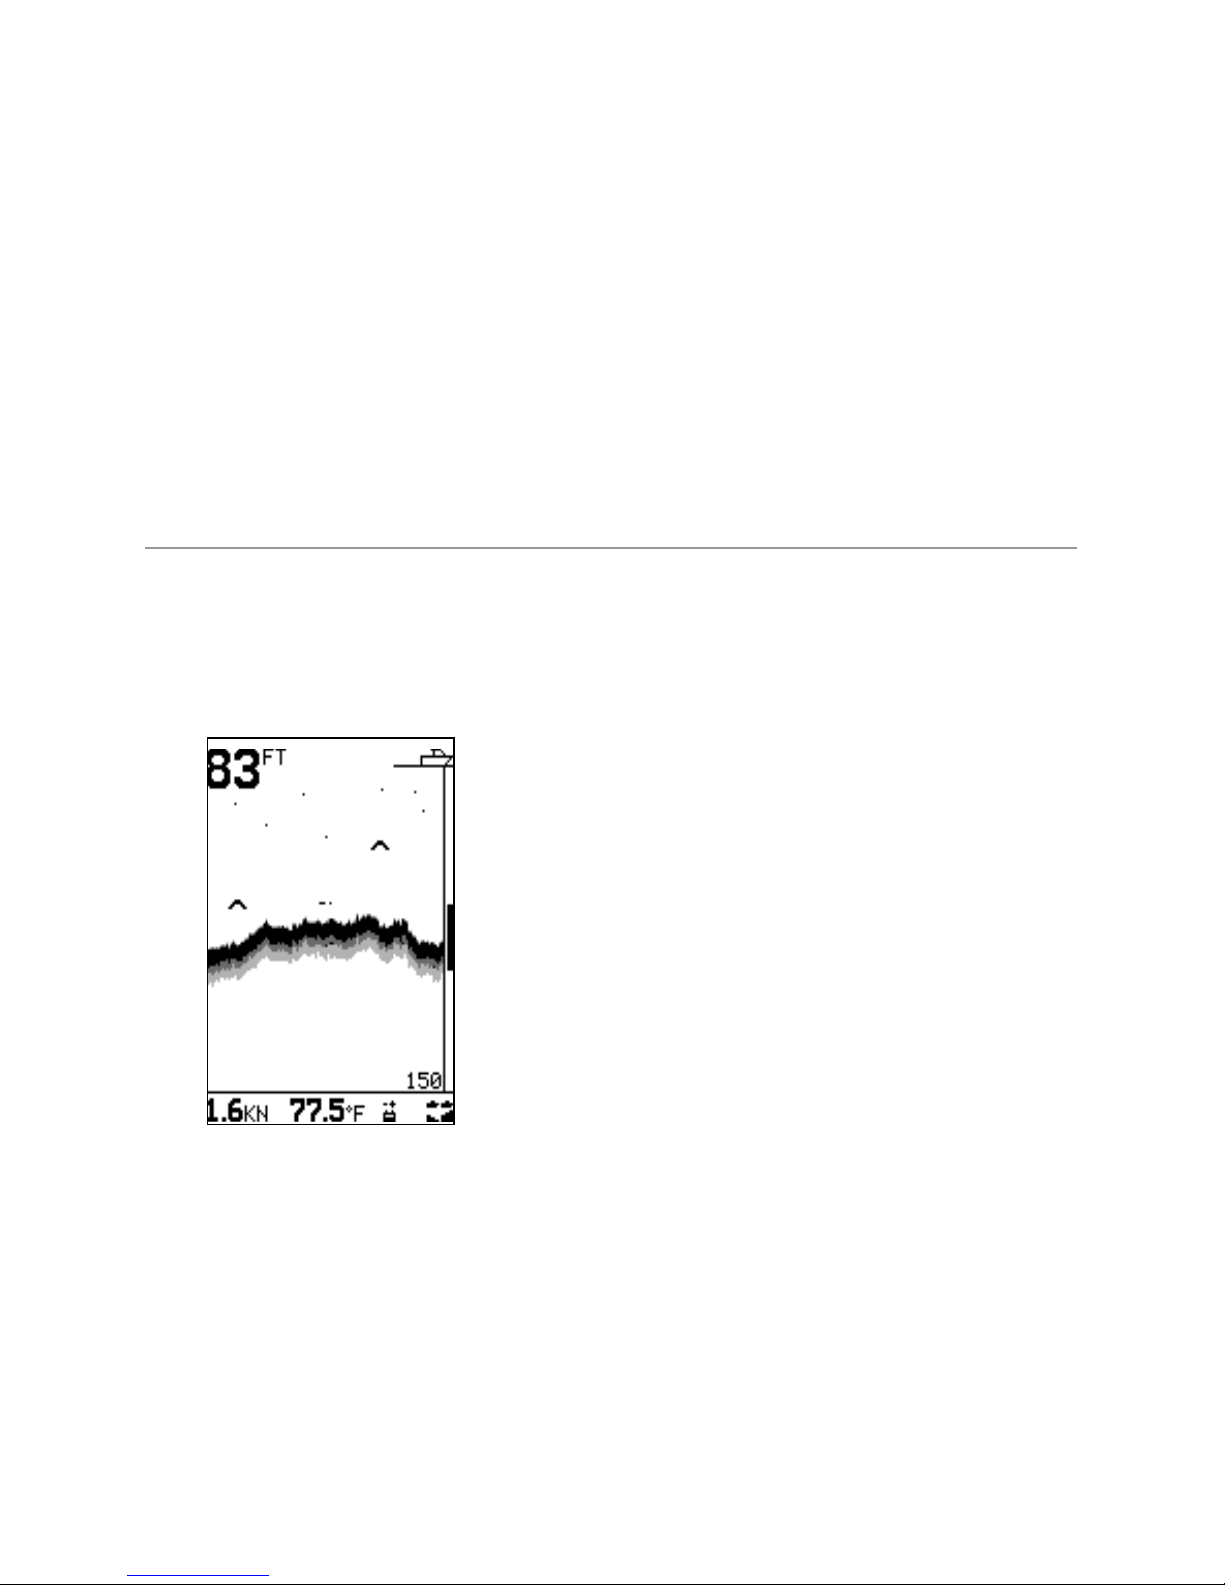
The distinctions between the four levels of
shading help the user to better interpret what is
in the water and what type of bottom is under
the boat.
Assisting with navigation
The Explorer 443s/443sp can be used to find
fish, to locate features on the bottom such as
reefs or wrecks, and to help recognise favorite
fishing spots from the profile of the bottom. Use
the Northstar fishfinder to assist navigation by
following the depth contours marked on charts.
How to find fish
Underwater features like reefs, wrecks and rocky
outcrops attract fish. Use the Explorer 443s/443sp
to find these features, then look for fish by
passing over the feature slowly several times
using the ZOOM screen (see section 3-4). Where
there is a current, the fish will often be found
downstream of the feature.
1 Introduction
5
Northstar Explorer 443s/443sp Installation and Operation Manual
CAUTION
!
IMPORTANT NOTE ON USE. While any fishfinder
can be used as an aid to navigation, accuracy
can be influenced by many factors including
the location of the transducer. It is the user’s
responsibility to ensure that the Explorer
443s/443sp is installed and used correctly.

6 Northstar Explorer 443s/443sp Installation and Operation Manual
2 Getting started
For deep-sea fishing with the Explorer
443s/443sp, a rapid change in temperature may
indicate the edge of a warm or cold current. The
temperature difference can form a barrier, and
the fish may not swim through this. Search for fish
on either side of the barrier.
Cleaning and maintenance
The Explorer 443s/443sp should be cleaned
with a damp cloth or mild detergent. Avoid
abrasive cleaners and petrol or other solvents.
Always cover or remove a transom-mounted
transducer when repainting the hull. If painting
over a through hull transducer with antifouling
paint then use only one coat of paint. When
repainting the transducer, remove previous coats
of antifouling paint by sanding it lightly.
When not in use, the Explorer 443s/443sp can
either be removed from the installation bracket
and stored in a safe, dry, cool place such as the
Northstar carry bag, or left on the installation
bracket and securely covered with the optional
sun cover.
Power and transducer connection
Explorer 443s
One end of the integrated transducer/power
cable has an 8 pin LT connector plug. Push this
plug into the socket located on the rear of the
display unit, then turn the collar to lock. Make
sure that the collar is secure for a watertight
connection.
Explorer 443sp
One end of the power cable has a black 8 pin LT
connector plug. Push this plug into the lower
socket, which has a black nut and is located on
the rear of the display unit, then turn the collar
to lock. Make sure that the collar is secure for a
watertight connection.
One end of the transducer cable has a blue 8 pin
LT connector plug. Push this plug into the upper
socket, which has a blue nut and is located on
the rear of the display unit, then turn the collar
to lock. Make sure that the collar is secure for a
watertight connection.
If the transducer is not connected, the
message “NO TRANSDUCER DETECTED. ENTER
SIMULATION MODE?” will appear. Press to
switch between YES, NEVER or NO. (More
information on the simulation mode can be
found in the following section). Press to
confirm the selection and the startup sequence
will continue.
(Note: If the transducer was not intentionally discon-
nected, turn the display unit off and refer to the section
on Troubleshooting in Appendix B.)
Names of keys:
Cursor key
key
+gain key
-gain key
Power key
Definition of Press and Hold in this manual:
· Press means to push the key for less than one
second.
· Hold means to push and hold the key down
for more than one second.
Power on
To turn the fishfinder on press .
Note: if the unit is wired for Auto Power (see sec-
tion 5-4) the fishfinder will turn on automatically
when the boat’s ignition is turned on.
A title screen briefly appears which displays basic
product information, including the software
version.
The Explorer 443s/443sp then automatically
displays the screen that was last used.

7
Northstar Explorer 443s/443sp Installation and Operation Manual
To turn the Simulation mode ON or OFF, press
SETUP highlight SIMULATE .
Power off
To turn the fishfinder off, hold . A countdown
box appears. Continue to hold for three
seconds until the fishfinder turns off.
Note: If the unit is wired for Auto Power (see
section 5-4) the fishfinder can only be turned off
when the boat’s ignition is turned off.
Language selection
To check which language is currently selected,
press to display the MAIN MENU.
Follow these steps to change the language:
1. Power off the unit.
2. While the unit is off, hold down the key.
3. Keep holding down the key and power
on the unit.
4. The screen displays a list of languages.
Press the Cursor or key to highlight a
language, then press the Cursor key to
select it. The fishfinder will continue the
startup sequence.
Backlighting
Use the button to adjust the backlighting to
suit individual preferences.
Press once, at any time, to see the backlight
bar. This is displayed at the bottom of the screen
and shows the current setting.
Press repeatedly until the desired backlighting
level is achieved. The backlight bar will disappear
two seconds after the last press.
An internal simulator allows users to learn how to
operate the fishfinder off the water.
In Simulation mode the word “SIMULATION”
flashes on the bottom of the screen. The
fishfinder generates data so that all the main
screens appear to be operational. Any changes
2-1 Simulation Mode
made to the contrast, backlighting, alarms or the
display setup are saved.
3 Operation
HISTORY screen (see section 3-2)
Displays the echoes received over time, with the
most recent events on the right of the screen. Use
this screen when travelling to show the bottom
so reefs, wrecks and fish can be found.
ZOOM screen (see section 3-4)
This screen is split into two parts. On the right
is the Full Range Section which shows part of
the HISTORY Screen and to the left is the Zoom
Section. Use this screen for taking a closer look at
interesting underwater features.
MAIN MENU screen
Northstar fishfinders are menu driven. Press
to display the MAIN MENU screen.
Press or to
highlight an option,
then press to
select it.
The MAIN MENU
options are
summarized below
and fully explained
in the following
sections.

8 Northstar Explorer 443s/443sp Installation and Operation Manual
SONAR screen (see section 3-5)
Displays the strength and depth of the echoes
returned from each ultrasonic pulse. The depth
range is displayed in the lower right corner. This
screen is a powerful aid, ideal for showing the
bottom hardness and the fish species.
This screen can also be used to adjust the display
shading on the HISTORY and ZOOM screens.
NAVIGATE screen (see section 3-6)
Prominently displays the water depth as a digital
readout. The corresponding bottom trace is
also shown. These two complimentary features
are particularly useful for understanding depth
trends when travelling at speed.
It also displays the boat speed and the enabled
alarms.
DATA screen (see section 3-7)
The DATA screen displays the water temperature
and water temperature history over the last 40
minutes. It also displays the boat battery voltage,
log, engine-hours counter, boat speed, water
depth and enabled alarms.
SETUP menu (see section 4)
Use this option to customise the Explorer
443s/443sp to suit the boat and individual
preferences.
RANGE menu (see section 3-8)
Use this option to select either Auto or Manual
Range and to change the selected depth range.
Alarms can be enabled to automatically detect
certain conditions, such as the water being
too shallow. The trigger settings for the alarms
can be defined to suit the boat and individual
preferences.
The fishfinder has six alarms, TOO SHALLOW, TOO
DEEP, FISH ALARM, TEMP VALUE, TEMP RATE and
LOW BATTERY.
The alarm symbols and beeper cycles for all of
the alarms are shown in section 4-1. The FISH
ALARM is three short beeps, the TOO SHALLOW
ALARM is a rapid continuous beep while all others
are a slower continuous beep.
When an alarm condition is met, then:
· The beeper sounds.
· The ALARMS menu is displayed on the screen
with the activated alarm(s) flashing.
Press any key to acknowledge the alarm, stop
the beeping and remove the ALARMS menu.
This does not disable the alarm. The symbol will
continue to flash until the alarm condition is no
longer present.
Alarms automatically re-enable
The TOO SHALLOW, TOO DEEP and LOW BATTERY
alarms automatically re-enable when the value
moves outside the alarm trigger setting.
The TEMP VALUE alarm automatically re-enables
when the temperature is more than 0.45°F
(0.25°C) above or below the alarm trigger setting.
The TEMP RATE alarm automatically re-enables
when the rate of temperature change falls below
the trigger setting by more than 0.2°F (0.1°C) per
minute.
Enabling Alarms and Changing Trigger Values
See section 4-1 for information about enabling
alarms and changing the trigger values.
3-1 Alarms

9
Northstar Explorer 443s/443sp Installation and Operation Manual
Select MAIN MENU - HISTORY to display the
HISTORY screen.
The HISTORY screen displays the most recent
echoes on the right of the screen and the oldest
echoes on the left. These eventually disappear off
the screen.
The vertical bar on the right edge of the screen
is the zoom bar. This shows the zoom range. To
adjust the zoom range (see section 3-4).
3-2 HISTORY screen operation
Range
Range is the depth of water displayed vertically.
The Northstar fishfinder has two range modes,
Auto Range and Manual Range:
· In Auto Range, the fishfinder adjusts the depth
range automatically so that the bottom is
always shown in the lower part of the screen.
The use of Auto Range is recommended.
· In Manual Range, the fishfinder shows only
a selected depth range. In areas of rapidly
changing bottom depth, such as the sea floor
around pinnacles, it can be useful to prevent
the screen from rescaling to always show
the bottom. If the bottom is deeper than the
specified depth range, it will not be shown
on the display screen.
To change the range mode, (see section 3-8).
Changing the Gain Mode
Gain (sensitivity) controls the amount of detail
displayed on the screen. The fishfinder has two
gain modes, Auto Gain and Manual Gain:
· In Auto Gain, the gain is automatically adjusted
to compensate for water depth and clarity. The
use of Auto Gain is strongly recommended
when learning to use a fishfinder, or when
travelling at speed.
· In Manual Gain, the user can adjust the gain
to compensate for water depth and clarity.
Manual settings range from 1 to 9. High
settings may amplify normal background
noise until it appears as random pixels on
the screen. The ideal setting produces only
a small number of random pixels. Normally
the best results with a fishfinder are obtained
in Manual Gain but practice and experience
are required to understand how to adjust the
gain correctly.
To change between Auto Gain and Manual Gain,
hold +or -. The Gain mode will be displayed
briefly at the bottom of the screen.
When in Manual Gain the gain symbol is
shown at the top of the display, followed by the
gain level. Press +to increase the gain level or
press -to decrease the gain level.
The HISTORY screen does not show a fixed
distance travelled by the boat; rather, it displays
what has passed below the boat during a certain
period of time. The actual display depends upon
the boat speed and the depth of the water.
As the boat travels through shallow water, the
echoes have less distance to travel between
the objects and the boat. This means that the
HISTORY screen display moves across the screen
more quickly than when the boat is travelling in
deep water. In deep water, the echoes take longer
to travel between the objects and the boat,
producing a display that moves across the screen
more slowly.
Note 1: Different fish symbols can be selected (see
section 4-3).
Note 2: The depth of bottom can be adjusted for keel
offset (see section 4-7).
Fish symbol
with depth
Selected depth range (0 to 150’)
Alarms
Bottom
Zoom bar

10 Northstar Explorer 443s/443sp Installation and Operation Manual
Fish detection and display
The fish symbol option can be customized, or
switched off altogether so that the echoes are not
converted to fish symbols on the screen. Section
4-4 explains how to do this. The differences
between Fish symbols on and off are:
Fish symbols ON
Using Northstar’s SBN sonar technology
the fishfinder analyses all return signals
and eliminates most false signals and
clutter so that remaining targets are most
likely fish. Depending on the strength of
the remaining signals, they are displayed
as either small, medium or large fish
symbols with or without depth. Whilst
the SBN processing is very sophisticated
it is not foolproof and there will be
times when the unit will not be able to
differentiate between large air bubbles,
rubbish containing air, fishing floats etc
and genuine fish returns.
Fish symbols OFF
For experienced users this will always
provide the best information as every
sonar return signal is displayed, whether
it is surface clutter, a thermocline or a fish.
Fish Arches
In ideal conditions and with Fish symbols turned
OFF, a fish passing through the cone-shaped
ultrasonic pulse is displayed on the screen as a
fish arch:
As the fish enters the weak edge of the sonar
cone it generates a weak return signal that turns
on the first pixel on the fishfinder screen. As
the boat moves closer to the fish the distance
between the transducer and the fish reduces
and the return signal is displayed at progressively
shallower depths, producing the start of an arch.
When the fish is directly beneath the transducer
and in the middle of the beam then the returned
signal is even stronger so the arch becomes
thicker. As the fish passes out of the cone the
reverse happens with a progressively weaker and
deeper return.
In reality there are many reasons why fish arches
can’t be seen. For example:
· Poor transducer installation - please refer to
the Transducer Installation Guide.
· If the boat is anchored then fish will tend to
show on the display as horizontal lines as they
swim into and out of the transducer sonar
beam. Slow speeds in deeper water give best
fish arch returns.
· Range is important. It will be much easier to see
fish arches when using Northstar’s split screen
zoom mode to concentrate on a particular
section of water rather than just displaying
everything from the surface to the bottom.
Zooming increases screen resolution and is
necessary for good fish arches.
· It is almost impossible to get fish arches in
shallow water as the transducer sonar beam is
very narrow near the surface and fish do not
stay within the beam long enough to display
an arch. Several fish in shallow water tend to
display as randomly stacked blocks of pixels.
3-3 HISTORY screen interpretation

11
Northstar Explorer 443s/443sp Installation and Operation Manual
The following picture shows the HISTORY screen
with the fish symbols turned off:
Single fish
Large school
of fish
Small school
of fish
Bottom
Strength of returned echoes
The shading indicates differences in the strength
of the returned echo from the bottom. A black
pattern indicates a strong echo, and light grey
indicates a weak echo. Fish symbols are always
shown in black.
The strength of the returned echo varies with
several factors, such as:
· The size of the fish, school of fish or other
object.
· The depth of the fish or object.
· The location of the fish or object. The
area covered by the ultrasonic beam is
approximately cone-shaped and echoes are
strongest in the middle.
· The clarity of water. Particles or air in the water
reduce the strength of the returned echo.
· The composition or density of the object
or bottom. Mud, weed and sand bottoms
tend to weaken and scatter the sonar signal,
which results in weaker returns. Rock or coral
bottoms concentrate the return signal for
strong returns.
Note: That planing hulls at speed produce air bubbles
and turbulent water that bombard the transducer.
The resulting ultrasonic noise may be picked up by the
transducer and obscure the real echoes.
Hard bottoms such as
rock or coral show as wide
bands at the bottom of
the screen
Soft bottoms such as
mud, weed and sand
show as narrow bands at
the bottom of the screen
Kelp / weed
Large fish

12 Northstar Explorer 443s/443sp Installation and Operation Manual
Shadows
Shadows are areas where the ultrasonic beam cannot ‘see’. These include
hollows on the bottom or beside rocks and ledges where the strong
echo returned off the rock obscures the weaker echo of the fish.
When looking for small objects including fish, users should consider that
there are places where fishfinders cannot ‘see’.
Shadow - where objects are hidden in the bottom echo.
These fish will be hidden in the bottom echo.
1 minute ago 30 seconds ago Now
When the fish symbol option is
ON, any echo returned that fits
the profile of a fish is displayed
on the screen with a fish symbol.
Air in water
(e.g. from
wake)
Northstar fishfinders display the most recent events on the right of the screen.
Moving boat

13
Northstar Explorer 443s/443sp Installation and Operation Manual
Note: Times indicated are for illustration only.
1 minute ago Now
Time
Stationary boat
When a boat is stationary, all bottom echoes will come from the same small
area of bottom. This will produce a flat bottom trace on the screen.
The appearance of the HISTORY and ZOOM screens can be
changed to suit individual preferences.
Select MAIN MENU - ZOOM to display the ZOOM
screen.
The ZOOM screen is split into two parts. On
the right is the full range section (just like the
HISTORY screen) and on the left is the zoom
section.
Full range section
Zoom section
Zoom bar
The full range section illustrated is 150 feet and
the zoom bar, located on the right edge of the
screen, shows the area that is enlarged in the
zoom section, in this case the section between
50 ft and 100 ft.
The zoom section shows the area of interest
(such as fish or features close to the bottom) in
greater detail than the HISTORY screen.
Bottom Lock
The zoom bar is normally locked to the bottom
(Bottom Lock) so that the bottom is always
displayed in the zoom section, regardless of
changes in depth.
To turn Bottom Lock off, press then move the
zoom bar to the desired position with or .
To turn Bottom Lock on, move the zoom bar
down until it touches the bottom and the
message “BOTTOM LOCK ON” briefly appears.
If Bottom Lock is off and the bottom rises to meet
the zoom bar, the zoom bar will temporarily track
the bottom. This condition will cease when the
depth exceeds the original depth of the zoom
bar.
Changing the Zoom
To increase magnification (make the zoom bar
smaller), press . To decrease magnification
(make the zoom bar bigger), press .
Alternatively, the zoom bar can be adjusted in the
HISTORY screen before switching to ZOOM.
3-4 ZOOM screen

14 Northstar Explorer 443s/443sp Installation and Operation Manual
Select MAIN MENU - SONAR to display the SONAR
screen.
This is a powerful feature and with some
experience, this screen can be used to identify
both the type of bottom and the fish species.
On the Sonar Echo section on the right side,
the strength of an echo at a particular depth is
shown by a horizontal line at that depth. A strong
echo produces a long line, whereas a weak echo
produces a short line. Below the echoes the
screen shows the Shading Bar. This disappears
from view after a few seconds, but just press to
re-display it.
The left side of the screen is the Fish History
section. Using the Shading Bar as a control, the
fishfinder interprets the echoes shown on the
Sonar Echo section and uses this information to
draw the Fish History section.
Recognising the Type of Bottom
The bottom trace is the strongest echo shown in
the lower part of the left side of the screen.
A bottom trace with a wide black layer is
indicative of a hard bottom, because a hard
bottom returns strong echoes. Conversely, a
soft bottom produces medium or weak echoes,
which are shown by a narrower trace.
Small strong echo
(e.g. fish). This
usually flashes
on and off as the
ultrasonic pulse
strikes the fish.
Large strong signal
(e.g. bottom)
Shading Bar
Recognising the Type of Fish
Different species of fish have different sizes and
shapes of swim bladders. The air in the swim
bladder reflects the ultrasonic pulse, so the
strength of the echo varies between fish species
according to the size and shape of the swim
bladder. The sonar display is 70 pixels wide, so it
can show 70 levels of return echo strength, which
is a powerful feature.
When fishing among a school of fish and catching
them, note the fish species and the strength
of the echo that it returns on the fishfinder on
the Sonar Echo screen. Then, the next time that
particular return on the fishfinder is seen, it is
likely to be the same fish species.
Adjusting the Shading Bar
The Shading Bar is displayed as a horizontal bar in
the lower half of the screen. Adjust the Shading
Bar so different strength echoes have a different
shade on the screen. Weaker echoes can be
shown as light grey, and the strongest echoes
shown as black.
Increase the black part of the Shading Bar by
pressing if there are too few long (strong)
echoes being displayed in black.
Decrease the black part of the Shading Bar by
pressing if there are too many long (strong)
echoes being displayed.
3-5 SONAR screen

15
Northstar Explorer 443s/443sp Installation and Operation Manual
Gain setting
These echoes will be
shown in grey on the
Fish History section.
These strong echoes
will be shown in black
on the Fish History
section.
The weak echoes
within this white
section of the shading
bar will not be shown
- they are below the
threshold of where
the shading begins.
Increasing Gain by pressing + will move
the edge of the light grey bar to the
left and result in weaker echoes being
displayed in the Fish History section.
Pressing - will move the edge of the grey
bar to the right.
Manual Gain
When Manual Gain is selected, increasing the gain
setting will result in more detail being shown on the
fishfinder display. Decreasing the gain will reduce
detail being shown. See ‘Changing the Gain Mode’ in
section 3-2 for more information on changing Gain
settings.
3-6 NAVIGATE screen
Select MAIN MENU - NAVIGATE to display the
NAVIGATE screen.
The NAVIGATE screen displays useful information
while travelling at speed. It prominently displays
the water depth, the boat speed, the bottom
profile and any alarms that are enabled.
Depth can be displayed in feet (FT), fathoms (FA),
or metres (M). Use the SETUP - UNITS - DEPTH
menu to select the required depth units (see
section 4-2).
Speed (443sp ONLY) can be displayed in knots
(KN), miles per hour (MPH), or kilometres per hour
(KPH). Use the SETUP - UNITS - SPEED menu to
select the desired speed units (see section 4-2).
TIP: Use the < key to immediately return to the
fish finder screens.

16 Northstar Explorer 443s/443sp Installation and Operation Manual
Select MAIN MENU - DATA to display the DATA
screen:
A graph displays the surface water temperature
for the last 40 minutes and is updated every
30 seconds. The current water temperature is
displayed above the graph and is updated every
second.
3-7 DATA screen
The temperature can be displayed in °F
(Fahrenheit) or °C (Celsius). Use the SETUP - UNITS
- TEMPERATURE menu to select the desired
temperature units (see section 4-2).
Alarms that indicate a specific temperature, or
rate of change of temperature, may be enabled
(see section 4-1).
Log (443sp ONLY) One of two distance logs
can be displayed: Trip Log or Total Log. Both logs
are retained in the Explorer 443s/443sp memory
when the unit is switched off.
Use the SETUP - LOG menu to select the Trip Log
or Total Log (see section 4-6). The Trip Log must
be reset manually (e.g. to record total mileage
during a season, or the distance travelled on this
trip).
Note: That the units displayed on each Log will
correspond with the Speed.
Speed (443sp ONLY) can be displayed in knots
(KN), miles per hour (MPH), or kilometres per hour
(KPH). Use the SETUP - UNITS - SPEED menu to
select the desired speed units (see section 4-2).
Battery
Depth
Speed
Temperature
Temperature
Graph
Log
Engine hours
Enabled
alarms
Select MAIN MENU - RANGE to change the
manual range and adjust the selected depth
range.
The range setup box is displayed. This shows the
depth of water displayed vertically and the range
mode setting.
3-8 RANGE menu
Northstar fishfinders has two range modes, Auto
Range and Manual Range. The use of Auto Range
is recommended. See section 3-2 for more details.
To change between Auto Range and Manual
Range, press .
The Manual Range mode offers the user a choice
of pre-selected water depths. Use and to
display the options and select a water depth.
Press to exit.
TIP: Use the < key to immediately return to the fish finder screens.

17
Northstar Explorer 443s/443sp Installation and Operation Manual
Select MAIN MENU - SETUP to display the SETUP
menu:
Use the SETUP menu to customize settings to suit
the boat and individual preferences, as follows:
· Specify the trigger settings for the alarms
(see section 4-1).
· Choose the units for depth, temperature,
speed and fuel (see section 4-2).
· Turn the key beep on or off.
· Choose the fish symbol (see section 4-3).
· Choose the contrast level (see section
4-4).
· Turn Simulation mode on or off
· Turn Zoom Split on or off (see section
4-5)
· Select the Trip Log or the Total Log (see
section 4-6).
· Zero Trip Log or zero all logs (see section
4-6).
· Select language, setup the keel offset
(see section 4-7).
· Calibrate speed and temperature sensors
(see section 4-7).
Press or to highlight an option, then see the
following sections.
4 SETUP menu

18 Northstar Explorer 443s/443sp Installation and Operation Manual
Alarms can
be enabled to
automatically detect
certain conditions,
such as the water
being too shallow.
Trigger settings
can be defined
to suit the boat
and individual
preferences.
4-1 ALARMS menu
Symbol Alarm Beeper Alarm condition is
Name Cycle met when:
Temp
1/2sec the temperature equals
Value the alarm trigger value
Temp
1/2sec the rate of change of
Rate temperature equals the
alarm trigger value
Too
1/5sec the depth is less than
Shallow the alarm trigger value
Too
1/2sec the depth is greater
Deep than the alarm trigger
value
Fish 3 short an echo matches the
Alarm beeps profile of a fish
Low
1/2sec the battery voltage is
Battery less than the alarm
trigger value
Select MAIN MENU - SETUP - ALARMS to display
the available alarms. Press or to highlight an
option.
When an alarm condition is met, then:
· The beeper sounds.
· The ALARMS menu is displayed on the screen
with the activated alarm symbol(s) flashing.
Press any key to acknowledge the alarm, stop
the beeping and remove the ALARMS menu.
This does not disable the alarm. The symbol will
continue to flash until the alarm condition is no
longer present. Note: The FISH ALARM gives only three short beeps.
The beeper cycle is different for some alarms.
All of the alarm symbols and beeper cycles are
shown:
Alarms automatically re-enable
The TOO SHALLOW, TOO DEEP and LOW BATTERY
alarms automatically re-enable when the value
moves outside the alarm trigger setting.
The TEMP VALUE alarm automatically re-enables
when the temperature is more than 0.45°F
(0.25°C) above or below the alarm trigger setting.
The TEMP RATE alarm automatically re-enables
when the rate of temperature change falls below
the trigger setting by more than 0.2°F (0.1°C) per
minute.

19
Northstar Explorer 443s/443sp Installation and Operation Manual
Flashing Light and/or External Beeper
If a secondary alarm indicator is required, a
flashing light and/or external beeper can be
installed. These can be positioned anywhere
suitable on the boat. For installation advice see
section 5-4.
Enabling Alarms and Changing
Trigger Values
Press or to highlight an alarm, then press to
select it. To enable or disable an Alarm, press to
switch between ON and OFF.
To set the trigger value for an Alarm, press or
to increase or decrease the trigger value.
The alarm trigger value is retained even when the
alarm is disabled.
Select MAIN MENU - SETUP - UNITS to define the
units for depth, temperature, speed and fuel.
4-2 UNITS menu
Press or to
highlight an option.
DEPTH
Can be displayed
in units of feet (FT),
fathoms (FA), or
metres (M). Press
to select the required
depth units.
TEMPERATURE
Can be displayed in °F (Fahrenheit) or °C (Celsius).
Press to select the required temperature units.
SPEED
Can be displayed in knots (KN), miles per hour
(MPH), or kilometres per hour (KPH). Press to
select the required speed units.
Note: Distance units will change automatically to
match the speed units.

20 Northstar Explorer 443s/443sp Installation and Operation Manual
Select MAIN MENU - SETUP - FISH SYMBOL to
display the fish symbol options for the screen
displays.
There are three options. Press to select:
· OFF
·
·
OFF
Displays echoes as dots on the screen.
Displays any echoes returned that match the
profile of a fish as a fish symbol in one of three
sizes:
Strongest echo
Average echo
Weakest echo
4-3 FISH SYMBOL
Echoes which are not recognised as fish are
displayed as dots on the screen.
Displays any echoes returned that match the
profile of a fish as a fish symbol in one of three
sizes as above. The depth of the fish is shown
to the left of the symbol. Echoes which are not
recognised as fish are displayed as dots on the
screen.
Use the FISH FILTER setting to adjust the fish
detection. (see section 4-9)
Select MAIN MENU - SETUP - CONTRAST to display the contrast setting box
and the current setting.
The contrast level can be set at any level between 0 and 16. The default
setting is 6.
Press or to increase or decrease the setting to the required level. Then
press to exit.
4-4 CONTRAST menu
Select OFF to obtain a zoom only screen. (full screen zoom)
Select ON to obtain a split zoom / history screen (default)
4-5 ZOOM SPLIT
This manual suits for next models
1
Table of contents
Other NorthStar Fish Finder manuals