Nostalgia Electrics HSB-590 User manual

Nostalgia Products Group LLC
1471 Partnership Dr.
Green Bay, WI 54304-5685
Visit Us Online at
www.nostalgiaelectrics.com
©2009 Nostalgia Products Group LLC
Rev. 6/23/09
STAINLESS STEEL MARGARATOR ™
MODEL# HSB-590
FOR HOUSEHOLD USE ONLY
READ THESE INSTRUCTIONS BEFORE USING THIS UNIT!
SAVE THESE INSTRUCTIONS!

1.
IMPORTANT PRECAUTIONS:
Appliance Specifications:
120 Watts
60 Hertz
AC 120 Volts/12Volts
Important Precautions to Remember:
A. NEVER immerse motor base in water.
B. NEVER use an abrasive sponge or cloth on unit.
C. NEVER use a scouring pad on the unit.
D. NEVER leave unit unattended while in use.
E. NEVER place anything other than the intended ingredients in the base bowl.
F. Unplug unit from outlet when not in use and when cleaning.
G. DO NOT operate this appliance with a damaged cord or plug or in the event the
appliance ever malfunctions.
H. DO NOT place motor base in dishwasher.
I. Keep Stainless Steel Margarator™ at a safe distance from water activity.
J. Keep out of reach of children.
K. This appliance is NOT A TOY.
L. This appliance is not intended for use by young children or infirm persons without
supervision.
M. Young children should be supervised to ensure that they do not play with the
appliance.
IMPORTANT SAFEGUARDS
When using electrical appliances, basic safety precautions should always be followed,
including the following:
1. Read all instructions before operating this appliance.
2. Any appliance with a damaged cord or plug or damaged in any manner should not be
operated. The appliance should be returned or taken to the nearest repair shop for
examination or repair or send back to company as stated in this booklet in the
warranty.
3. The appliance manufacturer does not recommend the use of accessory attachments
other than what is supplied with the unit. This may cause injuries.
4. When any appliance is used by or near children, adult supervision is strongly
recommended.
5. Keep appliance and cord away from any hot surfaces.
6. To prevent electrical shock, DO NOT immerse cord, plug or any part of the motor
base in water or other liquids.
2.
IMPORTANT SAFEGUARDS
7. This appliance should not be used for purposes other than stated in the instructions
accompanying this appliance.
8. DO NOT leave unit unattended while in use or when plugged in to an outlet.
9. DO NOT ATTEMPT TO OPEN BASE, THERE ARE NO SERVICEABLE PARTS.
10. The plug has one blade that is wider than the other, to reduce the risk of electrical
shock, this plug is intended to fit into a polarized outlet only one way.
11. Unplug from outlet when not in use and before removing parts for cleaning.
12. To reduce the risk resulting from becoming entangled or tripping over a long cord a
short power supply cord is provided.
13. UNIT MUST BE LEVEL, BALANCED AND SECURELY ASSEMBLED TO OPERATE
PROPERLY.
14. The marked electrical rating of an extension cord should be at least as great as the
electrical rating of the appliance. Electrical extension cords can be used if care is
exercised in their use.
15. Keep hands and foreign objects out of the unit while operating.
16. Use caution when moving the appliance when it contains liquid.
Save These Instructions!
INTRODUCTION
Thank you for purchasing The Stainless Steel MARGARATOR™. This margarita maker
has the capacity that will add thirst-quenching fun to any occasion.
Your friends and family will enjoy the fun The Stainless Steel MARGARATOR™ can
provide. Please take care of your machine by following these simple instructions and
precautions.
You can create a variety of beverages with your Stainless Steel MARGARATOR™ to
provide the drink you desire. The Stainless Steel MARGARATOR™ not only makes
fantastic margaritas, you can also mix up batches of your other favorite drinks such as
daiquiris or slushy type drinks for the kids! By using;
Various Juices
Premixed Beverages
Cola, Orange Drinks
Most any Beverage of Choice
**NOTE- The Stainless Steel MARGARATOR™ does not work with water or sugar free
drinks. Sugar free drinks work ONLY when there is at least 20% alcohol mixed with the
sugar free drinks.
Your Stainless Steel MARGARATOR™ is equipped with AC electrical power cord. It is
versatile and can be used indoors or outdoors.

3.
INTRODUCTION (Continued)
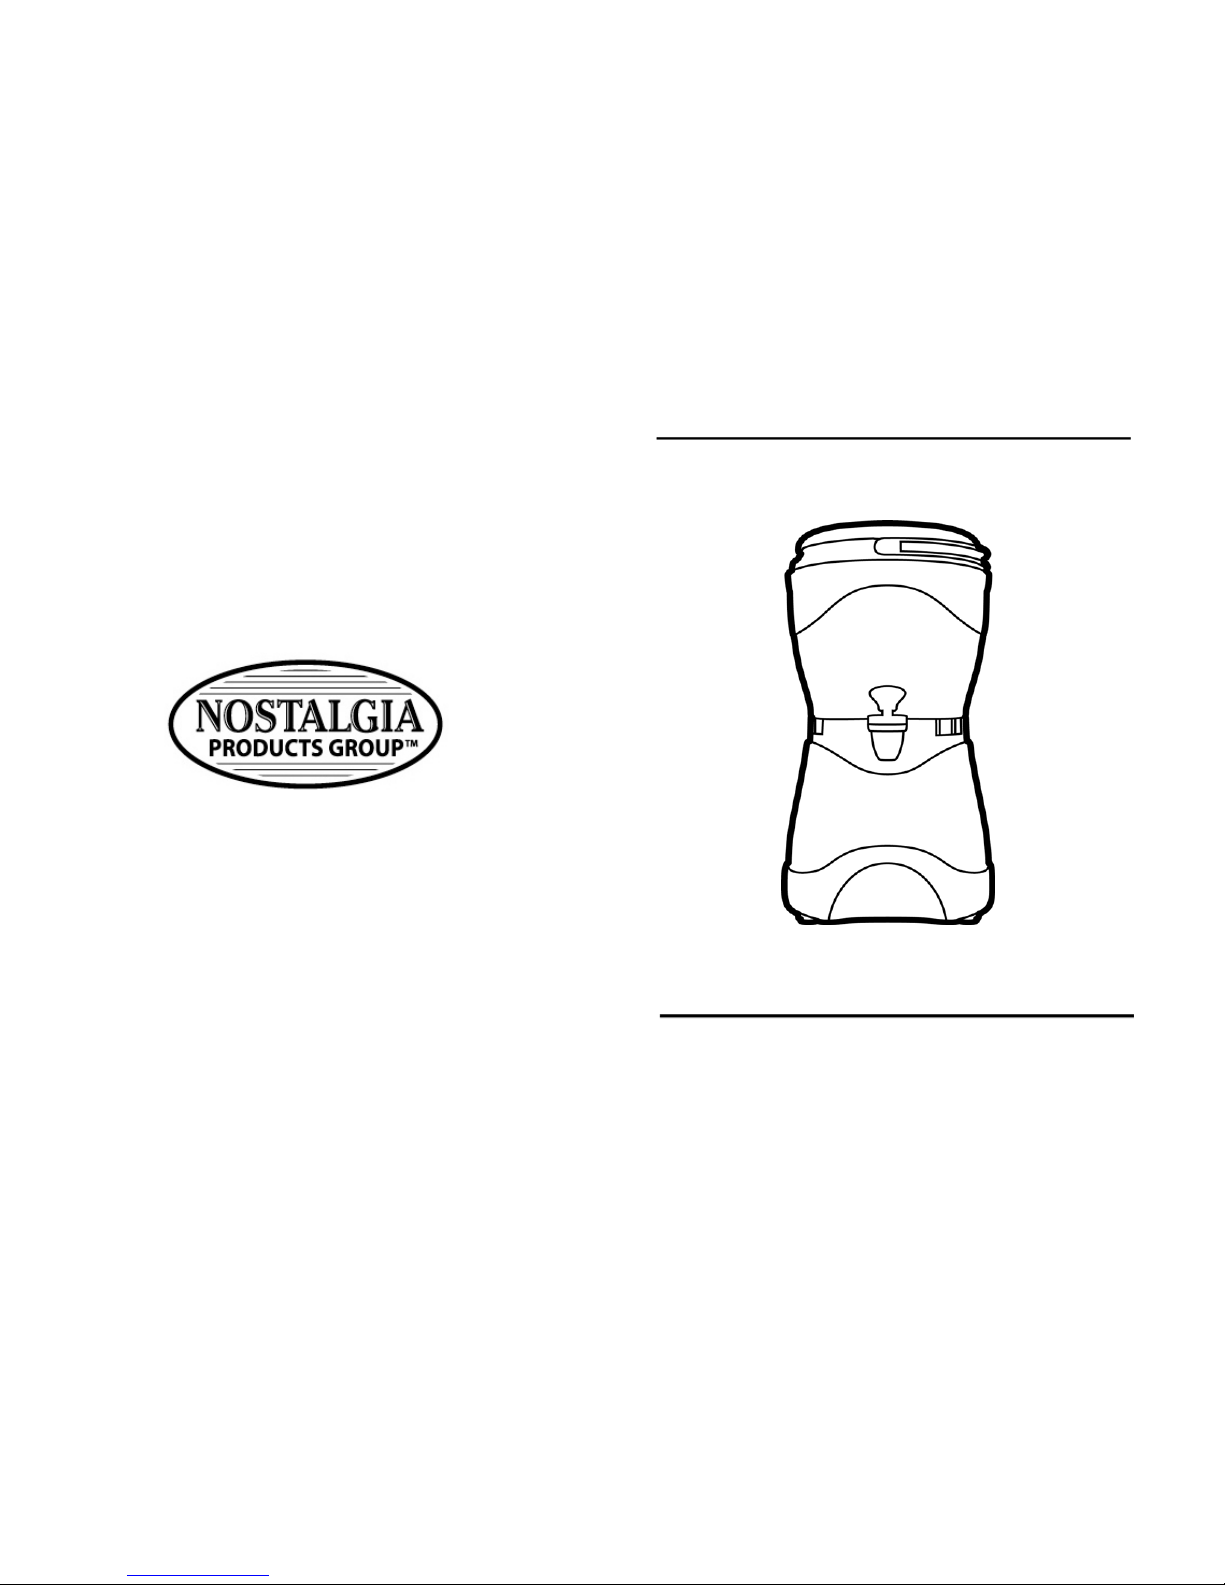
Special features of this Stainless Steel Model Margarator™ include a double wall; see
through durable poly carbonate tank, with a see through lid for watching your mouth
watering drink of choice become powerfully blended right before your eyes. You may also
add more ice or liquid to the tank after opening this see through lid. DO NOT place hands,
spoons or foreign objects through this opening!
Your STAINLESS STEEL MARGARATOR™ is great for;
Birthdays
Pool parties
Barbeques
Casual gatherings with friends and family
Anytime!
NOTE: Though this unit can be used at poolside parties, and other
events – We stress the importance of sensible use if making drinks
containing alcohol. SWIMMING, DRIVING AND ALCOHOL DO NOT
MIX.
CLEANSE PRODUCT BEFORE FIRST USE
Detach tank from motor base by sliding the 3 LOCK/UNLOCK
switches located on this unit to the unlock position. (Fig. A)
Gently remove the tank from the base. Pour warm soapy water
into the tank and dispense all of the soapy water through the
spigot to clean both tank and spigot. Rinse by pouring water into
the tank and dispense through the spigot until no soapy residue
remains.
Once the upper portion has been satisfactorily rinsed out, dry both interior and exterior
sides of the tank thoroughly with a soft non-abrasive clean dry towel.
Replace the upper portion (tank) onto the base, making sure spigot fits properly in “U”
shaped cut out in front of unit.
Slide the 3 LOCK/UNLOCK buttons to the LOCK position.
USING YOUR MARGARATOR – A QUICK START GUIDE
1. Securely place Margarator on level surface.
2. Plug your AC cord into your electrical outlet.(See Fig. B for
bottom of unit location and storage of the electrical cord.)
3. Check the black plastic grinding cage collar inside of unit
to make sure it is locked in place (Fig. E).
4. Fill the unit with ice to the top of the Max Fill line (Fig. C).
4.
QUICK START GUIDE (Continued)
5. FOR MARGARITAS; Pour 3 parts
concentrated mix (approx. 45 ounces) to
1 part Tequila (approx. 15 ounces). For a
slushier mix, less liquid is recommended OR
ADD MORE ICE. More liquid can always be
added by turning and opening the clear
window in the lid, after mixing to achieve the
desired consistency.
6. Place lid on unit. Line up the arrows (One
downward arrow on the black lid and one
upward arrow on the clear polycarbonate tank)
to find the correct fit. (This is a safety lock and
the unit will not turn on without the lid in correct
position). Lift the handle to a straight up
position to lock the unit. (Fig. D)
7. Turn the unit on and with the handle in a
straight up position, begin the slush process.
Blend for about 10 minutes or to desired
consistency.
8. The lid must be on and the handle must be in upright position for unit to operate!
While the unit is still on, place glass or a container under spigot and dispense the
chosen drink by pushing the spigot up. It is recommended to have a towel under the
spigot to protect against any drips. NOTE: the spigot has a locking upright position
for filling multiple drink glasses or a pitcher of drinks.
9. If spigot drips after dispensing, place glass or container under spigot and open and
close the valve by pushing down and “snapping” the spigot once or twice quickly.
Small ice chips can sometimes get caught inthe gasket preventing it fromclosing
completely.
10. Turn off the unit when desired consistency is achieved and it will keep the Margarita
mix cold.
11. ALWAYS DISPENSE WITH MARGARATOR RUNNING. Allow the unit to run for 8
seconds to mix before dispensing if unit has been sitting.
NOTE: WHEN LID IS REMOVED WHILE THE MACHINE IS RUNNING, THE MOTOR
WILL STOP RUNNING UNTIL LID IS PROPERLY REPLACED.
A
B
C

5.
TROUBLESHOOTING
PROBLEM POSSIBLE CAUSE/REMEDY
Power not turning on Check the plug; make sure it is properly
plugged into outlet.
Make sure lid and handle are locked and
handle is aligned properly
Mix is not dispensing Make sure the blending cage did not
loosen and float up.
Make sure the unit still has liquid inside
Make sure the spigot area did not freeze
Make sure unit is in the ON position.
CLEANING THE UNIT
1. Unplug the unit from the electrical outlet.
2. Dispense all remaining lliquid from the unit through the spigot.
3. Unlock top (See Illustration A) from base and rinse with clean water by pouring into
tank and dispensing thoroughly through the spigot until clear. Wipe inside and out
with a clean non-abrasive cloth or sponge. Dry with soft non-abrasive clean cloth.
4. Wipe the bottom base with a wet non-abrasive cloth and towel dry again using a
soft clean non-abrasive cloth to avoid scratching the surface.
Easily store your STAINLESS STEEL MARGARATOR™ for the next event!
By following these simple instructions, your STAINLESS STEEL MARGARATOR™ will be
fun for friends, family, and kids of all ages...by creating delicious servings of your favorite
beverages and making anytime an event.
NOTE: To prolong the life of your STAINLESS STEEL MARGARATOR™, be sure to
follow the cleaning instructions after every use and make sure the spout is flushed while
washing the unit to prevent build up. Never use anything abrasive on the base to maintain
the original finish and prevent scratches.
YOU MAY find a need to remove and clean the stainless grinding cage from the inside
base of the tank (trapped citrus pulp, etc.) Refer to the directions below to accomplish this.
6.
REMOVING AND SETTING THE STAINLESS GRINDING
CAGE
IT IS VERY IMPORTANT THAT THIS THE STAINLESS STEEL GRINDING CAGE IS
ASSEMBLED PROPERLY FOR YOUR UNIT TO WORK.
1. Inside the unit is a stainless steel grinding cage
and round plastic collar to lock the grinding cage into
place**.
2. Place the stainless steel grinding cage with the
smooth side (opposite of the 3 tab side) into the
plastic collar and twist until the notch of the stainless
steel grinding cage locks into the protrusion on the
plastic collar. (See illustration to the right).
3. Turn the assembled grinding cage (with plastic cover) over, so black plastic collar is
on the top to insert into the base of tank.
4. Looking down into the interior of the tank, you will see 2
Stainless Steel screws. This is where the clips attached to
the plastic collar lock the grinding mechanism down. (Fig. E,
Page 4)
5. When putting the collar into position, align the plastic collar
with the tabs with the indented postpositions. With firm but
gentle pressure, press the collar down until the tabs “click”
into place.
6. Once everything is in place, make sure the clips are pushed inward toward the
screws to lock the unit into position, (Fig. E, Page 4) and lift slightly to insure the
cage is in fact locked into position properly and will not release.
**THIS IS VERY IMPORTANT! IF THE COLLAR IS NOT LOCKED PROPERLY - THE
UNIT WILL GRIND BUT WILL NOT DISPENSE. Lock and unlock clips carefully, to
avoid breaking. Your STAINLESS STEEL MARGARATOR™ is now ready to fill with your
favorite liquid and use again.
IMPORTANT:
DO NOT SUBMERGE CLEAR TANK IN WATER!
E

7.
RECIPE IDEAS
Use your imagination to create many different drinks with your Stainless Steel
Margarator™. We have provided a few recipes here, in addition to the Margarita recipe on
page 4. You can adjust the ingredients to your particular taste, or create your own. Keep
in mind, that if you have a recipe for a drink made for ‘1’ – your Margarator™ has the
capacity for 16 – 8 oz. drinks – so adjust your recipes accordingly.
Basic Margarita
2 cups tequila
1.5 to 1.75 liter margarita mix
Add 3 lbs. of ice (to Max Fill line) then add all ingredients,
Strawberry Mango Margarita
1 1/2 cups tequila
2 cups margarita mix
3 cups mango juice (carton in juice section of store)
*16 oz fresh strawberries (cut / quartered)
Salt rim of glasses (if desired)
Add 3 lbs. of ice (to Max Fill line) then add all ingredients,
*Strawberry margarita mix, or frozen strawberries can be substituted for fresh strawberries.
Strawberry Margarita
1 cups tequila
1 liter margarita mix
*16 oz strawberries
Salt rim of glasses (if desired)
Add 3 lbs. of ice (to Max Fill line) then add all ingredients.
Rum Slush
1 cups Light Rum (depending on taste)
1 – 12 oz can frozen lime juice (thawed)
1 – 12 oz can frozen lemon juice (thawed)
2 – 12 oz cans of your favorite citrus soda
Add 3 lbs. of ice (to Max Fill line) then add all ingredients
Banana Daiquiri
1 1/2 cups Light Rum (depending on taste)
1 1/2 cup triple sec
3 - 4 bananas (cut approx. 1 inch size)
1 – 12 oz can frozen lime juice (thawed)
cup sugar
1 – 12 oz can citrus soda (of your choice)
Optional: cherries – top each glass with a cherry
Add 3 lbs. of ice (to Max Fill line) then add all ingredients.
8.
RETURNS & WARRANTY
SHOULD YOUR UNIT NOT WORK OR IS DAMAGED WHEN YOU FIRST TAKE IT OUT OF
THE BOX, PLEASE RETURN IT TO THE PLACE OF PURCHASE IMMEDIATELY.
Should you have any questions, please contact us via email or at the customer service number
listed below between the hours of 8:00 AM and 5:00 PM, Monday through Friday, Central
Standard Time.
Distributed by:
Nostalgia Products Group LLC
1471 Partnership Dr.
Green Bay, WI 54304-5685
Customer Service
Phone: (920) 347-9122
Web: www.nostalgiaelectrics.com
Customer Service Inquiry
To submit a Customer Service inquiry, go to www.nostalgiaelectrics.com and fill out the
Customer Service Inquiry form and click the Submit button. A representative will
contact you as soon as possible.
STAINLESS STEEL MARGARATOR™
MODEL# HSB-590
Limited Warranty
This appliance is designed and built to provide many years of satisfactory performance under
normal household use. The distributor pledges to the original owner that should there be any
defects in material or workmanship during the first 90 days of purchase, we will repair or replace
the unit at our option. Our pledge does not apply to damages caused by shipping, mishandling or
unit being dropped. A product deemed defective either from manufacturing or being mishandled
is up to the distributor’s discretion. To obtain service under this warranty, return this unit to
Nostalgia Products Group, LLC at the address above, shipping prepaid. You must also include a
copy of the original receipt along with your name, address and phone number. Include a
description of the defect along with the date you purchased the product.
This warranty does not apply to re-manufactured merchandise.
Please read these instructions carefully. Failure to comply with these instructions, damages
caused by improper replacement parts, abuse or misuse will void this pledge to you and is being
made in place of all other expressed warranties.
Other manuals for HSB-590
2
This manual suits for next models
1
Table of contents
Other Nostalgia Electrics Blender manuals