Nostalgia Electrics Kool-Aid KASCC399BL Quick guide

All products are trademarks of Nostalgia Products LLC.
Worldwide design & utility patented or patents pending.
© 2021 Nostalgia Products LLC.
www.nostalgiaproducts.com
(rev. 06/03/21 DL)

PMS 7686
C100, M70, Y0, K5
r191, g215, b48
PMS Process Blue
C30, M0, Y20, K0
r191, g215, b48
White
C30, M0, Y20, K0
r191, g215, b48
KASCC399BL
Kool-AidTM Snow Cone Cart
Carrito de Conos de Nieve Kool-AidTM
Chariot pour cornet glacé Kool-AidTM
Instructions and Recipes
Instrucciones y recetas
Consignes et recettes


ENGLISH
2
Make every day a party!
Visit www.nostalgiaproducts.com for more fun products.
CONTENTS
SAFETY . . . . . . . . . . . . . . . . . . . . . . . . . . . . . . . . . . . . . . . . . 2
IMPORTANT SAFEGUARDS . . . . . . . . . . . . . . . . . . . . . . . . . . . . . 3
ADDITIONAL IMPORTANT SAFEGUARDS . . . . . . . . . . . . . . . . . . . . 3
INTRODUCTION . . . . . . . . . . . . . . . . . . . . . . . . . . . . . . . . . . . . 4
PARTS & ASSEMBLY . . . . . . . . . . . . . . . . . . . . . . . . . . . . . . . . . . 5
HOW TO OPERATE . . . . . . . . . . . . . . . . . . . . . . . . . . . . . . . . . .10
HELPFUL TIPS . . . . . . . . . . . . . . . . . . . . . . . . . . . . . . . . . . . . .11
CLEANING & MAINTENANCE . . . . . . . . . . . . . . . . . . . . . . . . . . .11
RECIPES . . . . . . . . . . . . . . . . . . . . . . . . . . . . . . . . . . . . . . . . . 13
RETURNS & WARRANTY . . . . . . . . . . . . . . . . . . . . . . . . . . . . . . . 15
SAFETY
Appliance Specications:
120 Volts, 60 Hz
100 Watts
THIS PRODUCT IS FOR USE IN 120V AC OUTLET ONLY.
Refer to www.nostalgiaproducts.com/user-manuals/ for the most updated manual.
Your safety and the safety of others is very important.
We have provided many important safety messages in this manual and
on your appliance. Always read and obey all safety messages.
This is the safety alert symbol.
This symbol alerts you to potential hazards that can
cause serious injury to you and others.
All safety messages will follow the safety alert symbol.
All safety messages will tell you what the potential hazard is, tell you how to reduce the
chance of injury, and tell you what can happen if the instructions are not followed.

ENGLISH
3
IMPORTANT SAFEGUARDS
A person who has not read and understood all operating and safety instructions
is not qualied to operate this appliance. All users of this appliance must read and
understand this Instruction Manual before operating or cleaning this appliance.
When using electrical appliances, basic safety precautions
should always be followed, including:
1. Read all instructions before operating this appliance.
2. DO NOT TOUCH the hot surfaces. Use handles or knobs.
3. This appliance is NOT A TOY.
4. Unsupervised young children and cognitively challenged
individuals should never operate this appliance.
5. Close supervision is necessary when any appliance is used by or near children.
6. To protect against electrical shock do not immerse cord, plug
or any part of this unit in water or other liquids.
7. Unplug from outlet when not in use, before removing parts and before cleaning.
Allow to cool before putting on or taking o any parts, and before cleaning.
8. DO NOT operate any appliance with a damaged cord or plug, or after the appliance
malfunctions, or if the appliance has been damaged in any manner. Return the
appliance to the nearest repair shop for examination, repair or adjustment.
9. The manufacturer does not recommend the use of accessory attachments other than
what is provided by the manufacturer. Use of attachments may cause injuries.
10. DO NOT use the appliance for other than its intended use.
11. DO NOT use outdoors. FOR HOUSEHOLD USE ONLY.
12. DO NOT place on or near a hot gas or electric burner, or in a heated oven.
13. DO NOT let cord hang over edge of table or counter, or touch hot surfaces.
14. NEVER leave unit unattended while in use or when plugged into an outlet.
15. Always attach plug to appliance rst, then plug cord in the wall outlet. To
disconnect, turn any control to "o," then remove plug from wall outlet.
ADDITIONAL IMPORTANT SAFEGUARDS
Operating Safety Precautions
1. Blade is VERY sharp. Use EXTREME CAUTION when handling.
2. Avoid contact with moving parts. NEVER put ngers or utensils into feed or discharge areas.
3. Keep hands away from blade mechanism. Use handles or knobs.
4. Unplug from outlet when not in use, before removing parts and before cleaning.
5. Check the ice hopper for presence of foreign objects prior to use.
Instructions for the Electrical Cord and Plug
1. This appliance has a polarized plug (one blade is wider than the other). To reduce the
risk of electrical shock, this plug is intended to t into a polarized outlet only one way.
If the plug does not t fully into the outlet, reverse the plug. If it still does not t,
contact a qualied electrician. Do not attempt to modify the plug in any way.

ENGLISH
4
2. A short power supply cord is provided to reduce the risk resulting
from becoming entangled or tripping over a long cord.
3. If a long detachable power-supply cord or extension cord is used:
• Extension cords can be used if care is exercised in their use.
• The marked electrical rating of the cord or extension cord should
be at least as great as the electrical rating of the appliance.
• When using a longer cord or extension cord, make sure that
the cord does not drape over a countertop or tabletop where
it can be pulled on or tripped over unintentionally.
4. The manufacturer does not recommend using this machine in countries that do not
support 120V AC even if a voltage adapter, transformer, or converter is in use. Position the
appliance as close to the outlet as possible to prevent injury due to tripping over cord.
SAVE THESE INSTRUCTIONS!
INTRODUCTION
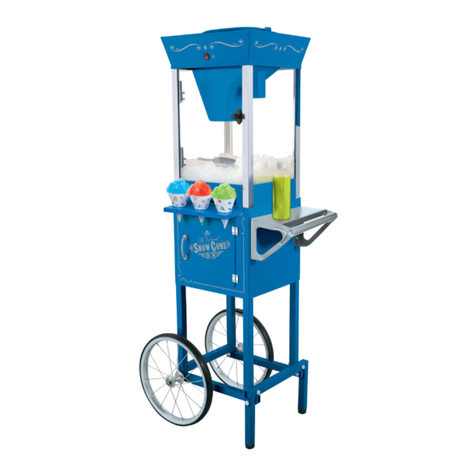
The KOOLAIDTM SNOW CONE CART is a fun, easy to use appliance. Use ice cubes from your
own freezer to shave and craft refreshing snow cones for any occasion. The handy storage
compartment is ideal for storing syrups, extra cones and other supplies. Standing 48" tall,
this snow cone cart is perfect for large groups, parties and events such as fundraisers.
With endless avor varieties, snow cones have always been incredibly fun to eat.
Use the machine to create mounds of shaved ice for smoothies, fruit-avored
slushies, other dessert treats, or to chill beverages. See the recipe section of
this manual for more fun ideas on how to enjoy your SNOW CONE CART.
Features include:
• Tempered Windows
• Wheels and Cart Handle for easy portability
• Storage Compartment

ENGLISH
5
PARTS & ASSEMBLY
Please ensure that you have removed all of the hardware and parts listed before
discarding packaging. In our eorts to reduce packaging, we maximize the packing
material to protect your new purchase. As a result, small parts may not be readily visible.
Hardware
#1 Bolt (10mm) #2 Bolt (38mm) #3 Bolt (60mm)
Qty. 10 Qty. 2 Qty. 2
#4 Screw (10mm) #5 Screw (15mm) #6 Flat Washer (6mm) #7 Flat Washer (8mm)
Qty. 4 Qty. 2 Qty. 10 Qty. 8
#8 Locking Washer #9 Magnet #10 Nut Cap #11 Nut
Qty. 4 Qty. 1 Qty. 2 Qty. 2
#12 Door Handle #13 Sleeve Barrel #14 Locking Screws
Qty. 1 Qty. 2 Qty. 2

ENGLISH
6
Parts
(A) Main Unit (B) Storage (C) Push Handle (D) Bottom Plate
Compartment
(E) Wheel (F) Base Support (G) Cross Bar (H) Leg
Qty. 2 Qty. 2 Qty. 2 Qty. 2
(I) Ice Shovel (J) Wrench (K) Disassembly Tool (L) Cone Holder
Qty. 2
(M) Blade

ENGLISH
7
Assembly of Base Support
1. Attach Push Handle (C) from inside Storage
Compartment (B) using two #1 Bolts and two
#6 Flat Washers. Attach two #11 Nuts to bottom.
2. Attach Cross Bar (G) to Base Support (F) and secure with
four #1 Bolts and four #6 Flat Washers.
3. Secure Bottom Plate (D) to Base Support (F) using four #1 Bolts and four #6 Flat Washers.
4. Attach Legs (H) to protruding ends of Base Support (F) using two #2
Bolts, two #7 Flat Washers and two #8 Locking Washers.

ENGLISH
8
5. Assemble Base Support (F) into the bottom of the Storage Compartment (B) and secure with
four #4 Screws.
Assembly of Wheels
1. Place #7 Flat Washer onto #3 Bolt and insert into pre-
drilled hole on inside of Base Support (F).
2. Put #7 Flat Washer and #13 Sleeve Barrel on end of inserted #3 Bolt.
3. Attach the Wheel (E) to the #3 Bolt. Place #7 Flat Washer and #8 Locking Washer
on Wheel (E). Use the end of Wrench (J) with small notch to hold the #3 Bolt in
place. While holding #3 Bolt in place, tighten the #10 Nut Cap with Wrench (J).
4. Repeat on other side, following the directions above.
(#10)
Nut
Cap
(#8)
Locking
Washer
(#7)
Flat
Washer
(#7)
Flat
Washer
(#3)
Bolt
(#13)
Sleeve
Barrel
(F)
Base
Support
(E)
Wheel

ENGLISH
9
Attaching Door Handle
1. Attach #9 Magnet to transparent door of Main Unit (A).
2. Place #12 Door Handle using two #5 Screws.
3. Place Main Unit (A) onto the top of the Storage Compartment (B).
4. Ensure that the two inserting pins at the bottom of the Main Unit (A) line up correctly so
that Main Unit (A) can be locked under the beam of the Storage Compartment (C).
Locking Main Unit to Storage Compartment
Place the Main Unit (A) onto the Storage Compartment (B) so that the two side
holes match up. Lock by tightening the #14 Locking Screws as shown below:

ENGLISH
10
HOW TO OPERATE
ON / OFF Switch
Ice Hopper
Door Handle
Before rst use, clean the inside of the unit by wiping with a moist, non-abrasive
sponge, towel or cloth and then wipe with a non-abrasive dry towel.
1. First, nd a at surface near an electrical outlet before starting. Make sure your cord
is away from any water source. It is acceptable to use an extension cord if needed.
2. Before plugging in the unit, add ice cubes by removing the clear lid
from the Main Unit of your SNOW CONE CART. To remove the lid,
simply push the release button on the lid, lift and remove.
3. Plug in the appliance while switch is ipped to OFF position.
4. When ice cubes are ready, place cubes in the shaving unit while allowing enough
room for the lid to be placed back on the unit easily. Never force it shut.
5. Return the clear lid to the unit and turn the power button to the ON
position. This will activate the unit to begin shaving. Please note that
the ice will not shave unless the lid is properly secured.
6. Repeat steps 2 and 3 until you have shaved the amount of ice desired.
Turn unit OFF and then unplug when you are nished.
7. Once you have the desired amount of ice, open the housing door on the Main Unit to
retrieve your ice and create your favorite snow-based treats!

ENGLISH
11
HELPFUL TIPS
Ice
For optimal ice shaving results, ice cubes should sit out of the freezer, in a bowl, for about
10 minutes before putting them into the shaving unit. If ice is frosty in appearance, it
is too hard to shave. When ice is clear and wet to the touch, then it is ready to shave.
CLEANING & MAINTENANCE
1. Make sure appliance is turned o and unplugged before cleaning.
2. Open the housing door to clean and dry the inside of the unit
using a slightly damp, non-abrasive cloth or sponge.
3. Wipe the outside of the unit using a slightly damp, non-abrasive
cloth or sponge, then dry with a non-abrasive towel.
4. The shaving unit and clear lid are dishwasher safe. To take
out the shaving unit, refer to steps on page 11.
Replacing the Blade
When your SNOW CONE CART blade becomes dull after a long period of normal
use, replace it with the included Replacement Blade and Tool. Should you need
additional blades, you can order them directly from the manufacturer.
The blade is VERY sharp. Use EXTREME CAUTION when handling.
Spinner
Blade Cap
Blade Housing Blade (M)

ENGLISH
12
Steps to Replace the Blade
1. Remove the Ice Tray and insert the Disassembly Tool (K) over the three arms of the Spinner.
2. Once the Disassembly Tool (K) is properly inserted, twist counter-
clockwise (as the arrow shows) and lift the Spinner out.
3. Carefully press the tabs of the Blade Housing inward and lift up to release.
4. Twist o the Blade Cap and, using extreme caution, remove the Blade
Cartridge. Insert the replacement Blade Cartridge, and reverse the above
steps to reassemble. USE EXTREME CAUTION. BLADE IS VERY SHARP.
5. When replacing the Spinner, reverse all steps and make sure
to lock Spinner using the Disassembly Tool.

ENGLISH
13
RECIPES
The SNOW CONE CART makes light, uy mounds of ice. Use dierent fruits,
syrups, teas, and juices to create a number of refreshing, icy, low-fat treats, drinks
and desserts. Use your imagination and enjoy your SNOW CONE CART!
BOTTLED SYRUP CONCENTRATE
• 19-oz. Warm Water
• 2¾ Cups Sugar
(1.25 lb.)
• 1-oz. Food Coloring
• 1-qt. Empty Bottle
Put 19-oz. of warm water into a one quart (or larger) bottle.
Using a funnel, add 2¾ cups of sugar to the water.
Screw cap on tightly. Shake bottle until sugar dissolves.
Add 1-oz. of food coloring. Shake until mixed.
Now you can add your favorite avor to syrup.
*To make sugar-free concentrate, use your choice
of powdered sugar substitute in place of sugar.
SOUR SYRUP
• 1-oz. Liquid
Citric Acid
• 1-oz. Flavor
Concentrate
• 1-qt. Simple Syrup
• 1-oz. Food Coloring
• 1-qt. Empty Bottle
Put 1 ounce of liquid citric acid and 1 ounce of avor
concentrate (grape, cherry, strawberry, watermelon, apple
or lemon work well) into a one quart (or larger) bottle.
Fill the rest of the bottle with simple syrup (you can
use the recipe above for bottled syrup concentrate).
Add one ounce of food coloring.
Screw cap on tightly. Shake bottle until well mixed.
CHOCOLATE SYRUP
• 15-oz. Simple Syrup
• 15-oz. Chocolate
Syrup
Pour ingredients into a 1 quart or larger bottle.
Screw cap on tightly. Shake bottle until well mixed.
CREAM SYRUP
• 4-oz. Evaporated Milk
• Simple Syrup
• 1-oz. Flavored Syrup
Pour 4 ounces of evaporated milk into 1 quart bottle.
Top o with simple syrup.
Add 1 ounce of avoring.
Screw on cap and shake until well mixed. Keep refrigerated.

ENGLISH
14
PEACH SPRITZER
• 2 Cups Peach Seltzer
• 2 Tbsp. Freshly
Squeezed
Orange Juice
• 1 Packet of Sugar
Substitute
Fill a cup halfway with freshly shaved ice.
Pour peach seltzer and orange juice over ice.
Empty packet of sugar substitute into cup.
Stir until well blended.
Add additional ice if desired, until cup is full.
Serves one.
VANILLA SNOW
• 3 Scoops of Vanilla
Ice Cream
• Shaved Ice
• Vanilla Flavored Syrup
Put scoops of ice cream in a bowl.
Shovel shaved ice over ice cream to create a mound.
Squirt vanilla avored syrup over shaved ice and serve.
(Try this recipe with other ice cream and syrup avors.)
ROOT BEER FLOAT SLUSH
• 2 Scoops Vanilla
Ice Cream
• Shaved Ice
• Root Beer
Freeze a beer mug until it is cold and frosty.
Put 2 round scoops of vanilla ice cream into beer mug.
Scoop shaved ice into mug, leaving
three ngers of space at the top.
Pour root beer into mug until full.
Serves one.
FROZEN MARGARITA
• 1 Cup Shaved Ice
• 3-oz. Tequila
• 1-oz. Triple Sec
• 2-oz. Lime Juice
• 1 Lime Wedge
• 2 Tsp. Coarse Salt
Put salt in a saucer. Rub rim of margarita glass
with a lime wedge and dip glass into salt,
coating rim thoroughly. Set lime aside.
Fill margarita glass with shaved ice.
Pour tequila, triple sec and lime juice into glass.
Stir well and garnish with lime wedge.
Serves one.

ENGLISH
15
RETURNS & WARRANTY
SHOULD YOUR UNIT NOT WORK OR IF DAMAGED WHEN YOU FIRST TAKE IT OUT OF
THE BOX, PLEASE RETURN IT TO THE PLACE OF PURCHASE IMMEDIATELY.
KOOLAIDTM SNOW CONE CART / KASCC399BL
Should you have any questions, please contact us via email or at the customer service number listed
below between the hours of 8:00 AM and 5:00 PM, Monday through Friday, Central Standard Time.
Distributed by:
Nostalgia Products LLC
1471 Partnership Dr.
Green Bay, WI 54304-5685
Customer Service
Phone: (920) 347-9122
Web: www.nostalgiaproducts.com
Customer Service Inquiry
To submit a Customer Service inquiry, go to www.nostalgiaproducts.com and ll
out the Customer Service Inquiry form and click the Submit button.
A representative will contact you as soon as possible.
Product Warranty Terms
Nostalgia Products LLC (the“Company”) hereby warrants that for a period of one (1) year from the
date of original purchase, this product will be free of defects in material and workmanship under
normal home use, provided that the product is operated and maintained in accordance with the
operating instructions. As the sole and exclusive remedy under this warranty, the Company will
at its discretion either repair or replace the product found to be defective, or issue a refund on the
product during the warranty period. This warranty is only available to the original retail purchaser of
the product from the date of initial retail purchase, and is only valid with the original sales receipt, as
proof of purchase date is required to obtain warranty benets. All warranty claims must be brought
to the attention of the Company within the warranty period and no later than 30 days of the failure
to perform. This warranty does not cover normal wear or damage caused by shipping, mishandling,
misuse, accident, alteration, improper replacement parts, or other than ordinary household use.
You may be required to return the product (with shipping prepaid by you) for inspection and
evaluation. Return shipping costs are not refundable. The Company is not responsible for returns
damaged or lost in transit. Unless otherwise specically permitted by the operating instructions, this
warranty applies to indoor household use only. In order to obtain service under this warranty, please
contact the Company at the telephone number listed above or by lling out the Customer Service
Inquiry Form located at www.nostalgiaproducts.com. Warranty valid only in USA and Canada.
This warranty is in lieu of all other warranties, expressed or implied, including warranties of
merchantability and tness for a particular purpose, which are hereby excluded to the extent
permitted by law. In no event shall the Company be liable for any indirect, incidental, consequential,
or special damages arising out of or in connection with this product or the use thereof. Some
states, provinces or jurisdictions do not permit the exclusion or limitation of incidental or
consequential damages, so the foregoing exclusion or limitation may not apply to you.
This warranty does not apply to re-manufactured merchandise.
Please read the operating instructions carefully. Failure to comply
with the operating instructions will void this warranty.
For more information, visit us online at www.nostalgiaproducts.com.
Like us on Facebook at www.facebook.com/NostalgiaElectrics.
Follow our boards on Pinterest at www.pinterest.com/nostalgiaelctrx.
Tweet along with us on Twitter at www.twitter.com/NostalgiaElctrx.

16
ESPAÑOL
16
¡Haga de cada día una esta!
Visite www.nostalgiaproducts.com para
ver más productos divertidos.
CONTENIDO
SEGURIDAD . . . . . . . . . . . . . . . . . . . . . . . . . . . . . . . . . . . . . . . 16
PROTECCIONES IMPORTANTES. . . . . . . . . . . . . . . . . . . . . . . . . . . 17
PROTECCIONES IMPORTANTES ADICIONALES . . . . . . . . . . . . . . . . .17
INTRODUCCIÓN . . . . . . . . . . . . . . . . . . . . . . . . . . . . . . . . . . . . 18
PIEZAS Y ENSAMBLAJE . . . . . . . . . . . . . . . . . . . . . . . . . . . . . . . . 19
FUNCIONAMIENTO . . . . . . . . . . . . . . . . . . . . . . . . . . . . . . . . . . 24
CONSEJOS ÚTILES . . . . . . . . . . . . . . . . . . . . . . . . . . . . . . . . . .25
LIMPIEZA Y MANTENIMIENTO . . . . . . . . . . . . . . . . . . . . . . . . . . . 25
RECETAS . . . . . . . . . . . . . . . . . . . . . . . . . . . . . . . . . . . . . . . . . 27
DEVOLUCIONES Y GARANTÍA. . . . . . . . . . . . . . . . . . . . . . . . . . . . 29
SAFETY
Appliance Specications:
120 Volts, 60 Hz
100 Watts
ESTE PRODUCTO SÓLO DEBE USARSE CON UN TOMACORRIENTE DE 120V CA.
Visite www.nostalgiaproducts.com/user-manuals/ para que vea el manual más actualizado.
Su seguridad y la de otras personas es muy importante.
Hemos proporcionado numerosos mensajes de seguridad importantes en este manual
y en su electrodoméstico. Siempre lea y obedezca todos los mensajes de seguridad.
Este es el símbolo de alerta de seguridad.
Este símbolo le avisa de los peligros potenciales que
pueden provocar serias lesiones a usted y a otros.
Todos los mensajes de seguridad estarán antecedidos por el símbolo de alerta.
Todos los mensajes de seguridad le dirán de qué peligro potencial se trata, cómo reducir
la posibilidad de lesiones y qué puede ocurrir si no se obedecen las instrucciones.

17
ESPAÑOL
17
PROTECCIONES IMPORTANTES
Una persona que no haya leído y comprendido todas las instrucciones
de uso y seguridad no está calicada para utilizar este aparato. Todos
los usuarios de este dispositivo deben leer y comprender este Manual
de instrucciones antes de utilizar o limpiar este aparato.
Cuando se utiliza aparatos eléctricos, siempre se deben seguir algunas
medidas básicas de seguridad que incluyen las siguientes:
1. Lea todas las instrucciones antes de utilizar este aparato.
2. NO TOQUE las supercies calientes. Use agarraderas o mangos.
3. Este aparato NO ES UN JUGUETE.
4. Sin supervisión los niños ni las personas con discapacidad
intelectual nunca deben usar este aparato.
5. Una supervisión estricta se requiere cuando un aparato se use por niños o cerca de ellos.
6. Como medida de protección contra el riesgo de descarga eléctrica, no sumerja el
cable, los enchufes ni ninguna otra parte de la unidad en agua ni en otros líquidos.
7. Desconéctelo del tomacorriente cuando no esté en uso, antes de
retirar piezas y antes de la limpieza. Déjelo enfriar antes de colocar
o retirar cualquiera de las piezas, y antes de la limpieza.
8. NO utilice ningún aparato con el cable o el enchufe dañados, ni después de que el
aparato funcione mal o SI el aparato se ha dañado de cualquier manera. Devuelva
el aparato al taller de reparación más cercano para su reparación o ajuste.
9. El fabricante no recomienda el uso de aditamentos accesorios diferentes de los
proporcionados por el fabricante. El uso de accesorios puede provocar lesiones.
10. NO utilice el aparato para usos no previstos.
11. NO utilice el aparato al aire libre. SÓLO PARA USO DOMÉSTICO.
12. NO lo coloque sobre una hornilla caliente, ni eléctrica ni de gas,
ni en un horno caliente ni cerca de ninguno de estos.
13. NO permita que el cable cuelgue sobre el borde de la mesa o
del mostrador, ni que toque supercies calientes.
14. NUNCA deje la unidad desatendida mientras esté en uso ni
cuando esté enchufada a una toma de corriente.
15. Siempre conecte primero el enchufe al aparato, luego enchufe el cable
a la toma de corriente. Para desconectar, mueva todos los controles
a“apagado”, luego retire el enchufe del tomacorriente.
PROTECCIONES IMPORTANTES ADICIONALES
Precauciones de seguridad operativa
1. La cuchilla está MUY alada. Actúe con EXTREMA PRECAUCIÓN cuando la manipule.
2. Evite el contacto con partes en movimiento. NUNCA ponga los dedos
ni coloque utensilios en las áreas de alimentación o descarga.
3. Mantenga las manos alejadas del mecanismo de la cuchilla. Use agarraderas o mangos.
4. Desconéctelo del tomacorriente cuando no esté en uso,
antes de retirar piezas y antes de la limpieza.
5. Antes del uso, revise la tolva de hielo por si contiene objetos extraño.

18
ESPAÑOL
18
Instrucciones para el cable eléctrico y el enchufe
1. RIESGO DE DESCARGA ELÉCTRICA: El incumplimiento de estas instrucciones
puede resultar en la muerte, incendio o descarga eléctrica.
• Enchufe en un tomacorrientes de 3 patas con conexión a tierra.
• NO retire la patilla de conexión a tierra.
• NO utilice un adaptador.
• NO utilice un cable de extensión.
2. La unidad DEBE conectarse a tierra. En caso de un corto circuito, la conexión
a tierra reduce el riesgo de descarga eléctrica al proporcionar un cable de
escape para la corriente eléctrica. Esta unidad está provista de un cable
que tiene un cable a tierra con un enchufe a tierra. Se debe enchufar en un
tomacorriente de pared instalado apropiadamente y conectado a tierra.
3. ADVERTENCIA: El uso incorrecto de la toma de tierra puede resultar en riesgo de sufrir
una descarga eléctrica. Si el enchufe no entra completo en el tomacorriente, contacte
a un electricista calicado. No trate de modicar el enchufe de ninguna manera.
4. Se provee un cable de alimentación corto para reducir el riesgo
resultante de enredarse o tropezar con un cable largo.
5. El fabricante no recomienda el uso de esta máquina en países que no admiten 120V
CA incluso si se está usando un adaptador, transformador o convertidor de voltaje.
¡ GUARDE ESTAS INSTRUCCIONES!
INTRODUCCIÓN
El CARRITO DE CONOS DE NIEVE es un aparato divertido y fácil de usar. Use
cubos de hielo de su propio congelador para rasparlos y hacer conos de nieve
refrescantes para cualquier ocasión. El compartimiento de almacenamiento,
que está a mano, es ideal para guardar siropes, conos extras y otros suministros.
Con una altura de 48”, este carrito de conos de nieve es perfecto para grandes
grupos, estas y eventos tales como para la recaudación de fondos.
Con innitas variedades de sabor, los conos de nieve siempre han sido increíblemente
divertidos de comer. Use la máquina para crear montículos de hielo raspado
para batidos de fruta, nieve espesa con sabor a frutas, otros platos de postre o
para enfriar bebidas. Consulte la sección de recetas de este manual para ver más
ideas divertidas de cómo disfrutar de su CARRITO DE CONOS DE NIEVE.
Las características incluyen:
• Ventanillas templadas
• Ruedas y agarradera de empuje para una portabilidad más fácil
• Compartimiento de almacenamiento
Table of contents
Languages:
Other Nostalgia Electrics Commercial Food Equipment manuals
Popular Commercial Food Equipment manuals by other brands

Diamond
Diamond AL1TB/H2-R2 Installation, Operating and Maintenance Instruction

Arneg
Arneg Atlanta Direction for Installation and Use

HURAKAN
HURAKAN HKN-ISE30 manual

Duke
Duke FWM3-22 Operator's manual

CHROMOnorm
CHROMOnorm BR795 Series Translation of the operating instructions

Rosko
Rosko RO-GCE Series installation guide

Pitco
Pitco TB-SRTG14-2 Upgrade instructions

Flavor Burst
Flavor Burst CTP 80SS-INT-2S Operation manual supplement

American Eagle
American Eagle AE-MC12N Operation manual

CASO DESIGN
CASO DESIGN WineSafe 12 Original operating manual

Mibrasa
Mibrasa PARRILLA GMB 160 FIRE user manual

PERFECT FRY COMPANY
PERFECT FRY COMPANY PFM Series owner's manual