Important Safety Instructions
Read instructions before connecting
Limited Warranty
Information and Disclaimer!
Wichtige Sicherheitshinweise!
Bitte vor Gebrauch lesen und aufbewahren!
Gewährleistung
Informationen und Haftungsausschluss
•Save these instructions for later use!
•Follow all warnings and instructions marked
on the product!
•Do not use this product in the near of water, i.e.
swimming pool, wet basement, etc.
•Read all of these instructions clearly!
•Do not place this product onto a instable stand or
table. The product may fall down, causing damage
to the product or to persons!
•Slots and holes in the cabinet and the electronic
modules are provided for ventilation; to ensure
reliable operation of the product, do not cover any
slots or holes.
•This product should not be placed in the near
an ofen or any other hot units.
•Use only the attached (original) power mains cable.
In case of questions about power supply or cable,
please ask your local NOVA dealer.
•Do not cover or damage the power mains cable.
•In case of damaged cables, do not use them at all.
•The power mains cable should be unplugged if the
unit is not used for longer time.
•Never push any objects into this product.
Dangerous (high) voltage points could result in
risk of fire or electrical shock. Do not spill any liquid
on the product.
•Do not try to service this product by yourself.
Opening or removing covers may expose you to
dangerous (high) voltage or other risks. All service
should be handeled by qualified service personnel only.
•Clean only with dry clothes.
•In case of any problems, unplug the product from the
mains supply immediately.
•Contact qualified service personnel in following cases:
•If the mains power cable or plug is damaged.
•If liquid has been spilled into the product.
•If the product has been exposed to water.
•If the product does not operate normally according
this manual.
•If the product has been dropped (damaged chassis).
•Exposure to extremely high volume levels may cause
a permanent hearing loss.
•Individuals vary considerably in susceptibility to noise
induced hearing loss, but nearly everyone will lose
some hearing if exposed to sufficiently intense noise
for a sufficient time. The U.S. Government´s
Occupational Safety and Health Administration
(OSHA) has specified the following permissible
noise level exposures:
Duration Per Day
In Hours
8
6
4
3
2
11/2
1
1/2
1/4 or less
•According to OSHA, any exposure in excess of the above
permissible limits could result in some hearing loss.
•Ear plug protectors in the ear canals or over the ears
must be worn when operating this product in order to
prevent a permanent hearing loss if exposure is in excess
of the limits as set forth above. To ensure against
potentially dangerous exposure to high sound pressure
levels, it is recommended that all persons exposed to
equipment capable of producing high sound pressure
levels such as this amplification system be protected by
hearing protectors while this unit is in operation.
•Fuses: Replace with IEC 127 (5 x 20 mm) type and
rated fuse for only.
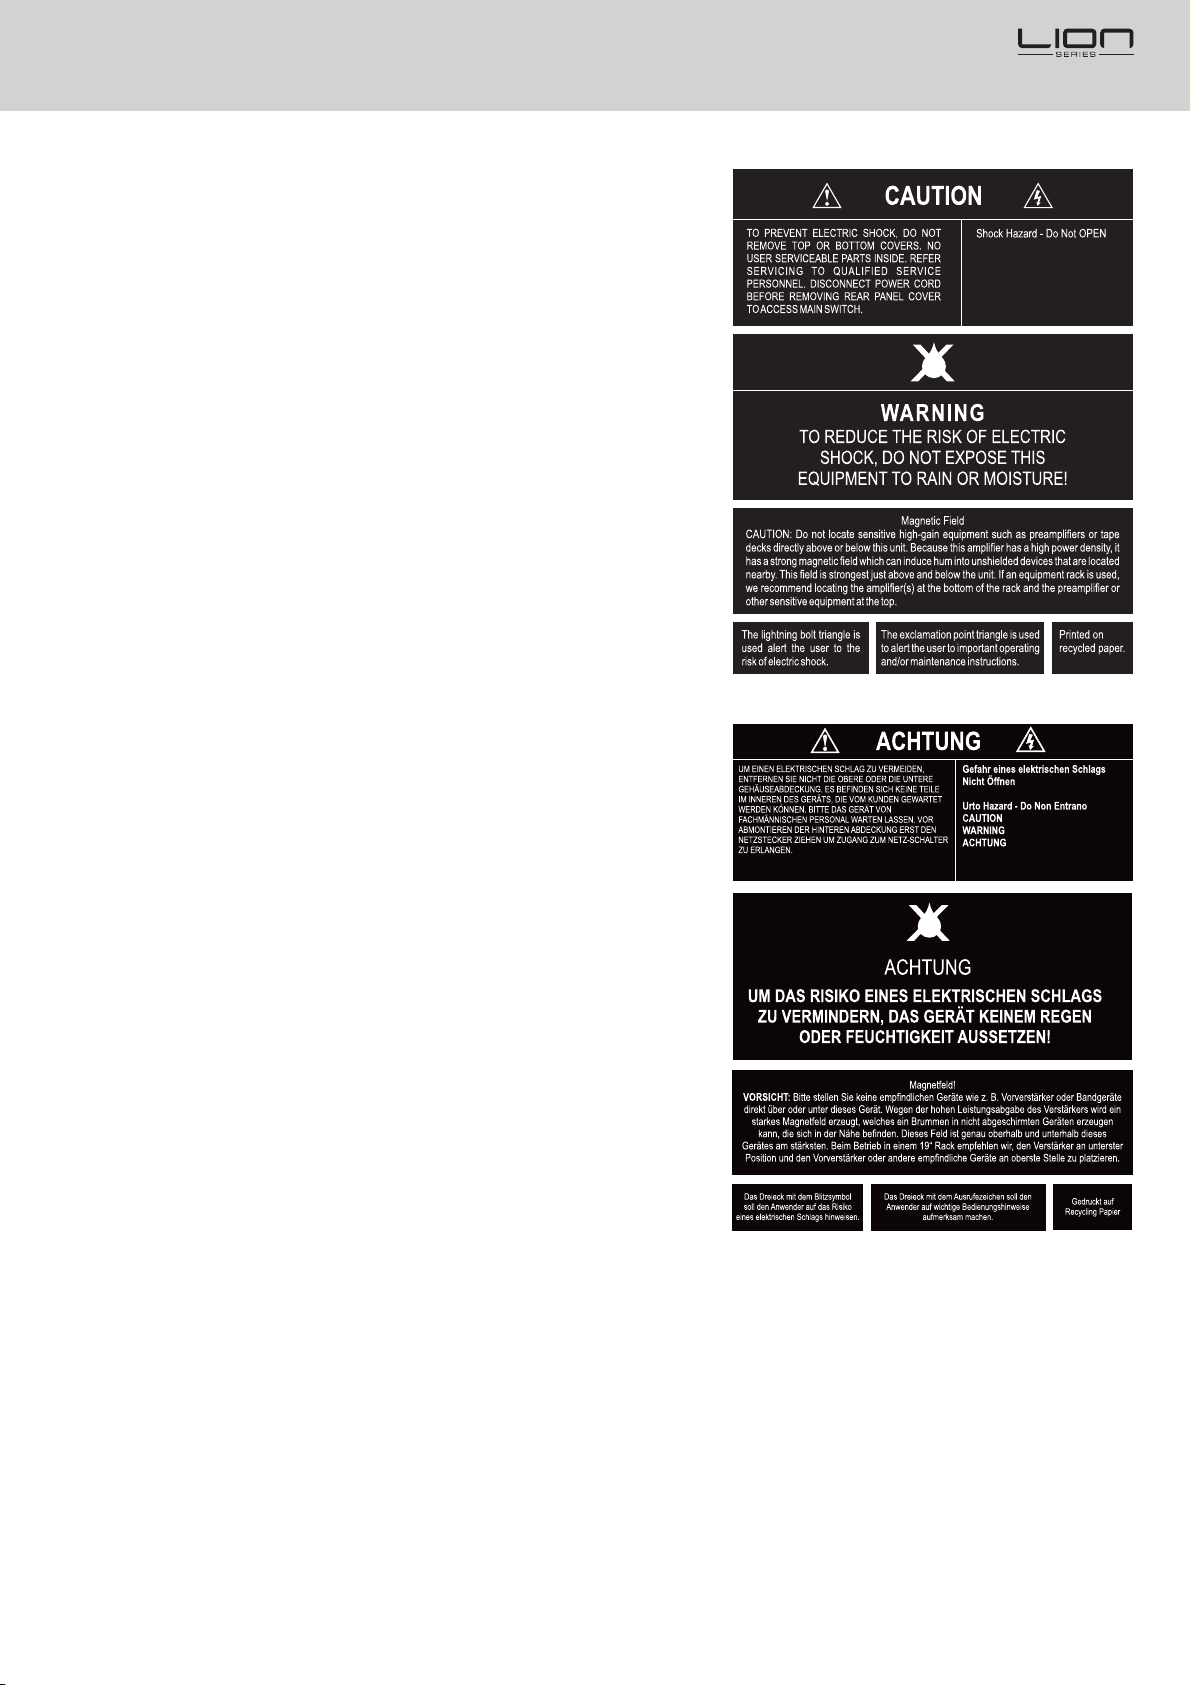
TO PREVENT THE RISK OF FIRE AND SHOCK HAZARD,
DO NOT EXPOSE THIS APPLIANCE TO MOISTURE OR RAIN.
DO NOT OPEN CASE; NO USER SERVICE-ABLE PARTS
INSIDE. REFER SERVICING TO QUALIFIED
SERVICE PERSONNEL ONLY.
•The product has been manufactured according to IEC 60065.
•The user must follow the advice and warning comments
found in the operating instructions. The unit conforms to
Protection Class 1.
•Loudspeaker outputs can carry dangerous high voltage.
Connect of disconnect any speaker cable ONLY if the unit
is switched off and the unit is disconnected from the mains
power supply (wall socket).
•Do not interrupt the protective conductor connection.
•Dieses Gerät wurde gemäß IEC 60065 hergestellt
und hat das Werk in technisch in einwandfreiem Zustand
verlassen. Für einen gefahrlosen Betrieb muss der Anwender
die Hinweise und Warnungen dieser Bedienungsanleitung
befolgen. Dieses Gerät entspricht der Schutzklasse I.
•DIE SICHERHEIT DES GERÄTES WIRD
NUR GEWÄHRLEISTET, WENN:
•Reparaturen von autorisierten NOVA-Servicestellen
ausgeführt werden.
•das Gerät in Übereinstimmung nach den Vorgaben dieser
Bedienungsanleitung verwendet wird.
WARNUNG:
•Wenn Abdeckungen oder Gehäuseteile entfernt werden,
können spannungsführende Bauteile freigelegt werden.
•Wartung sowie Reparatur am geöffneten Gerät unter
Spannung darf nur durch eine vom Hersteller autorisierte
Fachkraft (nach VBG 4) erfolgen, die mit den damit
verbundenen Gefahren vertraut ist.
•Lautsprecher-Ausgänge führen berührungsgefährliche
Spannungen. Verbinden Sie Lautsprecherausgänge mit
Lautsprechern mittels Kabeln nur im ausgeschalteten
Gerätezustand und nur mit dem original vom Hersteller
beigelegtem bzw. empfohlenem Netzkabel.
•Es dürfen nur Sicherungen vom Typ IEC 127 und der
angegebenen Nennstromstärke verwendet werden.
•Eine Verwendung von überbrückten Sicherungen sowie
ein Kurzschließen des Sicherungshalters ist verboten.
•Unterbrechen Sie niemals die Schutzleiterverbindung.
•Hohe Lautstärkepegel können dauerhafte Gehörschäden
verursachen. Vermeiden Sie deshalb die direkte Nähe
von Lautsprechern, die mit hoher Lautstärke betrieben
werden. Verwenden Sie einen Gehörschutz bei
dauernder Einwirkung hoher Pegel. NOVA, der Hersteller
bzw. der Inverkehrbringer übernimmt keinerlei Haftung
oder Verantwortung für Hörschäden und andere
gesundheitliche Schäden durch die Verwendung, den
Transport oder die Installation dieses Produkts.
NETZANSCHLUSS:
•Die Geräte-Betriebsspannung muss mit der
örtlichen Netzspannung überein stimmen.
•Der Anschluss an das Stromnetz darf nur mit
dem mitgelieferten Netzteil oder Netzkabel erfolgen.
AUFSTELLORT:
•Das Gerät sollte nur auf einer sauberen und wackelfreien
Fläche stehen.
•Das Gerät darf während des Betriebs keinen
Erschütterungen ausgesetzt sein.
•Setzen Sie das Gerät nicht Feuchtigkeit und Staub aus.
•Das Gerät darf nicht in der Nähe von Wasser oder anderen
Flüssigkeiten bzw. Behältnissen mit Flüssigkeiten jeglicher
Art betrieben werden. Stellen Sie niemals einen mit
Flüssigkeit gefüllten Gegenstand auf oder in direkte Nähe
des Gerätes.
•Sorgen Sie für ausreichende Belüftung des Gerätes.
•Eventuelle Belüftungsöffnungen dürfen nicht abgedeckt
werden.
•Vermeiden Sie eine direkte Sonneneinstrahlung und die
unmittelbare Nähe von Heizkörpern, Heizstrahlern
o.ä. Geräte.
•Betrieben oder transportieren Sie das Gerät nie auf einem
instabilen Wagen, Ständer, Dreifuß, Untersatz oder Tisch.
Beim Transport, Lagerung, Aufstellung sowie beim Betrieb
des Gerätes müssen die Anweisungen des Herstellers befolgt
werden.
•Zusatzvorrichtungen: Verwenden Sie niemals Zusatz-
vorrichtungen, die nicht vom Hersteller empfohlen wurden.
•Lagern Sie das Gerät über längere Zeit NUR stromlos
(Netzstecker sollte gezogen werden).
Wir behalten uns Änderungen der technischen Daten
im Rahmen der Produktverbesserung und Produktpflege
vor. Dabei legen wir größten Wert auf Kompatibilität und
Produkttreue. Wir behalten uns Änderungen jeglicher Art
vor. Keine Gewähr für Druckfehler.
Stative, Distanzrohre, Kabel und anderes Zubehör nicht
im Lieferumfang enthalten, soweit nicht anders angegeben.
Zubehör optional erhältlich.
Für den Zeitraum eines Jahres, beginnend mit
Lieferdatum an den ursprunglichen Käufer
(abzulesen von der Rechnung bzw. Kassenbon),
gewährleistet die CRAAFT AUDIO GmbH für
jeden Neukauf, dass das Produkt sowohl vom
Material als auch in der Ausführung der Herstellung
in einwandfreiem Zustand ist. Der CRAAFT AUDIO
GmbH steht es frei zu entscheiden, unter Vorbehalt
kostenlos alle fehlerhaften Teile zu reparieren oder
zu ersetzen. Es wird keinerlei Haftung für Reparatur
oder Ersatz des Produkts übernommen, wenn
Schäden durch Installationsfehler oder
unsachgemäßen Gebrauch des Gerätes entstanden
sind, die Seriennummer beschädigt wurde oder
versucht wurde, diese zu ändern oder zu entfernen.
Die CRAAFT AUDIO GmbH übernimmt ebenfalls
keine Haftung für Schäden, die bei unsachgemäßen
Reparaturen und/oder Eingriffen entstanden sind.
Diese Gewährleistung deckt ebenfalls keine Schäden
an Lautsprechern oder Folgeschäden an jeglicher
angeschlossenen Peripherie, Personenschäden
oder anderen Primär- und Sekundärschäden ab,
die durch eine Nichteinhaltung der geschriebenen
bzw. stillschweigenden Gewährleistungsregelungen
entstanden sind. Falls ein NOVA Produkt Service
benötigt, sollte der Eigentümer des Gerätes ein
autorisiertes NOVA Service-Center kontaktieren.
Egal aus welchem Grunde, deckt eine Gewähr-
leistung die Instandsetzung oder den Austausch,
jedoch keinesfalls Schadensersatzansprüche in
irgendeiner Art auch nicht wegen Ausfallhonorar
oder anderem ab. Als Eigentümer und/oder
Anwender sind Sie nicht berechtigt, von der
CRAAFT AUDIO GmbH Schadensersatz zu
fordern, wenn Nebenschäden durch ein Produkt
aus dem Hause der CRAAFT AUDIO GmbH
entstehen. Dies schließt Folge- und/oder Neben-
schäden an anderen Produkten ein.
Die Gewährleistung darf nicht geändert werden
und wird nicht um einen Zeitraum erweitert, in
dem der Eigentümer oder Anwender das Produkt
nicht nutzen kann. Lediglich vom nicht abgelaufenen
Teil der Gewährleistungszeit betroffen sind Reparaturen
und Ersatzteile, die im Rahmen der Gewährleistungs-
bestimmungen ausgeführt oder getauscht wurden.
Diese Gewährleistungserklärung ersetzt alle anderen
Erklärungen, die in dieser oder anderen oder vorherigen
Ausgaben für dieses Gerät enthalten bzw. vorhanden sind.
MAINS CONNECTION:
•The set operating voltage must match the local mains
supply voltage.
PLACE OF INSTALLATION:
•The unit should be used only on a clean, horizontal
working surface.
•Keep away the product from moisture and dust.
•Do not place this product onto a instable stand or
table. The product may fall down, causing damage
to the product or to persons!
•Slots and holes in the cabinet and the electronic
modules are provided for ventilation; to ensure
reliable operation of the product, do not cover any
slots or holes.
•This product should not be placed in the near
an ofen or any other hot units.
•Keep away from direct sunlight..
WEEE Mark
If you want to dispose of this product, do not mix with general
household waste. There are separate collection systems for used
electronic products in accordance with legislation under the WEEE
Directive (Directive 2002/96/EC) and is effective only within the
European Union.
EU Declaration of Conformity
Version for European Union
This declaration applies to loudspeakers and amplifiers
manufactured by CRAAFT AUDIO GmbH and includes
the types listed below.
EU conformity of loudspeakers
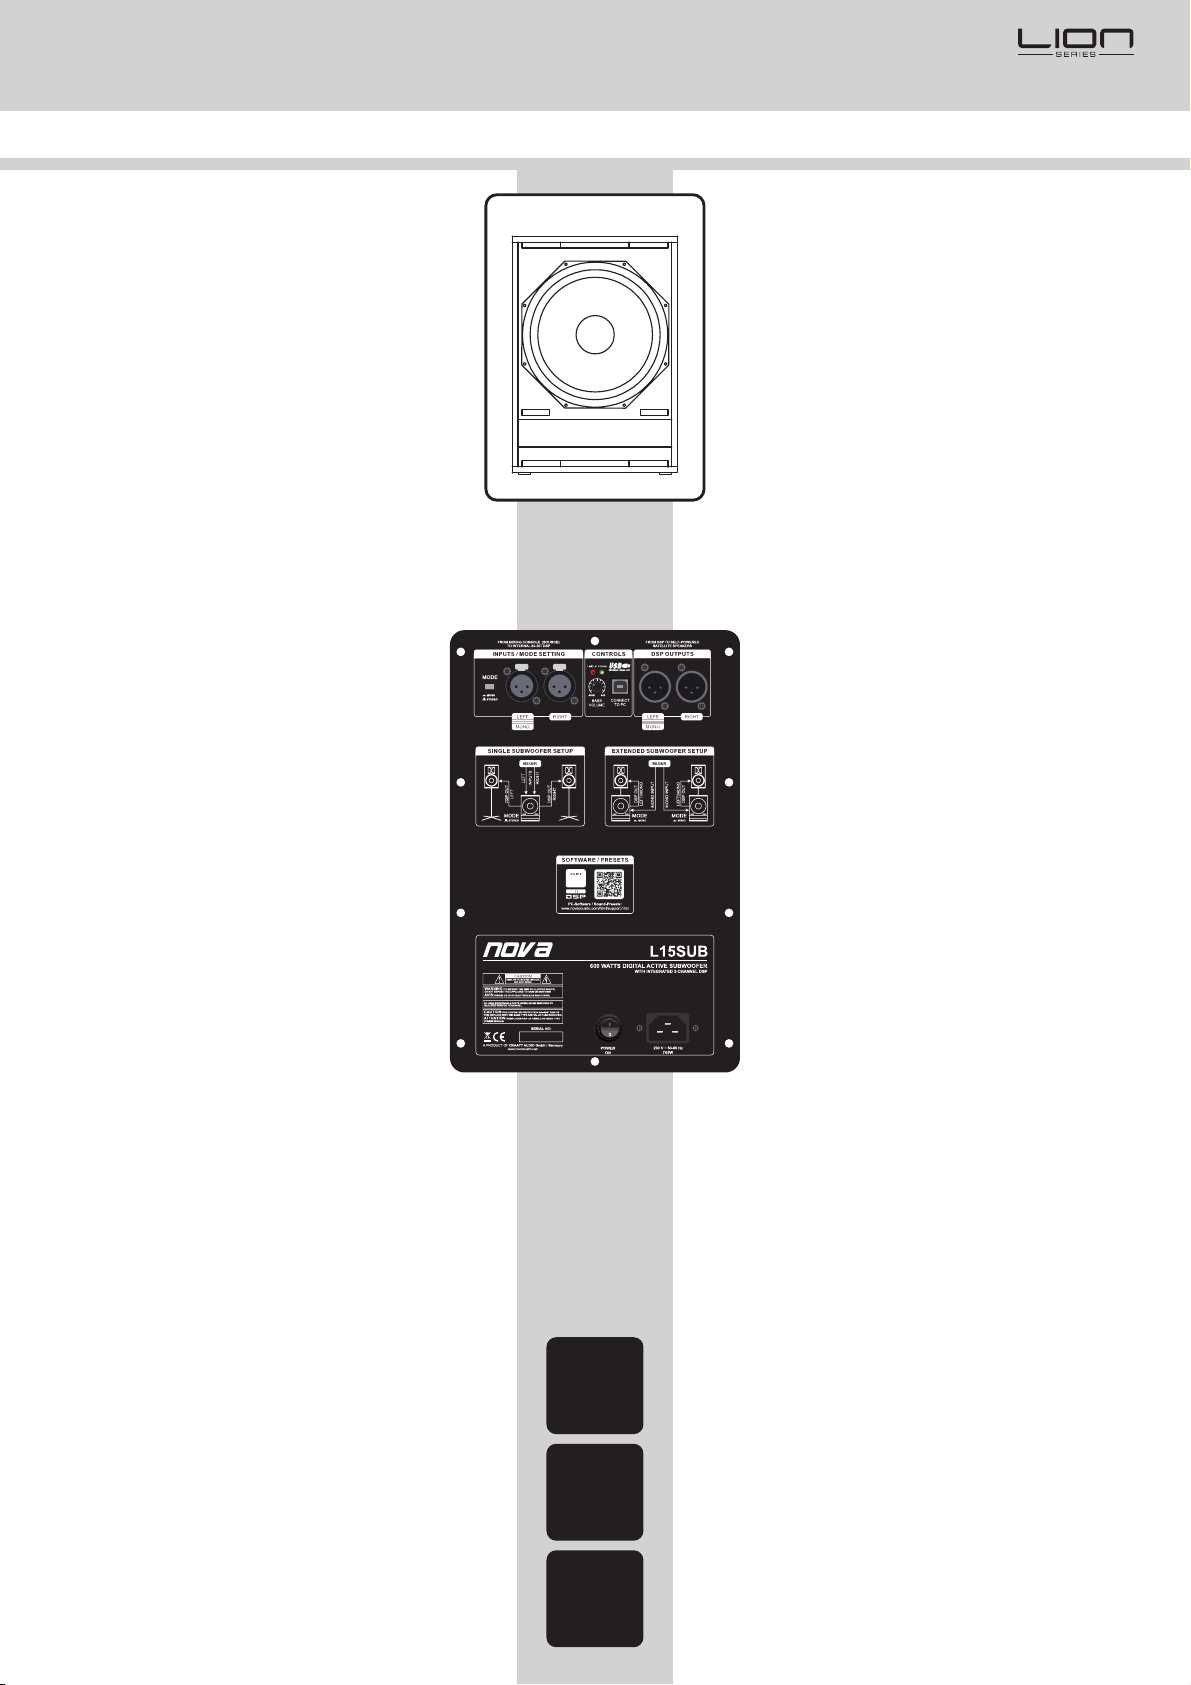
L10SUB
L15SUB
All production versions of these types are included,
provided they correspond to the original technical version
and have not been subject to any later design or
electromechanical modifications.
We herewith declare that said products are in conformity
with the provisions of the following EC directives including
all applicable amendments:
2006/95/EG, Low Voltage
2004/108/EG, Electromagnetic Compatibility
The following standards have been applied:
DIN EN 60065
DIN EN 55103-1:1996, classes E1 to E4
DIN EN 55103-2:1996, classes E1 to E4
CRAAFT AUDIO GmbH / Germany accepts responsibility
for this declaration.
Pocking, 8th May 2014
Mr. Heinz Schwarzmüller,
Managing Director / CEO
For a period of one year from the date of delivery to the
original purchaser (as shown on the original invoice or
sales receipt), CRAAFT AUDIO GmbH warrants to the
ORIGINAL OWNER of each product (provided it was
purchased at an authorized NOVA Dealer) that it is free
of defects in materials and workmanship and that each
product will meet or exceed all factory published
specifications for each respective model. NOVA agrees
to repair or replace (at its discretion) all defective parts
at no charge for labor or materials; subject to following
provisions:
NOVA shall take no responsibility for repair or replacement
as specified under this warranty, if the damaged product
has been subject to misuse, accident, neglect or failure
to comply with normal maintenance procedures; or if the
serial number has been defaced, altered or removed.
Nor will NOVA accept responsibility for, or resulting from,
improper alterations or unauthorized parts or repairs.
This warranty does not cover any damage to speakers or
any other consequential damage resulting from breach of
any written or implied warranty. NOVA will remedy any
defect, regardless of the reason for failure (except as
excluded) by repair, or replacement. NOVA will remedy
the defect and ship the product within a reasonable
time after receipt of the defective product at an authorized
NOVA Service Center. In the case that an NOVA product
requires service, the owner must contact NOVA or an
authorized NOVA Service Center to receive an R.A.N.
(Return Authorization Number) and instructions on how
to return the product to the authorized NOVA Service
Center, or to the factory. NOVA (or its Authorized Service
Center) will initiate corrective repairs upon receipt of the
returned product. Please save original carton and all the
packing materials in case shipping is required. All
products being returned to the factory or service center
for repairs must be shipped pre-paid.
If the repairs made by NOVA or the authorized NOVA
Service Center are not satisfactory, the owner is
instructed to give written notice to NOVA. If the defect
or malfunction remains after a reasonable amount of
attempts by NOVA to remedy the defect or malfunction,
the owner shall then have the option to elect either a
refund or replacement of said NOVA product free of
charge. The refund shall be an amount equal to but
not greater than the actual purchase price, not including
any taxes, interest, insurance, closing costs and other
finance charges (minus reasonable depreciation on the
product). If a refund is necessary, the owner must make
the defective or malfunctioning product available to
NOVA free and clear of all liens or other restrictions.
NOVA reserves the right to modify or change equipment
(in whole or part) at any time prior to delivery thereof, in
order to include therein electrical or mechanical
improvements deemed appropriate by NOVA; but without
incurring any liability to modify or change any equipment
previously delivered, or to supply new equipment in
accordance with any earlier specifications.
DISCLAIMER OF CONSEQUENTIAL AND INCIDENTAL
DAMAGES YOU, THE OWNER, IS NOT ENTITLED TO
RECOVER FROM NOVAANY INCIDENTAL DAMAGES
RESULTING FROM ANY DEFECT IN THE NOVA
PRODUCT. THIS INCLUDES ANY DAMAGE TO
ANOTHER PRODUCT OR PRODUCTS RESULTING
FROM SUCH A DEFECT.
No person has the authority to enlarge, amend, or modify
this warranty rules. This warranty is not extended by the
length of time which the owner is deprived of the use of
product. Repairs and replacement parts provided
pursuant to the warranty shall carry only the non-expired
portion of the warranty.
THIS STATEMENT OF WARRANTY SUPERSEDES ALL
OTHERS CONTAINED IN THIS MANUAL.
We continually engage in research related to product
improvement. Materials, production methods and design
refinements are introduced into existing products. Any
current NOVA product may differ in some respect from its
published description, but will always equal or exceed the
original design specifications unless otherwise stated.
Limited liability on contents. Subjects to be changed
without prior notice.
Speaker stands, distance rods, cables and other
accessories are available as option (not included).
Sound Level dBA,
Slow Response
90
92
95
97
100
102
105
110
115
23