Houd het apparaat uitsluitend•
bij de handgreep vast.
Houd de motorunit uit de•
buurt van uw ogen en gezicht.
Ga altijd van beneden naar•
boven te werk wanneer u
het apparaat op een trap
gebruikt.
Berg het apparaat als het niet•
in gebruik is op een droge
plaats op. Zorg dat kinderen
geen toegang hebben tot
opgeborgen apparaten.
Reiniging en onderhoud
Voordat u verder gaat, vragen wij graag uw
aandacht voor de volgende punten:
- Haal voor reiniging en onderhoud de
stekker uit het stopcontact en wacht tot
het apparaat is afgekoeld.
- Dompel het apparaat voor reiniging niet
onder in water of andere vloeistoffen.
Voordat u verder gaat, vragen wij graag u uw
aandacht voor de volgende punten:
- Reinig het apparaat niet met bijtende of
schurende reinigingsmiddelen.
- Gebruik geen scherpe voorwerpen om het
apparaat te reinigen.
Controleer het apparaat regelmatig op•
mogelijke schade.
Reinig regelmatig de ventilatiesleuven met•
behulp van een zachte borstel.
Berg het apparaat op op een droge plaats,•
buiten bereik van kinderen.
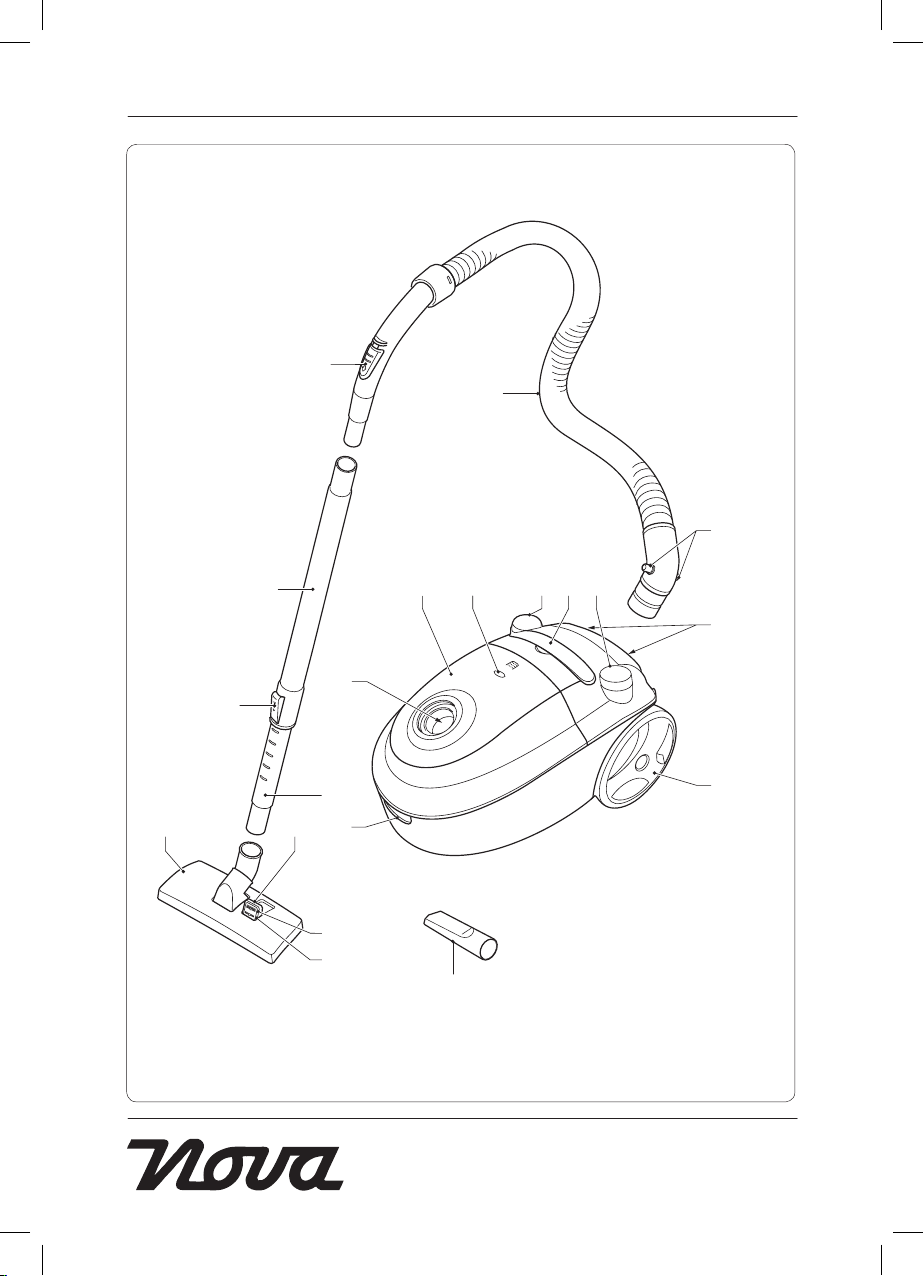
Vervangen van de stofzak (fig. A - C)
De stofzak (21) moet worden vervangen
wanneer de 'stofzak vol'-indicator (3) gaat
branden. Vervangende stofzakken zijn
verkrijgbaar bij ons servicestation. Indien u
vragen heeft omtrent de stofzak, wendt u zich
dan tot het servicestation.
Zie voor het verwijderen van de volle•
stofzak (21) het gedeelte "Monteren en
verwijderen van de stofzak".
Zie voor het monteren van de lege stofzak•
(21) het gedeelte "Monteren en
verwijderen van de stofzak".
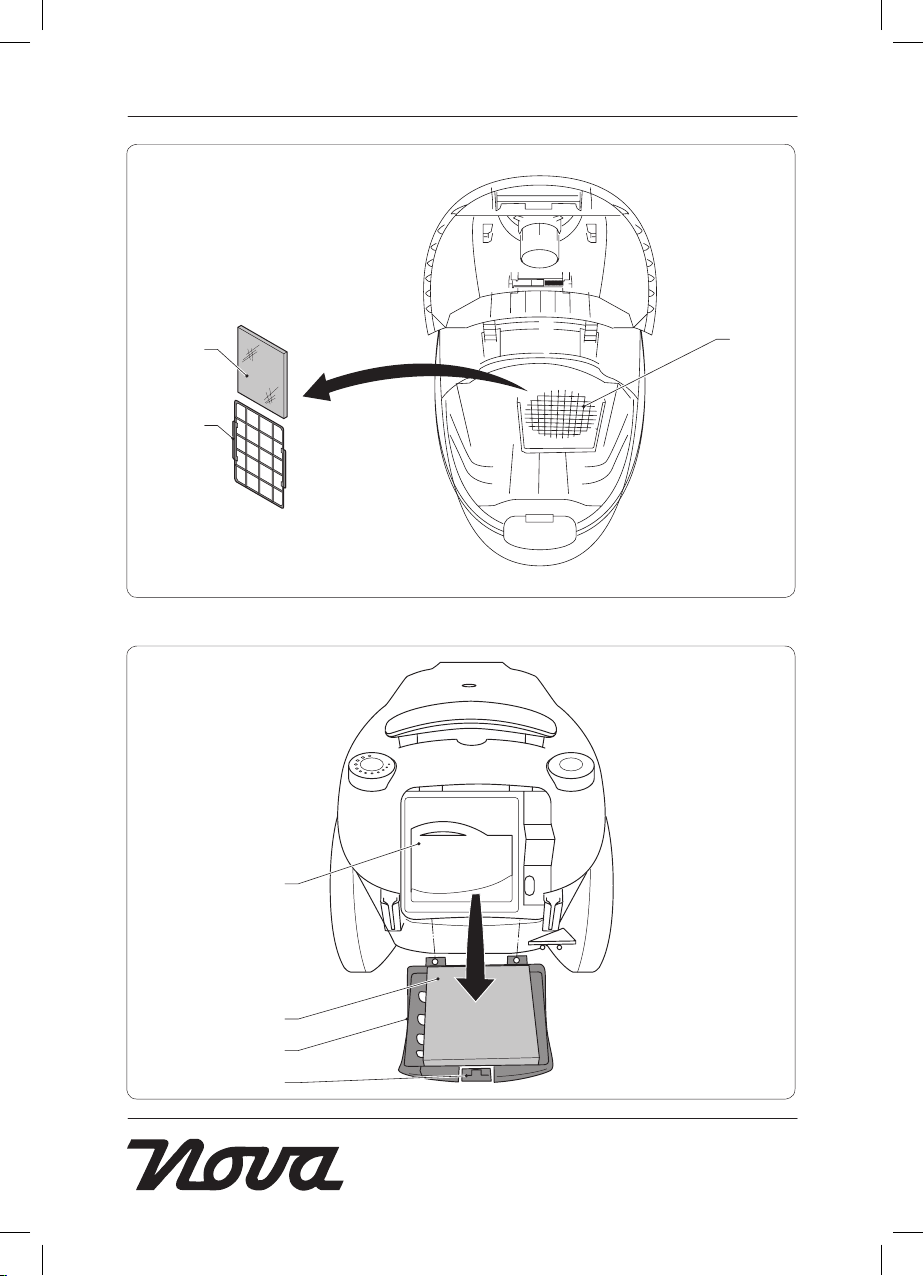
Reinigen en vervangen van het
motorfilter (fig. A - D)
Voordat u verder gaat, vragen wij graag u uw
aandacht voor de volgende punten:
- Was het motorfilter niet en spoel het
motorfilter niet af.
Het motorfilter (24) beperkt de hoeveelheid
stof die de motorunit binnendringt tot het
mimimum. Het motorfilter moet regelmatig
worden gereinigd. Het motorfilter moet na
enkele maanden worden vervangen of
wanneer het versleten of beschadigd is.
Vervangende motorfilters zijn verkrijgbaar bij
ons servicestation.
Houd de ontgrendelingsknop (6) ingedrukt•
en open het deksel (19).
Verwijder indien nodig de stofzak (21).•
Zie het gedeelte "Monteren en verwijderen
van de stofzak".
Verwijder de filterhouder (23) uit het•
stofzakcompartiment (5).
Verwijder het motorfilter (24) uit de•
filterhouder (23).
Verwijder het stof van het filter met behulp•
van een zachte borstel. Gebruik in geval
van slijtage een nieuw filter.
Plaats het motorfilter (24) in de•
filterhouder (23).
Plaats de filterhouder (25) in het•
stofzakcompartiment (5).
Monteer indien nodig de stofzak (21).•
Zie het gedeelte "Monteren en verwijderen
van de stofzak".
Sluit het deksel (19) totdat de•
ontgrendelingsknop (6) op zijn plaats klikt.
Reinigen en vervangen van het
uitlaatfilter (fig. E)
Voordat u verder gaat, vragen wij graag u uw
aandacht voor de volgende punten:
- Was het uitlaatfilter niet en spoel het
uitlaatfilter niet af.