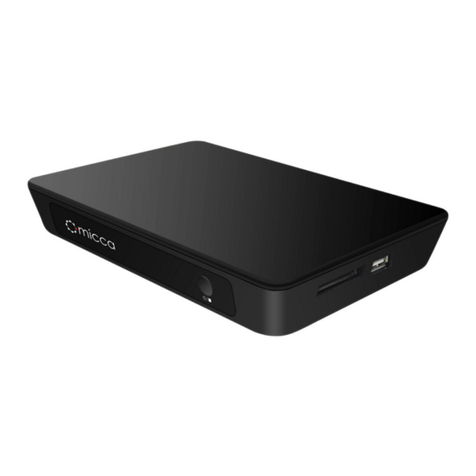
NOVENTRI SF-200 User manual

SF200 Manual
SF200E-0160-01 REV 03
Diane Smith
4/15/13
Page 1 of 27
SF-200
MANUAL

SF200 Manual
SF200E-0160-01 REV 03
Diane Smith
4/15/13
Page 2 of 27
SF-200
Manual
Table of Contents
1. Overview / Default IP Address / Default Password................................................... 3
2. Getting Started .......................................................................................................... 3
3. I/O Connectors........................................................................................................... 4
4. Installation ................................................................................................................ 8
5. Network Connection.................................................................................................. 15
6. Web App Configuration................ ............................................................................ 18
7. Stand-Alone (Sneakernet)..........................................................................................23
8. Optional Remote Control .......................................................................................... 24
9. Specifications ........................................................................................................... 25
10. Proper Disposal ........................................................................................................ 27

SF200 Manual
SF200E-0160-01 REV 03
Diane Smith
4/15/13
Page 3 of 27
1. Overview / Default IP Address / Default Password
1.1 The Noventri SF-200 is a small, solid state digital signage player
that is part of the Noventri Eco-Series™ line.
1.2 The SF-200 is exclusively designed to be used with the Noventri
Suite and the Noventri Server software that can be downloaded
free from the Noventri Forum. http://www.noventri.com/forum
1.3 The SF-200 can be used as a stand-alone (Sneakernet) player, as
part of a local area network, or over the internet.
1.4 When using Sneakernet, the SF-200 plays content that is created in
the Suite software, published to a USB Drive, then hand
carried and inserted into the SF-200 player.
1.5 When used as part of a local area network, the SF-200 plays
content that is created in the Suite software, published to the
Noventri Server, which then sends it to the SF-200 player.
1.6 The SF-200, when used over the Internet, plays content that is
created in the Suite software, published to the Noventri Server,
which can connect and send the content via your local area
network across the internet to the SF-200 player.
1.7 Default IP Address – 192.168.0.190
(see the Network Connection section of this Manual)
1.8 Default Password – noventri
(see the Web App Configuration section of this Manual)
2. Getting Started
2.1 The following is included when you
receive your Noventri SF-200
player:
• SF-200 player
• USB Drive (installed)

SF200 Manual
SF200E-0160-01 REV 03
Diane Smith
4/15/13
Page 4 of 27
The following are sold separately:
• Power Adapter (required) (US, EU, or UK)
• Remote Control with Batteries
• AV Cable
• RGB Cable
• Mounting Plate with Hardware
• HDMI Cable
Noventri for all your accessory needs.
1-301-790-0103 www.noventri.com
2.2 Other items needed that can also be purchased from Noventri:
• Monitor
• Surge Suppressor
• Ethernet Cable (cat5e)
• HDMI to DVI Cable (optional)
• Computer for running Noventri Suite/Server software
Noventri for all your accessory needs.
1-301-790-0103 www.noventri.com
3. I/O Connectors
3.1 Power Connector
3.1.1 We recommend using a Surge Suppressor to protect your
SF-200 player. The SF-200 Power Adapter plugs into the
Surge Suppressor and connects to the DC 12V input on
the SF-200.
Note: Power Adapter is Sold Separately

SF200 Manual
SF200E-0160-01 REV 03
Diane Smith
4/15/13
Page 5 of 27
3.2 HDMI OUT
3.2.1 Connection from the SF-200 HDMI output to the monitor is
typically made using a HDMI to HDMI cable. If your monitor
does not have an HDMI input and has a DVI input, a HDMI
to DVI cable can be used.
Note: For best results, the video cable should be less then 3M long.
3.3 Ethernet Port
3.3.1 Connection from the SF-200 to the local area network is
made through the Ethernet port (LAN)).
If you plan on using your SF-200 as a networked player you
will need to make the connection using an Ethernet (Cat-5)
cable.
3.3.2 By default, the SF-200 is set to get an IP Address using
DHCP. If the player cannot get a DHCP assigned address, it
will then use 192.168.0.190 as the default IP Address.
You can also Statically assign an IP Address.
(see the Web App Configuration section of this Manual)
You can also make arrangements with Noventri to customize
your SF-200 player’s IP Address for your network.
1-301-790-0103 www.noventri.com

SF200 Manual
SF200E-0160-01 REV 03
Diane Smith
4/15/13
Page 6 of 27
3.4 USB Port
Note: The only time the USB Drive should ever be
removed is to Publish Sneakernet and then it
should be reinstalled.
3.4.1 The USB ports are used to connect the USB Drive to your
SF-200 Player. Either USB Port can be used.
3.4.2 The SF-200 is shipped with the USB Drive installed.
3.4.3 The USB Drive stores the content of your projects and
MUST BE INSTALLED for the SF-200 to operate.
3.4.4 Using the SF-200 for Sneakernet is the only time the USB
Drive should be removed and this is only to temporarily
Publish to the Drive and then it is reinstalled.
The Drive MUST BE INSTALLED for the SF-200 to operate.
3.5 Composite Video Port
3.5.1 The SF-200 has a Composite Video Port (CVBS) for
future use.

SF200 Manual
SF200E-0160-01 REV 03
Diane Smith
4/15/13
Page 7 of 27
3.6 Component Video Port
3.6.1 The SF-200 has a Component Video Port (YPbPr) for
future use.
3.7 Optical Digital Audio Port
3.7.1 The SF-200 has an Optical Audio Port (S/PDIF)
for future use.
3.8 SD Card Slot
3.8.1 The SF-200 has a SD Card Slot for future use.

SF200 Manual
SF200E-0160-01 REV 03
Diane Smith
4/15/13
Page 8 of 27
4. Installation
4.1 Every installation is unique and can range from being very simple
with a desktop monitor to very complex requiring wall or ceiling
mount arrangements.
Installation specific accessories and custom installations available
through Noventri. 1-301-790-0103 www.noventri.com
The following installation instructions cover a simple desktop
installation and assume you have Ethernet (for non-Sneakernet)
and Power available.
4.2 The back of Monitors typically have a mounting hole pattern (VESA).
If these mounting holes are not being used to mount the monitor, they
can be used to mount the SF-200 to the Monitor.
To do this use the SF-200 Mounting Plate (purchased separately) .
4.2.1 The SF-200 Mounting Plate comes with hardware for mounting the
SF-200 to the Mounting Plate, but does not include the hardware
need for mounting the Mounting Plate to the Monitor. Contact
Noventri for all your accessory needs.
1-301-790-0103 www.noventri.com
4.2.2 First determine from what direction the Power Adapter cord and
Ethernet cable will coming from and also consider what direction
would be best for Remote Control access.
4.2.3 You can then position the SF-200 onto the Mounting Plate in any
one of four different directions allowing for Remote Access and
easy cable entry.
(see figure 1)

SF200 Manual
SF200E-0160-01 REV 03
Diane Smith
4/15/13
Page 9 of 27
4.2.4 Verify that you are mounting the SF-200 on the correct side
of the Mounting Plate.
Bend in the plate is to allow room for the screw heads
between the Mounting Plate and the Monitor.
So this side of the Mounting Plate always goes toward
the Monitor.

SF200 Manual
SF200E-0160-01 REV 03
Diane Smith
4/15/13
Page 10 of 27
Figure 1

SF200 Manual
SF200E-0160-01 REV 03
Diane Smith
4/15/13
Page 11 of 27
4.2.5 Connect the SF-200 to the Mounting Pate using the
hardware that came with the Mounting Plate.
Be careful not to over tighten.
Qty = 4 Thread Forming Screws
Qty = 4 Washers
Note1 : The SF-200 Case is held together with four small screws.
DO NOT remove these small screws.
Note 2: The Thread Forming Screws that are used to mount the SF-200
to the Mounting Plate will screw into the same hole as the
small screws but will not go deep enough to touch the small
screws.
Note 3: The Thread Forming Screws will form their own threads into the
case as you screw them in.

SF200 Manual
SF200E-0160-01 REV 03
Diane Smith
4/15/13
Page 12 of 27
4.3 Once the SF-200 is mounted to the Mounting Plate, the assembly
can then be mounted to the Monitor.
4.3.1 The back of Monitors typically have a VESA mounting hole
pattern. The SF-200 Mounting Plate is designed to mount to
these.
4.3.2 The most common VESA mounting hole patterns found on
monitors is 100mmx100mm or 75mmx75mm. The SF-200
Mounting Plate has hole spacing to attach to either of these
using two screws(not included).
For other VESA spacing, use one screw

SF200 Manual
SF200E-0160-01 REV 03
Diane Smith
4/15/13
Page 13 of 27
4.3.3 Mount the assembly to the Monitor using the appropriate
hole spacing with two screws.
4.3.3 For monitors that have other VESA mounting hole patterns
the SF-200 can also be mounted with one screw using the
center mounting hole on the Mounting Plate.
4.4 Now that the SF-200 is mounted on the Monitor it is ready to be
connected.
4.4.1 Connect the SF-200 to the monitor using a HDMI cable.
When connecting to a monitor that does not have a HDMI
input but does have a DVI input, a DVI to HDMI cable or
adapter can be used.
Contact Noventri for all your accessory purchases
1-301-790-0103 www.noventri.com

SF200 Manual
SF200E-0160-01 REV 03
Diane Smith
4/15/13
Page 14 of 27
4.4.2 Power connections. Connect the SF-200 Power Adapter
cable from the Surge Suppressor to the DC 12V input on the
SF-200. The Monitor should also be plugged into the Surge
Suppressor.
Contact Noventri for all your accessory purchases
1-301-790-0103 www.noventri.com
4.4.3 If you plan on using your SF-200 as a networked player,
connect it’s LAN to your Local Network using an Ethernet
cable.
Contact Noventri for all your accessory purchases
1-301-790-0103 www.noventri.com
Note: If you plan on installing multiple SF-200 players to your
Ethernet network it is best at the very beginning to connect
only one player at a time. This can be done by powering
them all up and making their Network connections one at a
time, or by having them all connected to the network and
powering up only one player at time. This is to verify that
they are properly being assigned IP Addresses.
If they boot up to display the default IP Address
192.168.0.190, you must correct it’s IP Address before
connecting the next player.
(See the Network Usage section of this manual)
4.4.4 If you plan on using your SF-200 as a stand-alone
(Sneakernet) player, the Ethernet cable is not necessary.
4.4.5 If you will be using your SF-200 as a networked player, verify
that the USB Drive is firmly inserted into one of the SF-200
USB ports.
If you will be using your SF-200 as a stand-alone
(Sneakernet) player, the USB Drive can be inserted at a later
time, after a project has been created and published to it.
Note: The USB Drive MUST remain in the SF-200 for the player to
connect to the server or display content.

SF200 Manual
SF200E-0160-01 REV 03
Diane Smith
4/15/13
Page 15 of 27
4.5 You can now power up and use the SF-200.
4.5.1 Verify that the SF-200 is powered on.
(front LED will be green)
No LED or red LED indicate insufficient power.
4.5.2 Verify that the monitor has power and turned on.
4.5.3 Wait for the Grey Scale image to be displayed.
The image will also show what IP address the SF-200 is
connected to, and what resolution it is set to.
5. Network Connection
5.1 Network that is setup for DHCP (to automatically assign IP
Addresses).
5.1.1 The SF-200 default mode is DHCP enabled. So when
booted up, the SF-200 should be assigned an IP address
from the Network and this IP Address will be displayed as
part of the Grey Scale image.

SF200 Manual
SF200E-0160-01 REV 03
Diane Smith
4/15/13
Page 16 of 27
5.1.2 So if the SF-200 has it’s DHCP mode enabled and an IP
address other than 192.168.0.190 is displayed, you know
you are connected to the Network.
- If the IP Address displayed on the Grey Scale image
is 192.168.0.190, this means the SF-200 is not getting
a DHCP IP Address from your network.
- 192.168.0.190 is the default IP address that is
assigned to the SF-200 if there is no Network
connection, or if the Network is not configured to
assign DHCP IP Addresses.
- If the IP Address is 192.168.0.190 and your Network
is setup to assign DHCP IP Addresses, you need to
check the network connection. A good way to check
for connectivity is to verify that the SF-200 LAN LED’s
are blinking.
Note: Contact your Network Administrator or
Noventri, if you experience problems.
5.2 Network that is not setup for DHCP (does not automatically assign
IP Addresses).
5.2.1 The SF-200 default mode is DHCP enabled. So when
booted up and no IP address is assigned, it will time out and
default to 192.168.1.190.
- First verify that only one SF-200 at a time is
connected to the Network with the default
192.168.0.190 IP Address.
Note: If there is more than one SF-200 on the same
IP address this will cause IP conflicts and
make it difficult to configure Players.
- Log into the SF-200 through it’s Web App and change
the SF-200 from DHCP to a Static IP Address
compatible with your Network.
(SeetheWeb App Configuration section of this manual)

SF200 Manual
SF200E-0160-01 REV 03
Diane Smith
4/15/13
Page 17 of 27
5.3 If your SF200’s already has a Static IP Address assigned to it, it will
only connect to you Network if the Static IP Address is compatible
with your Network.
5.3.1 There is the possibility that the SF-200 you are trying to
connect to your Network was assigned a Static
IP Address that is out of your subnet range.
If this is the case you can change the it’s IP Address several
ways...
- The optional Remote Control can be used.
(See the Remote Control section of this manual)
- Have your network administrator set up a
temporary compatible network that will allow you to
connect to the SF-200 and long enough to change its
IP Address to another one that is compatible with the
main Network you are using.
Note: This method will only work if the SF-200 is
directly connected on the Network and not
through a Router.
- Noventri can help setup or reset the SF-200 through
it’s USB.
1-301-790-0103 www.noventri.com
5.4 The SF-200 NOVENTRI SERVER is now ready to be configured.
(See the Web App Configuration section of this manual)

SF200 Manual
SF200E-0160-01 REV 03
Diane Smith
4/15/13
Page 18 of 27
6. Web App Configuration
Note1: If the Noventri Server version is older than the
SF-200 firmware version, the SF-200 will not connect
to the Server. Download the latest Noventri Suite
software from the Noventri Forum.
http://www.noventri.com/forum
Note2: If the Noventri Server version is newer than the
SF-200 firmware version, the SF-200 firmware will
automatically update as soon as it connects.
6.1 Once the SF-200 is connected to your Network, you can access it
and configure it through your Web Browser using Noventri SF-200
Configuration Web App.
6.2 You connect to the SF-200 using your Web Browser as you would
connect to any website, but use the SF-200 IP Address.
The SF-200 IP Address is displayed part of the Grey Scale image.
Example: http://192.168.0.190
6.3 Once you are connected to the SF-200 you will see the following
Log In screen.
6.4 Log into the SF-200 using the following Default password and click
Submit.
Password: noventri

SF200 Manual
SF200E-0160-01 REV 03
Diane Smith
4/15/13
Page 19 of 27
6.5 If you have changed the SF-200 password and cannot remember it,
you can reset the Password back to the default, “noventri” by using
the optional Remote Control.
(See the Remote Control section of this manual)
6.6 Once you are logged on to the SF-200 you will see the following
Configuration screen showing the current configuration.
Important: Since you are logged into the SF-200 via its IP
Address, any changes made to the IP Address
(such as DHCP ENABLE or a new STATIC IP
Address) may cause you to loose connection to
the player.

SF200 Manual
SF200E-0160-01 REV 03
Diane Smith
4/15/13
Page 20 of 27
6.6.1 DHCP – When the DHCP checkbox is selected, the
SF-200 will obtain an IP address automatically
from the Network (the Network must be set up
for DHCP).
When the DHCP checkbox is unchecked the
SF-200 will not accept an automatically
assigned IP address form the network.
Note: Your Network must have a DHCP server for this to
work. If the SF-200 does not receive a DHCP
assigned IP Address, it will go to its default
192.168.0.190 IP Address.
• When DHCP is enabled, you no longer have
the ability to change the IP ADDRESS,
NETMASK or GATEWAY. The Player will
obtain these automatically.
6.6.2 IP ADDRESS - You can set a static IP ADDRESS for the
SF-200. If you change to a static IP
ADDRESS, be sure you have the correct
NETMASK and GATEWAY filled in for your
network.
6.6.3 NETMASK – If you changed to a static IP ADDRESS, you
will need to make sure the NETMASK is
correct for your network.
6.6.4 GATEWAY – If you changed to a static IP ADDRESS, you
will need to make sure the GATEWAY is
correct for your network.
6.6.4 DNS 1 – You will need to set the primary DNS for your
network if you are not using DHCP. You can
use the GATEWAY IP Address as the DNS.
6.6.5 DNS 2 – The secondary DNS is set to 0.0.0.0 by default.
If DNS 1 is using the GATEWAY IP Address,
DNS 2 can stay default.
Other manuals for SF-200
1
Table of contents
Other NOVENTRI Media Player manuals

