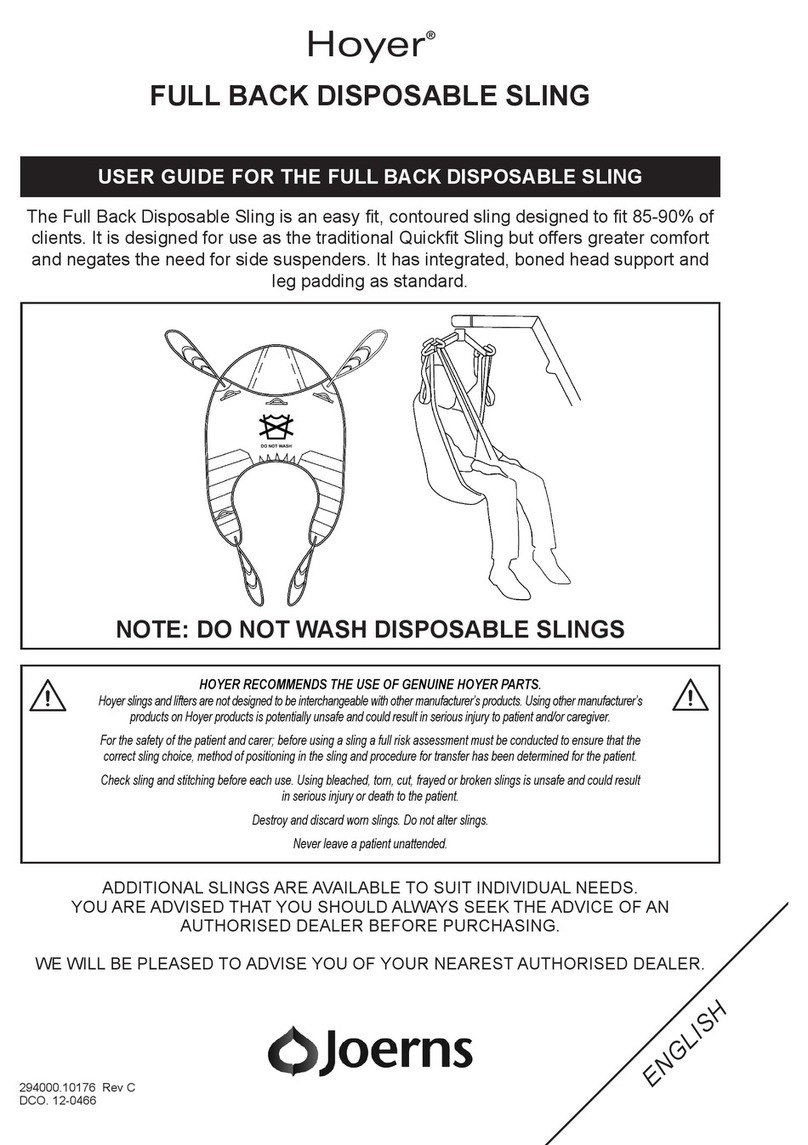
Novis ProSling User manual

PATIENT LIFTING SLINGS
FOR YOKE FRAME LIFTERS
User Guide
General Purpose
General Purpose
with Head Support Hygiene
Hygiene with
Head Support

overview
Slings specifically designed for attachment
to yoke frame patient lifters.
ProSling Yoke Frame slings are designed to lift
patients from seated (chair) or reclined (bed or
floor) positions. With a range of different models
versatile enough for general patient transfers,
toileting or hygiene care, these slings are
manufactured from the highest quality material
and are contoured for patient fit and security.
An easy fitting sling with adjustable straps to suit
general lifting for a variety of patient positions, the
multi-user models are manufactured from a
re-usable, long wearing polyester mesh designed
to maximise air circulation. The mesh fabric allows
water to pass efficiently through the sling, making
these products suitable for washing and bathing.
Head support options suit patients with limited
upper body support – the built in head support
provides a greater sense of security and comfort
during transfer.
These slings are suitable for use with either a single
or double yoke spreader bar, and will suit the
majority of lifter products on the market.
Some lift manufacturers make claims that only
their brand of sling should be used on their lifter.
There is no Australian Government or TGA
directive to support these claims.
important notice
Before using the sling, it is important to read this
user guide and understand the operating
instructions and safety precautions. Failure to do so
could result in patient injury and/or damage to the
product.
The ProSling range has been tested and complies
with requirements of AS/NZS ISO 10535:2011.
If you have any questions, please contact
Novis Healthcare on 1300 738 885
definitions of symbols used
Important information
Warning
Do not…

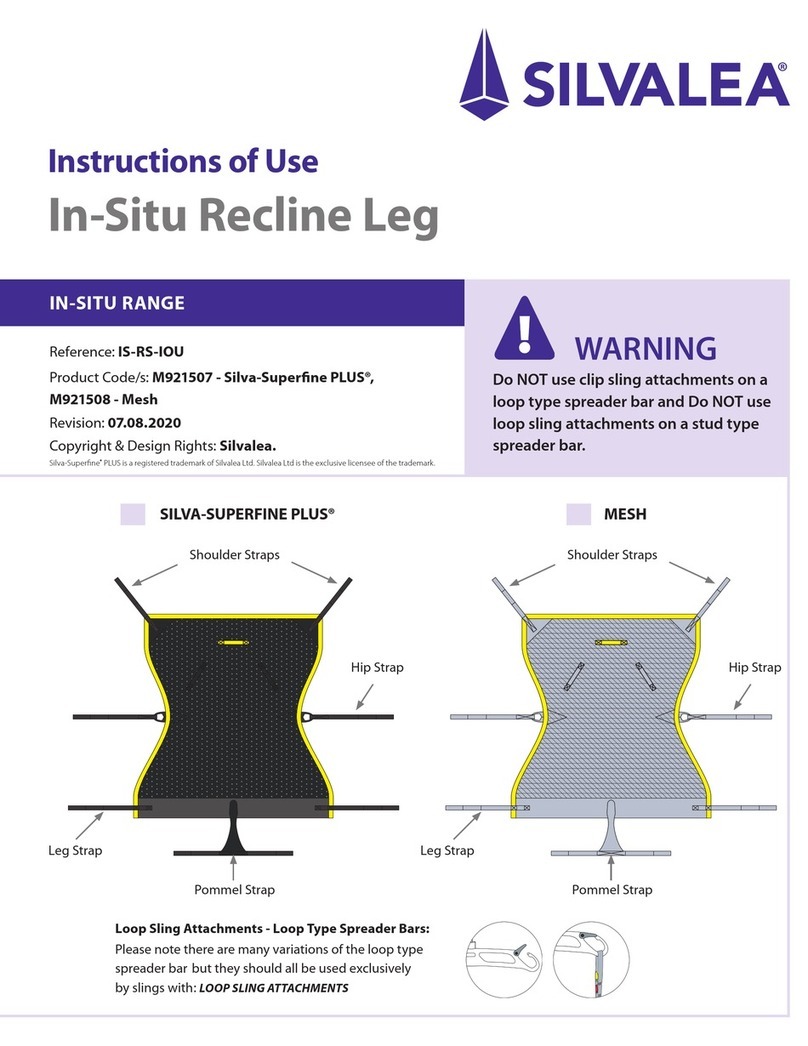
Leg section yoke
attachment straps
3 lengths; outer strap
colour-coded by size
Upper body yoke
attachment straps
3 lengths; outer strap
colour-coded by size
Adjustable head support straps
Care label with size marking
Body section
Positioning handles
Torso band
(Hygiene models)
Padded mesh leg section
sling components

safety precautions
DO NOT lift a patient unless you are
trained and competent to do so. Ensure
that all users read this guide, and any
relevant lifter instructions, before fitting a
sling or operating a patient lifter.
DO NOT use a Yoke Frame Sling on a Pivot
Frame. Sling failure and patient injury
could result.
Patient lifters and slings should only be
used under the supervision of a qualified
healthcare professional. As a carer, you are
responsible for the patient’s safety. You
must be well informed of the patient’s
condition and ability to manage the lifting
situation.
Never leave a patient unattended in a
lifting situation.
Never liftapatienthigher offtheunderlying
surfacethan isneeded tocomplete thelifting
andtransferprocedure.
Lifting and transferring a patient always
involves a degree of risk. Ensure all users
are trained and familiar with the user
guides for slings, lifter systems and any
related accessories. A complete
understanding of the contents of the user
guides is essential.
ALWAYS ensure the correct sling is used to
match the patient’s weight and suits the
patient’s needs with regard to model, size,
fabric and design. Do not exceed the
weight capacity of the sling or lifter.
ALWAYS ensure the sling is appropriate for
the lifter and the lifting situation. Exercise
caution and care when using lift
equipment and accessories.
Regularly inspect the sling for damage and
general wear and tear, especially after
laundering. Check carefully for wear and
damage to seams, fabric, straps and strap
loops. Do not use if the sling is damaged or
worn in any way.

choosing the correct size
It is very important to use the correct sized sling and ensure it is properly fitted before
attempting to lift. This will ensure the patient feels safe, dignified and comfortable,
and allows the carer to be confident of an effective and safe procedure.
Use these sizing recommendations as a guide only. The outside strap of each
sling is colour coded to indicate size. Please refer to the ProSling Size
Selection Chart for guidance on sizing recommendations. This chart is
published in the ProSling Range Guide and is available to download from
www.novis.com.au
Size / strap colour
S
Shoulder circumference mm
C
Sacrum to Shoulders mm
Yoke
General
Purpose
Small 700 - 790 460 - 490
Medium 800 - 840 500 - 540
Large 840 - 1080 540 - 640
Extra Large 1080 - 1350 640 - 765
Extra Extra Large 1350 - 1400 765 - 800
Size / strap colour
S
Shoulder circumference mm
H
Sitting Height mm
Yoke
General
Purpose
with Head
Support
Small 700 - 780 640 - 800
Medium 780 - 900 800 - 920
Large 900 - 1100 920 - 1000
Extra Large 1100 - 1300 1000 - 1160
Extra Extra Large 1300 - 1400 1160 - 1200
Yoke
Hygiene
with Head
Support
Small 700 - 860 580 - 620
Medium 860 - 980 620 - 700
Large 980 - 1060 700 - 800
Extra Large 1060 - 1200 800 - 900
Extra Extra Large 1200 - 1300 900 - 920
Yoke
Hygiene
Small 700 - 900 640 - 800
Medium 900 - 1000 800 - 920
Large 1000 - 1120 920 - 1000
Extra Large 1120 - 1230 1000 - 1160
Extra Extra Large 1230 - 1350 1160 - 1200

Leg strap and positioning configuration cannot be adjusted with a patient in the sling.
Patient must be lowered to a seated or lying position before the appropriate adjustment can
be performed. Always assess the patient’s comfort and security before raising.
Upright positioning
Head straps positioned on the
shortest loop and leg straps on the
longest. Allows patient to sit in a
more upright position, with head
and torso held vertically and legs
lowered.
Mid positioning
Both head straps and leg straps
positioned on the middle loop.
Allows patient to recline slightly
with legs slightly lifted.
Reclined positioning
Head straps positioned on the
longest loop and leg straps on
the shortest. Allows patient to lie
in a reclined position, with head
and torso reclined back and legs
raised.
Legs apart lift
Leg straps pass underneath each
thigh, from outer thigh, to inner
thigh and up to the lifter hook on
the same side. This allows legs to
hang apart, a position best suited
for toilet use, washing and
hygiene care.
Cross strap lift
Leg straps pass underneath each
thigh, from inner thigh to outer
thigh, and up to the lifter hook on
the opposite side. This prevents
the patient from falling forward,
and is considered the most
supportive lifting position.
Seat lift
Leg straps pass underneath both
thighs, from the outside of each
thigh and up to the lifter hook on
the corresponding side. This
cradles the legs together for a
more dignified lifting position. To
minimise risk of patient tipping
forward, head and leg straps
should be set in a reclining position.
positioning
Slings can be fitted for seated or reclined transfer, using a variation of the attachment loops at the upper
body and leg section.
lifting
Regardless of seated or reclined positioning, leg straps can be arranged to fit and lift the patient in three
ways depending on patient transfer needs or comfort considerations.

fitting the sling
Sling may be fitted when patient is seated or reclined / lying down position
Patient in seated position
1With the label on the outer rear of the sling,
position the sling around the patient, with the
base of the sling level with the base of the
patient’s spine and the leg sections lying either
side of the patient’s legs.
2Pass the leg sections underneath each thigh,
pulling gently until material is taut. This will
ensure the leg sections support as much of the
patient’s hip and thigh region as possible. Gently
raising the patient’s feet may help to better
position the leg straps underneath the thighs.
If using a Hygiene sling, secure the torso band
around the patient’s waist. Ensure the buckle
fastening is firm and the top of the torso band is
clear of the patient’s underarm.
3Position the leg straps according to the patients
transfer needs. Refer to the Positioning
configurations (previous page) for further
details.
4The sling is now ready to be attached to the
patient lifter. In general, ensure the lifter legs are
widened for maximum stability before
approaching the patient. Manoeuvre the lifter
carefully to ensure the spreader bar and boom
does not hit the patient’s head. Refer to the
patient lifter manufacturer’s user guide for
further instruction.
Patient in reclined or lying position
Always use a full body sling with head
support when lifting from the floor.
1Lay the sling alongside the patient, with label to
the rear and facing away.
2Position the base of the sling next to the base of
the spine, and the leg section beside the
patient’s legs.
3Move to the other side of the patient (with sling
on opposite side) and gently roll the patient
towards you. With the patient lying on their
side, slide the slinging underneath the patient’s
head and back.
If using a Hygiene sling, secure the torso band
around the patient’s waist. Ensure the buckle
fastening is firm and the top of the torso band is
clear of the patient’s underarm.
4Raise the patient’s knees one at a time, to allow
the sling leg sections to pass underneath each
leg. Position the leg straps according to the
patient’s transfer needs. Refer to the Positioning
configurations (previous page) for further
details.
5The sling is now ready to be attached to the
patient lifter. Ensure the lifter legs are widened
for maximum stability before approaching the
patient. Slowly position the lifter, with one leg
through the patient’s raised legs and other leg
close to the patient’s head, making sure the lifter
does not hit the patient. Where necessary, use
pillows or cushioning devices to provide comfort
or protection to the patient. Refer to the patient
lifter manufacturer’s user guide for further
instruction.

connecting to the lifter
Once the patient lifter is in place, with the yoke
spreader bar centrally positioned above the patient
(if supline) or in front (if sitting), the sling can be
attached.
1Carefully lower the spreader bar to approx-
imately 50 mm above or in front of the patient.
2Select the appropriate length head and leg
straps to suit the patient’s transfer needs. Refer
to the Positioning configurations (previous
pages) for further details.
3Slide the strap loop over the appropriate
spreader bar hook to attach all four yoke
attachment straps to the.
4Ensure the straps are correctly aligned and not
twisted. Ensure the straps are sitting firmly
within the spreader bar hook and that the safety
latch is secure before proceeding.
5Check the patient’s safety and comfort level
before raising the lifter.
removing the sling
Ensure the patient is centrally positioned over the
bed, chair or other support surface on to which
they are being lowered. Gently and carefully lower
the lifter, helping to guide the patient and ensuring
they are comfortable and secure at all times.
Once the patient is firmly and securely supported
on the bed, chair or other support surface, the sling
can be removed.
1Push down on the spreader bar hook security
latch to open and remove all four attachment
straps. Move the lifter away from the patient.
2Carefully pass leg straps through the inside of
the patient’s legs.
3Undo torso buckles (Hygiene slings only).
4Position the patient as per the fitting process,
and gently slide the sling out and away from the
patient.
transfer tips
• Before lifting the patient, ensure both lifter and
patient are supported on a flat stable surface
and that all attachment straps are properly fitted
to the yoke hooks.
• Ensure that the lifter brakes are used properly.
Castor brakes should not be engaged when
lifting a patient, to allow the lifter to naturally
shift to the patient’s centre of gravity. Locked
castors during lifting increase the risk of the lifter
tilting.
• Ensure the support surface from which the
patient is being lifted is properly secured and will
not move during the lifting operation.
• Always communicate with the patient, before
and during the transfer, to ensure they
understand what is taking place.
• During the transfer, always suspend the patient
close to the floor to minimise the risk of injury
due to a fall.
• Use gentle, gradual movements when
controlling the lifter to ensure the patient feels
secure and to reduce the risk of accidental
contact with surrounding objects.
• Where possible, two carers should be available
for patient transfers. The second carer can be
positioned beside the patient and help to move
them into the required position, using the
handles on the outside of the sling body.
• Pay attention to the patient’s physical and
mental well being during the lifting and transfer
process. Some patient’s may become uneasy,
uncomfortable or may undergo muscle spasms.
If the patient is showing any signs of discomfort
or if the sling becomes unbalanced – stop
immediately and lower the patient to a safe and
appropriate support surface.

care and cleaning
Do not use high pressure cleaners or harsh,
caustic chemicals for cleaning.
Avoid contact with excessive heat, acid
aerosols, organic solvents or alkalis. If you
suspect contamination, wash out well in
warm water.
Sling should be washed between patients or if
there are visible signs of body fluids and/or
substances present.
To wash, use a solution of mild soap and warm
water and rinse well. Sling can be machine washed
up to 85°C.
Air dry in a warm, clean area away from any direct
heat source. Do not place on a heating system or in
direct sunlight. Do not tumble dry, iron, wring dry
or dry clean.
safety and maintenance
Before each use, the sling should be inspected for
signs of wear and tear. The sling must be inspected
more thoroughly at least once every 6 months.
More frequent inspections may be required if the
sling is used or washed more often than normal.
If any faults are found immediately withdraw the
sling from use.
Regular inspection
Inspect the sling for signs of wear, tearing or
fraying. Check for obvious damage to the fabric
including webbing burns, cuts or tears, or damage
to the wave patterns or core support sections due
to abrasion.
Examine the stitching around the base of each
loop, all seams and side tape for broken lines,
unravelling or any free strands. Slings showing
signs of the above should not be used.
Storage
Store the clean, dry sling in a sealed, airtight bag or
container to protect the sling from moisture
ingress. Where possible use the original zip lock
bag supplied.
Slings should be stored away from sharp objects,
chemicals, heat or any other sources of damage or
fire risk.
Expected life time
The product has an expected life time of 1-5 years
with normal use. Expected life time varies
depending on the fabric, use frequency, washing
procedure and weight carried.

warranty
This warranty is provided by
Novis Healthcare (ABN 45 102 735 491)
of Unit 12, 12 Mars Road Lane Cove West
New South Wales 2066.
Novis Healthcare (Novis) products are
manufactured to the highest quality standards and
are thoroughly tested and inspected before leaving
our factory. In addition to any statutory rights and
remedies you may have, Novis warrants all of its
products sold directly or via an Authorised Novis
Australia Dealer against defective workmanship
and faulty materials from the date of purchase
by the end user for a period of twelve months
unless otherwise specified for that product and its
components.
Warranty Claims
To claim under this warranty, please contact Novis
Healthcare and have your receipt or proof of
purchase available. Novis Healthcare may need to
assess the defect before determining any claim,
and additional information may be requested
to process your claim. Claims without proof of
purchase may not be able to be processed.
Novis Healthcare may at its option inspect the
goods on site or require them to be returned to its
premises or one of its Authorised Service Agents in
person or freight prepaid by you.
Novis will undertake at its option, to repair or
replace, free of charge, each product or part
thereof on the condition that:
• The product found on examination, to be
suffering from a manufacturing defect;
• The product or relevant part has been serviced
regularly by Novis or one of its Authorised
Service Agents and has not been subjected
to misuse, neglect or been involved in an
accident;
• The repairs are not required as part of normal
wear and tear.
At our option
• Goods repaired may be replaced by
refurbished good of the same type rather than
being repaired.
• Refurbished parts may be used to repair goods.
Novis Healthcare will not be held responsible for
any repair other than those carried out by it or one
of its Authorised Service Agents.
Warranty repairs do not extend the length of the
warranty period.
Limited Liabilities
Our liability under this manufacturer’s warranty
is subject to us being satisfied that a defect
was caused by faulty parts, manufacture or
workmanship, and was not caused or substantially
contributed to by other factors or circumstances
beyond our control, including (but not limited
to) defective installation, maintenance or repair,
product modification or alteration, any neglect,
misuse, or excessive use, normal wear and tear or
failure to follow manufacturer’s instructions.
IMPORTANT NOTICE FOR
AUSTRALIAN CONSUMERS:
Our goods come with guarantees that cannot
be excluded under the Australian Consumer
Law. You are entitled to a replacement or refund
for a major failure and for compensation for any
other reasonably foreseeable loss or damage.
You are also entitled to have the goods repaired
or replaced if the goods fail to be of acceptable
quality and the failure does not amount to a major
failure. To obtain compensation, you will need
to provided documentary evidence of the loss
or damage suffered and documentary evidence
that such loss or damage was a reasonable
foreseeable consequence of a failure Novis
Healthcare to comply with a consumer guarantee
under the Australian Consumer Law. Subject to
the provisions of the Australian Consumer Law,
Novis Healthcare excludes, to the fullest extent
permitted by law, all liability in respect of loss of
profit or other economic loss, direct to indirect or
consequential, special, general or other damages
or other expenses or costs which may include
negligence.

Novis Healthcare reserves the right to alter any product specifications without prior notice.
Novis Healthcare accepts no liability for any use, change or assembly of the product other than
as stated in this user guide.
© Copyright Novis Healthcare 2018. All rights reserved

May18
Pressure care and patient handling specialists
novis.com.au /1300 738 885
Other manuals for ProSling
1
Table of contents