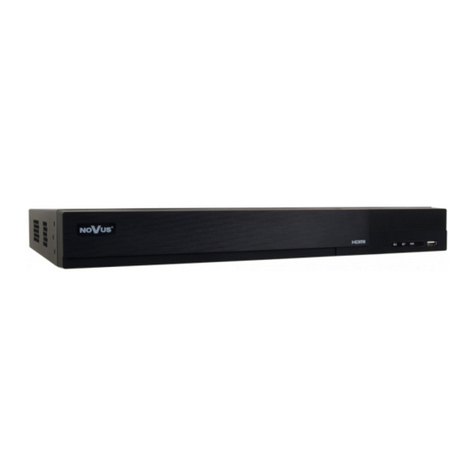
Novus NV-KBD30 User manual

NV-KBD30
U s e r ’s m anual

NV-KBD30 ver. 2.0 - User’s manual
All rights reserved © AAT H lding sp. z . .
2
INFORMATION
EMC (2004/108/EC) and LVD (2006/95/EC ) Dire tives
CE Marking
Our products are manufactured to comply with requirements of following directives and national regulations
implementing the directives:
•
Electromagnetic compatibility EMC 200 /108/EC.
•
Low voltage LVD 2006/95/EC with further amendment. The Directive applies to electrical equipment
designed for use with a voltage rating of between 50VAC and 1000VAC as well as 75VDC and 1500VDC.
WEEE Dire tive 2002/96/EC
Information for users who want to get rid of ele tri al and ele troni applian es
This product is marked according to the European Directive on Waste Electrical and Electronic
Equipment (2002/96/EC) and further amendments. By ensuring this product is disposed of
correctly, you will help to prevent potential negative consequences for the environment and
human health, which could otherwise be caused by inappropriate waste handling of this product.
The symbol on the product, or the documents accompanying the product, indicates that this appliance
may not be treated as household waste. It shall be handed over to the applicable collection point for the
waste electrical and electronic equipment for recycling purpose. For more information about recycling
of this product, please contact your local authorities, your household waste disposal service or the shop
where you purchased the product.
RoHS Dire tive 2002/95/EC
Information on erning limitation of the use of dangerous substan es in the ele tri al
and ele troni applian es.
Out of concern for human health protection and friendly environment, we assure that our
products falling under RoHS Directive regulations, regarding the restriction of the use of hazardous
substances in electrical and electronic equipment, have been designed and manufactured in compliance
with the above mentioned regulation. Simultaneously, we claim that our products have been tested and
do not contain hazardous substances whose exceeding limits could have negative impact on human
health or natural environment.
Information
The device, as a part of professional CCTV system used for surveillance and control, is not designed
for self installation in households by individuals without technical knowledge.
The manufacturer is not responsible for defects and damages resulting from improper or inconsistent
with user’s manual installation of the device in the system.

NV-KBD30 ver. 2.0 - User’s manual
All rights reserved © AAT H lding sp. z . .
3
SAFETY REQUIREMENTS
1. Prior to undertaking any action please consult the following manual and read all the
safety and operating instructions before starting the device.
2. Please keep this manual for the lifespan of the device in case referring to the contents of this manual
is necessary;
3. All the safety precautions referred to in this manual should be strictly followed, as they have a
direct influence on user’s safety as well as durability and reliability of the device;
. All actions conducted by the servicemen and users must be accomplished in accordance with the
user’s manual;
5. The device should be disconnected from power sources during maintenance procedures;
6. Usage of additional devices and components neither provided nor recommended by the producer
is forbidden;
7. Device should be supplied only from a power sources whose parameters are in accordance with
those specified by the producer in the keyboard’s technical datasheet. Therefore, it is forbidden to
supply the keyboard from a power sources with unknown parameters, unstable or not meeting
producer’s requirements;
8. Signal cables should be placed in a way excluding the possibility of damaging them by accident.
Special attention must be paid to cables getting from the keyboard and connecting the power supply;
9. Electric installation supplying the device should be designed to meet the specifications given by
the producer in such a way that overloading is impossible;
10. User cannot repair or upgrade the equipment himself. All maintenance actions and repairs should
be conducted only by qualified service personnel;
11. Unplug the keyboard from the power source immediately and contact the proper maintenance
department in case of:
♦ Damages to the power cord or to the plug itself;
♦ Liquids getting inside the device or exposure to strong mechanical shock;
♦ Device behaves in a way not described in the manual and all adjustments approved by the
manufacturer and possible to apply by user himself, seem not to have any effect;
♦ Keyboard is damaged;
♦ Atypical behaviour of the keyboard components may be seen (heard).
12. In necessity of repairs attention to using only original replacement parts (with their parameters
in accordance with those specified by the producer) should be paid. Non-licensed service and
non-genuine replacement parts may cause fire or electrocution;
13. After maintenance activities tests should be run to ensure proper operation of all the functional
components of the device.
Warning!
PRIOR TO UNDERTAKING ANY ACTION THAT IS NOT PROVISIONED FOR THE GIVEN
PRODUCT IN ITS USER’S MANUAL AND OTHER DOCUMENTS DELIVERED WITH THE
PRODUCT, OR THAT ARISES FROM THE NORMAL APPLICATION OF THE PRODUCT, ITS
MANUFACTURER MUST BE CONTACTED OR THE RESPONSIBILITY OF THE
MANUFACTURER FOR THE RESULTS OF SUCH AN ACTION SHALL BE EXCLUDED.
Information
Data included in the following user’s manual is up to date at the time of printing.
Novus Security Sp z o.o. holds exclusive rights to modify this manual. The producer reserves the
rights for device specification modification and change in the design without prior notice.
SAFETY REQUIREMENTS

NV-KBD30 ver. 2.0 - User’s manual
All rights reserved © AAT H lding sp. z . .
4
1. FOREWORD INFORMATION ............................................................................................ ..5
1.1 General characteristics ........................................................................................................ 5
1.2 Technical specification..................................................................................................... ...6
2. PACKAGE CONTENTS .......................................................................................................... 7
3. KEYBOARD OVERVIEW....................................................................................................... 8
3.1. Front panel description ...................................................................................................... 8
3.2. LED display overview ....................................................................................................... 8
3.3. Back panel description....................................................................................................... 9
4. CONNECTING DIGITAl RECORDERS AND KEYBOARD............................................ 10
.1 Connecting keyboards and NV-DVR101 DVRs............................................................ 11
.2. Connecting keyboards and NV-DVR1100 series DVRs.................................................. 16
.3. Connecting keyboards and NV-DVR1200 series DVRs.................................................. 21
. . Connecting keyboards and NV-DVR 500 and NV-DVR 600 series DVRs................... 26
.5. Connecting keyboards and NV-DVR5000 and NV-DVR5500 series DVRs................... 32
.6. Connecting keyboards and NV-DVR5100 series DVRs.................................................. 38
.7 Connecting keyboards and NV-DVR5800 DVRs............................................................
.8. Connecting keyboards and NDR-HA210 DVRs............................................................ 50
5. USING THE KEYBOARD ..................................................................................................... 56
5.1. Operating the keyboard ................................................................................................... 56
5.2. Keyboard configuration................................................................................................... 57
TABLE OF CONTENTS

NV-KBD30 ver. 2.0 - User’s manual
All rights reserved © AAT H lding sp. z . .
5
1. FOREWORD INFORMATION
The NV-KBD30 NOVUS keyboard is a product for professional use in security systems applications.
The keyboard is used to remotely control the following Novus digital recorders:
−
NV-DVR101
−
NV-DVR1108, NV-DVR1116, including (S) version
−
NV-DVR1208, NV-DVR1216
−
NV-DVR 508, NV-DVR 516 including (S) version
−
NV-DVR 608, NV-DVR 616
−
NV-DVR5009, NV-DVR5016
−
NV-DVR5108, NV-DVR5116 including (S) version
−
NV-DVR5508, NV-DVR5516 including (S) version
−
NV-DVR5816,
−
NDR-HA210 ,
Due to utilisation of RS- 85 standard KBD-30 keyboard may be up to 1200m away from the
controlled DVR.
1.1 General hara teristi s
−
Keyboard designed for remote control of NOVUS digital video recorderss.
−
Novus-D1, Novus-D2, Novus-D3, N-Control DVR control protocols implemented
−
27 multifunction keys
−
LED display: characters
−
Power supply: 9 VDC
FOREWORD INFORMATION

NV-KBD30 ver. 2.0 - User’s manual
All rights reserved © AAT H lding sp. z . .
6
TECHNICAL SPECIFICATION
1.2. Te hni al spe ifi ation
Equipment onne tion
NOVUS digital video recorders:
− NV-DVR101 ,
− 1100 (including (S) version),
− 1200,
− 500 (including (S) version),
− 600,
− 600,
− 5000,
− 5100 (including (S) version),
− 5500 (including (S) version),
− 5800,
− NDR-HA210
(connection up to 9 devices possible)
DVR proto ols Novus-D1, Novus-D2, Novus-D3, N-Control
Keys 27, multifunctional
Display LED, characters
External ports RS- 85 DVR remote controlling port (RJ- 5 plug)
Power supply 9 VDC
Power onsumption 2,5 W
Operating temperature 5°C ~ 0°C
Dimensions (mm) 220 (W) x 56 (H) x 180 (L)
Weight 0,8 kg

NV-KBD30 ver. 2.0 - User’s manual
All rights reserved © AAT H lding sp. z . .
7
2. PACKAGE CONTENTS
Please unpack the device carefully.
After unpacking please ensure that package contains the following items.
If any of the listed equipment has been damaged during transport or if package is incomplete, the
contents of package should be packed back to the original box. Contact local NOVUS distributor for
further assistance.
WARNING !
If the devi e was brought in from an area with lower ambient temperature, please wait for the
devi e to rea h urrent ambient temperature. Please do not power on the devi e immediately
after bringing it from a older pla e. Water vapor ondensation may ause short- ir uits and
damage to the devi e as a result.
PACKAGE CONTENTS
1x RJ- 5 cable
1x user’s manual
1x NV-KBD30 keyboard
2x junction box
NV
-
KBD30
i n s t r u k c j a o b s ł u g i

NV-KBD30 ver. 2.0 - User’s manual
All rights reserved © AAT H lding sp. z . .
8
KEYBOARD OVERVIEW
3. KEYBOARD OVERVIEW
3.1. Front panel
3.2. LED display overview
1. Keyboard operating modes :
- DVR controlling mode ; - keyboard configuration mode
2. DVR ID number
3. Numerical keys pressed by user.
LED display Numerical and function keys
1 2 3

NV-KBD30 ver. 2.0 - User’s manual
All rights reserved © AAT H lding sp. z . .
9
KEYBOARD OVERVIEW
3.3. Ba k panel des ription
Rear panel view.
RJ- 5 for connecting the DVR
Pin descrpition:
1 -
2 -
3 -
- RS- 85 (-)
5 - RS- 85 (+)
6 -
7 -
8 -
Power supply socket
Polarisation:
+ 9V DC in the middle pin

NV-KBD30 ver. 2.0 - User’s manual
All rights reserved © AAT H lding sp. z . .
10
CONNECTING DIGITAL RECORDERS AND KEYBOARD
4. CONNECTING DIGITAL RECORDERS AND KEYBOARD
To create a properly working system, please connect the keyboard with the DVR (or DVRs) and
configure both the keyboard and DVRs appropriately. Please use UTP cat.5 cable to connect the
devices. When needed, keyboard can be connected to UTP line using telephone mounting box and
included connector. Please doublecheck the assignment of particular wires in the RJ- 5 connector
using the ohmmeter.
WARNING: Daisy hain onne tion topology needs to be stri tly followed when using
aforementioned onne tion. One line (up to 1200m) with additional short taps (up to 1,5m) is
possible using this method. When using star topology please use a tive proto ol distributor, e.g.
NVPT-016DD.
The following pages contain schemes of connections between keyboard and various series of NOVUS
DVRs, with additional descriptions of keyboard and DVR settings.

NV-KBD30 ver. 2.0 - User’s manual
All rights reserved © AAT H lding sp. z . .
11
4.1 Conne ting keyboards and NV-DVR1014 digital re orders
4.1.1 Conne ting the DVRs:
CONNECTING KEYBOARDS AND NV-DVR1014 DIGITAL RECORDERS
RS-485 (+)
RS-485 (
-
)
Up to 9 DVRs connected
in a way depicted above
Keyboard
R+
R
-
R+
R
-
R+
R
-

NV-KBD30 ver. 2.0 - User’s manual
All rights reserved © AAT H lding sp. z . .
12
CONNECTING KEYBOARDS AND NV-DVR1014 DIGITAL RECORDERS
4.1.2 DVR address setup
To establish a proper cooperation between keyboard and DVR, a unique address for the whole system
must be assigned to a particular DVR.
To configure the DVR ID number, please enter the menu (as described in user’s manual of the DVR),
enter SYSTEM submenu…
… and set the desired DVR number, ranging 1~9
NOTE: When onne ting multiple DVRs, please ensure that their ID numbers are different for
ea h devi e.
0H0L01 N2.1.45P
SYSTEM SETUP
DATE/TIME SETTINGS
SYSTEM TYPE PAL
KEYBOARD LOCK OFF
DVR ID NUMBER 1
DISPLAY SETUP
LANGUAGE ENGLISH
SYSTEM PASSWORD
FIRMWARE UPGRADE
LOAD DEFAULT

NV-KBD30 ver. 2.0 - User’s manual
All rights reserved © AAT H lding sp. z . .
13
4.1.3 Setting the transmission ontrol proto ol of the keyboard.
To establish a proper cooperation between keyboard and DVR, a correct control protocol must be set
for a given DVR ID number. A unique ID number is assigned to each of the connected DVRs, i.e. to
control DVR no.1, no.1 address must be selected in the keyboard. To control DVR no.2 select no.2
etc. Free assignment of addresses to ID numbers is not possible.
To enable the remote control please enter the keyboard setup mode and set proper protocol number for
desired DVR ID number. Assigning different protocols to different ID numbers is possible.
Novus D-3 is the control protocol for the NV-DVR101 recorders. It’s assigned to number 2 in the
keyboard.
An example given below depicts LED display informing about Novus-D3 protocol assigned to DVR
no. 1.
Entering the setup mode of the keyboard and methods of changing assigned protocols are described in
chapter 5 of this manual.
CONNECTING KEYBOARDS AND NV-DVR1014 DIGITAL RECORDERS

NV-KBD30 ver. 2.0 - User’s manual
All rights reserved © AAT H lding sp. z . .
14
4.1.4 Keys assignment:
KEY OR KEY COMBINATION BUTTON / DVR FUNCTION
SHIFT + MENU MENU
ENTER ENTER
SHIFT + SEQ F.FWD (in QUAD mode)
PLAY / SEARCH
STOP
REW. SEARCH
PAUSE
F.FWD SEARCH
SHIFT +
REC
CONNECTING KEYBOARDS AND NV-DVR1014 DIGITAL RECORDERS

NV-KBD30 ver. 2.0 - User’s manual
All rights reserved © AAT H lding sp. z . .
15
Certain buttons and functions are not directly linked with keys on the keyboard. The following
functions are executed in a different way:
- Selecting a particular channel to be displayed full-screen on main monitor:
- PTZ cameras movement control:
In PTZ mode of the DVR camera control is implemented via steps, i.e. keeping a cursor
key pressed doesn’t result in continous movement of the camera. To make camera control
easier, usage of presets is advised.
CONNECTING KEYBOARDS AND NV-DVR1014 DIGITAL RECORDERS
KEY OR KEY COMBINATION BUTTON / DVR FUNCTION
1 MAIN
2 MAIN
4 MAIN
5 MAIN
...

NV-KBD30 ver. 2.0 - User’s manual
All rights reserved © AAT H lding sp. z . .
16
4.2 Conne ting keyboards and NV-DVR1100 digital re orders (in luding S version)
4.2.1 Conne ting the DVRs:
CONNECTING KEYBOARDS AND NV-DVR1100 SERIES DVRS
RS-485 (+)
RS-485 (
-
)
Up to 9 DVRs connected
in a way depicted above
Keyboard
R+
R
-
R+
R
-
R+
R
-

NV-KBD30 ver. 2.0 - User’s manual
All rights reserved © AAT H lding sp. z . .
17
CONNECTING KEYBOARDS AND NV-DVR1100 SERIES DVRS
4.2.3 DVR address setup
To establish a proper cooperation between keyboard and DVR, a unique address for the whole system
must be assigned to a particular DVR.
To configure the DVR ID number, please enter the menu (as described in user’s manual of the DVR),
enter SYSTEM SET submenu...
… and set the desired DVR number, ranging 1~9
NOTE: When onne ting multiple DVRs, please ensure that their ID numbers are different for
ea h devi e.
▪ SYSTEM SET
]
▪ CAMERA SET
]
▪ MOTION SET
]
▪ RECORD SET
]
▪ ALARM SET
]
▪ EVENT LIST
]
▪ HDD MANAGEMENT
]
▪ NETWORK SET
]
▪ FIRMWARE UPDATE
]
▪ CD/DVD BACKUP
]
▪ VGA *
]
▪ LOAD DEFAULT
▪ EXIT
SETUP MODE
ENTER -SET
MENU EXIT
▪ DATE FORMAT Y-M-D
▪ DATE 2006/06/10
▪ TIME H:M:S 10:10:10
▪ AUTO SWITH DWELL 02 SEC
▪ SPOT SETUP
]
▪ DATE AND OSD DISPLAY ENABLE
▪ SYSTEM TYPE PAL
▪ KEYBOARD LOCK OFF
▪ ID NUMBER 01
▪ LANGUAGE SELECT ENGLISH
▪ PASSWORD MODE ENABLE
▪ PASSWORD 1111
SYSTEM SETUP 0F0GBD N3.36-26
ENTER -SET
MENU EXIT

NV-KBD30 ver. 2.0 - User’s manual
All rights reserved © AAT H lding sp. z . .
18
CONNECTING KEYBOARDS AND NV-DVR1100 SERIES DVRS
4.2.3 Setting the transmission ontrol proto ol of the keyboard.
To establish a proper cooperation between keyboard and DVR, a correct control protocol must be set
for a given DVR ID number. A unique ID number is assigned to each of the connected DVRs, i.e. to
control DVR no.1, no.1 address must be selected in the keyboard. To control DVR no.2 select no.2
etc. Free assignment of addresses to ID numbers is not possible.
To enable the remote control please enter the keyboard setup mode and set proper protocol number for
desired DVR ID number. Assigning different protocols to different ID numbers is possible.
Novus D-3 is the control protocol for the NV-DVR1100 recorders. It’s assigned to number 2 in the
keyboard.
An example given below depicts LED display informing about Novus-D3 protocol assigned to DVR
no. 1.
Entering the setup mode of the keyboard and methods of changing assigned protocols are described in
chapter 5 of this manual.

NV-KBD30 ver. 2.0 - User’s manual
All rights reserved © AAT H lding sp. z . .
19
4.2.4 Keys assignment:
NOTE: When using NV-KBD30 keyboard, button is unavailable).
CONNECTING KEYBOARDS AND NV-DVR1100 SERIES DVRS
KEY OR KEY COMBINATION BUTTON / DVR FUNCTION
SHIFT + MENU MENU
ENTER ENTER / COPY
SHIFT + SEQ AUTO
SHIFT + SEL SEL
PLAY / SEARCH
STOP
Rra REW
Rra R.PAUSE
Rra PAUSE
Rra FF
SHIFT +
Rra REC

NV-KBD30 ver. 2.0 - User’s manual
All rights reserved © AAT H lding sp. z . .
20
Certain buttons and functions are not directly linked with keys on the keyboard. The following
functions are executed in a different way:
- Selecting a particular channel to be displayed full-screen on main monitor:
- PTZ cameras movement control:
In PTZ mode of the DVR camera control is implemented via steps, i.e. keeping a cursor key pressed
doesn’t result in continous movement of the camera. To make camera control easier, usage of presets
is advised.
CONNECTING KEYBOARDS AND NV-DVR1100 SERIES DVRS
KEY OR KEY COMBINATION BUTTON / DVR FUNCTION
1 MAIN
2 MAIN
1 0 MAIN
1 6 MAIN
... ...
Table of contents
Languages:
Other Novus Security System manuals